Okay, so confession time: for the longest time, Yorkshire puddings felt like this mystical culinary Everest. You know, the kind of dish that looks amazing in magazines but you secretly fear will end up a sad, flat puddle in your oven. I remember my mum trying to make them once when I was a kid, and they were… well, let’s just say they were more like rubber coasters than fluffy delights. For years, that memory stuck with me, and I’d skip right past any Yorkshire pudding recipe, convinced it was beyond my reach. Then, one rainy Sunday, a craving hit. A serious, deep-down craving for something savoury and comforting, and for some reason, those giant, golden cups popped into my head. I decided to tackle it, armed with a newfound determination and a healthy dose of skepticism. And you know what? This Yorkshire pudding recipe is the one that finally broke the spell. It’s ridiculously easy, shockingly forgiving, and the results are consistently *stunning*. Seriously, forget those fussy, intimidating recipes; this is the one that will make you a Yorkshire pudding hero, I promise. It’s honestly a game-changer for Sunday roasts, but I’ve also found it’s surprisingly versatile!
What are Yorkshire Puddings?
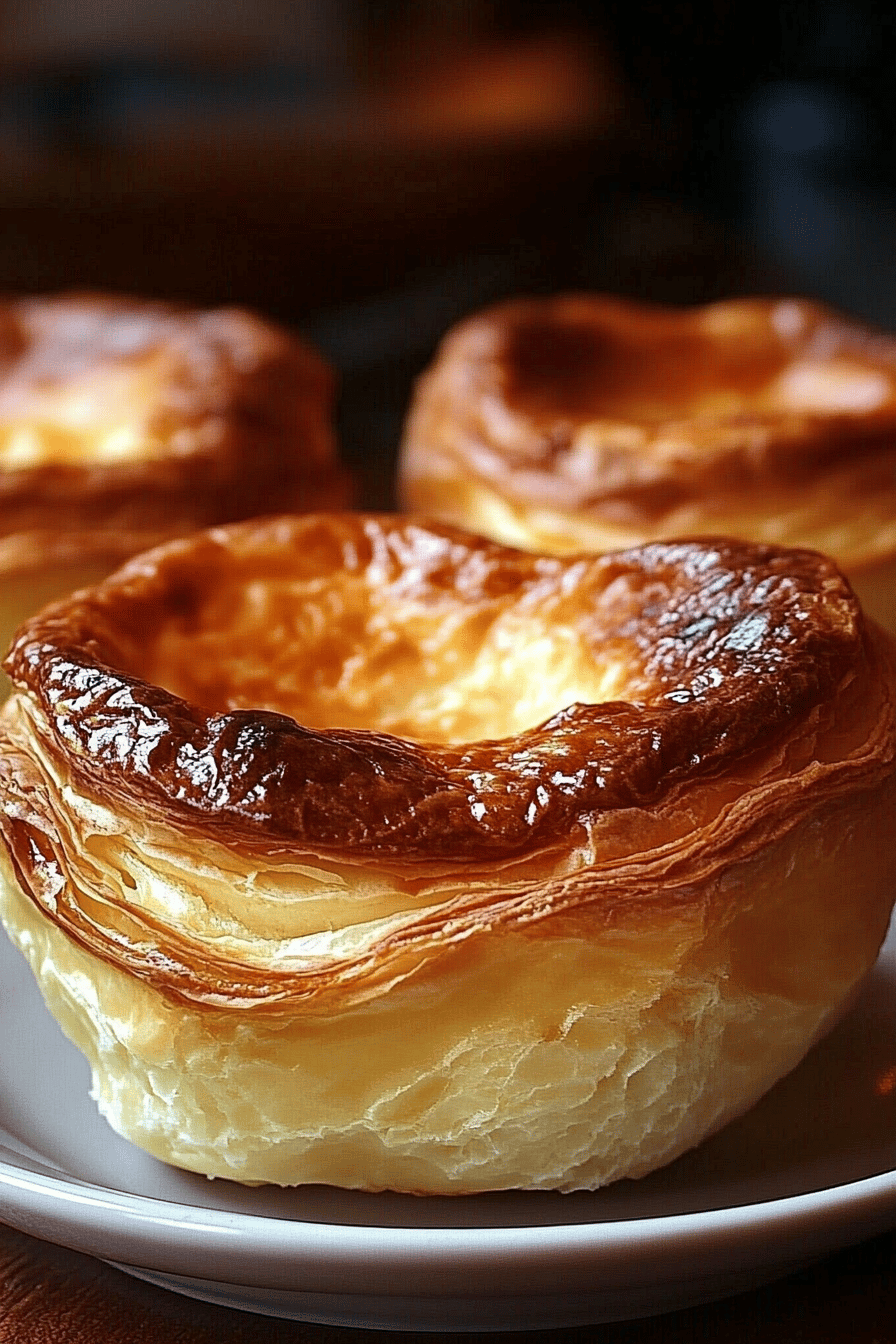
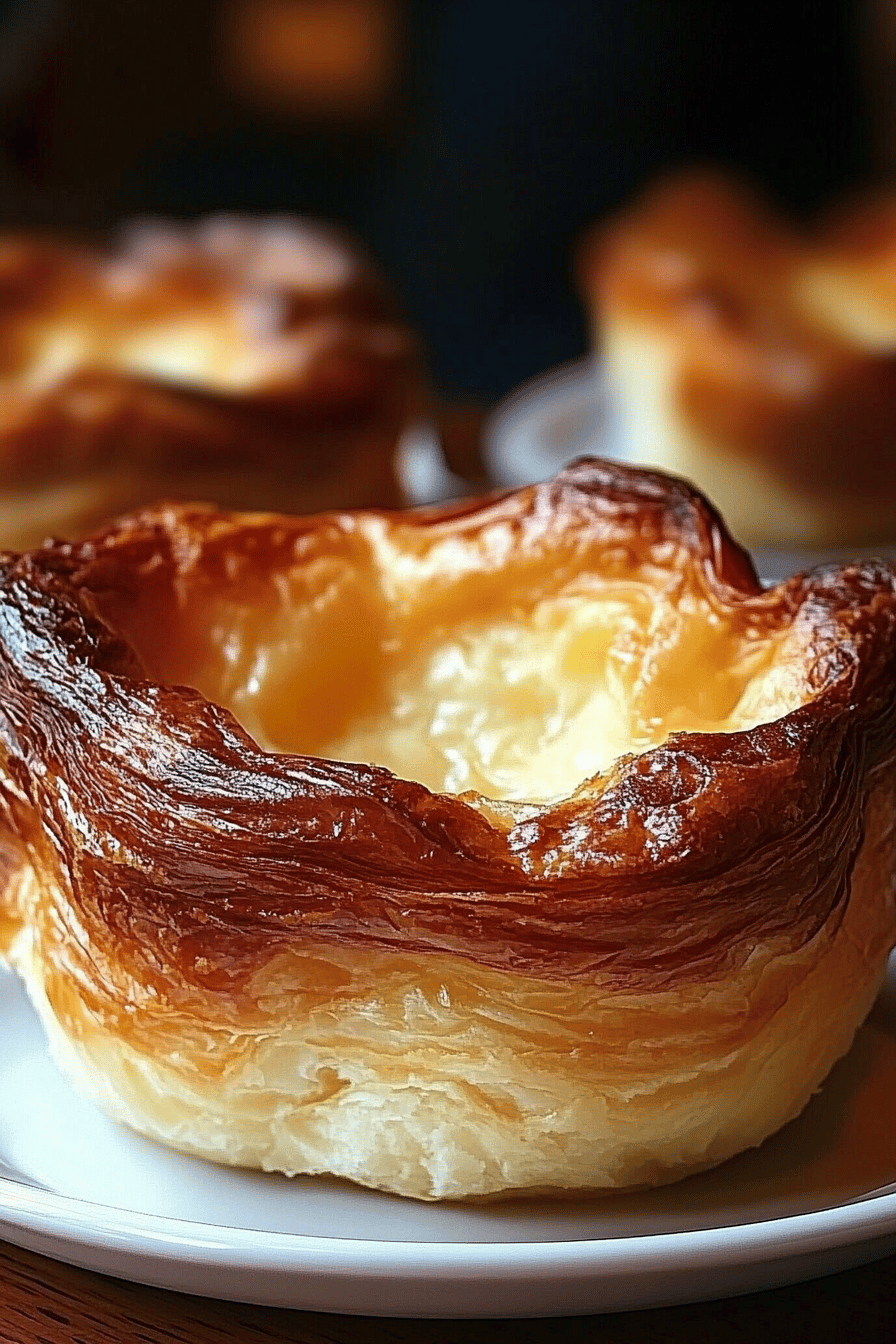
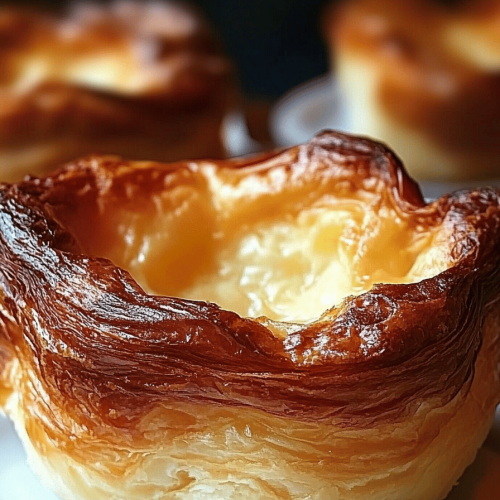
So, what exactly are these glorious golden mounds we call Yorkshire puddings? At their heart, they’re a simple batter of eggs, flour, and milk that puffs up magnificently in a hot oven, creating a crisp exterior and a wonderfully soft, slightly eggy interior. Think of it as a savoury pancake batter that gets *way* more ambitious in the heat. The name, of course, points to their origin in Yorkshire, England, where they’ve been a beloved staple for centuries, traditionally served alongside a hearty roast dinner. They’re not meant to be overly sweet, though some people do enjoy them that way – we’ll get to variations later! The magic truly happens when that batter hits a piping hot tin greased with hot fat. That’s the secret sauce, folks. It’s essentially a culinary alchemy that transforms humble ingredients into something truly special. They’re often seen as the unsung hero of the roast, soaking up all those delicious gravy juices. I love them because they’re so unassuming yet deliver such a satisfying textural and flavourful punch.
Why you’ll love this recipe?
Honestly, the list of reasons why this Yorkshire pudding recipe is my absolute go-to is pretty long, but let me boil it down to the most important bits. First off, the FLAVOR. Oh my goodness, the flavour. They come out golden brown, with those wonderfully crisp edges that crackle just a bit when you bite into them, and a soft, yielding center that’s pure comfort. They’re not just a vessel for gravy; they have a delicate, slightly eggy taste that complements everything. Second, SIMPLICITY. I cannot stress this enough. Once you’ve done it once, you’ll realise how unbelievably straightforward it is. There’s no fancy equipment, no weird ingredients you have to hunt down. It’s literally a few pantry staples and a bit of whisking. This recipe is a lifesaver on busy nights when you want something impressive without a ton of effort. COST-EFFICIENCY is another huge win. Flour, eggs, milk – these are some of the most budget-friendly ingredients you can find, making this an incredibly economical way to elevate any meal. And VERSATILITY! While they’re iconic with a Sunday roast, I’ve served these with stews, chilli, and even as a base for a savoury breakfast stack. They’re just *good*. What I love most about this particular Yorkshire pudding recipe is its reliability. I’ve tested it with different flours, different milks (though whole milk is my preference for richness!), and it always delivers. It’s that dependable friend in the kitchen you can always count on. Compared to other dishes that can be finicky, like a perfect soufflé or a delicate pastry, this is genuinely achievable for everyone. It’s the kind of recipe that makes you feel like a kitchen wizard, even if you’re just starting out.
How do I make Yorkshire pudding?
Quick Overview
This recipe is all about high heat and good quality fat. We’re going to whisk up a simple batter, let it rest for a bit (optional, but it helps!), and then pour it into super-hot, greased tins before baking them until they’re puffed and golden. The key is preheating everything properly. It sounds simple, and it is, but getting those elements right is what makes the difference between a good Yorkshire pudding and a truly spectacular one. Trust me, once you see them rise, you’ll be hooked!
Ingredients
For the Main Batter:
We’re keeping it classic and simple here. You’ll need 140g plain flour (all-purpose flour works too, just make sure it’s not self-raising). Sieve it into a bowl – this little step really helps prevent lumps later on. Then, you’ll need 4 large eggs. Room temperature eggs whisk up better, so if you remember, take them out of the fridge about 30 minutes before you start. And finally, 200ml full-fat milk. Whole milk gives the richest flavour and best texture, in my opinion. You can experiment with others, but this is the gold standard for me. A pinch of salt is also a good idea for flavour enhancement.
For the Fat:
This is crucial for that amazing crispy bottom and sides! You’ll need about 4 tablespoons of beef dripping, lard, or a high smoke point oil like vegetable or sunflower oil. Beef dripping is traditional and adds an incredible depth of flavour that you just can’t replicate, but if you’re vegetarian or just don’t have it, lard or a good quality vegetable oil will absolutely do the trick. The key is that it needs to be smoking hot when the batter hits it.
For the Filling:
This section is a bit of a placeholder because for *classic* Yorkshire puddings, there isn’t really a filling in the batter itself. The “filling” is what goes *around* them, like your roast dinner! However, if you’re feeling adventurous, some people like to add a tiny pinch of Black Pepper to the batter for a subtle kick. I’ve also seen recipes that add a smidgen of dried herbs, but I personally prefer them plain to let the flavour of the roast shine.
For the Glaze:
Again, for classic Yorkshire puddings, there isn’t a glaze applied *to* them. The “glaze” is often the rich gravy that you pour over them! However, if you were making them as a sweet treat (which is less traditional but still delicious!), you might consider a light dusting of icing sugar or a drizzle of honey. For savoury, stick to that glorious gravy! The consistency of your gravy is key to a good “glaze” – you want it rich and flavourful, but not so thick that it overwhelms the delicate pud.
Step-by-Step Instructions
Step 1: Preheat & Prep Pan
This is probably the most important step. You need to get your oven screaming hot – 220°C (200°C Fan / 425°F / Gas Mark 7). While the oven is heating up, get your Yorkshire pudding tin ready. I use a standard 12-hole muffin tin, but you can also use a dedicated Yorkshire pudding tin, which usually has larger, deeper moulds. Put about half a teaspoon of your chosen fat (dripping, lard, or oil) into each hole of the tin. Then, pop that tin into the preheated oven for at least 10-15 minutes. You want that fat to be shimmering and almost smoking by the time you’re ready to pour in the batter. This extreme heat is what makes them puff up so dramatically!
Step 2: Mix Dry Ingredients
While the tin is getting toasty, let’s make the batter. Take your 140g of plain flour and sieve it into a medium-sized bowl. Sieving is a small step that makes a big difference in avoiding lumps. I also like to add a good pinch of salt at this stage. This just helps to season the pudding and enhance its flavour. Give it a quick whisk with a fork or a small whisk to aerate it slightly.
Step 3: Mix Wet Ingredients
Now, crack your 4 large eggs into a separate jug or bowl. Whisk them up until they’re well combined. Then, gradually pour in your 200ml of milk, whisking continuously. It’s good to have the milk and eggs at room temperature if you can, as this helps everything combine smoothly without shocking the flour. The mixture should be a lovely pale yellow.
Step 4: Combine
This is where the magic starts to happen. Make a well in the centre of your flour and salt mixture. Pour about half of the egg and milk mixture into the well. Start whisking from the centre, gradually incorporating the flour from the sides. Keep whisking until you have a thick, smooth paste. Don’t worry if it’s quite stiff at this stage; that’s exactly what we want! Then, gradually add the remaining egg and milk mixture, whisking all the time until you have a smooth, lump-free batter that’s roughly the consistency of thin cream or double cream. The trick here is to avoid overmixing once all the flour is incorporated – just mix until it’s smooth.
Step 5: Prepare Filling
As I mentioned earlier, for traditional Yorkshire puddings, the “filling” is usually the delicious roast meat and vegetables that accompany them, topped with lashings of gravy. The batter itself is designed to be a delightful, savoury pastry that soaks up all those wonderful flavours. If you are making a sweet version (which is a different recipe entirely!), you might consider preparing a fruit compote or a dollop of crème fraîche and berries. For this classic Yorkshire pudding recipe, your “filling” preparation involves ensuring your gravy is hot and ready to go!
Step 6: Layer & Swirl
Okay, now for the exciting bit! Carefully take your smoking hot tin out of the oven (use oven mitts, obviously!). Working quickly, pour your batter evenly into each of the hot fat-filled moulds. You want to fill each mould about two-thirds of the way full. You might notice a bit of sizzling – that’s a good sign! There’s no real “swirling” involved in the batter itself for a classic Yorkshire pudding. The texture comes from the way it bakes and puffs. The even distribution of batter and hot fat is key for uniform rising.
Step 7: Bake
Now, immediately pop the tin back into the hot oven. Bake for about 20-25 minutes, or until they are gloriously puffed up and a deep golden brown. Resist the urge to open the oven door during the first 15-20 minutes, as this can cause them to collapse. If they start to look a little too dark on top before they’re fully puffed, you can loosely cover them with a piece of foil, but I rarely have to do this with this recipe. They should look impressive, tall, and proud!
Step 8: Cool & Glaze
Once they’re perfectly puffed and golden, carefully remove the tin from the oven. You can serve them straight away! For the “glaze,” this is where your hot, rich gravy comes in. Ladle generous amounts of gravy over your Yorkshire puddings just before serving. The heat from the gravy will be absorbed by the soft centres, creating an irresistible combination. If you were making a sweet version, you’d apply your glaze or dusting at this stage, but for savoury, gravy is king!
Step 9: Slice & Serve
The best way to serve these is piping hot. You can either present them individually on plates alongside your roast dinner, or you can place them in a serving dish with the roast and let everyone help themselves. They’re usually served as a side dish, but they are so delicious, sometimes I think of them as the main event! When you cut into them, you’ll get that satisfying crispy crunch from the edges, followed by the tender, slightly yielding centre. Absolutely divine!
What to Serve It With
Honestly, the classic pairing for Yorkshire puddings is a hearty Sunday roast – think roast beef, lamb, or chicken with all the trimmings like roast potatoes, parsnips, and greens. The puddings are just perfect for soaking up all those delicious pan juices and gravy. But don’t limit yourself! I’ve found they are incredibly versatile. For Breakfast: They can be a fantastic base for a savoury breakfast. Imagine a Yorkshire pudding topped with a fried egg, some crispy bacon, and a dollop of hollandaise sauce. It’s indulgent and utterly delicious! For Brunch: They step up beautifully for a more elegant brunch. Serve them smaller, perhaps, and top with smoked salmon, crème fraîche, and a sprinkle of chives. A glass of bubbly is practically mandatory here! As Dessert: While less traditional, a sweet Yorkshire pudding can be incredible. Think of them as a lighter, crispier alternative to a pancake. Serve them warm with fresh berries, a drizzle of maple syrup or honey, and a scoop of vanilla ice cream. For Cozy Snacks: These are perfect for a comforting snack on a chilly evening. Serve them warm with a thick, rich cheese sauce, or even just a sprinkle of grated cheddar. My kids, who are notoriously picky, absolutely adore them this way. They’re surprisingly filling and just feel like a warm hug in food form.
Top Tips for Perfecting Your Yorkshire Pudding Recipe
I’ve made enough Yorkshire puddings to know a thing or two about what makes them sing. So, here are my hard-won tips and tricks to ensure yours are consistently brilliant. First, about the batter: don’t overmix it! Once the flour is incorporated, just mix until it’s smooth. Overmixing develops the gluten too much, which can make them tough. Some people swear by resting the batter in the fridge for at least 30 minutes, or even overnight. I’ve honestly had great results without resting, but if you have the time, it’s said to help the flour absorb the liquid better, leading to a better rise. So, if you remember, give it a go! When it comes to the fat, it *has* to be smoking hot. I can’t stress this enough. If your fat isn’t hot enough, the batter will just sit in it and won’t puff up properly. Use beef dripping if you can – it really does add a flavour dimension that’s hard to beat. If you’re using oil, make sure it’s a high smoke point one so it doesn’t burn. Mixing advice: If you find lumps, a quick blitz with an immersion blender can save the day, or simply strain the batter. Texture indicators: You’re looking for a batter that flows but isn’t watery. Think thin cream. It should coat the back of a spoon. Ingredient swaps: I always use full-fat milk for richness. While you *can* use semi-skimmed or skimmed, you might find the texture is a little less tender. I haven’t personally experimented with plant-based milks for this recipe, but I imagine a good creamy oat milk or soy milk might work. Baking tips: The oven temperature is crucial. Make sure it’s preheated properly. If your oven has hot spots, you might need to rotate the tin halfway through, but be quick about it! Don’t open the door during the first 15 minutes – that’s when they need to build up their structure. For the best results, bake them on the middle or lower-middle shelf. Glaze variations: As we discussed, the “glaze” is usually gravy! But for those sweet versions, consider a simple dusting of icing sugar, a drizzle of honey, or even a fruit coulis. The key is to not overdo it so the pudding’s texture isn’t compromised. Oh, and a personal lesson learned: If your puddings don’t rise perfectly one time, don’t despair! It happens to the best of us. Sometimes it’s oven temperature, sometimes it’s the fat not being hot enough. Just try again, keeping these tips in mind, and you’ll get there!
Storing and Reheating Tips
Yorkshire puddings are absolutely at their best when served fresh from the oven. That incredible crispness and fluffiness just doesn’t last once they’ve cooled down. However, life happens, and sometimes you have leftovers. Here’s how I manage them: Room Temperature: They’re best eaten within a couple of hours of baking if left at room temperature. Beyond that, they can start to lose their crispness and become a bit chewy. If you’ve got a few left, just pop them on a wire rack to keep them from going soggy underneath. Refrigerator Storage: If you have more than a few, or want to save them for the next day, store them in an airtight container in the fridge. They’ll usually keep for 2-3 days. While they won’t be as crisp as when they’re fresh, they’re still perfectly salvageable, especially if you plan to reheat them. Freezer Instructions: You can freeze Yorkshire puddings, but again, the texture will change. It’s best to freeze them *after* they’ve cooled completely. Wrap them well in cling film, then pop them into a freezer-safe bag or container. They should last for up to 1-2 months. Thawing methods: For the best results, thaw them overnight in the refrigerator. Glaze Timing Advice: For any storage method, it’s best to apply the “glaze” (i.e., pour gravy over them) *after* reheating, just before serving. If you glaze them before storing, they will become soggy very quickly. Reheating: To reheat, spread them in a single layer on a baking sheet and pop them into a preheated oven at around 180°C (160°C Fan / 350°F). They usually take about 5-10 minutes to reheat, or until they are warmed through and a little crispy again. Avoid the microwave if you can, as it tends to make them soft and rubbery. A quick spell in a hot oven is your best bet for bringing them back to life!
Frequently Asked Questions
Final Thoughts
There you have it – the Yorkshire pudding recipe that I swear by, the one that took me from fearing baking to absolutely loving it. It’s proof that sometimes the most iconic dishes are actually the simplest. I genuinely believe this recipe is accessible to everyone, and the results are so rewarding. Seeing those golden beauties puff up in the oven is such a thrill, and the taste is just divine. They bring such comfort and deliciousness to any meal. If you’re new to making Yorkshire puddings, please give this a try. Don’t be intimidated! And if you’re a seasoned pro, I hope this gives you a new perspective or a reliable go-to. They’re perfect for Sunday roasts, of course, but don’t forget their potential for brunch or even a simple, comforting snack. They really do make everything taste better. I can’t wait to hear how yours turn out! Let me know in the comments below if you try this recipe, or if you have any special family traditions or tips of your own. Your feedback and stories are what make this community so special. Happy baking, everyone!

Yorkshire Pudding Recipe
Ingredients
Main Ingredients
- 200 g All-purpose flour
- 4 large Eggs
- 300 ml Milk whole milk is best
- 0.5 tsp Salt
- 100 ml Beef dripping or vegetable oil for the tins
Instructions
Preparation Steps
- Preheat your oven to 220°C (200°C fan/Gas Mark 7). Place your Yorkshire pudding tin into the oven to heat up.
- In a jug, whisk together the flour and salt.
- Crack the eggs into the flour mixture and whisk until you have a thick paste.
- Gradually add the milk, whisking continuously until you have a smooth batter the consistency of double cream.
- Carefully remove the hot tin from the oven. Add the beef dripping or oil to each cup of the tin, ensuring it's piping hot.
- Pour the batter evenly into the hot fat. Be careful as it will sizzle.
- Return the tin to the oven and bake for 20-25 minutes, or until the Yorkshire puddings are well-risen and golden brown.
- Serve immediately with your favourite roast dinner.