You know those nights? The ones where the clock is ticking way too fast, dinner seems like an insurmountable mountain, and the thought of a complicated meal just sends shivers down your spine? Yeah, I’ve been there. So many times. This upside-down turkey loaf recipe is my absolute secret weapon. It’s the kind of dish that looks like you slaved away for hours, but in reality, it’s surprisingly simple and always a massive hit with my family. It reminds me a little bit of those classic meatloaf recipes, but with a delightful twist that makes it so much more exciting. Seriously, the first time I made it, my son, who is usually the pickiest eater on the planet, devoured his portion and asked for seconds. That’s when I knew I had stumbled upon something truly special. It’s not just a meal; it’s a little bit of weeknight magic. The “upside-down” part sounds fancy, but trust me, it’s the easiest trick to get that beautiful, caramelized topping without any fuss.
What is the upside down turkey?
So, what exactly *is* this upside-down turkey loaf? Think of it as a super-moist, incredibly flavorful turkey meatloaf that you bake in a pan lined with something delicious. Instead of just baking it in a loaf pan or on a Sheet Pan, we’re going to line the bottom of a baking dish – usually with a layer of something sweet and tangy, like brown sugar and pineapple, or even some caramelized onions and apples. Then, we pack the turkey mixture on top. Once it’s baked, you flip the whole thing over onto a serving platter. Voilà! The topping that was at the bottom is now beautifully gracing the top of your moist turkey loaf, creating this gorgeous, caramelized crust that is just out-of-this-world good. It’s essentially a genius way to ensure your meatloaf is always moist and has a fantastic, flavor-packed glaze without any extra steps of basting or creating a separate glaze to pour over at the end. It’s meatloaf, but elevated, and ridiculously easy!
Why you’ll love this recipe?
Let me tell you, there are so many reasons why this upside-down turkey loaf has become a staple in my kitchen. First and foremost, the flavor is just phenomenal. The turkey stays so incredibly moist and tender, thanks to the delicious topping that steams and caramelizes around it as it bakes. The topping itself is usually a combination of sweet, savory, and sometimes a little tangy, which perfectly complements the mildness of the turkey. It’s a flavor explosion in every single bite, far more exciting than a plain old meatloaf. And then there’s the simplicity. I know, I know, “upside-down” sounds a bit intimidating, but it’s honestly just a few easy steps. You mix everything up, layer it in the pan, bake, and flip. That’s it! It’s perfect for those nights when you’re short on time but still want to serve something that feels a little bit special. Beyond that, it’s surprisingly budget-friendly. Turkey is often a more economical choice than beef, and the ingredients for the topping are pantry staples. My family devours this, and I love that it’s a healthier alternative to some other comfort foods. What I love most about this recipe is that it feels both comforting and a little bit sophisticated. It’s the perfect dish for a casual weeknight dinner, but it’s also impressive enough to serve at a family gathering. It’s just one of those recipes that keeps on giving, and I always feel good serving it.
How do I make upside down turkey?
Quick Overview
This upside-down turkey loaf is all about smart layering and letting the oven do the work. We’ll start by prepping our pan with a flavorful topping, then mix up a Super Moist turkey mixture, pack it on top, and bake until golden. The magic happens when we flip it over, revealing a beautifully glazed and caramelized top. It’s a straightforward process that guarantees a tender, flavorful turkey loaf every single time, making it a weeknight savior.
Ingredients
For the Topping: What is the best way to get the top 10?
1 cup packed light brown sugar – I find light brown sugar gives the best caramelization without being too overpowering.
1/4 cup unsalted butter, melted – This helps everything bind and get super glossy.
1 (20-ounce) can crushed pineapple, drained well – Make sure to drain this really thoroughly, or your topping can get watery. Patting it dry with paper towels helps!
Optional: 1/2 cup thinly sliced onion or apple for an extra layer of flavor.
For the Turkey Mixture:
2 pounds ground turkey (I prefer 85% lean for the best moisture)
1 cup breadcrumbs (plain or Italian seasoned, your preference!) – These are key for binding and texture.
1/2 cup finely chopped onion
1/4 cup milk (whole milk makes it extra creamy, but any kind works)
2 large eggs, lightly beaten – These bind everything together.
2 tablespoons ketchup – Adds a little tang and color.
1 tablespoon Worcestershire sauce – For that umami depth.
1 teaspoon dried Italian seasoning
1/2 teaspoon salt
1/4 teaspoon Black Pepper
For the Glaze (Optional, if you want extra shine):
1/4 cup ketchup
1 tablespoon brown sugar
Step-by-Step Instructions
Step 1: Preheat & Prep Pan
First things first, let’s get that oven going. Preheat it to 375°F (190°C). Now, grab a 9×5 inch loaf pan. This is where the magic happens. In a small bowl, mix together the packed brown sugar, melted butter, and the drained crushed pineapple. If you’re using those optional sliced onions or apples, tuck them around the pineapple mixture now. Press this topping mixture evenly into the bottom of the loaf pan. Really press it down so it forms a nice, compact layer. This is the base for our beautiful upside-down creation.
Step 2: Mix Dry Ingredients
In a large bowl, we’re going to combine the dry ingredients for our turkey mixture. Add the breadcrumbs, chopped onion, Italian seasoning, salt, and pepper. Give it a good stir to make sure everything is well distributed. This ensures all those savory flavors are evenly spread throughout the loaf.
Step 3: Mix Wet Ingredients
In a separate, medium-sized bowl, whisk together the lightly beaten eggs, milk, ketchup, and Worcestershire sauce. Whisk it until it’s all nicely combined and has a consistent color. This wet mixture is going to help bind our turkey and keep it super moist.
Step 4: Combine
Now, add the ground turkey to the large bowl with the dry ingredients. Pour the wet ingredients over the top. This is the part where you need to be gentle. Use your hands (the best tool for the job, in my opinion!) to gently mix everything together. You want to combine it just until everything is incorporated. Overmixing can make meatloaf tough, and we definitely don’t want that. Just a few gentle folds will do the trick!
Step 5: Prepare Filling
Actually, the “filling” here is the turkey mixture we just made. The topping is already prepared and in the pan. We’re just going to pack this delicious turkey mixture right on top of the pineapple and brown sugar layer in the loaf pan. Gently press it down, making sure it’s evenly distributed and fills the pan completely. You want a nice, smooth surface so it bakes evenly.
Step 6: Layer & Swirl
There’s no swirling needed for this particular upside-down method! The ‘swirling’ effect comes from the beautiful caramelization of the topping once we flip it. Just ensure your turkey mixture is packed down evenly over the topping layer.
Step 7: Bake
Pop that loaf pan into your preheated oven. Bake for about 45-55 minutes. The exact time can vary depending on your oven, but you’re looking for the turkey to be cooked through and nicely browned on top. A good way to check is to use a meat thermometer; it should read 165°F (74°C). If you’re using the optional ketchup glaze, you can mix those ingredients together in a small bowl and spread them over the top of the turkey mixture during the last 10-15 minutes of baking for an extra glossy finish.
Step 8: Cool & Glaze
This is a crucial step, so don’t skip it! Once the loaf is out of the oven, let it rest in the pan for about 10 minutes. This allows the juices to redistribute, which is super important for a moist loaf. If you opted for the ketchup glaze, now is the time to apply it evenly over the top. If you didn’t do the glaze during baking, you can still brush some on now for extra sheen and flavor.
Step 9: Slice & Serve
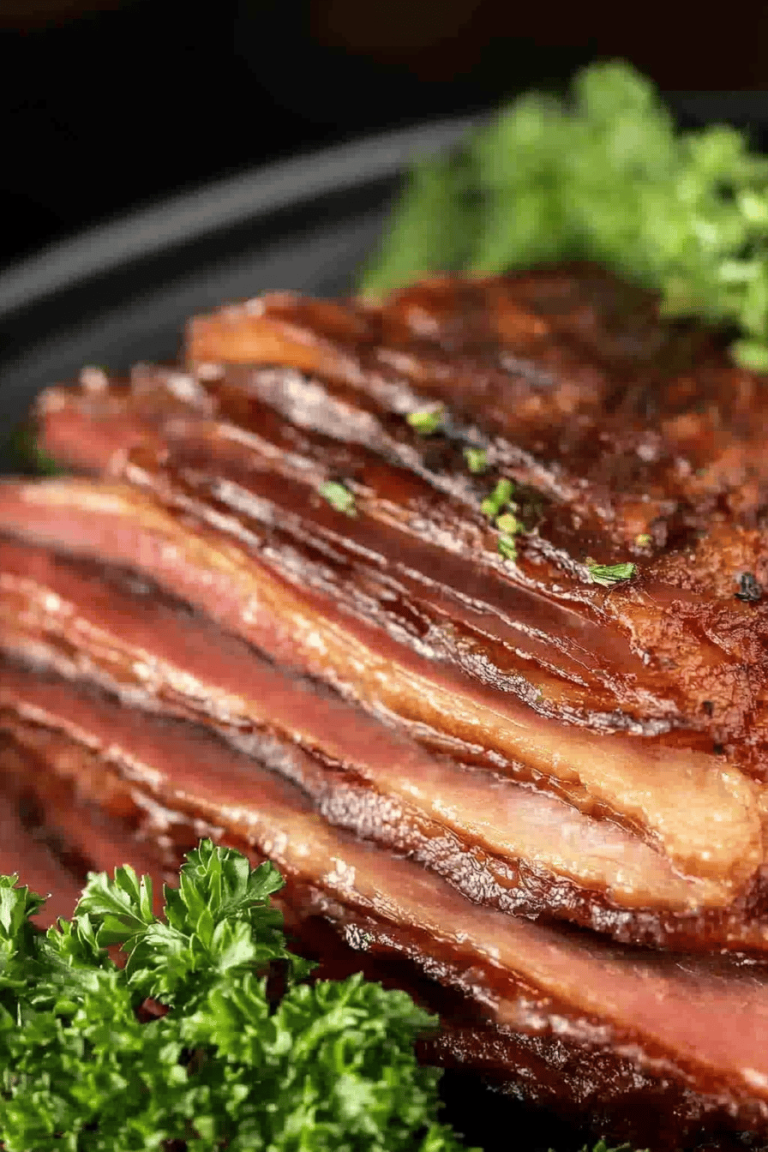
Now for the exciting part – the flip! Place a serving platter over the top of the loaf pan. Carefully, and I mean *carefully* (it’s hot!), invert the pan and platter together. Give it a gentle shake. Hopefully, the loaf will slide out beautifully, revealing that gorgeous, caramelized topping. If any bits stick to the pan, just gently scoop them out and arrange them on top of the loaf. Let it rest for another 5 minutes before slicing into thick, hearty portions. Serve it warm and watch everyone’s faces light up!
What to Serve It With
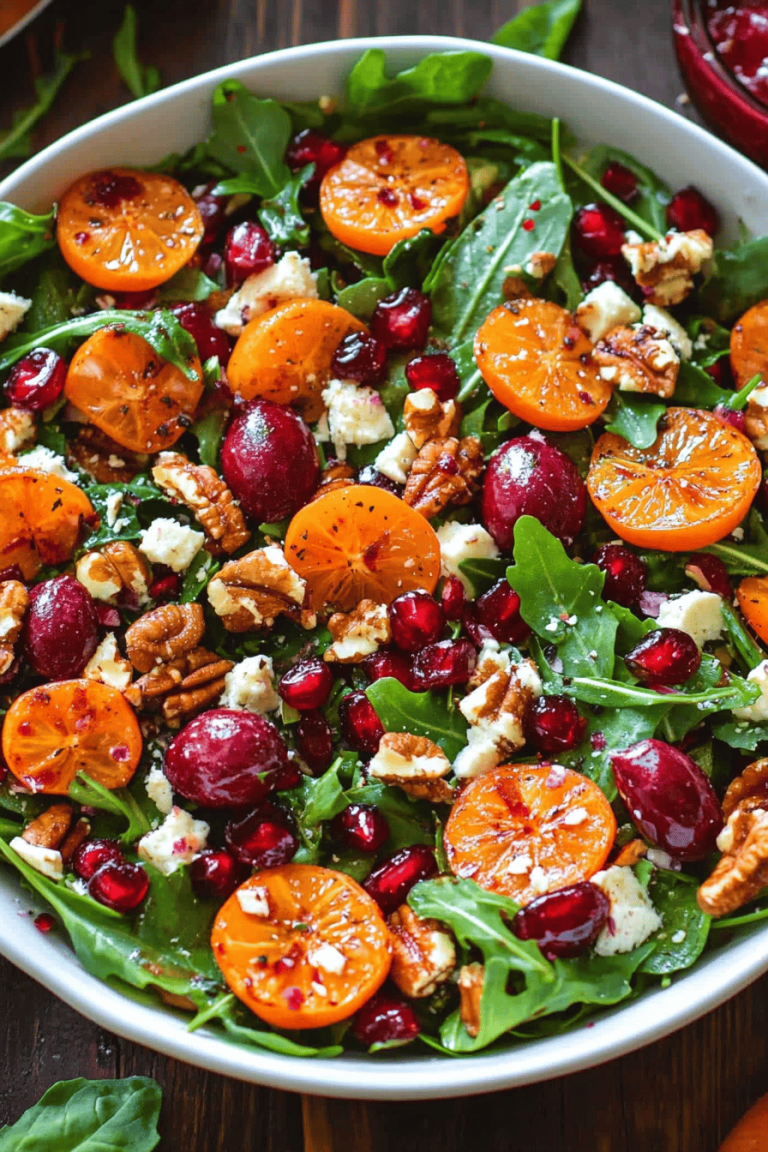
This upside-down turkey loaf is so versatile, it fits right in at almost any meal. For a classic breakfast, I love to serve a slice alongside some fluffy scrambled eggs and maybe a side of crispy hash browns. The savory turkey and sweet topping are surprisingly delicious first thing in the morning! For a delightful brunch, elevate it with some fresh fruit salad – think melon, berries, and grapes – and perhaps some small, buttery croissants. A mimosa or a nice iced tea would be perfect. As a dessert, though it sounds unusual, a small, warm slice is actually fantastic with a dollop of sour cream or even a tiny bit of cranberry sauce if you have some leftover. The sweet and savory notes work surprisingly well. And for those cozy, lazy evenings when you just want something comforting, a big slice of this with some steamed green beans or a simple side salad is pure bliss. My family also loves it with Mashed Potatoes – the gravy from the mashed potatoes mixing with the caramelized topping is just divine. It’s truly a dish that can be enjoyed any time of day!
Top Tips for Perfecting Your Upside-Down Turkey Loaf
Over the years, I’ve picked up a few tricks that really make this upside-down turkey loaf sing. Let’s talk about the topping first. Pineapple is classic, but don’t be afraid to experiment! Applesauce mixed with a little cinnamon and brown sugar is amazing, especially in the fall. You can also try a layer of sautéed mushrooms and onions for a more savory version. The key is to make sure whatever topping you choose is relatively moist but not watery. Draining that pineapple really well is non-negotiable for me; I’ve had watery loaves before, and it’s just not the same! When it comes to mixing the turkey mixture, my biggest advice is to be gentle. Seriously, treat it like you’re fluffing a pillow, not kneading dough. Overworking the ground turkey will make your loaf dense and dry, and we absolutely want to avoid that. You should see streaks of fat and meat; that’s what you’re aiming for, not a uniform paste. For the baking itself, ovens can be so finicky. If you find your loaves always brown too quickly on top, you can loosely tent a piece of aluminum foil over it for the last 20 minutes. Conversely, if it’s not browning enough, a quick blast under the broiler (watch it like a hawk!) can give it that extra golden finish. My personal favorite ingredient swap? Sometimes, I’ll use half ground turkey and half ground chicken for a slightly different flavor profile. I’ve also tested this with almond milk for the wet ingredients, and it made it even creamier – who knew! For the glaze, if you want it extra shiny and sticky, add a tablespoon of corn syrup to the ketchup and brown sugar mixture. It gives it that professional bakery sheen.
Storing and Reheating Tips
One of the things I love most about this upside-down turkey loaf is how well it stores, which makes it perfect for leftovers. If you happen to have any, that is! For room temperature storage, it’s best to let it cool completely first, then cover it tightly with plastic wrap or store it in an airtight container. It should be fine at room temperature for about two hours. If you’re not planning to eat it within that timeframe, it’s best to get it into the refrigerator. In the fridge, this loaf will stay good for about 3 to 4 days. I usually store it in the original loaf pan, tightly covered, or transfer slices to an airtight container. When it comes to reheating, I have a couple of favorite methods. For a single slice, I find the microwave works best for speed, but you might want to add a tiny splash of water or broth before heating to keep it moist. For a larger portion or if you want to recapture that crispy topping, the oven is your friend. Place a slice on a baking sheet and reheat at a moderate temperature, around 300°F (150°C), for about 10-15 minutes, or until heated through. This helps it retain its texture. Freezing is also an option, though I don’t often have leftovers long enough! If you do want to freeze it, let the loaf cool completely. You can freeze the whole loaf, wrapped tightly in plastic wrap and then in foil, or freeze individual slices. It should last in the freezer for up to 2 months. To thaw, transfer it to the refrigerator overnight before reheating. And a note on the glaze: if you’re storing leftovers, it’s often best to store the glaze separately and add it after reheating, unless you want it to be fully absorbed into the loaf.
Frequently Asked Questions
Final Thoughts
Honestly, this upside-down turkey loaf is more than just a recipe to me; it’s a solution. It’s the answer to the frantic weeknight dinner dilemma, the way to impress guests without breaking a sweat, and a foolproof method for getting a moist, flavorful meatloaf every single time. The combination of the tender turkey with that sweet, caramelized pineapple topping is just pure comfort food magic. It’s a recipe that has consistently brought smiles to my family’s faces, and I truly believe it will do the same for yours. If you’re a fan of this kind of cozy, easy comfort food, you might also enjoy my [Link to another recipe, e.g., “Super Simple Shepherd’s Pie”] or my [Link to another recipe, e.g., “One-Pan Lemon Herb Roasted Chicken and Veggies”]. They’re all about bringing deliciousness to your table with minimal fuss. Give this upside-down turkey loaf a try – I have a feeling it might just become your new weeknight hero too! I can’t wait to hear what you think, so please leave a comment below and let me know how yours turns out, or share your own favorite topping variations!
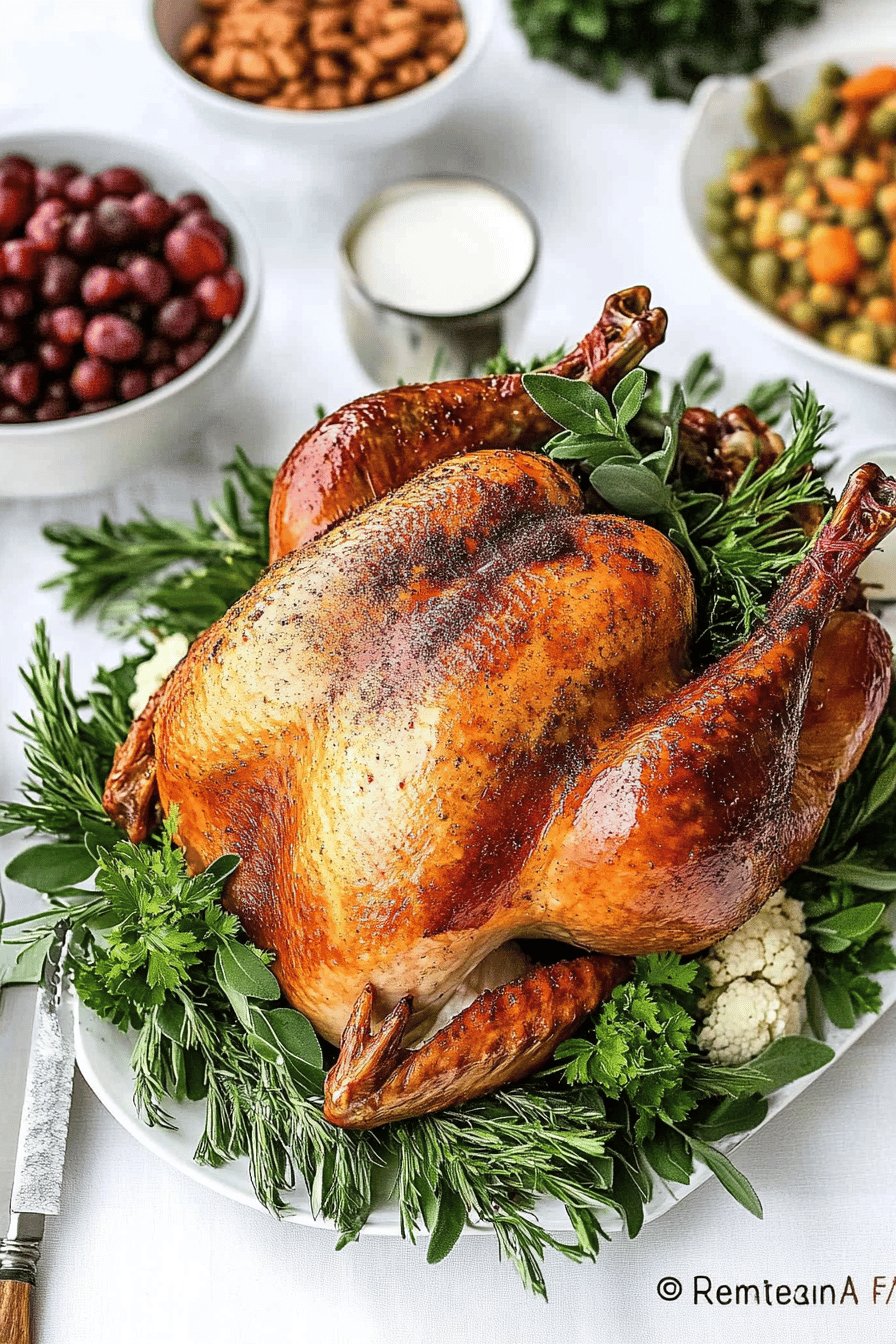
Upside-Down Turkey
Ingredients
Main Ingredients
- 1 whole Turkey 12-14 pounds, giblets removed
- 0.5 cup Butter melted
- 2 tablespoons Fresh Rosemary chopped
- 1 tablespoon Fresh Thyme chopped
- 1 teaspoon Garlic Powder
- 1 teaspoon Salt
- 0.5 teaspoon Black Pepper
Instructions
Preparation Steps
- Preheat your oven to 325°F (160°C).
- Remove the turkey from its packaging and pat it dry inside and out with paper towels. Remove any giblets from the cavity.
- In a small bowl, combine the melted butter, chopped rosemary, chopped thyme, garlic powder, salt, and pepper.
- Brush the turkey all over with the herb butter mixture. Make sure to get under the skin of the breast if possible for extra flavor.
- Place the turkey breast-side down on a rack in a roasting pan.
- Roast for 3 hours, or until the internal temperature reaches 165°F (74°C) in the thickest part of the thigh, avoiding the bone.
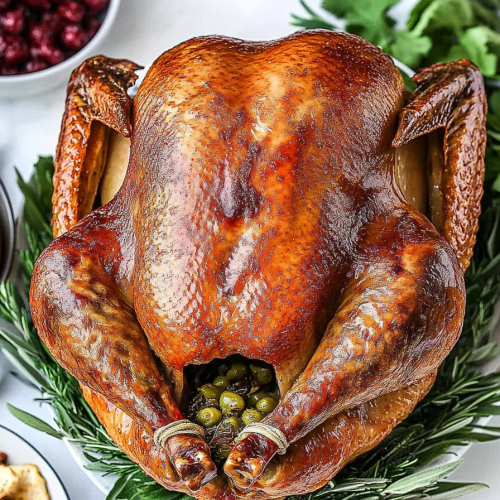
- Carefully turn the turkey breast-side up for the last 30-45 minutes of cooking to crisp up the skin.
- Once cooked, remove the turkey from the oven and let it rest for at least 20-30 minutes before carving.