Oh, you know those chilly autumn evenings? The ones where the air gets crisp and all you want is something warm, comforting, and just a little bit magical? That’s exactly when my mind drifts to pumpkin carving season, and more importantly, to the glorious aftermath: perfectly roasted pumpkin seeds. I’ve tried my fair share of snacks over the years, from elaborate baked goods to quick store-bought fixes, but honestly, nothing beats the simple, addictive crunch of these roasted pumpkin seeds. They’re so incredibly satisfying, especially when you’ve carved out your own jack-o’-lantern and have a pile of freshly cleaned seeds waiting for their delicious destiny. It’s like the universe is giving you a reward for your creative efforts. Forget those store-bought seasoned varieties; they just don’t compare to the sheer joy of making these from scratch. This recipe is my go-to, a tradition that my whole family looks forward to every single year. They’re better than chips, way more wholesome, and frankly, just plain fun to eat. I can’t wait to share my secrets with you!
What are roasted pumpkin seeds?
So, what exactly are we talking about when I say “roasted pumpkin seeds”? Think of it as giving those humble pumpkin innards a glow-up! After you’ve scooped out the slimy seeds and pulp from your Halloween pumpkin (or even a nice sugar pumpkin from the grocery store), you clean them up, toss them with a little oil and your favorite seasonings, and then roast them until they’re irresistibly crunchy. It’s essentially nature’s perfect crunchy snack, transforming something you might have thrown away into a gourmet treat. It’s not complicated at all; it’s more about coaxing out the natural nutty flavor of the seeds and giving them that satisfying snap. My mom used to make these when I was a kid, and the smell of them toasting in the oven instantly takes me back to those happy, spooky days. It’s less about fancy culinary techniques and more about simple, delicious transformation.
Why you’ll love this recipe?
What are some of the best reasons to make roasted pumpkin seeds?flavor! Oh my goodness. When they’re done right, they have this incredible, toasty, slightly nutty taste that’s just divine. Depending on your seasoning choices, you can go savory with garlic and herbs, or even a little sweet with cinnamon and a pinch of sugar. It’s a flavor profile that keeps you reaching for more. Then there’s the simplicity. Seriously, if you can scoop out a pumpkin, you can make these. The process is so straightforward, and it’s a fantastic activity to do with kids. You get this amazing snack with minimal effort, which is a lifesaver on busy weeknights or during those hectic holiday preparations. And speaking of saving money, these are incredibly cost-efficient. You’re essentially getting a delicious snack for free from something you already have! It feels so resourcefulversatility is off the charts. You can customize the seasonings to your heart’s content. I’ve made them with a spicy kick using chili powder, and my kids absolutely love a cinnamon-sugar version for a sweet treat. They’re perfect for movie nights, packed lunches, or just as a healthy alternative to potato chips. What I love most about this is that it takes something so humble and makes it truly special. It’s a little bit of kitchen magic, and it never fails to impress.
How to Make Roasted Pumpkin Seeds
Quick Overview
The process for making these amazing roasted pumpkin seeds is delightfully simple. You’ll start by cleaning and drying your pumpkin seeds, then tossing them with your chosen oil and seasonings. Spread them out on a baking sheet and roast until golden brown and crispy. It’s a quick, rewarding journey from raw seed to crunchy delight, perfect for any home cook looking for a delicious and healthy snack.
Ingredients
For the Main Seeds:
Fresh pumpkin seeds (from about 1-2 medium pumpkins)
2-3 tablespoons olive oil or your favorite cooking oil
1 teaspoon salt, or to taste
For the Seasoning (Choose Your Adventure!):
A mix of your favorite spices! Here are a few ideas to get you started:
Savory Classic:
1 teaspoon garlic powder
1/2 teaspoon onion powder
1/4 teaspoon Black Pepper
(Optional: a pinch of smoked paprika or cayenne pepper for a kick)
Sweet Cinnamon Spice:
1 tablespoon granulated sugar (or brown sugar)
1 teaspoon ground cinnamon
1/4 teaspoon nutmeg
(Optional: a pinch of cloves)
Cheesy Herb:
2 tablespoons grated Parmesan cheese
1 teaspoon dried Italian herbs
1/2 teaspoon garlic powder
Step-by-Step Instructions
Step 1: Preheat & Prep Pan
First things first, preheat your oven to 375°F (190°C). While the oven is warming up, grab a sturdy baking sheet. You don’t need to grease it, but if you’re worried about sticking, you can line it with parchment paper. Personally, I find they crisp up best directly on the pan. Make sure your baking sheet is clean and dry and ready for action.
Step 2: Clean & Dry the Seeds
This is probably the most “work” involved, but it’s so worth it. Carefully scoop out the seeds and any stringy bits from your pumpkin. Rinse them under cool water in a colander. Now, here’s a crucial tip: get them as dry as possible! You can spread them out on paper towels or a clean kitchen towel and gently pat them dry. The drier they are, the crispier they’ll get. I’ve made the mistake of not drying them enough, and they ended up a little chewy instead of delightfully crunchy. So, really give them a good dry!
Step 3: Toss with Oil & Seasonings
Once your seeds are nice and dry, it’s time to make them delicious. Place the dried seeds in a medium bowl. Drizzle them with the olive oil (or your chosen oil) and add your salt. If you’re using a spice blend, add it now too. Toss everything together really well, making sure every single seed is coated in oil and seasoning. Get your hands in there – it’s the best way to ensure even distribution! If you’re doing a sweet version, mix the sugar and cinnamon together separately and then toss with the oiled seeds.
Step 4: Spread on Baking Sheet
Pour your seasoned seeds onto the prepared baking sheet. Spread them out in a single layer. This is super important! If they’re piled on top of each other, they’ll steam instead of roast, and you won’t get that satisfying crunch. Give them a little breathing room; it makes all the difference.
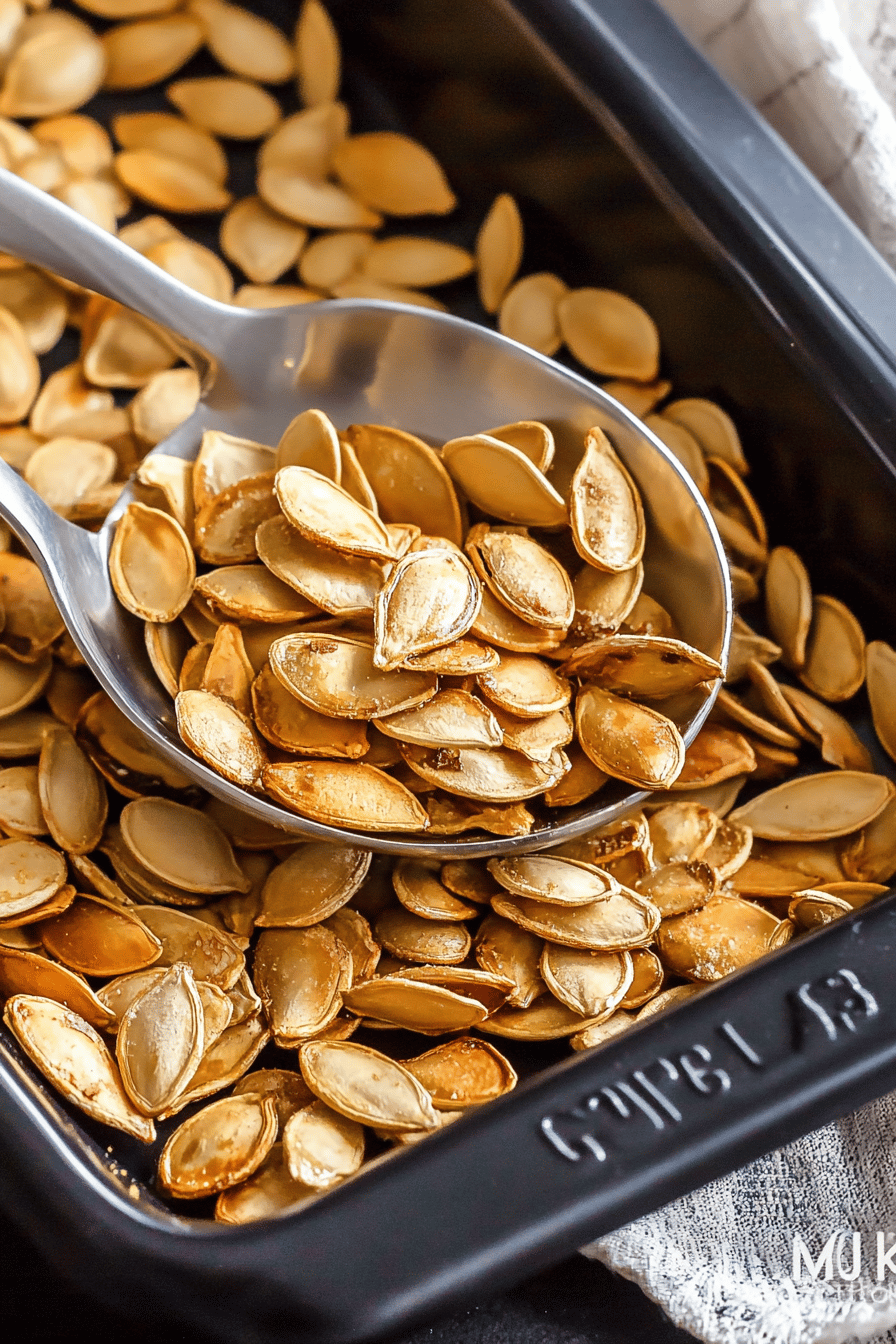
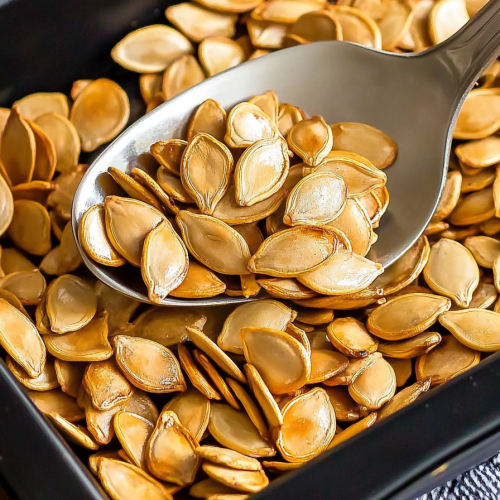
Step 5: Roast to Golden Perfection
Now, pop that baking sheet into your preheated oven. Roast for about 15-20 minutes. Keep an eye on them! They can go from perfectly toasted to burnt pretty quickly. You’re looking for a beautiful golden-brown color. You might want to give the pan a little shake halfway through to help them cook evenly. Listen for that little crackling sound – it’s a good sign they’re getting nice and toasty. The exact time can vary depending on your oven and the size of your seeds, so trust your eyes and your nose!
Step 6: Cool & Enjoy
Once they look and smell amazing, carefully remove the baking sheet from the oven. Let the seeds cool completely on the baking sheet. They’ll continue to crisp up as they cool. I know it’s tempting to dive right in, but trust me, patience is a virtue here! Once they’re cool, they should be wonderfully crunchy and ready to devour. Pour them into a bowl and enjoy!
What to Serve It With
These roasted pumpkin seeds are wonderfully self-sufficient, but they can also play well with others, adding a delightful crunch and flavor to so many occasions. For a cozy start to your day, sprinkle them over yogurt parfaits or even a bowl of oatmeal. The texture contrast is just heavenly. For a more elegant brunch spread, I love adding them as a garnish to a salad or even a savory tart. They add a sophisticated crunch that guests always rave about. As a dessert, they’re fantastic sprinkled over Ice Cream, especially with caramel or chocolate flavors. Or, for those moments when you just need a satisfying, healthy snack, they’re perfect on their own, paired with a warm mug of apple cider or a glass of milk. My family also loves them crumbled over butternut squash soup – it adds such a wonderful textural element! They’re really that versatile.
Top Tips for Perfecting Your Roasted Pumpkin Seeds
Over the years, I’ve learned a few tricks that elevate my roasted pumpkin seeds from good to absolutely spectacular. Let’s talk about getting that perfect crunch. Seed Prep is Key: I can’t stress enough how important it is to get those seeds really clean and, most importantly, dry. Any excess moisture will steam the seeds, and you’ll end up with a chewy, disappointing texture instead of that satisfying crisp. I usually spread them on a kitchen towel and really pat them down, sometimes even letting them air dry for a bit longer if I have the time. For Mixing Advice, I always recommend using your hands. It might sound messy, but it’s the best way to ensure every single seed is evenly coated with oil and seasonings. If you just try to stir them with a spoon, you’ll inevitably miss spots, and those under-seasoned seeds just aren’t as satisfying. Don’t be afraid to really get in there and massage the oil and spices into them! When it comes to Roasting Tips, keep a close eye on your seeds. Ovens can be so different, and these little guys can go from perfectly toasted to burnt in a blink. I find that giving the pan a good shake about halfway through the roasting time helps ensure they brown evenly. If you notice some are browning faster than others, you can even pull them out and let the others continue for a few more minutes. My favorite Ingredient Swaps involve playing with the spices. If you don’t have garlic powder, a little finely minced fresh garlic tossed with the oil *before* adding the seeds can work, but be cautious as it can burn faster. For a sweeter version, I’ve experimented with maple syrup instead of sugar, and it gives a lovely depth of flavor, though it can make them a bit stickier. And for Glaze Variations (if you’re feeling extra fancy and adding one), make sure your seeds are completely cool before attempting to glaze them, otherwise, the glaze will just melt off. These little tips might seem minor, but they’ve made a world of difference in my own kitchen, turning out consistently delicious, perfectly crunchy roasted pumpkin seeds every time.
Storing and Reheating Tips
Alright, let’s talk about keeping these crunchy little gems fresh. Once your roasted pumpkin seeds have cooled completely, you can store them in an airtight container at room temperature. They generally stay nice and crunchy for about 3-5 days this way. If you live in a humid climate, or if you just want to ensure maximum crispness, popping them in the refrigerator in a sealed container is a good option; they should last for about a week to 10 days. For longer storage, freezing is your best bet. Spread the cooled seeds on a baking sheet and freeze them until solid, then transfer them to a freezer-safe bag or container. They can stay perfectly good in the freezer for up to 3 months. If you find they’ve lost a bit of their crunch after storage, don’t worry! You can easily revive them. Just spread them back out on a baking sheet and pop them in a 300°F (150°C) oven for about 5-10 minutes, watching them closely. They’ll crisp right up again. If you’ve made a sweet version with a glaze, it’s best to add the glaze just before serving if you plan on storing them for more than a day, as the glaze can sometimes make them a bit soft over time.
Frequently Asked Questions
Final Thoughts
There you have it – my absolute favorite way to transform humble pumpkin seeds into a snack that’s bursting with flavor and satisfying crunch. It’s such a simple pleasure, isn’t it? Taking a few minutes to clean and season these little guys, and then being rewarded with a treat that’s both delicious and wholesome. I really hope you’ll give this a try, especially if you find yourself with a pile of seeds after your next pumpkin carving adventure. It’s a little bit of edible magic that always brings a smile to my face, and I have a feeling it will do the same for you. If you love this recipe, you might also enjoy my recipe for [link to a related recipe, e.g., Spiced Roasted Nuts] for another fantastic crunchy snack idea. Happy roasting, and I can’t wait to hear how your perfectly crispy roasted pumpkin seeds turn out!
Roasted Pumpkin Seeds
Ingredients
Main Ingredients
- 2 cup pumpkin seeds cleaned and dried
- 2 tablespoon olive oil
- 0.5 teaspoon salt
- 0.25 teaspoon black pepper
Instructions
Preparation Steps
- Preheat your oven to 300°F (150°C).
- In a medium bowl, toss the pumpkin seeds with olive oil, salt, and pepper until evenly coated.2 cup pumpkin seeds
- Spread the seeds in a single layer on a baking sheet.
- Roast for 20-25 minutes, stirring occasionally, until golden brown and fragrant.
- Let cool completely before serving.