You know those days? The ones where you swear you’ll never get to the bottom of your to-do list, and by 3 PM, your stomach is rumbling so loudly it’s drowning out your thoughts? Yeah, I have those days *all the time*. And honestly, before I perfected this protein bar recipe, I used to just grab whatever processed thing I could find, which never really hit the spot and often left me feeling a bit blah. But this? Oh, this is different. This is the recipe I whip up when I need a serious energy boost, a guilt-free treat, or just something to keep me going until dinner without resorting to a sugar crash. It’s my go-to, my secret weapon, my incredibly satisfying no-bake protein bar recipe that my family devours. Forget those expensive, chalky store-bought bars; this homemade version is so much better, and honestly, it’s ridiculously easy.
What is a no bake protein bar recipe?
So, what exactly are these magical little bars? Think of them as your ultimate portable snack. They’re dense, chewy, packed with goodness, and just sweet enough to satisfy a craving without being over the top. It’s essentially a customizable powerhouse of energy, combining protein, healthy fats, and a touch of complex carbs to keep you full and focused. The “no-bake” part is key, of course. No oven required means less fuss, less mess, and instant gratification once they’ve set. It’s like a gourmet energy bite had a delicious baby with a satisfying granola bar, all without the baking drama. I call them “power bars” around here, and honestly, that’s exactly what they are!
Why you’ll love this recipe?
Okay, let me count the ways you’re going to adore this protein bar recipe. First off, the *flavor*. It’s nutty, slightly sweet, with hints of whatever you decide to mix in – chocolate chips are a must in my house, obviously. The texture is just divine: chewy, satisfying, and substantial. It’s not crumbly like some homemade bars can be, nor is it sticky and hard to bite. It’s the perfect balance. And then there’s the sheer *simplicity*. Seriously, if you can stir ingredients together and press them into a pan, you can make these. It takes maybe 15 minutes of active time, and the rest is just chilling in the fridge. Budget-friendly is another huge plus. You control the ingredients, which means no fancy, expensive additives. Plus, you can use pantry staples you probably already have on hand. The *versatility* is where this recipe truly shines, though. I’ll get into some ideas later, but you can swap out nut butters, add different seeds, use various dried fruits, and change up the protein powder flavor. It’s a blank canvas for your taste bud desires! What I love most about this is that it’s a lifesaver on busy mornings, a perfect post-workout refuel, and an ideal afternoon pick-me-up. It’s genuinely a recipe that keeps on giving.
How do I make a no bake protein bar?
Quick Overview
The process is wonderfully straightforward. We’ll start by gently warming some sticky binders to help everything meld together, then stir in your dry ingredients, fold in your exciting additions like chocolate chips or nuts, press everything into a prepared pan, and let it firm up in the fridge. That’s it! No complicated techniques, no special equipment, just pure, simple goodness coming together to create these fantastic protein bars. It’s so easy, my kids can help, and they love doing it!
Ingredients
For the Binding Base:
Here’s where we get that perfect chewy texture and help everything stick. I like using a combination of nut butter and a liquid sweetener. Feel free to use Peanut Butter, almond butter, cashew butter – whatever you love! For the sweetener, maple syrup or honey works beautifully. You can even use agave. The key is that it’s liquid and a touch sticky.
- 1 cup creamy nut butter (peanut, almond, cashew, sunflower seed butter for nut-free)
- 1/2 cup liquid sweetener (maple syrup, honey, or agave nectar)
- 1 teaspoon vanilla extract (pure vanilla is best for flavor!)
For the Dry Goodness:
This is where we pack in the protein and the texture. You can play around a lot here. I usually opt for a neutral-flavored protein powder, but chocolate or vanilla can be fun too. Make sure it’s a protein powder you actually *like* the taste of because it will come through! Oats are my go-to for fiber and a satisfying chew. You can use rolled oats or quick oats, but I find rolled give the best texture. Chia seeds and flax seeds are fantastic for extra nutrients and binding power.
- 2 cups rolled oats (or quick oats)
- 1 scoop (about 30g) protein powder (your favorite flavor!)
- 1/4 cup chia seeds
- 1/4 cup ground flaxseed (or whole flaxseed if you prefer more texture)
- 1/2 teaspoon cinnamon (optional, but lovely)
- Pinch of salt (enhances all the flavors!)
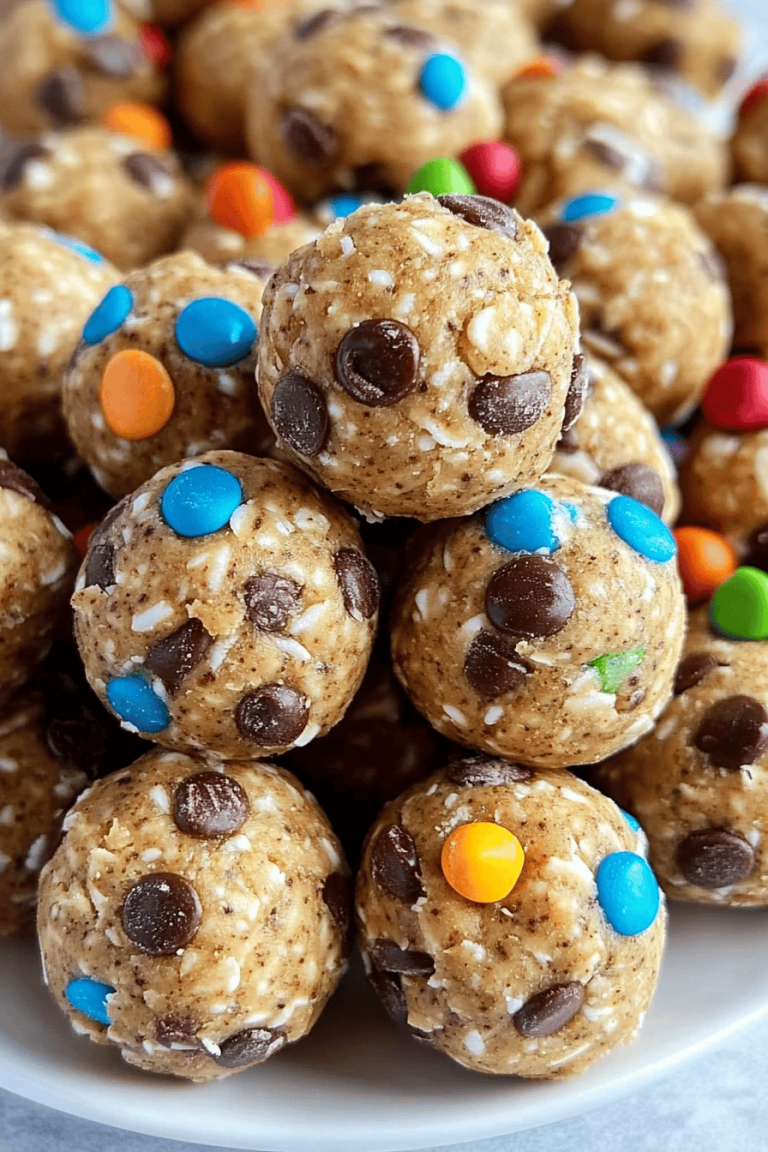
For the “Extras” (Get Creative!):
This is where you make them your own! My absolute favorite is dark chocolate chips, but feel free to swap or add. Dried cranberries, chopped dried apricots, or even some chopped nuts like walnuts or pecans can be amazing. Just make sure they are chopped into bite-sized pieces so they distribute evenly.
- 1/2 cup mix-ins of your choice (dark chocolate chips, chopped nuts, dried fruit, etc.)
Step-by-Step Instructions
Step 1: Prepare Your Pan
Grab an 8×8 inch baking pan. You’ll want to line it with parchment paper, leaving some overhang on the sides. This makes it SO much easier to lift the whole block out later. Just press the parchment paper into the corners and let the excess hang over the edges like little handles. This is a step I never skip – it saves so much hassle when you’re ready to cut!
Step 2: Gently Warm Binders
In a medium saucepan over low heat, combine your nut butter and liquid sweetener. Stir gently until they are smooth and well combined. You don’t want it to boil, just to get warm enough so they are easily pourable and mix well with the dry ingredients. This usually takes just a few minutes. Stir in the vanilla extract and a pinch of salt.
Step 3: Combine Dry Ingredients
In a large bowl, add your rolled oats, protein powder, chia seeds, ground flaxseed, and cinnamon (if using). Give everything a good whisk to combine. Make sure the protein powder is evenly distributed so you don’t get pockets of it in your bars.
Step 4: Mix Wet and Dry Together
Pour the warm nut butter and sweetener mixture into the bowl with the dry ingredients. Now, grab a sturdy spatula or wooden spoon and start mixing. It will seem like a lot at first, but keep stirring and folding until everything is well incorporated and you have a thick, cohesive mixture. This is where you can also fold in your chosen mix-ins like chocolate chips or nuts. Just gently fold them in.
Step 5: Press into Pan
Transfer the mixture into your prepared baking pan. Now comes the slightly sticky but satisfying part: pressing it all down firmly and evenly. You can use your hands (lightly dampened can help!), the back of a spatula, or even the bottom of a measuring cup. The firmer you press, the more stable your bars will be. Get into the corners and make sure the top is as level as possible.
Step 6: Chill to Set
Cover the pan (plastic wrap works great) and place it in the refrigerator for at least 2 hours, or until the bars are firm to the touch. The longer they chill, the firmer they’ll get, making them easier to slice cleanly.
Step 7: Slice and Enjoy!
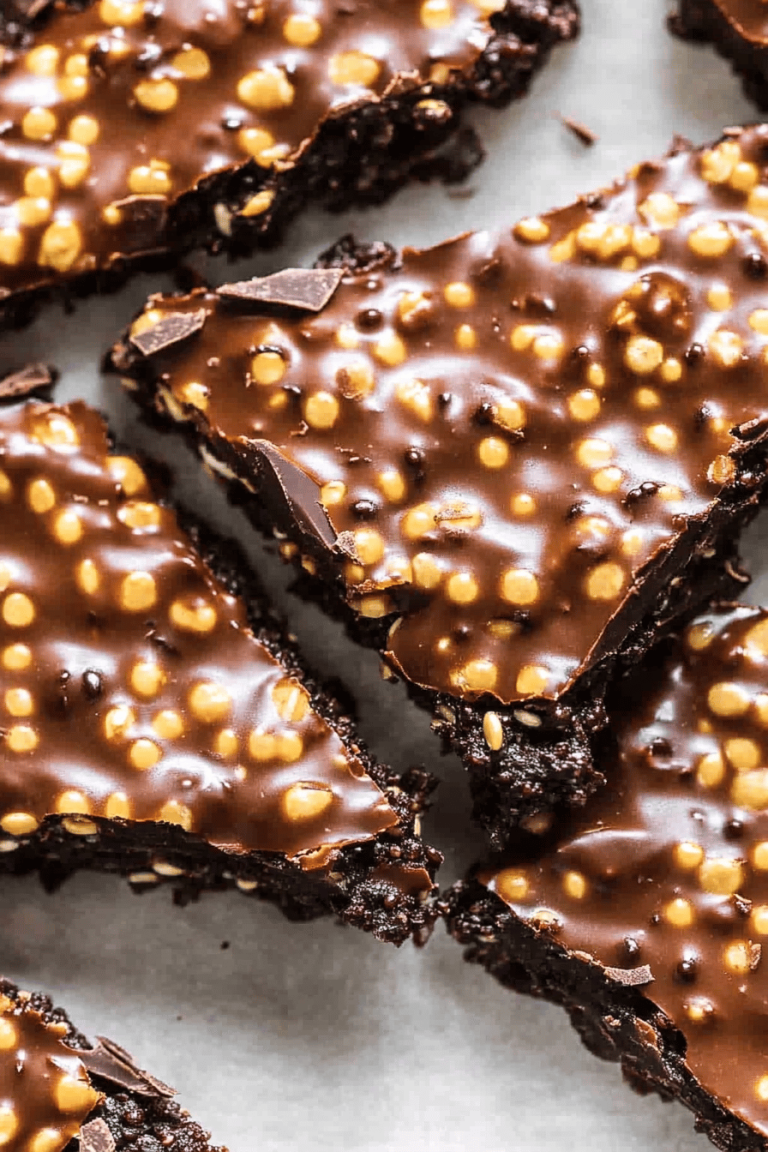
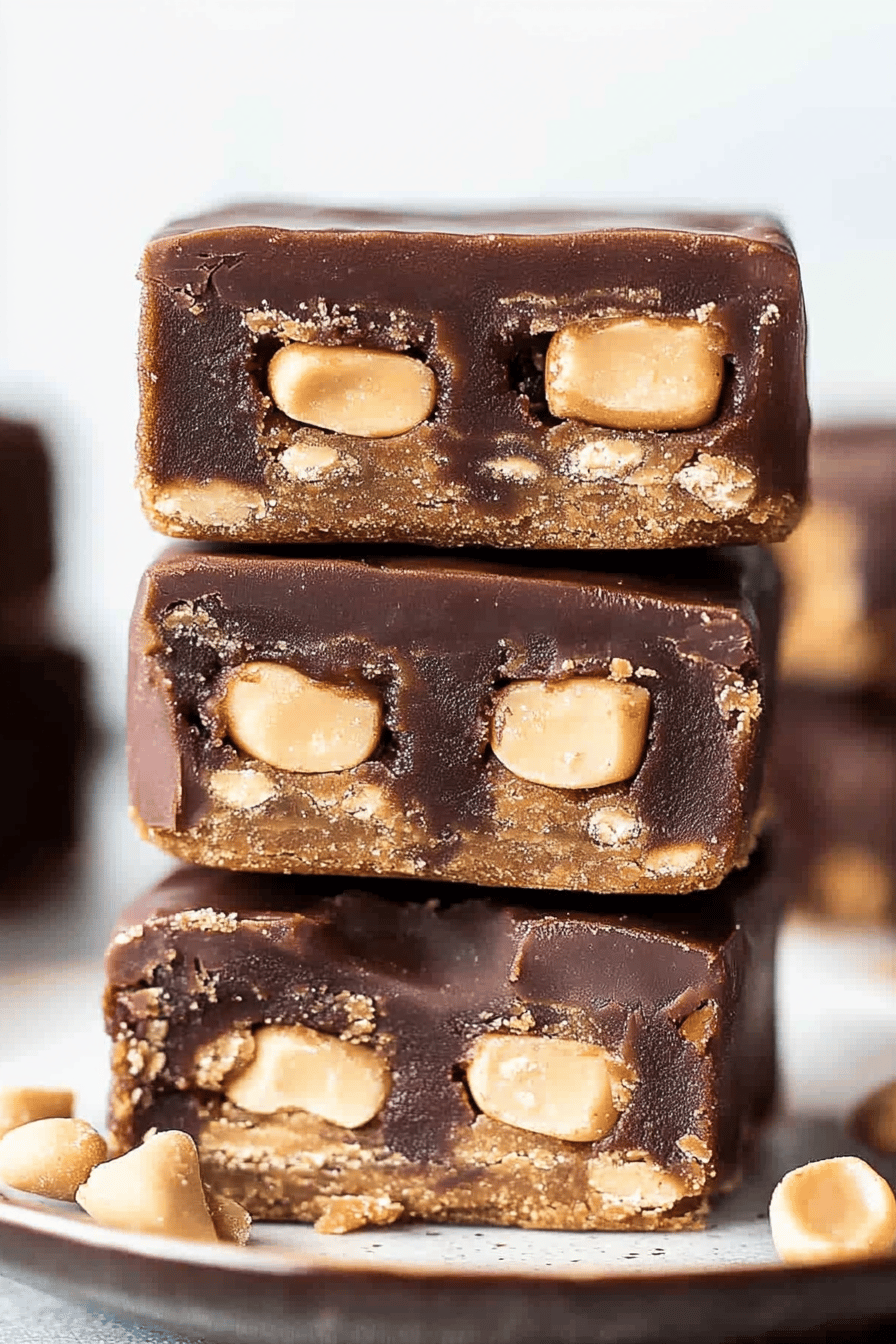
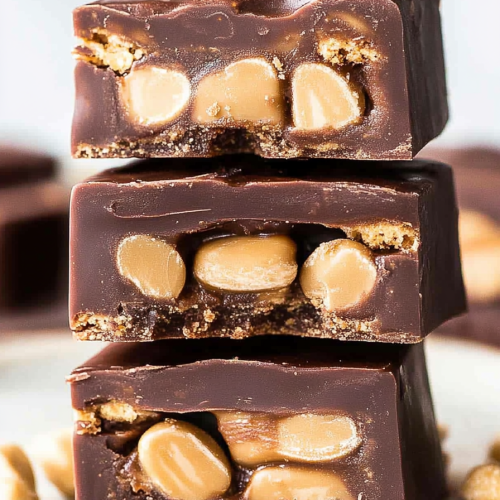
Once firm, use the parchment paper overhang to lift the entire block out of the pan onto a cutting board. Now, using a sharp knife, slice the block into your desired bar size. I usually get about 10-12 bars out of an 8×8 pan, depending on how thick I want them. And voilà! Your delicious, homemade protein bars are ready to go.
What to Serve It With
These protein bars are pretty much a meal or snack all on their own, but they also pair wonderfully with a few things depending on when you’re enjoying them. For a quick breakfast, I love grabbing one with a big mug of hot coffee. The warmth of the coffee and the satisfying chewiness of the bar is just the perfect start. If I’m feeling a bit more fancy or have guests, for brunch, I might serve a smaller piece alongside some fresh Fruit Salad or even a dollop of Greek yogurt. It adds a nice textural contrast and a boost of energy without being too heavy. As a simple dessert, especially when I’m craving something sweet after dinner but don’t want to bake, a single bar is fantastic. Sometimes I’ll even warm it up *very* slightly for about 10-15 seconds in the microwave to make the chocolate chips extra gooey – pure bliss! For those cozy snacks when you’re curled up with a book or watching a movie, they’re just perfect. Pair it with a glass of milk (dairy or non-dairy!) or a soothing cup of herbal tea. It’s that perfect balance of treat and sustenance. My kids love them after school with a glass of chocolate milk – it’s our little after-school ritual!
Top Tips for Perfecting Your No-Bake Protein Bar Recipe
I’ve made this protein bar recipe more times than I can count, and over the years, I’ve picked up a few tricks that make them even better. First, when it comes to the nut butter, make sure it’s a good quality, creamy one. Natural nut butters that have been stirred well will give you the best texture. If your nut butter is super oily, you might need to drain off a little of the excess oil before mixing. For the oats, I generally stick to rolled oats because they provide a lovely chew. Quick oats can sometimes make them a bit softer, which isn’t bad, just different! If you’re going for a gluten-free version, make sure your oats are certified gluten-free.
When you’re mixing the wet and dry ingredients, don’t be tempted to overmix once the oats are in. You just want everything to be combined. Overmixing can sometimes make the oats break down too much, leading to a gummier texture. The goal is a thick, cohesive dough that holds together when you press it.
For the mix-ins, I find that chocolate chips are non-negotiable in my kitchen. However, if you’re using dried fruit, make sure it’s not too sticky or large, or it can make the bars harder to slice. Chop them into smaller pieces. If you’re adding nuts, raw or lightly toasted nuts work best. I also love adding a sprinkle of shredded coconut for extra flavor and texture!
When it comes to pressing the bars, this is crucial for their structure. Really pack that mixture down firmly into the pan. Use a flat-bottomed glass or a spatula to get it as dense and even as possible. This is what prevents them from crumbling when you cut them. Don’t be shy with the pressing!
And finally, about the chilling time – patience is key! While you *can* cut them after an hour, letting them chill for at least 2-3 hours, or even overnight, makes a world of difference in how cleanly they slice. If you’re in a hurry, pop them in the freezer for about 30-45 minutes, which speeds up the firming process considerably.
Storing and Reheating Tips
These protein bars are wonderfully stable, which is another reason I love them so much. For room temperature storage, I find they keep well for about 3-4 days, especially if it’s not too hot in your house. Just keep them in an airtight container. If your kitchen tends to be warm, or if you’ve added a lot of chocolate chips that might melt, it’s better to store them in the fridge. For refrigerator storage, they’ll stay fresh and delicious for up to 2 weeks. Again, an airtight container is your best friend here. They firm up nicely in the fridge, which makes them great for grabbing on the go.
If you want to make a big batch and have them last even longer, freezer instructions are your answer! I usually wrap individual bars tightly in plastic wrap or place them in freezer-safe bags. They’ll keep beautifully in the freezer for up to 3 months. To thaw, simply take a bar out and let it sit at room temperature for about 15-30 minutes, or until it reaches your desired texture. They can also be enjoyed straight from the freezer if you prefer a firmer, colder treat!
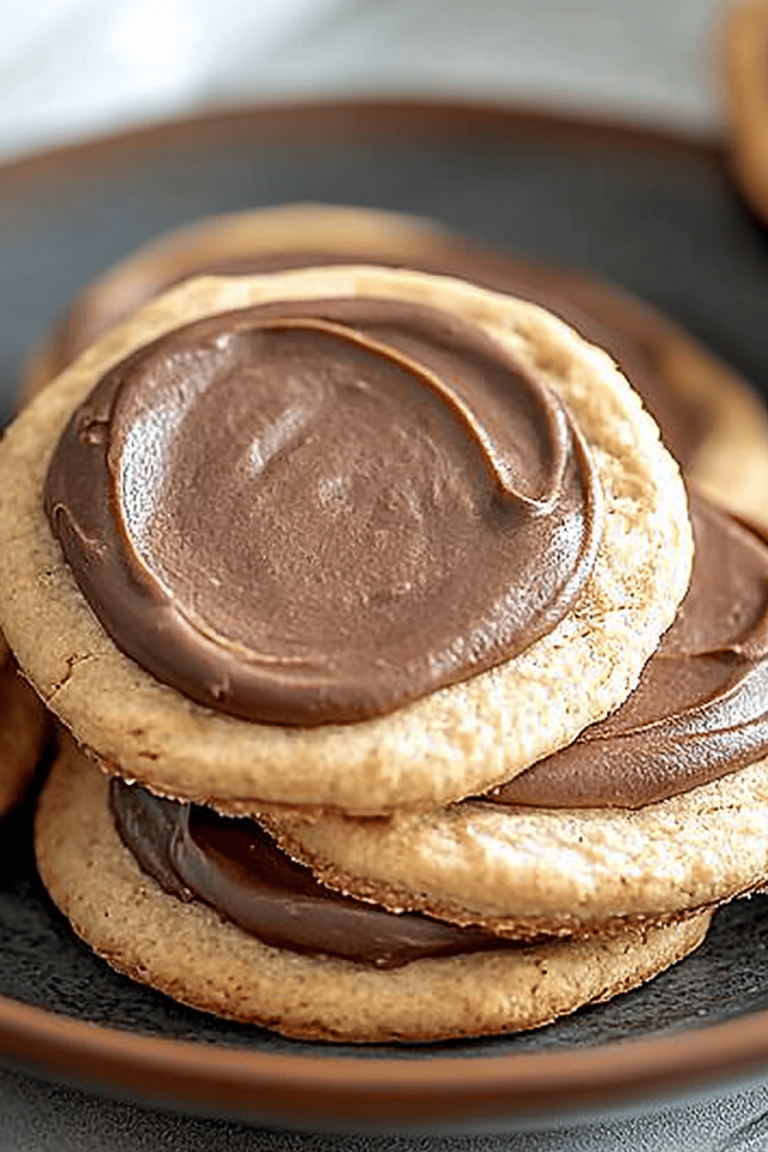
If you’ve opted to not add a glaze (which I sometimes do to keep things super simple!), but decided to add one later, I usually add the glaze right before serving or just before storing in the fridge. If you freeze them with a glaze, the glaze might crack a bit upon thawing, but they’ll still taste fantastic. For the best texture, I recommend glazing right before you’re ready to eat them or store them in the fridge.
Frequently Asked Questions
Final Thoughts
Honestly, I can’t sing the praises of this no-bake protein bar recipe enough. It’s more than just a convenient snack; it’s a little peace of mind in bar form, knowing you’ve got something wholesome and delicious ready to fuel you through your day. The satisfaction of making something so good for yourself and your family, with minimal effort and maximum flavor, is just unbeatable. It’s the kind of recipe that becomes a staple, the one you come back to again and again because it never fails. If you’re looking for a way to boost your energy, curb those sweet cravings healthily, or simply want a fantastic portable snack, please give this a try. I promise you won’t regret it!
I’d absolutely love to hear how yours turn out! What mix-ins did you choose? Did your family devour them as quickly as mine does? Leave a comment below and let me know your favorite variations. Happy making!
Protein bar recipe
Ingredients
Main Ingredients
- 2 cups Rolled Oats
- 1 scoop Protein Powder Vanilla or Chocolate flavor
- 0.5 cup Peanut Butter Natural, creamy
- 0.33 cup Honey
- 0.25 cup Milk Dairy or non-dairy
- 0.5 cup Chocolate Chips Optional
Instructions
Preparation Steps
- In a large bowl, combine the rolled oats and protein powder. Mix well.
- In a separate small bowl, whisk together the peanut butter, honey, and milk until smooth.
- Pour the wet ingredients into the dry ingredients and stir until everything is well combined. If using, fold in the chocolate chips.
- Press the mixture evenly into a square baking dish lined with parchment paper. Make sure it's packed tightly.
- Chill in the refrigerator for at least 30 minutes to allow the bars to set.
- Once set, lift the parchment paper to remove the slab from the dish and cut into 12 bars.