You know those days? The ones where a craving hits, fierce and sudden, demanding something rich, something chocolatey, something utterly decadent, but the thought of preheating the oven feels like climbing Everest? Yeah, I know those days intimately. It was on one of those particularly lazy, yet intensely dessert-driven afternoons that I stumbled upon this absolute gem: the No-Bake Black Forest Cheesecake. Forget everything you think you know about cheesecakes; this isn’t about wrestling with water baths or praying your creation doesn’t crack. This is pure, unadulterated joy in a springform pan, and let me tell you, it tastes every bit as magical as the classic baked version, if not better. It’s like a hug for your taste buds, and it’s my go-to when I want maximum flavor with minimum fuss. If you’re a fan of that iconic Black Forest cake – the layers of chocolate, the tart cherries, the cloud of whipped cream – then this no-bake cheesecake is your new best friend.
What is a no bake black forest cheesecake?
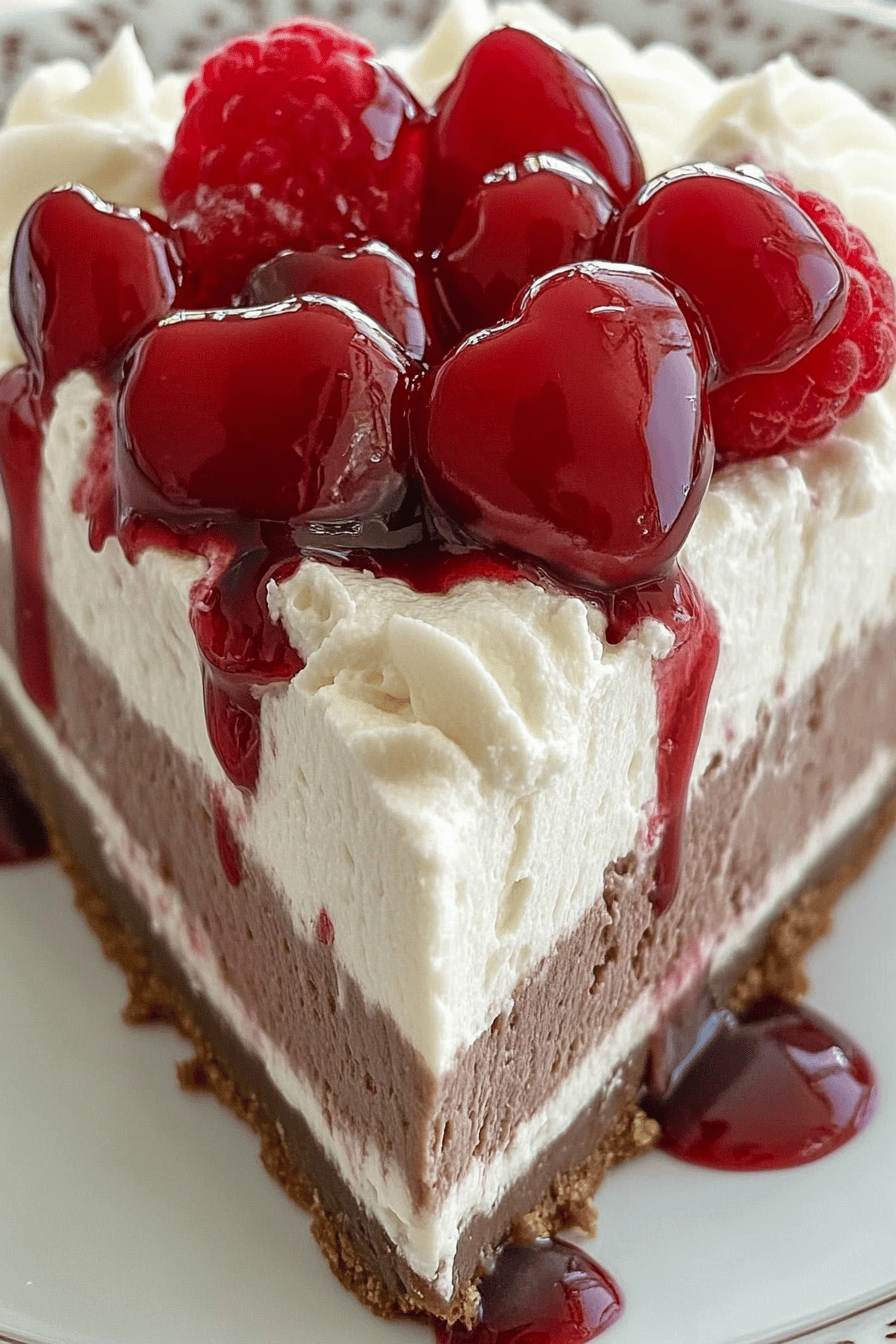
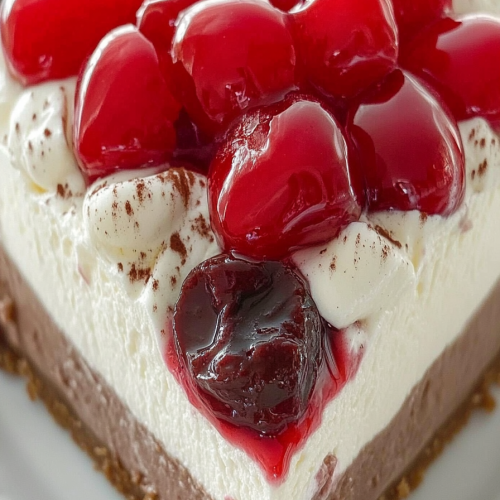
So, what exactly *is* this delightful creation? At its heart, it’s a cheesecake that skips the oven altogether. Instead of baking, we use a magical combination of CREAM CHEESE, whipped cream, and a few other goodies that set up beautifully in the refrigerator. Think of it as a super-charged, intensely flavored mousse that’s firm enough to slice. The “Black Forest” part comes from the signature flavors: a deep, rich chocolate crust (no soggy bottom here!), a creamy, luscious cheesecake filling infused with chocolate, and then, the stars of the show, tart cherry pie filling swirled in and piled on top. It captures all the beloved elements of a traditional Black Forest cake – the dark chocolate, the bright cherries, the smooth creaminess – but in a format that’s surprisingly approachable for even the most kitchen-shy among us. It’s essentially a dream you can eat, made even better by the fact that your oven stays blessedly cool.
Why you’ll love this recipe?
What are some of the reasons why I love this no bake black forest cheesecake?flavor. It’s just out of this world. You get that intense chocolate hit from the cookie crust and the filling, balanced perfectly by the tartness of the cherries. It’s not overly sweet, which I really appreciate, and the textures are just divine – the crisp crust, the velvety smooth cheesecake, and the bursts of soft cherry. It’s a symphony for your senses! Then there’s the sheer simplicity. I’ve made this countless times when I’ve been short on time or energy, and it’s never failed me. It requires no special equipment beyond an electric mixer and a springform pan, and the steps are so straightforward. You can easily whip this up in about 30 minutes of active time, then let the fridge do all the hard work. This makes it a lifesaver for last-minute gatherings or when you just need a serious dessert fix without the baking drama. It’s also surprisingly cost-efficient. While some cheesecake recipes can call for a hefty list of ingredients, this one relies on pantry staples and readily available items, making it an indulgence that won’t break the bank. And let’s talk versatility. While the cherry and chocolate combo is classic, I’ve experimented with different fruit fillings (raspberry is fantastic!) and even added a hint of almond extract to the filling once. It’s perfect for a fancy dinner party dessert, a birthday celebration, or even just a cozy night in with a good book. It truly stands out because it delivers all the indulgence of a traditional Black Forest cake without any of the baking stress. What I love most is that feeling of accomplishment when you pull this gorgeous dessert out of the fridge, knowing you made something so spectacular with so little effort. It’s pure magic!
How do I make a no bake black forest cheesecake?
Quick Overview
This No-Bake Black Forest Cheesecake is all about simplicity and stunning results. We’ll start by creating a quick and easy chocolate cookie crust, then whip up a luscious, no-bake cheesecake filling that’s studded with chocolate chips and swirled with cherry pie filling. After a good chill in the refrigerator, it’s ready to be adorned with more cherries and served. The beauty of this method is that you achieve all the classic Black Forest flavors and textures without ever turning on your oven. It’s the perfect dessert for warm weather, busy holidays, or anytime you crave a showstopper that’s surprisingly easy to master.
Ingredients
For the Chocolate Cookie Crust:
2 cups (about 200g) chocolate cookie crumbs (Oreos work brilliantly, just crush them up in a food processor or a zip-top bag with a rolling pin)
6 tablespoons (85g) unsalted butter, melted
2 tablespoons granulated sugar (optional, if your cookies are very sweet, you might skip this or reduce it)
For the Creamy Cheesecake Filling:
24 ounces (about 680g) full-fat cream cheese, softened to room temperature. Trust me, using full-fat makes a huge difference in texture and richness here! If it’s not soft enough, your filling might be lumpy.
1 cup (120g) powdered sugar, sifted to avoid any graininess.
1 teaspoon vanilla extract. A good quality vanilla makes all the difference.
1/2 cup (120ml) heavy whipping cream, very cold. This is what makes it light and fluffy.
1/4 cup (30g) unsweetened cocoa powder, sifted. Use a good quality cocoa for the best chocolate flavor.
1/2 cup (85g) semi-sweet chocolate chips, roughly chopped. These melt slightly when mixed, adding little pockets of chocolatey goodness.
1 cup (about 240g) cherry pie filling, plus more for topping. Look for a good quality one with plump cherries. You can also make your own!
Step-by-Step Instructions
Step 1: Preheat & Prep Pan
While this is a no-Bake Recipe, we still need a little prep! Grab a 9-inch springform pan. If you’re worried about sticking, you can lightly grease the sides or line the bottom with a circle of parchment paper. There’s no oven to preheat here, but we’ll pop this into the fridge later, so make sure you have space!
Step 2: Mix Dry Ingredients
In a medium bowl, combine your chocolate cookie crumbs, melted butter, and optional granulated sugar. Stir until the crumbs are evenly moistened and resemble wet sand. This ensures your crust holds together nicely and has a good texture.
Step 3: Mix Wet Ingredients
In a separate large bowl, using an electric mixer, beat the softened cream cheese until it’s completely smooth and creamy. This is a crucial step for a lump-free cheesecake. Add the sifted powdered sugar and vanilla extract, and beat again until just combined. Don’t overmix at this stage.
Step 4: Combine
In a small bowl, whip the very cold heavy cream until stiff peaks form. Be careful not to overwhip it into butter! Gently fold about half of the whipped cream into the cream cheese mixture to lighten it. Then, carefully fold in the remaining whipped cream until just incorporated. Now, gently fold in the sifted cocoa powder and the chopped semi-sweet chocolate chips. You want to see streaks of chocolate and cocoa, but don’t overmix and lose that lovely airy texture from the whipped cream.
Step 5: Prepare Filling
This is where the magic happens! Take about half of your creamy cheesecake filling and gently dollop it into your prepared crust. Then, spoon about half of your cherry pie filling over the cream cheese layer. Dollop the remaining cream cheese filling on top, followed by the rest of the cherry pie filling. Now, grab a butter knife or a skewer and gently swirl the cherry filling into the cream cheese. Don’t over-swirl; you want distinct ribbons of cherry, not a uniform pink mess.
Step 6: Layer & Swirl
This step is actually part of Step 5! The layering and swirling are done together to create those beautiful patterns. Gently dollop half the cream cheese filling into the crust, then spoon half the cherry pie filling over that. Repeat with the remaining cream cheese and cherry filling. Then, using a knife or skewer, create swirls. I like to go in random patterns, lifting and dragging slightly, to create beautiful marbled effects. You want visible pockets of cherry and creamy white cheesecake.
Step 7: Bake
Okay, here’s the fun part: we don’t bake this! After swirling, cover the cheesecake loosely with plastic wrap (try not to let it touch the surface) and transfer it to the refrigerator. We need it to chill and set for at least 6-8 hours, or preferably overnight. This is the most important step for achieving that perfect cheesecake texture without any baking.
Step 8: Cool & Glaze
Once the cheesecake has had ample time to chill and set firmly, it’s time to unmold it. Carefully run a thin knife around the edge of the pan before unclipping it. You can also gently lift the sides. Once unmolded, you can add more cherry pie filling on top for that classic Black Forest look, or even a dollop of whipped cream. The glaze isn’t strictly necessary, as the cherry filling acts as a wonderful topping, but if you wanted a shinier finish, you could warm up a bit more cherry filling and brush it on.
Step 9: Slice & Serve
To get clean slices, I always recommend using a sharp knife dipped in hot water and wiped dry between each cut. This helps create beautiful, professional-looking slices. Serve chilled. This cheesecake is rich and decadent, so smaller slices are often perfectly satisfying.
What to Serve It With
This No-Bake Black Forest Cheesecake is so versatile, it fits into almost any occasion! For a delightful breakfast treat (yes, I’m that person!), I love serving a small sliver with a strong cup of black coffee. The richness of the cheesecake with the bitterness of the coffee is a surprisingly wonderful start to the day. For brunch, it absolutely shines. I’ll present it whole, maybe with a few fresh raspberries scattered around the plate for extra color, and pair it with mimosas or a light sparkling rosé. It feels wonderfully elegant without being overly fussy. As a show-stopping dessert, it’s a winner every time. After a hearty meal, a slice of this is pure indulgence. I often serve it with a small scoop of good quality vanilla bean Ice Cream or a dollop of unsweetened whipped cream to cut through the richness. For those cozy snack moments, when you just need a little something sweet to brighten your day, this is it. I’ll cut a generous wedge, grab a glass of milk or a hot chocolate, and curl up on the sofa. My family has a tradition of having this for our “end of summer” celebration because it feels like a special treat that doesn’t heat up the kitchen on a warm evening. Another favorite combination is pairing it with a glass of port wine; the flavors complement each other beautifully!
Top Tips for Perfecting Your No-Bake Black Forest Cheesecake
Over the years, I’ve learned a few tricks that make this No-Bake Black Forest Cheesecake even better. For the cookie crust, make sure your crumbs are fine enough. If you’re using a food processor, pulse until it’s like coarse sand. If you’re using a bag and rolling pin, don’t leave large chunks. Press the crust firmly and evenly into the pan; this is key to preventing it from crumbling when you slice it. For the filling, the most important thing is to use full-fat cream cheese that’s truly softened. I can’t stress this enough! If your cream cheese is cold or lumpy, your filling won’t be smooth. When whipping the heavy cream, make sure it’s very cold and use a clean, dry bowl and whisk. Overmixing is the enemy of light whipped cream, so stop as soon as you see stiff peaks. When it comes to swirling, less is more! You want distinct ribbons of cherry, not a muddy mess. A few gentle passes with a knife or skewer is all you need. If you’re worried about the swirl disappearing, try dolloping the cherries *between* layers of the cream cheese filling, rather than just on top. For ingredient swaps, I’ve experimented with success! For a gluten-free version, I’ve used Gluten-Free Chocolate sandwich cookies (like Kinnikinnick or Glutino) for the crust, and it works wonderfully. If you don’t have chocolate chips, you can use finely chopped dark chocolate. For the cherries, while classic, I’ve also used a good quality raspberry or strawberry jam mixed with a tablespoon of cornstarch and cooked briefly to thicken it – it gives a lovely fruity burst. For baking tips (or rather, chilling tips!), patience is paramount. Don’t rush the chilling process. Six to eight hours is the minimum, but overnight is truly best for that firm, sliceable texture. If your refrigerator runs particularly cold, you might check it a little earlier, but it’s generally hard to over-chill this type of cheesecake. Finally, for glaze variations, while cherry pie filling is traditional, a simple chocolate ganache drizzled over the top can be decadent, or even a dusting of cocoa powder and powdered sugar can look lovely. Just ensure whatever you use is cool or at room temperature so it doesn’t melt the cheesecake.
Storing and Reheating Tips
Proper storage is key to keeping this No-Bake Black Forest Cheesecake tasting as amazing as it did when you first made it. If you have any leftovers (which is rare in my house!), the best way to store it is in the refrigerator. Make sure it’s well covered, either with plastic wrap pressed gently onto the surface of the cheesecake or in an airtight container. It will keep well in the fridge for about 3 to 4 days. The texture remains lovely and creamy, and the flavors meld even further. I wouldn’t recommend leaving it at room temperature for more than 2 hours, as the dairy and cream cheese can spoil. If you plan to serve it the next day and want to keep it fresh, I’d cover it loosely with plastic wrap and keep it chilled. For longer storage, this cheesecake freezes surprisingly well, though the texture might be slightly softer upon thawing. To freeze, I recommend slicing it first and then wrapping each slice individually in plastic wrap, followed by a layer of aluminum foil. You can also freeze the entire cheesecake, but slicing it first makes it easier to serve portions later. It should be good in the freezer for up to 1 to 2 months. To thaw, transfer the frozen cheesecake (or slices) to the refrigerator overnight. Avoid thawing at room temperature, as this can affect the texture. The glaze timing advice is simple: if you’re storing it in the fridge or freezing it, it’s best to add the topping (extra cherry filling or any other glaze) right before serving. This keeps it looking fresh and prevents the topping from making the cheesecake too soggy. If you do add it ahead of time and refrigerate, the fruit topping will still be fine, but it might not look quite as vibrant.
Frequently Asked Questions
Final Thoughts
And there you have it – my absolute favorite No-Bake Black Forest Cheesecake! It’s a dessert that truly delivers on all fronts: incredible flavor, a luxurious texture, and that wonderful feeling of accomplishment that comes from making something so special with such ease. It’s the kind of treat that makes people’s eyes light up, and honestly, it makes my day when I see my family or friends savoring every bite. It’s proof that you don’t need an oven to create something truly spectacular. If you’re a fan of rich chocolate and tart cherries, and you’re looking for a dessert that’s impressive yet surprisingly simple, please, please give this a try. I promise, it’s a keeper. For those of you who enjoyed this, you might also love my No-Bake Chocolate Mousse Pie or my Easy No-Bake Lemon Raspberry Tart – they offer similar levels of deliciousness with minimal fuss. I can’t wait to hear how yours turns out! Let me know in the comments below if you try it, or if you have any favorite variations. Happy no-baking!
No-Bake Black Forest Cheesecake
Ingredients
Crust
- 200 grams chocolate cookies crushed
- 113 grams butter melted
Cheesecake Filling
- 680 grams cream cheese softened
- 200 grams granulated sugar
- 240 ml heavy cream whipped to stiff peaks
- 1 teaspoon vanilla extract
- 2 tablespoons unsweetened cocoa powder
Cherry Topping
- 400 grams cherries pitted and halved (fresh or frozen)
- 50 grams granulated sugar
- 1 tablespoon cornstarch
- 30 ml water
Garnish
- 100 ml heavy cream for whipping
- 1 tablespoon powdered sugar
- 0.5 cup chocolate shavings
Instructions
Preparation Steps
- For the crust: In a bowl, combine crushed chocolate cookies and melted butter. Press the mixture evenly into the bottom of a 9-inch springform pan.
- For the cheesecake filling: In a large bowl, beat softened cream cheese and granulated sugar until smooth. Gradually beat in the whipped heavy cream and vanilla extract until well combined.
- Gently fold in the unsweetened cocoa powder until just combined.
- Pour the cheesecake filling over the prepared crust and spread evenly.
- For the cherry topping: In a saucepan, combine cherries, granulated sugar, cornstarch, and water. Cook over medium heat, stirring constantly, until thickened.
- Remove from heat and let cool slightly. Spoon the cherry topping over the cheesecake filling.
- Chill the cheesecake in the refrigerator for at least 4 hours, or until firm.
- For garnish: Whip heavy cream with powdered sugar until stiff peaks form. Decorate the cheesecake with whipped cream and chocolate shavings before serving.