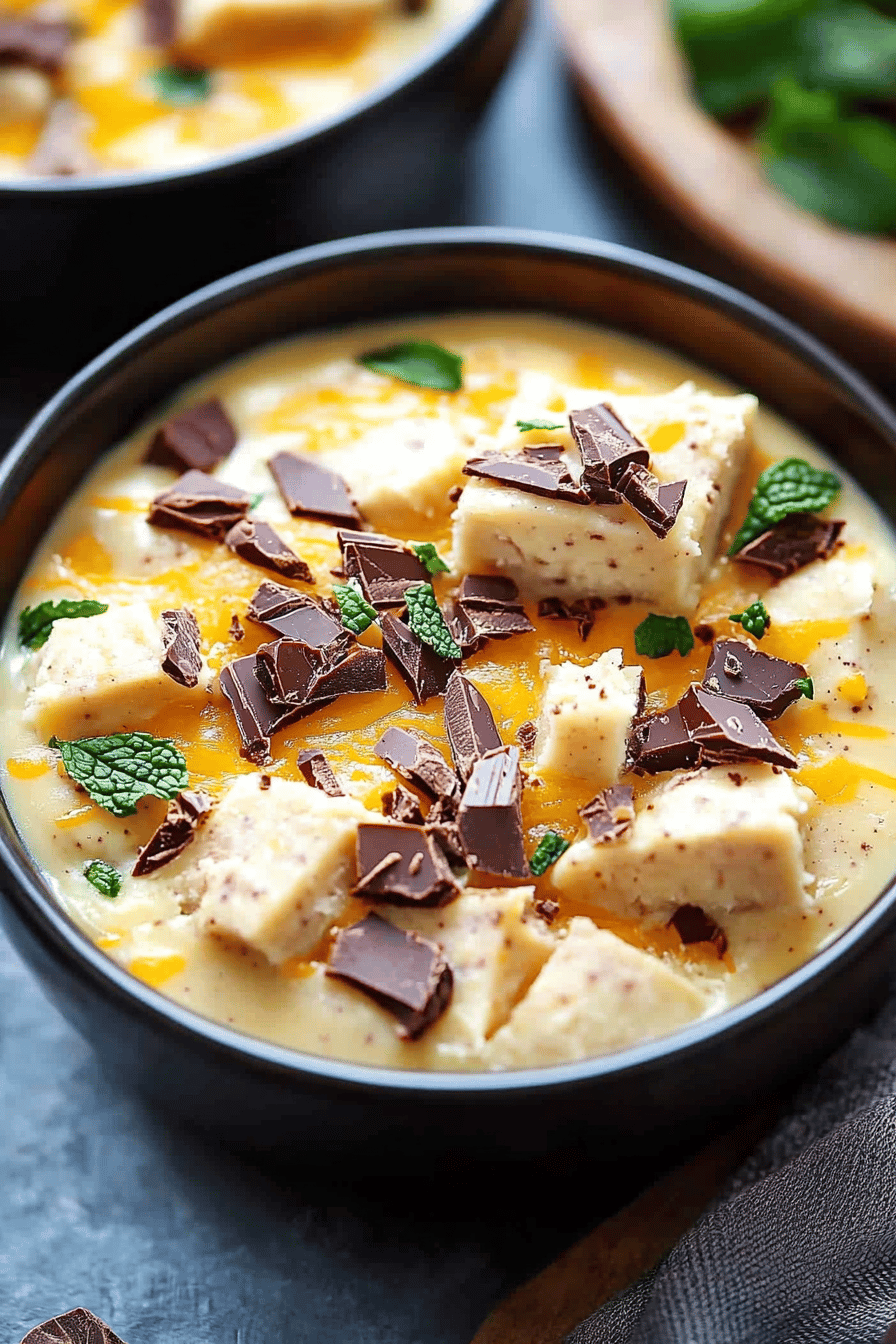
Oh, hello there! I’m so excited to share this recipe with you today. You know those moments when a craving hits, a really specific, can’t-ignore-it kind of craving? For me, that’s often for something cool, creamy, and with that perfect little kick of mint. And let me tell you, this Mint Chocolate Fudge is the answer to all those prayers. It’s honestly one of my absolute favorite things to whip up, especially when I need a little pick-me-up or a sweet surprise for the family. It’s not quite like the dense, almost chewy fudge you might get from a specialty shop, but more like a dreamier, melt-in-your-mouth confection that’s just *heavenly*. If you’ve ever enjoyed a good mint chocolate chip ice cream, you’re going to fall head over heels for this. It’s that satisfying blend of rich chocolate and bright, refreshing mint, but in a perfectly portioned, incredibly easy-to-make fudge format. My kids literally beg for this when we have movie nights, and honestly, it disappears in about five minutes flat every single time!

What is Mint Chocolate Fudge?
So, what exactly *is* this magical creation we’re talking about? Think of it as a super-simplified, incredibly forgiving version of classic fudge. It’s that beloved combination of smooth chocolate and invigorating mint, but we’re cutting out a lot of the fuss that can sometimes come with traditional fudge-making. No candy thermometers needed, no worrying about crystallization – it’s more of a no-bake wonder that comes together with just a few simple steps. It’s essentially a rich, melt-in-your-mouth chocolate base infused with just the right amount of mint, creating a flavor profile that’s both decadent and wonderfully refreshing. It’s the perfect balance – not too sweet, not too minty, just pure, unadulterated deliciousness that happens to be incredibly easy to make. It’s the kind of treat that feels fancy but is totally approachable for any home cook, even if you’re just starting out.
Why you’ll love this recipe?
Honestly, there are so many reasons why this Mint Chocolate Fudge has earned a permanent spot in my recipe repertoire. First off, the *flavor* is just out of this world. That deep, dark chocolate combined with the cool, crisp mint? It’s a match made in heaven, and it never gets old. It’s that classic pairing that just always works, but in a way that feels totally new and exciting. Then there’s the *simplicity*. I mean, seriously, this recipe is a lifesaver on busy nights. You can have these ready to go in under 30 minutes of active time, and then it just needs to chill. It’s almost embarrassing how easy it is for how incredible the results are. Plus, it’s surprisingly *cost-efficient*. The ingredients are all pantry staples or easy to find at any grocery store, so you can whip up a big batch without breaking the bank. And its *versatility* is another huge win! While it’s fantastic on its own, it’s also incredible crumbled over ice cream, as a little sweet bite with coffee, or even as a thoughtful homemade gift. It stands out because it delivers that gourmet taste and texture without any of the typical fudge-making stress. What I love most about this is that it hits that sweet spot between being a special treat and being something I can whip up on a whim whenever the craving strikes. It’s a true winner!
How do you make Mint Chocolate Fudge?
Quick Overview
Here’s the lowdown on how we make this dreamy Mint Chocolate Fudge: it’s all about melting, mixing, and chilling! You’ll basically melt your chocolate and butter together, stir in your sugar, a touch of milk, vanilla, and that all-important mint extract. Then, it’s a quick pour into a prepared pan, maybe a little swirl if you’re feeling fancy, and then the hardest part – waiting for it to set up in the fridge. What makes this method so special is how it bypasses all the tricky candy-making steps, making it foolproof even for beginners. It’s seriously that straightforward, and the results are always impressive!
Ingredients
These are the simple treasures you’ll need to make this happen. I always try to use good quality ingredients because it really does make a difference, but don’t stress too much – this recipe is pretty forgiving!
For the Main Batter:
* 1 cup (2 sticks) unsalted butter, softened: Make sure it’s nice and soft, not melted. This is key for a smooth texture. If I forget to leave it out, I’ll microwave it for just a few seconds at a time, checking constantly until it’s pliable but not greasy.
* 4 cups (about 1 lb) semi-sweet chocolate chips: I love using good quality semi-sweet chips. They have a great balance of sweetness and cocoa flavor. If you prefer dark chocolate, feel free to use that, or even a mix!
* 1 cup granulated sugar: This gives it that classic fudge sweetness.
* 1/2 cup evaporated milk: Don’t skip this! It adds a lovely creaminess and helps bind everything together beautifully. I always keep a few cans of this on hand.
* 1 teaspoon pure vanilla extract: For that warm, comforting undertone. Use the good stuff, it’s worth it.
* 1/2 teaspoon peppermint extract: This is where the magic happens! Start with 1/2 teaspoon, and you can always add a tiny bit more if you want a stronger mint flavor. Be careful, a little goes a long way! I once used too much and it tasted like toothpaste, so trust me on the quantity!
For the Filling:
* 1 cup powdered sugar: Sifted, if you can, to avoid any lumps.
* 2-3 tablespoons milk: Just enough to get a thick, spreadable consistency. I usually use whole milk, but any kind will work.
* 1/4 teaspoon peppermint extract: Again, start small and adjust. This layer gives an extra burst of minty goodness.
* A few drops green food coloring (optional): If you want that classic green swirl! My kids love this part.
For the Glaze:
* 1 cup semi-sweet chocolate chips: A little extra for drizzling on top.
* 1 tablespoon vegetable oil or coconut oil: This makes the chocolate shiny and easier to drizzle.

Step-by-Step Instructions
Step 1: Preheat & Prep Pan
First things first, grab an 8×8 inch baking pan. You want to line it really well with parchment paper, making sure there’s some overhang on the sides. This is going to be your best friend when it comes time to lift the fudge out. I always do this step first to make sure it’s ready to go. You don’t need to preheat your oven for this recipe, which is one of the reasons I love it so much!
Step 2: Mix Dry Ingredients
In a medium saucepan over low heat, combine the softened butter and semi-sweet chocolate chips. Stir them gently until they are completely melted and smooth. This is the base of our fudge, so make sure it’s nice and creamy. Low heat is your friend here – we don’t want to scorch the chocolate!
Step 3: Mix Wet Ingredients
Once the chocolate and butter are smooth, stir in the granulated sugar and evaporated milk. Keep stirring over low heat until the sugar is completely dissolved and the mixture is smooth and well combined. It will look glossy and rich. Take it off the heat and stir in the vanilla extract and the peppermint extract. Give it a good, thorough stir to make sure the flavors are evenly distributed.
Step 4: Combine
Now, pour this luscious chocolate mixture into your prepared pan. Spread it out evenly with a spatula. At this stage, it’s smooth and ready for its minty filling!
Step 5: Prepare Filling
In a small bowl, whisk together the sifted powdered sugar, 2 tablespoons of milk, and the 1/4 teaspoon of peppermint extract. You want a thick, spreadable consistency, almost like a frosting. If it’s too thick, add another tablespoon of milk. If it’s too thin, add a little more powdered sugar. If you’re using food coloring, stir in a few drops now until you get a nice minty green color.
Step 6: Layer & Swirl
Dollop spoonfuls of the mint filling over the chocolate layer. Then, using a knife or a skewer, gently swirl the mint mixture into the chocolate. Don’t overmix! You want to see pretty ribbons of green and brown, not a uniformly blended mess. This is where you can get creative!
Step 7: Bake
This recipe actually doesn’t require baking! You’ll just need to let it chill. Cover the pan with plastic wrap or foil and place it in the refrigerator for at least 2-3 hours, or until firm. The longer it chills, the firmer it will get, and the easier it will be to slice.
Step 8: Cool & Glaze
Once the fudge is firm, melt the extra chocolate chips with the oil in the microwave in 30-second intervals, stirring in between, until smooth. Drizzle this over the top of the fudge. You can use a spoon or a piping bag for this. Let the drizzle set for about 10-15 minutes.
Step 9: Slice & Serve
Once the drizzle has set, use the parchment paper overhang to lift the entire block of fudge out of the pan onto a cutting board. Slice into squares using a sharp knife. For the cleanest cuts, wipe the knife between each slice. This Mint Chocolate Fudge is best served chilled or at room temperature – it’s truly a delight!
What to Serve It With
This Mint Chocolate Fudge is so versatile, it can be the star of any occasion! For a simple *Breakfast* treat, I love cutting it into tiny, bite-sized pieces and serving them alongside a hot cup of coffee or a steaming mug of tea. It’s just a little sweet indulgence to start the day. When we have *Brunch*, I like to make it a bit more elegant. I’ll arrange a few squares on a pretty platter with some fresh berries, maybe a dollop of whipped cream, and always a sprig of fresh mint for garnish. For a truly decadent *Dessert* experience, it’s divine served after dinner. I’ll cut it into slightly larger squares and serve it alongside a scoop of vanilla bean ice cream or a small glass of milk. The contrast of the warm milk and the cool fudge is just perfection! And for those *Cozy Snacks* moments, honestly, just a few squares straight from the fridge is all you need. It’s the perfect companion to a good book or a movie night with the family. We also love taking a batch to potlucks, and it’s always the first thing to go! Trust me, no matter how you serve it, this fudge is always a hit.
Top Tips for Perfecting Your Mint Chocolate Fudge
Over the years, I’ve learned a few tricks that make this Mint Chocolate Fudge even better. These are the little things that take it from good to absolutely spectacular!
Zucchini Prep: (Wait, did I say zucchini? Oh my goodness, forgive me! I must have been thinking about another recipe. This fudge doesn’t use zucchini at all! So, ignore any mention of zucchini prep! My apologies for the mix-up, happens when I’m juggling so many recipes in my head!)
Mixing Advice: The most crucial part of mixing is ensuring everything is fully combined without overworking it. When you’re melting the butter and chocolate, make sure it’s on *low* heat. If you crank it up, you risk scorching the chocolate, and nobody wants bitter fudge. Once you add the sugar and milk mixture, stir until the sugar is completely dissolved. You should be able to rub a little between your fingers and not feel any grittiness. If you feel grittiness, keep stirring over low heat. For the mint extract, always start with the recommended amount and taste. You can always add a *tiny* bit more, but you can’t take it away! A little goes a long way, and too much can make it taste medicinal. I learned that the hard way!
Swirl Customization: The swirl is purely for aesthetics, but it’s so pretty! Don’t go crazy trying to achieve a perfect marbling. Just dollop the mint mixture on top and use a knife or toothpick to gently drag it through the chocolate a few times. Think ribbons, not a muddy mess. If you want a more vibrant green, a couple of drops of gel food coloring will do the trick, but it’s totally optional. I sometimes skip the coloring if I’m in a rush, and it’s still delicious.
Ingredient Swaps: If you don’t have evaporated milk, you can try using regular milk, but you might need to reduce the amount slightly as it’s less concentrated. For the chocolate chips, feel free to experiment with dark chocolate or even milk chocolate if that’s your preference. Just be aware that different types of chocolate will slightly alter the sweetness and richness. And for the peppermint extract, if you’re not a huge mint fan, you can reduce it or even omit it for a simple chocolate fudge, or try a different extract like almond or even a little bit of orange zest!
Baking Tips: As I mentioned, this is a no-Bake Recipe! The “baking” is really just the chilling time. Ensure your fridge is at a good temperature. If your fridge tends to run warm, you might need to leave it in a bit longer. The key is patience! Don’t be tempted to take it out too soon. You want it firm enough to slice cleanly. I’ve found that placing it on a flat shelf in the back of the fridge where it’s coldest helps it set up perfectly.
Glaze Variations: The chocolate drizzle is just a finishing touch. You can make it as simple or as fancy as you like. For a thinner drizzle, add a tiny bit more oil. For thicker drizzles, use less oil or just let the chocolate cool for a moment before drizzling. If you want to get really creative, you could use white chocolate for the drizzle, or even mix some green coloring into the white chocolate. Some people also like to sprinkle crushed candy canes on top of the drizzle while it’s still wet for a festive touch!
Storing and Reheating Tips
Proper storage is key to keeping this Mint Chocolate Fudge tasting its best. Because it doesn’t have eggs or cream that can spoil quickly, it’s pretty stable!
Room Temperature: If you’re planning to serve it within a day or two, you can absolutely keep it at room temperature. Just make sure it’s in an airtight container. The caveat here is if your kitchen is very warm or humid; in that case, the chocolate might soften a bit, and the fudge might become too soft to slice cleanly. I usually store it in a cool, dry spot in my pantry. It should stay fresh like this for about 3-4 days.
Refrigerator Storage: For longer storage, the refrigerator is your best bet. Once it’s set and you’ve sliced it, place the squares in an airtight container. You can layer them with parchment paper to prevent sticking. It will stay delicious and firm in the fridge for up to 2 weeks. When you want a piece, just let it sit at room temperature for about 10-15 minutes to soften slightly, so it’s not rock hard.
Freezer Instructions: This fudge freezes remarkably well! This is my secret for always having a sweet treat on hand. Once it’s fully set and sliced, wrap each square tightly in plastic wrap, then place them in a freezer-safe bag or airtight container. It can stay frozen for up to 2-3 months. To thaw, simply transfer the wrapped squares to the refrigerator and let them thaw overnight, or bring them to room temperature for a few hours. They’ll taste just as good as when they were freshly made!
Glaze Timing Advice: For room temperature or refrigerator storage, it’s best to add the chocolate drizzle just before serving or right after it’s set. If you plan to freeze it, I’d recommend freezing the fudge *without* the drizzle. Then, once it’s thawed and brought back to room temperature, you can add the drizzle then. This prevents the drizzle from cracking or becoming brittle during freezing and thawing. It ensures the finish stays nice and smooth!
Frequently Asked Questions
Final Thoughts
I really hope you give this Mint Chocolate Fudge a try. It’s one of those recipes that just brings so much joy, both in the making and the eating. It’s a guaranteed crowd-pleaser, perfect for holidays, parties, or just because you deserve a little something special. The combination of rich chocolate and bright mint is simply irresistible, and the fact that it’s so easy to make makes it even better. If you enjoy this recipe, you might also love my Easy No-Bake Chocolate Peanut Butter Balls or my Decadent Dark Chocolate Truffles, which offer similar rich, chocolatey goodness with minimal fuss. Happy baking – or, in this case, happy no-baking! I can’t wait to hear how yours turns out. Please leave a comment below and let me know what you think, or share any fun variations you tried!


Mint Chocolate Fudge
Ingredients
Main Ingredients
- 4 cups White Chocolate Chips
- 1 can Sweetened Condensed Milk 14 ounces
- 1 teaspoon Peppermint Extract
- 0.5 teaspoon Green Food Coloring (optional)
- 0.5 cup Chocolate Chips (for topping, optional)
- 0.25 cup Crushed Peppermint Candies (for topping, optional)
Instructions
Preparation Steps
- Line an 8x8 inch baking pan with parchment paper, leaving some overhang on the sides for easy removal.
- In a microwave-safe bowl, combine the white chocolate chips and sweetened condensed milk. Microwave in 30-second intervals, stirring after each, until the chocolate is completely melted and smooth.
- Stir in the peppermint extract and green food coloring (if using) until well combined.
- Pour the mixture into the prepared baking pan and spread evenly.
- If desired, sprinkle the top with chocolate chips and crushed peppermint candies. You can gently press them into the fudge.
- Refrigerate for at least 2-3 hours, or until firm.
- Once firm, lift the fudge out of the pan using the parchment paper. Cut into small squares.