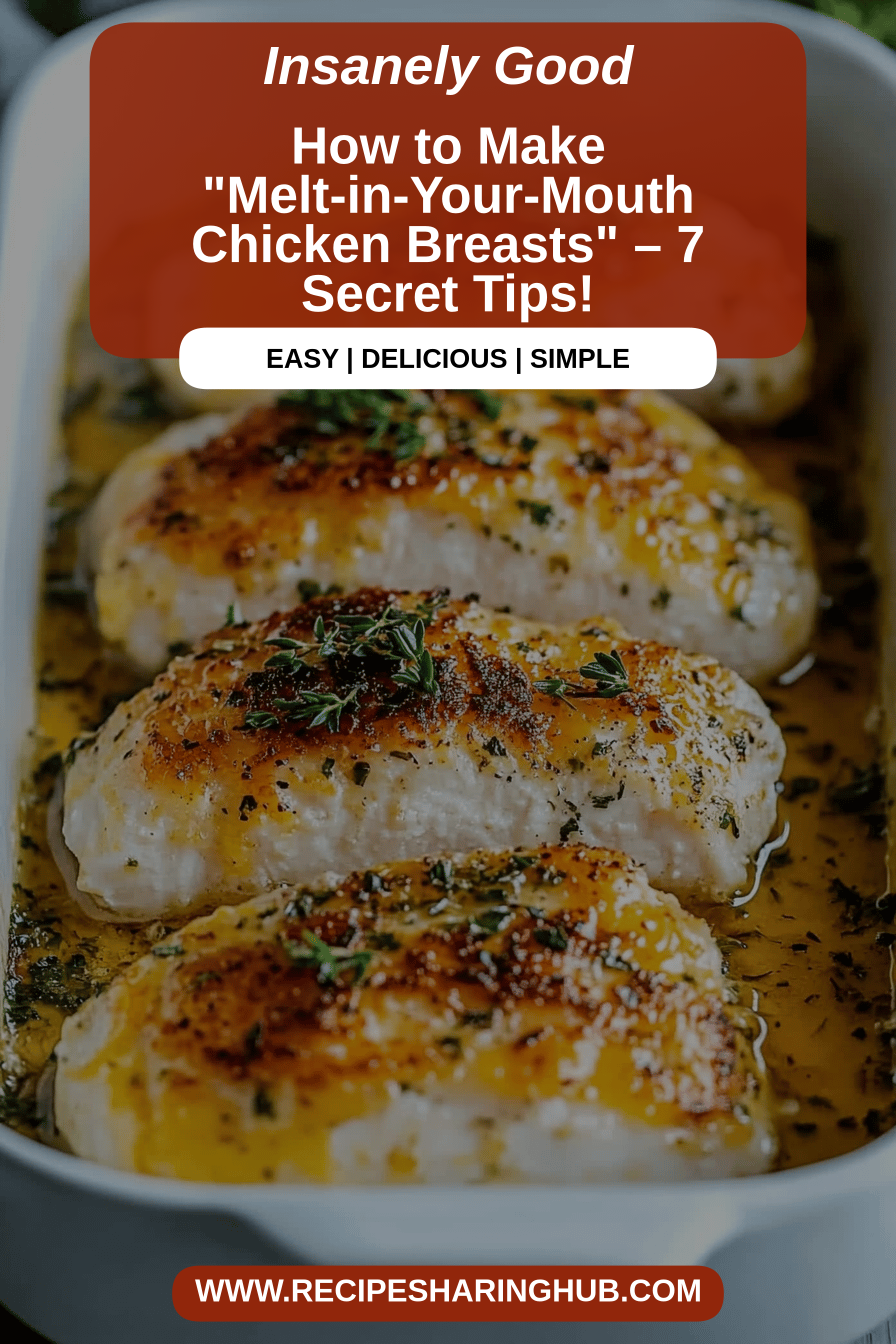
Oh, where do I even begin with this chicken? If there’s one dish that has saved me on countless weeknights, kept my family happy, and frankly, made me look like a kitchen wizard, it’s this one. You know how sometimes chicken breasts can turn out a little… sad? Dry, bland, just begging for a drowning in sauce? Yeah, we’ve all been there. But these Melt-in-Your-MOUTH CHICKEN Breasts? They are a game-changer. They’re so incredibly tender and juicy, you’ll swear you’re eating something far more complicated than what actually went into it. It’s like culinary magic, but the best kind – the kind you can actually do in your own kitchen without breaking a sweat. Honestly, if you’re looking for a reliable, crowd-pleasing chicken recipe that doesn’t require a culinary degree, you’ve found your holy grail. Forget those takeout menus for a night, because this is going to be your new go-to.
What is Melt-in-Your-Mouth chicken breast?
So, what exactly makes these chicken breasts melt in your mouth? It’s really not as fancy as it sounds! Think of it as a super-smart way to prepare chicken that guarantees moisture and flavor from the inside out. It’s essentially a beautifully seasoned chicken breast that’s cooked using a specific technique that locks in all those delicious juices. It’s not fried, it’s not breaded (though you *could* do that if you wanted!), and it’s not swimming in a heavy sauce before cooking. Instead, it’s all about treating the chicken right, infusing it with simple, yet powerful flavors, and cooking it until it’s just perfect. It’s the kind of dish that makes you feel good about what you’re serving, and it’s so wonderfully versatile, you’ll find yourself reaching for it again and again. It’s comfort food with a side of elegance, and it’s incredibly forgiving.
Why you’ll love this recipe?
What are some of the best reasons to make Melt-in-Your-Mouth Chicken Breasts?flavor is out of this world. It’s savory, a little herbaceous, and just deeply satisfying without being overpowering. It’s the kind of taste that makes you close your eyes for a moment and savor it. But what I truly adore is its simplicity. Seriously, on a busy Tuesday night when the last thing I want to do is spend an hour in the kitchen, this is my lifesaver. The ingredient list is short, the steps are straightforward, and you don’t need any fancy equipment. Plus, it’s incredibly cost-efficient! Chicken breasts are usually pretty budget-friendly, and the other ingredients are pantry staples. You get a restaurant-quality meal without the restaurant price tag, which is always a win in my book. And the versatility? Oh my goodness. This chicken can be sliced and tossed into salads, served alongside roasted vegetables, tucked into wraps, or just enjoyed on its own. It’s fantastic hot, but honestly, I’ve found it’s even delicious cold the next day. It stands up so well to different accompaniments, making it perfect for any meal of the day. Compared to other chicken breast recipes where you might pound them thin or have to be super precise with timing to avoid dryness, this method just *works*. It’s the kind of recipe that builds your confidence in the kitchen, and that’s priceless.
How do you make Melt-in-your-mouth chicken breasts?
Quick Overview
This recipe is all about building flavor and tenderness from the ground up. We’ll start by prepping the chicken and a simple, yet impactful, marinade or rub that infuses it with flavor. Then, it’s a gentle cooking process that ensures every bite is moist and succulent. It’s less about complicated techniques and more about respecting the ingredients and allowing them to shine. You’ll be amazed at how something so simple can yield such incredible results. Trust me, the aroma that fills your kitchen while this is cooking is just divine!
Ingredients
For the Main Chicken Breasts:
4 boneless, skinless chicken breasts (about 6-8 oz each) – I always try to get ones that are relatively uniform in thickness for even cooking. If they’re super thick, a quick gentle pounding can help.
2 tablespoons olive oil – Good quality extra virgin olive oil makes a difference here!
1 teaspoon garlic powder – Don’t skimp on the garlic; it’s foundational.
1 teaspoon onion powder – Adds a lovely depth of flavor.
1/2 teaspoon paprika – For a touch of color and subtle sweetness.
1/2 teaspoon dried Italian herbs (or a mix of oregano, thyme, and rosemary) – Whatever you have on hand works!
1/4 teaspoon Black Pepper – Freshly ground is always best.
1/4 teaspoon salt – Or to your taste, but don’t be shy with the salt, it really brings out the chicken’s flavor.
For the Flavor Infusion (The Secret Sauce!):
1/4 cup chicken broth – Low sodium is fine.
2 tablespoons lemon juice – Freshly squeezed is a must for that bright, zesty kick.
1 tablespoon unsalted butter, softened – This adds richness and helps create a lovely sheen.
Optional Garnish:
Fresh parsley, chopped – For a pop of color and freshness.
Step-by-Step Instructions
Step 1: Preheat & Prep Chicken
First things first, preheat your oven to 375°F (190°C). This is the sweet spot for cooking chicken breasts without drying them out. While the oven is warming up, grab your chicken breasts. If any are particularly thick in one spot, you can gently pound them a bit with a meat mallet or even the bottom of a heavy pan to ensure they’re more uniform. This helps them cook evenly. Pat the chicken breasts completely dry with paper towels. This is a crucial step, especially if you want a little bit of sear and for the seasonings to stick properly. No one wants soggy chicken!
Step 2: Mix Dry Ingredients
In a small bowl, whisk together the garlic powder, onion powder, paprika, Italian herbs, black pepper, and salt. This simple blend is going to coat our chicken and provide the primary flavor base. Make sure it’s all well combined so you get an even distribution of flavor on each piece of chicken. I like to do this before I even touch the chicken, so everything is ready to go.
Step 3: Coat the Chicken
Place the dried chicken breasts in a shallow dish or on a plate. Drizzle the olive oil over them and use your hands or a brush to lightly coat each piece. Then, generously sprinkle the dry seasoning mixture all over the chicken, making sure to get both sides coated evenly. Gently press the seasonings into the chicken to help them adhere. This step is where the magic starts to happen, infusing that wonderful flavor right into the meat.
Step 4: Prepare Baking Dish & Arrange Chicken
Lightly grease a baking dish that’s large enough to hold all your chicken breasts in a single layer. You don’t want them overlapping too much, as that can lead to uneven cooking. I usually use a 9×13 inch baking dish for about 4 chicken breasts. Arrange the seasoned chicken breasts in the prepared dish. Make sure they have a little bit of space around them.
Step 5: Create the Flavor Infusion
In a small bowl, whisk together the chicken broth, fresh lemon juice, and the softened butter. The lemon juice adds a lovely brightness that cuts through the richness, and the butter helps create a luscious, almost sauce-like consistency as it bakes. This little mixture is what truly elevates the chicken and ensures it stays incredibly moist.
Step 6: Pour & Bake
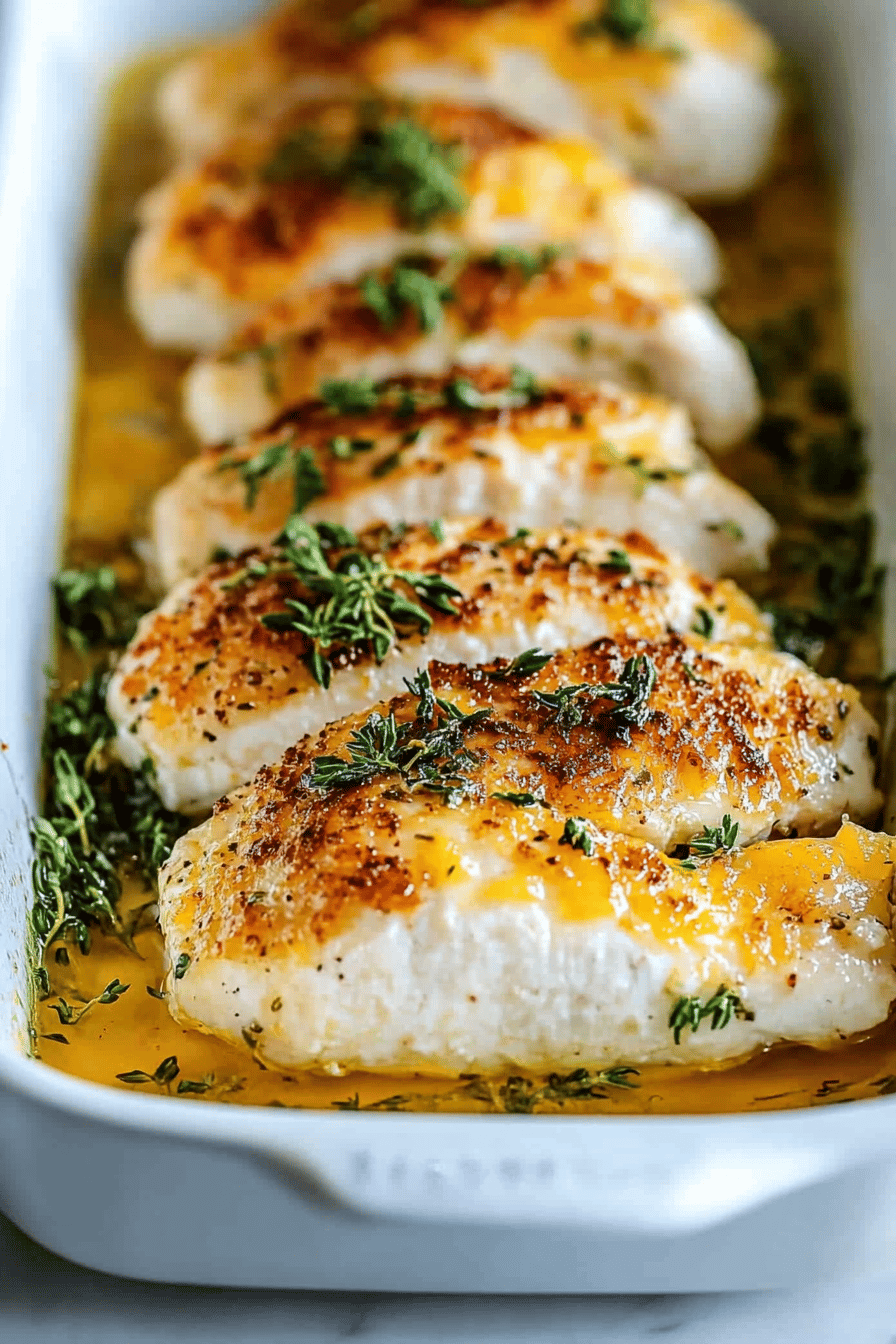
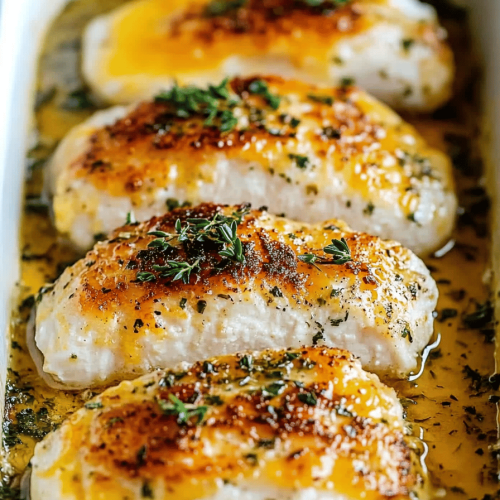
Pour this delicious broth and butter mixture evenly over the chicken breasts in the baking dish. Try to distribute it so each piece gets a good coating. Now, pop the dish into your preheated oven. Bake for 20-25 minutes, or until the chicken is cooked through. The best way to tell is to use a meat thermometer inserted into the thickest part of the chicken – it should read 165°F (74°C). You’ll also notice the juices run clear when pierced with a fork.
Step 7: Rest and Serve
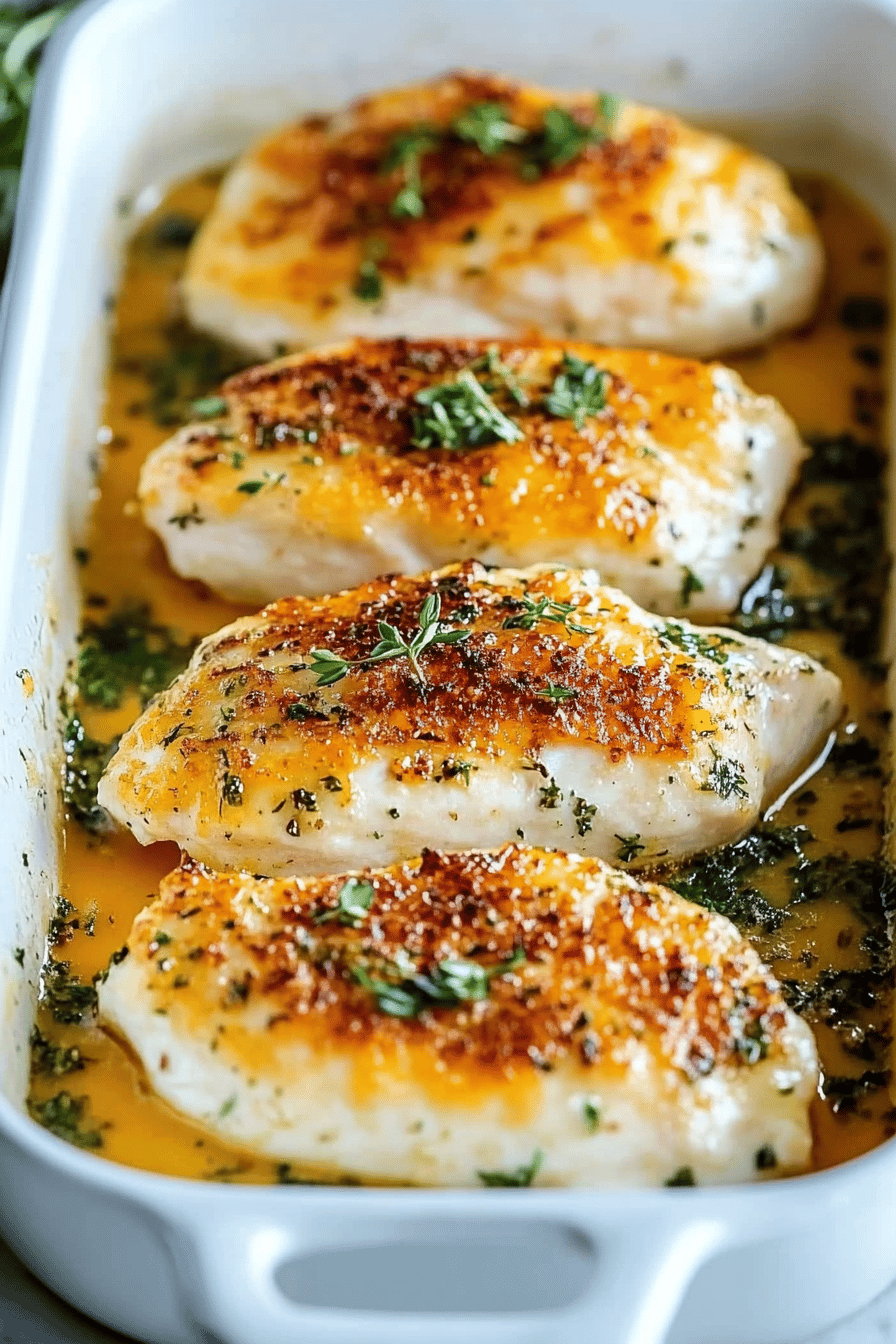
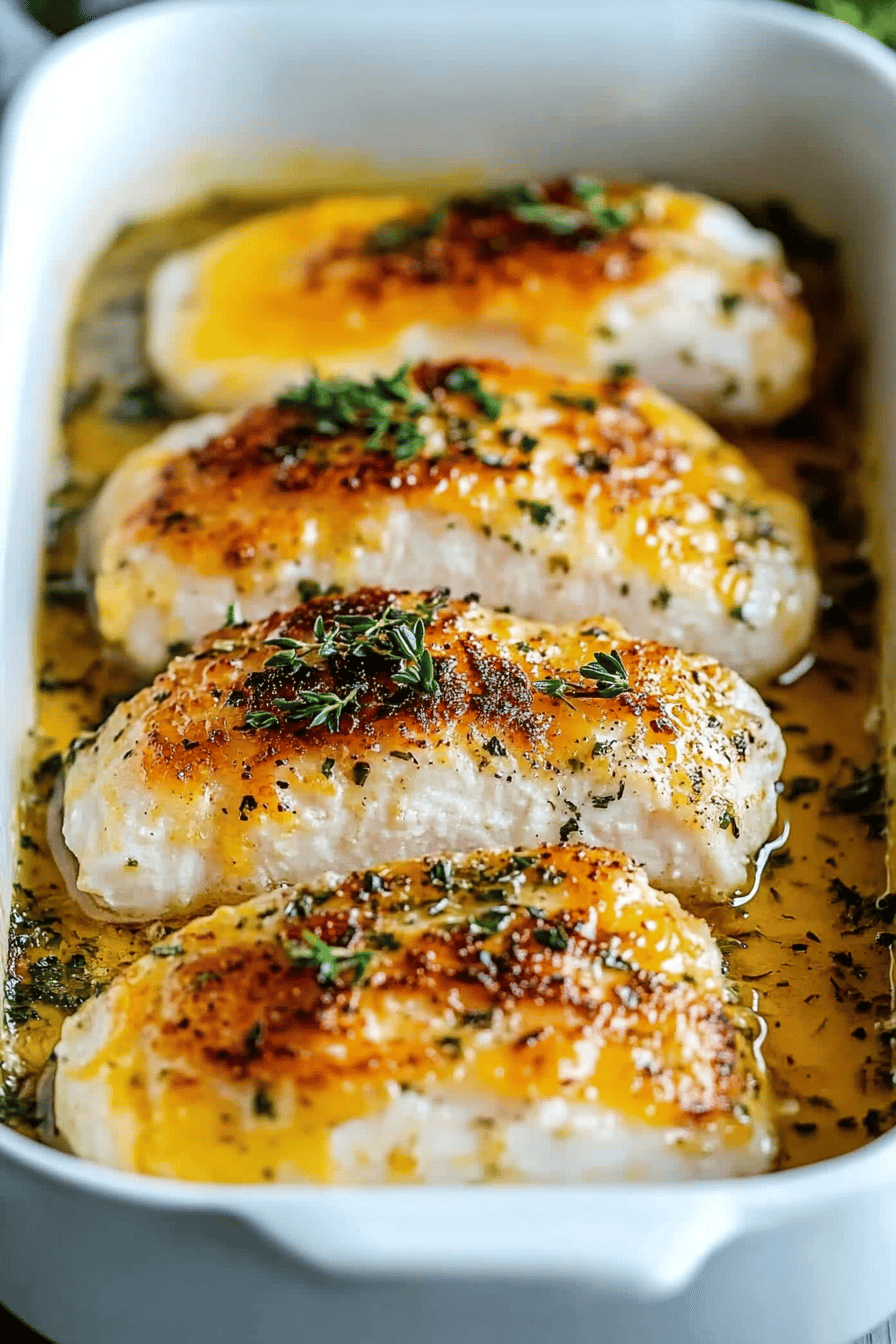
This is a crucial step that most people skip, but it makes ALL the difference! Once the chicken is cooked, remove the baking dish from the oven. Tent it loosely with foil and let the chicken rest for at least 5-10 minutes. This allows the juices to redistribute throughout the meat, ensuring that every bite is as tender and juicy as possible. If you cut it too soon, all those delicious juices will run out onto the plate. Once rested, you can spoon some of the pan juices over the chicken. Garnish with fresh chopped parsley if you like, for a little burst of freshness and color. Slice and enjoy!
What to Serve It With
Honestly, the beauty of these Melt-in-Your-Mouth Chicken Breasts is how well they play with just about anything. For a lovely breakfast or light start to the day, I love to serve them warm with a simple side of scrambled eggs or a fresh fruit salad. The bright flavors of the chicken complement a morning meal perfectly. If you’re planning a more elaborate brunch, these chicken breasts are an absolute star. They’re elegant enough to be the centerpiece, perhaps alongside some roasted potatoes, a delicate quiche, or a vibrant green salad with a light vinaigrette. A crisp white wine or even a sparkling rosé would be a delightful pairing. For something more indulgent, think of this chicken as a sophisticated main course for dessert – yes, I know, chicken for dessert sounds odd, but hear me out! Serve it with a small portion of creamy polenta or a risotto, and maybe a side of lightly sautéed asparagus. It’s a rich, satisfying meal that feels truly special. And for those days when you just need some pure comfort food, these chicken breasts are fantastic for cozy snacks. Serve them with some crusty bread for dipping into those glorious pan juices, or alongside a comforting bowl of tomato soup. My family also loves them tucked into warm pita bread with a dollop of plain Greek yogurt and some shredded lettuce for a quick, healthy lunch. I’ve even sliced them cold and added them to a pasta salad for a picnic – they hold up so beautifully!
Top Tips for Perfecting Your Melt-in-Your-Mouth Chicken Breasts
I’ve made this recipe more times than I can count, and over the years, I’ve picked up a few tricks that I think really make it shine. For the chicken itself, always start with good quality chicken breasts. If you can, opt for organic or free-range, as they tend to have a better texture and flavor. As I mentioned, trying to get breasts that are similar in thickness is key for even cooking. If you have one that’s super thick and another that’s quite thin, you can always gently pound the thicker one a bit more to match the thinner one. Don’t go crazy, just aim for consistency! When it comes to the seasonings, don’t be afraid to adjust them to your liking. I love Italian herbs, but feel free to swap them out for your favorite blend – perhaps some smoked paprika for a deeper flavor, or a pinch of red pepper flakes for a little heat. The key is to ensure the seasonings adhere well, which is why patting the chicken dry is so important. Regarding the liquid mixture, I’ve found that using fresh lemon juice makes a world of difference compared to bottled. That bright, zesty flavor is essential. And while butter is wonderful for richness, I’ve experimented with a good quality olive oil or even a tiny bit of ghee in a pinch, and it still turns out great. The cooking time can vary depending on your oven and the thickness of your chicken, so always rely on a meat thermometer. It’s the most foolproof way to ensure perfectly cooked, juicy chicken without guessing. Aim for that 165°F (74°C) internal temperature. And please, please, please don’t skip the resting period! It’s perhaps the most underrated step in cooking any kind of meat. Ten minutes under a foil tent allows the juices to settle back into the muscle fibers, making the chicken incredibly tender. If you cut into it right away, all that moisture will escape, and you’ll be left with dry chicken. I learned that the hard way when I was younger and always in a rush!
Storing and Reheating Tips
This chicken is so good, you’ll probably have leftovers, and thankfully, it stores and reheats beautifully. For storing at room temperature, I wouldn’t recommend leaving it out for more than two hours, especially in warmer weather, just for food safety reasons. It’s best to get it into the fridge promptly. In the refrigerator, leftovers will stay fresh for about 3-4 days. Store them in an airtight container, or wrap them tightly in plastic wrap or foil. I often just leave the chicken in the baking dish and cover it tightly with plastic wrap or a lid. It’s still fantastic cold for salads or sandwiches! If you want to freeze this chicken for longer storage, it’s definitely doable. Wrap the cooled chicken breasts tightly in a double layer of plastic wrap, then a layer of aluminum foil, or place them in a freezer-safe bag, squeezing out as much air as possible. Properly stored, it can last in the freezer for up to 2-3 months. When you’re ready to thaw it, the best method is to transfer it from the freezer to the refrigerator and let it thaw overnight. This helps maintain the best texture. For reheating, I generally prefer to warm it up gently in the oven or on the stovetop to avoid drying it out. In the oven, place the chicken in a small baking dish with a tablespoon or two of extra chicken broth or water and cover with foil. Reheat at around 300°F (150°C) for about 10-15 minutes, or until heated through. On the stovetop, you can place the chicken in a skillet over medium-low heat with a splash of broth or water, covered, until warmed. If you’re in a real hurry, you can microwave it, but be extra careful not to overcook it; use short bursts of power and check frequently. The pan juices are gold, so if you have them, spoon some over the chicken before reheating, or add them back in when you reheat to add moisture and flavor.
Frequently Asked Questions
Final Thoughts
So there you have it – my absolute go-to recipe for Melt-in-Your-Mouth Chicken Breasts. It’s one of those dishes that consistently delivers, making me feel like a culinary star even on my busiest days. The tender, juicy texture and the perfectly balanced flavors are just divine, and the fact that it’s so easy to whip up makes it a true winner. I truly hope you give this recipe a try. It’s not just about the food, it’s about those moments around the table, the happy sighs of satisfied eaters, and the confidence you gain in the kitchen. If you’re a fan of this recipe, you might also enjoy my Lemon Herb Roasted Chicken Thighs for another flavorful and easy chicken dish, or my One-Pan Garlic Butter Shrimp and Asparagus for a quick weeknight meal that’s packed with flavor. I can’t wait to hear how yours turns out! Please leave a comment below and let me know your favorite way to serve these, or any fun variations you try. And if you snap a photo, I’d love to see it – tag me on social media!
Melt-in-Your-Mouth Chicken Breasts
Ingredients
Main Ingredients
- 4 large boneless, skinless chicken breasts
- 2 tablespoons olive oil
- 1 teaspoon paprika
- 0.5 teaspoon garlic powder
- 0.5 teaspoon onion powder
- 0.25 teaspoon dried thyme
- 0.5 teaspoon salt
- 0.25 teaspoon black pepper
Instructions
Preparation Steps
- Preheat your oven to 375°F (190°C).
- Pat the chicken breasts dry with paper towels.
- In a small bowl, whisk together olive oil, paprika, garlic powder, onion powder, thyme, salt, and pepper.
- Place the chicken breasts in a baking dish. Brush the spice mixture evenly over both sides of the chicken.
- Bake for 25-35 minutes, or until the chicken is cooked through and reaches an internal temperature of 165°F (74°C).
- Let the chicken rest for 5-10 minutes before slicing and serving.