Oh, Jello Roll-Ups! Just saying the name brings me back to sticky summer afternoons and birthday parties where these were always the first to disappear. If you’ve ever craved something that’s light, fun, and ridiculously easy, but still feels like a special treat, you’ve landed in the right spot. Honestly, these are my secret weapon when I need a quick dessert that wows everyone, from my pickiest eaters to my dessert-loving friends. They’re like a magical combination of a fluffy cake and a vibrant, fruity cloud. If you love my classic sheet cake, you’ll adore these Jello Roll-Ups because they capture that same joyful, uncomplicated sweetness but in a totally unique, playful package. They’re not just a dessert; they’re a little bit of happy sunshine rolled up into one perfect bite.
What is a Jello roll up?
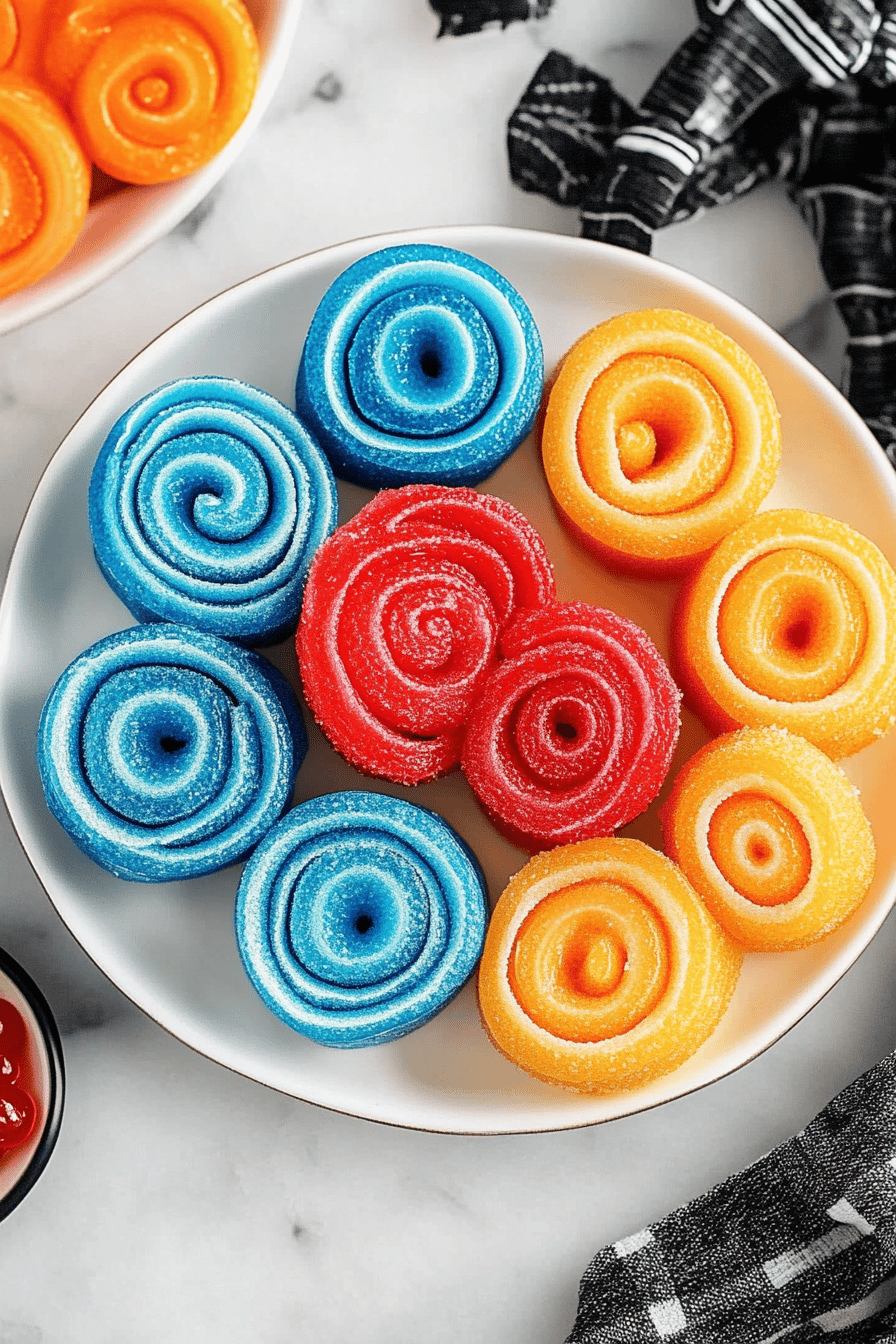
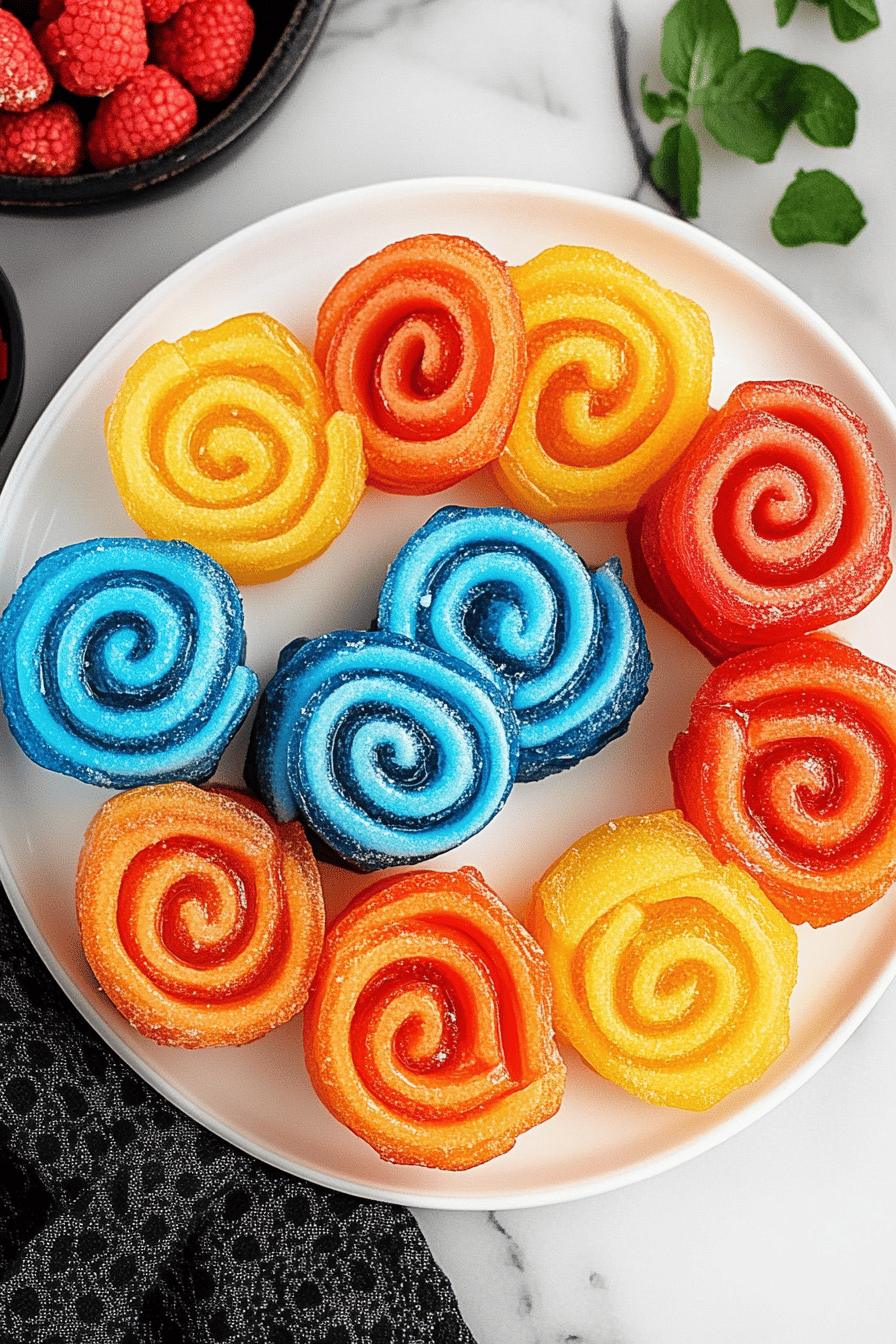
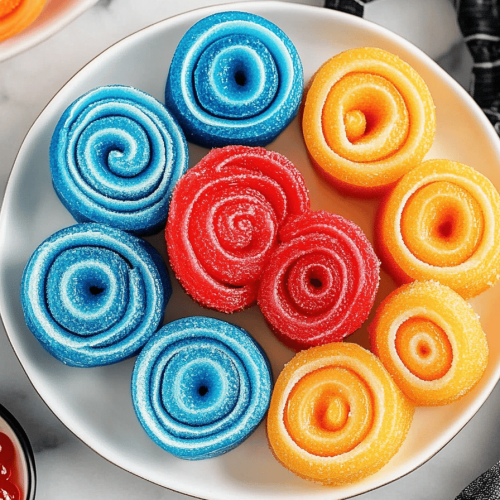
So, what exactly are Jello Roll-Ups? Well, imagine a soft, pillowy cake batter that gets swirled with bright, fruity Jello, then baked until it’s wonderfully tender. Once cooled, it’s often finished with a simple, sweet glaze. The name itself is pretty descriptive, right? You roll up this amazing creation, hence “roll-ups.” It’s essentially a Sponge Cake meets a delightful Jello swirl. Think of it as a way to get that beloved Jello flavor and vibrant color into a baked good without it feeling heavy or complicated. It’s the kind of treat that looks impressive but is surprisingly simple to whip up, making it a favorite for casual get-togethers, bake sales, or just because you need a little something sweet to brighten your day. It’s pure comfort in a slice!
Why you’ll love this recipe?
Why do I love this Jello Roll-Up recipe?flavor is just out-of-this-world delightful. You get that comforting, subtly sweet cake base that pairs perfectly with the burst of fruity flavor from the Jello. It’s not overwhelmingly sweet, which is something I really appreciate in a dessert. Then there’s the simplicity– seriously, this is a lifesaver on busy nights or when unexpected guests pop by. The steps are straightforward, and you don’cost-efficient! All the ingredients are pantry staples, making it a budget-friendly option that still feels like a luxurious treat. What I love most about this recipe, though, is its versatility. You can swap out the Jello flavors for literally anything you love – cherry, lime, strawberry, orange, grape, you name it! It’s perfect for any holiday or season. If you’re a fan of my funfetti cupcakes, you’ll appreciate how these Jello Roll-Ups bring a similar burst of color and fun without all the fuss. This recipe truly stands out because it delivers big on taste and visual appeal with minimal effort, and that’s a win-win in my book!
How to Make Jello Roll-Ups
Quick Overview
Making Jello Roll-Ups is surprisingly straightforward! You’ll start by whipping up a simple Cake Batter, then gently swirl in some prepared Jello. This mixture gets baked into a thin sheet, cooled, and then rolled up. The magic happens in the swirl, creating beautiful patterns in every slice. It’s a fuss-free process that guarantees a delightful dessert everyone will be asking about. Trust me, it’s easier than it looks!
Ingredients
For the Main Batter:
Here’s what you’ll need for that wonderfully tender cake base. I always use good quality all-purpose flour for the best texture. Make sure your eggs and butter are at room temperature – it really helps everything combine smoothly. And for the milk, I’ve experimented with everything from whole milk to almond milk, and honestly, whole milk gives it that perfect richness, but almond milk works beautifully if you need a dairy-free option!
- 1 ½ cups all-purpose flour
- 1 teaspoon baking powder
- ¼ teaspoon salt
- ½ cup unsalted butter, softened
- 1 cup granulated sugar
- 2 large eggs, room temperature
- ½ cup milk, room temperature
- 1 teaspoon vanilla extract
For the Filling:
This is where all the fun and color comes in! You can really go wild with the Jello flavors. My personal favorite is raspberry because it gives a beautiful pink hue, but strawberry is a close second. Make sure your Jello is set just enough so it’s thick but still pourable – not completely firm, or it won’t swirl well.
- 1 (3-ounce) package Jello, any flavor
- ½ cup boiling water
- ½ cup cold water
For the Glaze:
A simple glaze really ties everything together and adds a touch of extra sweetness. You want it to be pourable but not too thin. If it’s too thick, a tiny splash of milk or water will loosen it up. If it’s too thin, a little more powdered sugar will do the trick.
- 1 cup powdered sugar
- 2-3 tablespoons milk (or water)
- ½ teaspoon vanilla extract (optional)
Step-by-Step Instructions
Step 1: Preheat & Prep Pan
First things first, let’s get our oven prepped. Preheat it to 350°F (175°C). Now, grab a 15×10 inch jelly roll pan or a rimmed baking sheet. Line it really well with parchment paper, making sure to grease the paper and the sides of the pan too. I find that greasing the parchment paper helps the cake release even more easily. You can even let the parchment paper hang over the edges a bit, which will help you lift the cake out later – that’s a trick I learned after a few stuck-bottomed attempts!
Step 2: Mix Dry Ingredients
In a medium bowl, whisk together your flour, baking powder, and salt. Whisking them together now ensures that the leavening and salt are evenly distributed throughout the flour. This might seem like a small step, but it makes a difference in getting a consistent rise and flavor in your cake. Just give it a good whisk until everything looks uniform.
Step 3: Mix Wet Ingredients
In a large bowl, cream together the softened butter and granulated sugar until it’s light and fluffy. This is where you really want to incorporate some air, which contributes to the cake’s tender texture. Beat in the eggs, one at a time, making sure each egg is fully incorporated before adding the next. Then, stir in the vanilla extract. In a separate small bowl or liquid measuring cup, combine the milk.
Step 4: Combine
Now, we add the dry ingredients to the wet ingredients alternately with the milk. Start by adding about a third of the dry mixture to the butter mixture and mix until just combined. Then, add half of the milk and mix again. Continue this process, alternating dry and wet ingredients, ending with the dry ingredients. Be careful not to overmix! Overmixing can develop the gluten too much, resulting in a tougher cake. Mix just until no dry streaks of flour remain.
Step 5: Prepare Filling
While your cake batter is resting for a moment, let’s get the Jello ready. In a heatproof bowl, dissolve your Jello powder completely in the boiling water. Stir it really well for about 2 minutes to make sure all the granules are gone. Then, stir in the cold water. You want the Jello to be thickened but still pourable. You can speed this up by popping it in the fridge for about 30-45 minutes, stirring occasionally, until it reaches a syrupy consistency – think honey, not solid jelly. It shouldn’t be so cold that it starts to set firm, but thickened enough to swirl.
Step 6: Layer & Swirl
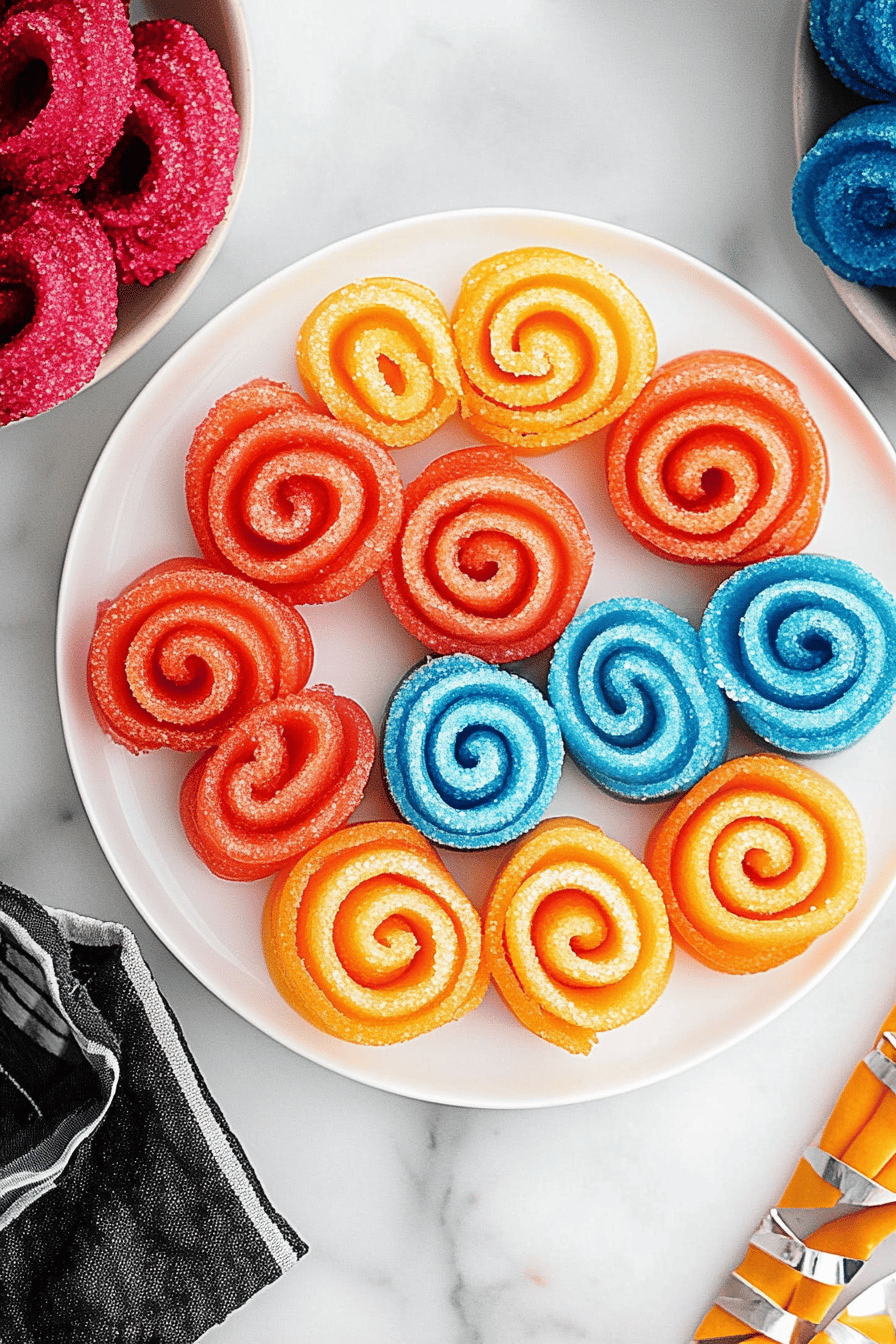
Pour your cake batter into the prepared pan and spread it evenly. Now for the fun part! Gently spoon dollops of the thickened Jello mixture over the top of the batter. Use a toothpick or the tip of a knife to swirl the Jello into the batter. Don’t over-swirl, or you’ll lose the distinct pretty patterns. A few gentle swirls are all you need to create those beautiful marbled effects that make Jello Roll-Ups so special. Aim for those lovely ribbons of color!
Step 7: Bake
Pop that beautiful pan into your preheated oven. Bake for about 12-15 minutes, or until the cake is lightly golden and springs back when gently touched. The exact baking time can vary depending on your oven, so keep an eye on it. You don’t want to overbake it, as it can become dry and might crack when you roll it.
Step 8: Cool & Glaze
Once baked, carefully invert the cake onto a clean kitchen towel or parchment paper that you’ve dusted with a little powdered sugar or granulated sugar. Let it cool completely on the towel. While it’s cooling, whisk together the powdered sugar, milk, and vanilla extract (if using) until you have a smooth, pourable glaze. Once the cake is completely cool, drizzle the glaze evenly over the top. Let the glaze set for a few minutes before rolling.
Step 9: Slice & Serve
Now for the grand finale! Carefully roll up the cake, starting from one of the shorter sides, using the parchment paper or towel to help guide it. Slice the rolled cake into ½ to 1-inch thick pieces. I find a sharp serrated knife works best for clean cuts. Serve immediately and watch them disappear!
What to Serve It With
Jello Roll-Ups are so wonderfully versatile, they fit in perfectly with almost any meal or occasion. For breakfast, they’re a delightful sweet surprise alongside a hot cup of coffee or a refreshing glass of orange juice. Imagine starting your day with a slice of sunshine! For brunch, they add a playful pop of color and sweetness to the table. You could plate them up alongside fresh fruit salad, yogurt parfaits, or even some savory breakfast meats for a balanced spread. When serving them as dessert, they’re fantastic on their own, but I love pairing them with a dollop of whipped cream or a small scoop of vanilla ice cream – it’s pure indulgence! They also make a wonderful addition to a dessert buffet alongside cookies and brownies. And for those times when you just need a little something sweet for a cozy snack, they’re perfect with a warm mug of tea or hot chocolate. My family absolutely loves these for an after-school treat with a tall glass of cold milk – it’s a tradition that never gets old!
Top Tips for Perfecting Your Jello Roll-Ups
I’ve made these Jello Roll-Ups more times than I can count, and over the years, I’ve picked up a few tricks that I think will really help you achieve Jello Roll-Up perfection. First, about the Jello prep: don’t rush it. You want it thickened but still liquid enough to swirl. If it’s too firm, it’ll just break when you try to swirl it. If it’s too runny, it’ll soak into the cake and might make it soggy. A good syrupy consistency is key! For mixing advice, remember that overmixing the cake batter is your enemy. Mix until *just* combined. A few tiny lumps are okay; they won’t affect the final texture as much as overmixing will. When it comes to swirl customization, have fun with it! You can use multiple Jello colors for a rainbow effect or just stick to one for a bold statement. Gently dragging a toothpick through the Jello and batter creates those lovely marbled patterns. For ingredient swaps, if you don’t have butter, you can use a good quality vegetable oil, but you might find the cake a little less rich. For the milk, as I mentioned, almond milk works great if you need dairy-free. When it comes to baking tips, every oven is a little different, so keep an eye on your cake. It bakes quickly! If your cake tends to brown too fast on top, you can loosely tent it with foil for the last few minutes. And for glaze variations, if you want a different flavor profile, try adding a little lemon zest or a different extract like almond to your glaze. Sometimes, I even just dust them with powdered sugar if I’m feeling lazy, and they’re still delicious!
Storing and Reheating Tips
When it comes to storing these delightful Jello Roll-Ups, I’ve found a few methods that work best to keep them tasting fresh. If you’re serving them within a day or two, storing them at room temperature is perfectly fine. Just make sure they are in an airtight container, and try to keep them out of direct sunlight or heat. They usually hold up well for about 2-3 days this way. If you know you won’t be able to finish them quite so quickly, refrigerator storage is your best bet. Wrap the rolled cake tightly in plastic wrap, and then place it in an airtight container. They can stay good in the fridge for up to 5 days. The glaze might get a little softer from the moisture, but the flavor is still fantastic. I don’t typically recommend freezing these, as the texture of the cake and the Jello can change quite a bit upon thawing. However, if you absolutely must freeze them, I would suggest freezing the un-glazed roll before slicing. Wrap it very tightly in plastic wrap, then in foil, and freeze for up to a month. Thaw overnight in the refrigerator. I always advise adding the glaze *after* it’s thawed, and at room temperature, for the best results and to prevent sogginess. If you’ve made them and decide to keep them for a bit longer than planned, always check for any signs of staleness or off-smells before digging in!
Frequently Asked Questions
Final Thoughts
So there you have it – my beloved Jello Roll-Ups! They are such a simple yet incredibly satisfying treat that brings a smile to everyone’s face. The combination of the soft cake, the vibrant Jello swirl, and that sweet glaze is just pure magic. I really hope you give these a try, especially if you’re looking for a dessert that’s fun, festive, and doesn’t require a ton of effort. They’re perfect for parties, bake sales, or just a quiet afternoon treat with a cup of tea. If you love these, you might also enjoy my other easy dessert recipes like my no-bake cheesecake bars or my simple fruit crumble – they’re all about bringing joy to your kitchen without the fuss! I can’t wait to hear what you think of these Jello Roll-Ups, and I’d absolutely love to see how yours turn out! Don’t forget to leave a comment below and share your favorite Jello flavor combination. Happy baking!
Jello Roll-Ups
Ingredients
Main Ingredients
- 0.5 cup All-purpose flour
- 1 cup Granulated sugar
- 0.25 cup Unsalted butter, melted
- 3 large Eggs
- 1 teaspoon Vanilla extract
- 1 box Jell-O (any flavor)
- 0.5 cup Hot water
- 1 cup Powdered sugar
Instructions
Preparation Steps
- Preheat oven to 350 degrees F (175 degrees C). Grease and flour a 13x9 inch baking pan.
- In a large bowl, whisk together flour and granulated sugar.
- Add melted butter and eggs. Beat until well combined.
- Stir in vanilla extract.
- Pour batter into the prepared baking pan and spread evenly.
- Bake for 12-15 minutes, or until a toothpick inserted into the center comes out clean.
- While the cake is baking, dissolve Jell-O in hot water according to package directions. Let it cool slightly.
- Once the cake is baked, immediately pour the slightly cooled Jell-O mixture over the warm cake.
- Let the cake cool completely in the pan.
- Once cooled, invert the cake onto a serving platter. Dust with powdered sugar.
- Cut into squares or roll up carefully to serve.
![Vanilla French Beignets [120 Minutes]](https://www.recipesharinghub.com/wp-content/uploads/2026/01/auto-1f4192040def1962e5266df2da80b42e-768x1152.png)