There are some recipes that just *feel* like home, aren’t there? For me, that’s this zucchini bread. It’s not just any zucchini bread, though. This is my go-to, my lifesaver, my absolute favorite way to start the day with a truly healthy breakfast that doesn’t taste like cardboard. I remember my mom making a version of this when I was a kid, and the smell of cinnamon and warm zucchini wafting through the house was pure magic. Back then, it was more of a sweet treat, but over the years, I’ve tweaked it, fussed with it, and generally turned it into something I feel genuinely good about feeding myself and my family every morning. It’s become that reliable friend in the kitchen, the one I can always count on to deliver flavor and goodness without a fuss. If you’re anything like me, and you’re constantly on the hunt for that perfect healthy breakfast that actually satisfies, you’re going to fall head over heels for this.
What is Zucchini bread?
So, what exactly *is* this “healthy breakfast zucchini bread” I’m raving about? Think of it as your favorite comforting zucchini bread, but dialed way, way back on the sugar and supercharged with wholesome ingredients. It’s essentially a moist, tender, incredibly flavorful quick bread that happens to be packed with grated zucchini. But here’s the secret sauce: it’s engineered to be a satisfying and nutritious start to your day. It’s not cloyingly sweet; instead, it’s subtly spiced with cinnamon and nutmeg, with just enough natural sweetness from things like mashed banana and a touch of honey or maple syrup. The zucchini itself is a marvel – it disappears into the batter, adding incredible moisture and a soft texture without any hint of its vegetal origins. It’s like a breakfast hug in slice form, perfect for those mornings when you need something substantial but don’t have a ton of time.
Why you’ll love this recipe?
What are some of the reasons why this recipe has earned a permanent spot in my recipe rotation?flavorIs it good for you?simplicity. I’m talking about a one-bowl wonder for the dry ingredients and a separate bowl for the wet, then just a quick mix. No fancy equipment needed, and it comes together faster than you can say “breakfast is served!” What I particularly love is how cost-effective it is. Zucchini is often super affordable, and the other pantry staples are things most of us already have on hand. Plus, it’s so versatile! I’ll share some ideas later, but you can easily adapt it for different dietary needs or flavor preferences. What I love most about this recipe is that it bridges the gap between a delicious treat and a genuinely healthy breakfast option. It’s like getting the best of both worlds. It’s a wonderful alternative to those processed Breakfast Bars that are often loaded with sugar and weird ingredients, and it’s way more satisfying than a bowl of plain cereal for me. I’ve even found that a slice of this makes a fantastic afternoon snack when a sweet craving hits, but I don’t want to derail my healthy eating goals.
How to Make This Zucchini Bread
Quick Overview
The beauty of this recipe is its straightforward nature. You’ll essentially be whisking your dry ingredients together, then combining your wet ingredients, before gently bringing them together. The star, grated zucchini, is added last and gives the batter its wonderful moisture. It bakes up into a golden-brown loaf that’s incredibly tender and satisfying. It’s designed to be easy enough for a busy weekday morning but special enough for a leisurely weekend brunch. The key is not to overmix, which is crucial for that tender crumb you’re after.
Ingredients
For the Main Batter:
I always try to use fresh, medium-sized zucchinis. You don’t want them to be too watery, so aim for ones that are firm to the touch. You’ll need about 2 cups, finely grated. Make sure to squeeze out as much excess moisture as possible – I’ll tell you how later! For the flour, I typically use whole wheat flour for extra fiber and a nice nutty flavor. You can also use a blend of whole wheat and all-purpose if you prefer a slightly lighter texture, or even a gluten-free all-purpose blend. It’s about 1.5 cups of flour. Then we have our leavening agents: 1 teaspoon of baking soda and ½ teaspoon of baking powder. Don’t skip either! They work together to give us that perfect lift. For flavor and warmth, 1 teaspoon of ground cinnamon and ¼ teaspoon of ground nutmeg are essential. A pinch of salt enhances all those lovely flavors, so ½ teaspoon of fine sea salt is perfect. For sweetness, I use about ½ cup of mashed ripe banana. The riper, the better for natural sweetness! I also add 1/3 cup of a liquid sweetener like honey or maple syrup – you can adjust this a bit to your preference. Then, 2 large eggs, lightly beaten. And finally, ¼ cup of melted unsalted butter or a neutral-flavored oil like avocado or light olive oil. I’ve even tested this with almond milk and it actually made it even creamier!
For the Filling (Optional but Recommended!):
This is where things get really fun and you can customize it! My favorite mix is ½ cup of chopped walnuts or pecans for a lovely crunch, and ½ teaspoon of extra cinnamon to really amp up that warm spice. You could also toss in ½ cup of chocolate chips (dark chocolate is my go-to!), or even some dried cranberries for a bit of tartness.
For the Glaze (Optional, for a touch of sweetness):
This is totally optional, but if you want a little extra something, a simple glaze is divine. I whisk together ½ cup of powdered sugar with about 1 to 2 tablespoons of milk (dairy or non-dairy) until it’s a pourable consistency. Sometimes I add a tiny splash of vanilla extract, or even a bit of lemon zest for a bright contrast. For a healthier spin, you can skip the powdered sugar and just dust with a little extra cinnamon or powdered erythritol.
Step-by-Step Instructions
Step 1: Preheat & Prep Pan
First things first, preheat your oven to 350°F (175°C). I always line a standard 9×5 inch loaf pan with parchment paper, leaving some overhang on the sides. This makes it ridiculously easy to lift the finished loaf out. If you don’t have parchment, just grease and flour your pan really well. Make sure every nook and cranny is covered!
Step 2: Mix Dry Ingredients
Grab a large bowl. Sift in your whole wheat flour (or your chosen blend), baking soda, baking powder, cinnamon, nutmeg, and salt. Give it all a good whisk to make sure everything is evenly distributed. This step is so important for an even rise and no surprise pockets of baking soda!
Step 3: Mix Wet Ingredients
In a separate medium bowl, whisk together the mashed banana, honey or maple syrup, beaten eggs, and melted butter or oil. Make sure it’s all well combined and smooth.
Step 4: Combine
Pour the wet ingredients into the bowl with the dry ingredients. Now, this is crucial: gently fold everything together with a spatula until *just* combined. You should still see a few streaks of flour; that’s perfectly fine. Overmixing develops the gluten too much, leading to a tough bread, and we absolutely don’t want that here. We want tender, moist perfection!
Step 5: Prepare Filling
If you’re using any add-ins like nuts, chocolate chips, or dried fruit, this is where you prep them. Just give them a quick toss in a tiny bit of flour (this helps prevent them from sinking to the bottom of the loaf). If you’re using the optional cinnamon filling, mix that together in a small bowl now.
Step 6: Layer & Swirl
Now for the fun part! Add your grated, squeezed zucchini to the batter and gently fold it in. Don’t overmix! Spoon about half of the batter into your prepared loaf pan. If you’re using a filling, sprinkle about half of your chosen filling ingredients over the batter. Dollop the remaining batter on top, then sprinkle with the rest of the filling. If you’re doing a Cinnamon Swirl, dollop spoonfuls of the cinnamon-sugar mixture over the top and gently swirl with a knife or skewer. Be careful not to swirl too much, or it will just disappear!
Step 7: Bake
Pop that beautiful loaf into your preheated oven. Bake for 50-65 minutes, or until a wooden skewer or toothpick inserted into the center comes out clean. Ovens can be so finicky, so start checking around the 50-minute mark. If the top starts to brown too quickly, you can loosely tent it with foil.
Step 8: Cool & Glaze
Once it’s done, let the loaf cool in the pan for about 10-15 minutes. This allows it to set up nicely. Then, use those parchment overhangs to lift it out of the pan and place it on a wire rack to cool completely. Patience here is key! If you’re adding the glaze, wait until the bread is completely cool. Drizzle it over the top and let it set.
Step 9: Slice & Serve
Once cooled (and glazed, if you chose to!), slice it up with a good serrated knife. This bread is amazing warm, at room temperature, or even chilled. I love it sliced thick!
What to Serve It With
This healthy breakfast zucchini bread is so wonderfully versatile, it’s practically a meal in itself! For a simple, everyday Breakfast, a thick slice toasted and topped with a smear of almond butter or Greek yogurt is divine. It’s incredibly satisfying and keeps you full until lunch. A good cup of coffee or a soothing herbal tea is the perfect companion. For a more elegant Brunch spread, I love serving it alongside fresh fruit salad, scrambled eggs, or a light yogurt parfait. It looks beautiful sliced and arranged on a platter. It’s also a fantastic option for a quick and satisfying Dessert. A little scoop of vanilla bean Ice Cream on the side, or a drizzle of dark chocolate sauce, and it’s a decadent treat without all the guilt. And for those Cozy Snacks when you just need a little something to tide you over, a slice of this with a glass of milk or a small smoothie is pure comfort. My family also loves it packed in their lunchboxes as a healthier alternative to cookies or brownies.
Top Tips for Perfecting Your Zucchini Bread
Over the years, I’ve learned a few tricks that make this zucchini bread turn out perfectly every single time. It’s all about the details! Here are my top tips:
Zucchini Prep: This is probably the MOST important step. When you grate your zucchini (I prefer a medium grate), it releases a ton of water. You absolutely must squeeze out as much of that liquid as possible. I usually put the grated zucchini in a clean kitchen towel or a few layers of paper towels and wring it out over the sink. Seriously, get as much water out as you can! This prevents a soggy, gummy bread and ensures a tender crumb. Fresh zucchini is always best; wilted or old zucchini won’t give you the same results.
Mixing Advice: Remember what I said about overmixing? It’s worth repeating! Once you combine the wet and dry ingredients, mix *just* until it comes together. A few lumps and streaks of flour are your friends here. Overmixing activates the gluten in the flour, which will make your bread tough and dense. Gentle folding is the name of the game.
Swirl Customization: If you’re making a swirl, don’t go crazy with it. You want distinct ribbons of flavor and visual appeal, not a muddy mess. Just a few gentle swirls with a knife or skewer is perfect. You can also play with different spices for the swirl – cardamom is lovely, or even a bit of cocoa powder for a chocolate swirl!
Ingredient Swaps: I’ve experimented a lot! For a dairy-free version, I’ve used plant-based yogurt or applesauce instead of butter, and almond milk or soy milk instead of regular milk for the glaze. For nut allergies, omit the nuts and maybe add some sunflower seeds or pepitas, or just enjoy it plain. If you don’t have ripe bananas, you can use unsweetened applesauce, but you might need to slightly increase the liquid sweetener. And if you’re aiming for less sugar overall, you can often reduce the liquid sweetener by a tablespoon or two without much impact, especially if you use very ripe bananas.
Baking Tips: Always trust your oven, but also be aware of how it bakes. If your oven tends to run hot, you might want to lower the temperature by 10-15 degrees and bake a little longer. Placing the loaf in the center rack ensures even heat circulation. The toothpick test is your best friend for checking doneness. If the top is browning too quickly, don’t hesitate to cover it loosely with aluminum foil to prevent burning while the inside finishes cooking.
Glaze Variations: Don’t feel limited to the powdered sugar glaze! A simple dusting of powdered sugar (or a sugar substitute like erythritol) and cinnamon is beautiful and lighter. A drizzle of melted dark chocolate is always a hit. For a CREAM CHEESE frosting, you can whip together softened cream cheese with a little powdered sweetener and a splash of vanilla. Just make sure the bread is completely cool before applying any topping!
Storing and Reheating Tips
One of the best things about this zucchini bread is how well it keeps, making it perfect for meal prep. For Room Temperature storage, once the bread is completely cooled, I wrap it tightly in plastic wrap or store it in an airtight container. It stays fresh and moist for about 2-3 days. If your kitchen is particularly warm, or you live in a humid climate, you might want to err on the side of caution and refrigerate it after day one. For Refrigerator Storage, it will keep beautifully for up to a week in an airtight container. The texture might become a little firmer when cold, but it’s still delicious! When you’re ready to eat a slice from the fridge, I highly recommend toasting it lightly in a toaster or toaster oven – it brings back that wonderful tender texture. For Freezer Instructions, this bread freezes like a dream. You can freeze the whole loaf or individual slices. Wrap it very well in plastic wrap, then in a layer of aluminum foil or a freezer-safe bag. It should keep its quality for up to 3 months. To thaw, unwrap and let it come to room temperature, or pop slices directly into the toaster. For Glaze Timing Advice, I always recommend glazing *after* the bread has completely cooled. If you glaze a warm bread, the glaze will melt and slide off. If you plan to freeze the glazed bread, the glaze might soften during thawing, so you might consider glazing after it’s thawed and reheated.
Frequently Asked Questions
Final Thoughts
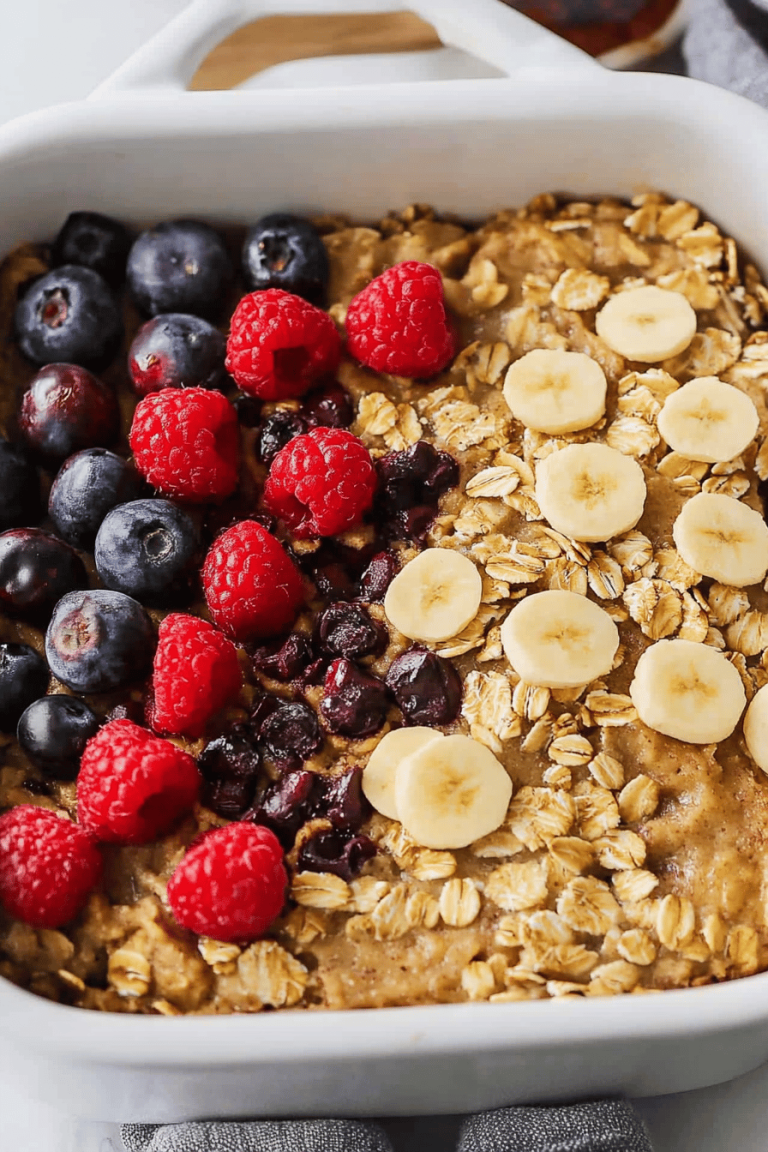
I truly hope you give this healthy breakfast zucchini bread a try. It’s become such a staple in my home because it’s honest, delicious, and makes me feel good about what I’m eating. It’s proof that you don’t have to sacrifice flavor for health, especially when it comes to starting your day right. This isn’t just a recipe; it’s a little bit of morning sunshine, a shortcut to a wholesome meal, and a taste of comfort all rolled into one. If you love this recipe, you might also enjoy my other healthy breakfast bakes like my Overnight Oats with Berries or my Simple Seeded Granola. I can’t wait to hear what you think! Let me know in the comments below how yours turned out, any fun variations you tried, or if you have any other questions. Happy baking, and here’s to delicious and healthy mornings!

Healthy Berry Oatmeal
Ingredients
Main Ingredients
- 1 cup rolled oats
- 2 cups water
- 0.5 cup mixed berries (fresh or frozen)
- 0.25 cup chopped almonds
- 1 tablespoon chia seeds
- 0.5 teaspoon cinnamon
- honey or maple syrup (optional, to taste)
Instructions
Preparation Steps
- In a medium saucepan, combine rolled oats and water. Bring to a boil, then reduce heat and simmer for 5-7 minutes, stirring occasionally, until oats are tender and have absorbed most of the liquid.
- Stir in the mixed berries, chia seeds, and cinnamon. Cook for another 2-3 minutes, or until berries have softened and chia seeds have started to thicken the oatmeal.
- Divide the oatmeal into two bowls. Top with chopped almonds and a drizzle of honey or maple syrup, if desired.