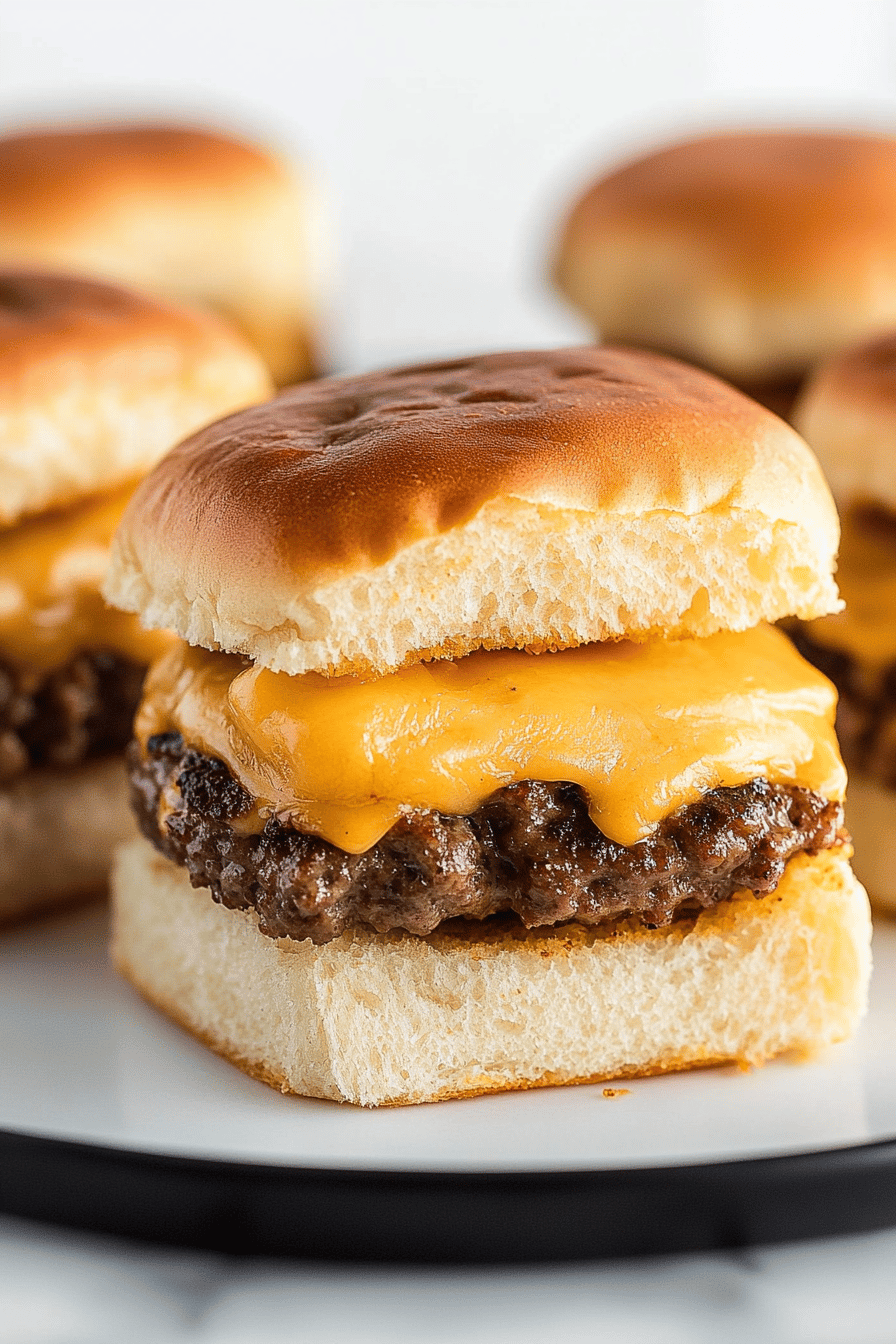
Oh, you guys! I am so incredibly excited to share this recipe with you today. It’s one of those dishes that just screams “good times” and has a way of bringing everyone together. Picture this: a relaxed weekend gathering, the grill is going, and you’ve got a batch of these irresistible Hawaiian roll cheeseburger sliders sitting there, just begging to be devoured. They’re like mini flavor explosions of pure happiness. Honestly, I’ve tried a million slider recipes over the years, from fancy brioche buns to humble white bread, but there’s just something magical about using those sweet, soft Hawaiian rolls as the base for a juicy, cheesy burger. It’s a flavor combination that just works, and it’s always a massive hit, whether it’s for a Super Bowl party, a summer barbecue, or even just a fun weeknight dinner that feels a little bit special. These little gems are seriously addictive, and I guarantee they’ll disappear in minutes!
What are Hawaiian Roll Cheeseburger Sliders?
So, what exactly are these little pockets of joy? Think of them as the most delicious, bite-sized version of your favorite cheeseburger, all nestled cozily within those wonderfully sweet and pillowy Hawaiian rolls. It’s not just about slapping a mini patty on a bun, though. The magic happens when you combine the savory goodness of seasoned Ground Beef, melted cheese, and all your favorite burger toppings, then bake them all together in a way that melds all those incredible flavors into one cohesive, craveable bite. It’s essentially a deconstructed cheeseburger experience, elevated by the distinct sweetness and incredible texture of Hawaiian rolls. They’re not dry or crumbly like some sliders can be; the rolls soak up all the delicious juices from the beef and cheese, making every single bite moist and utterly satisfying. It’s the ultimate comfort food, miniaturized and made even more fun!
Why you’ll love this recipe?
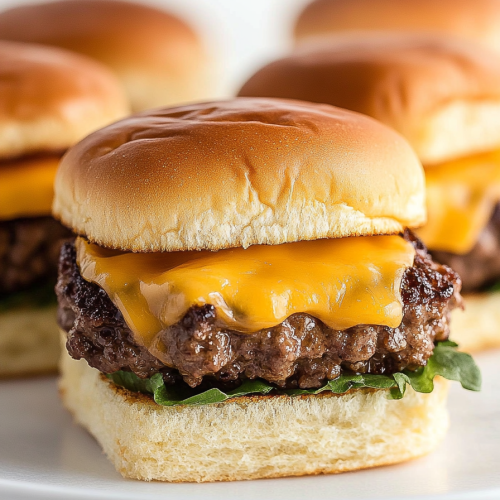
There are so many reasons why this recipe has become a staple in my kitchen, and I just know you’re going to love it too. First off, the flavor profile is just out of this world. You get that classic savory, beefy, cheesy goodness that we all crave in a burger, but then you have the delightful, subtle sweetness from the Hawaiian rolls that perfectly balances everything out. It’s a flavor marriage made in heaven, truly! And the texture? Oh, the texture! The rolls become incredibly soft and slightly toasted on the outside while staying super tender and moist on the inside, thanks to the juicy filling.
Then there’s the sheer simplicity of it all. Even if you’re not a seasoned chef, you can whip these up with confidence. It’s a one-pan wonder for the most part, which means less mess and more time enjoying the party (or just relaxing!). I’ve found that this recipe is also surprisingly cost-effective, especially if you’re feeding a crowd. Buying a few packs of Hawaiian rolls and a pound or two of Ground Beef is way more budget-friendly than individual burgers.
Versatility is another huge win here. While I’ve got my favorite way to make them, you can totally customize these sliders to your heart’s content. Add some caramelized onions, jalapeños for a kick, or even a dollop of your favorite sauce right into the filling. They’re perfect for any occasion – game days, potlucks, birthday parties, or even just as a fun twist on dinner. What I love most about this recipe is how it always impresses without requiring a ton of effort. It’s that perfect blend of crowd-pleasing flavor and effortless execution that makes it a lifesaver on busy nights. If you enjoy my Sweet and Savory Meatball Skillet.I think you’ll find this recipe hits a similar spot for its comforting flavors and ease of preparation.
How to Make Hawaiian Roll Cheeseburger Sliders
Quick Overview
The process is wonderfully straightforward. You’ll essentially create a simple, flavorful Ground Beef mixture, layer it between halved Hawaiian rolls with plenty of cheese, and then bake the whole thing until it’s golden brown and gooey. The key is to get that perfect balance of savory meat, melted cheese, and slightly sweet bread. It’s so simple, you’ll be wondering why you haven’t made these sooner. No fancy techniques, just delicious results!
Ingredients
For the Sliders:
1 package (12 rolls) Hawaiian sweet rolls
1 pound ground beef (80/20 is great for flavor)
1/2 cup finely chopped yellow onion (or onion powder for less texture)
1/4 cup ketchup
1 tablespoon Worcestershire sauce
1 teaspoon garlic powder
1 teaspoon onion powder
1/2 teaspoon salt, or to taste
1/4 teaspoon Black Pepper, or to taste
2 cups shredded cheddar cheese (or a mix of cheddar and Monterey Jack)
For the Glaze (Optional, but highly recommended!):
2 tablespoons butter, melted
1 teaspoon Worcestershire sauce
1/2 teaspoon garlic powder
Pinch of poppy seeds (optional)
Step-by-Step Instructions
Step 1: Preheat & Prep Pan
First things first, preheat your oven to 375°F (190°C). Grab a 9×13 inch baking dish. You don’t need to grease it, but if you’re worried about sticking, a light spray of cooking oil or a thin layer of butter will do the trick. This size dish is perfect for fitting all 12 sliders snugly.
Step 2: Mix Dry Ingredients
In a medium bowl, combine the Ground Beef, chopped onion (if using), ketchup, Worcestershire sauce, garlic powder, onion powder, salt, and pepper. Use your hands to gently mix everything together. You don’t want to overwork the meat; just mix until everything is evenly distributed. Overmixing can make the burgers tough, and we definitely don’t want that!
Step 3: Mix Wet Ingredients
This recipe doesn’t really have separate “wet” and “dry” ingredients in the traditional sense, but the ketchup and Worcestershire sauce act as our binders and flavor enhancers for the meat mixture. Ensure they are well incorporated with the ground beef and seasonings.
Step 4: Combine
This is where the magic starts! You’ve already combined the ingredients in Step 2. Just make sure it’s all mixed well. The goal is for the seasonings and liquids to be evenly distributed throughout the ground beef.
Step 5: Prepare Filling
Now, take your Hawaiian sweet rolls and carefully slice the entire package in half horizontally, like you’re slicing a loaf of bread. This creates your top and bottom bun layers. Place the bottom half of the rolls into your prepared baking dish. Then, evenly spread the seasoned ground beef mixture over the bottom half of the rolls. Gently press it down so it forms a relatively even layer. Sprinkle the shredded cheese generously over the beef mixture. Finally, place the top half of the rolls over the cheese. You want them to sit nicely on top of the filling.
Step 6: Layer & Swirl
This step is all about assembly! You’ve already layered the beef and cheese. The “swirl” aspect comes from how the flavors meld together as it bakes. Ensure the cheese is evenly distributed over the meat, and the top rolls are placed snugly. There’s no specific swirling technique needed here, as the baking process will do the mingling for you!
Step 7: Bake
Cover the baking dish loosely with aluminum foil. You want to bake it for about 20 minutes. This allows the rolls to warm through and the cheese to start melting. After 20 minutes, remove the foil and bake for another 10-15 minutes, or until the tops of the rolls are lightly golden brown and the cheese is fully melted and bubbly. Keep an eye on it to make sure they don’t get too dark!
Step 8: Cool & Glaze
Once they’re out of the oven, let the sliders rest in the baking dish for about 5-10 minutes. This is crucial! It allows everything to settle and makes them easier to handle. While they’re resting, whisk together the melted butter, Worcestershire sauce, garlic powder, and poppy seeds (if using) in a small bowl for the glaze. After the sliders have rested, brush this delicious glaze generously over the tops of the rolls.
Step 9: Slice & Serve
Now for the best part! Using a sharp knife, carefully cut between the rolls to separate them into individual sliders. Serve them immediately while they’re warm, gooey, and absolutely irresistible. They’re perfect just as they are, or you can serve them with extra ketchup, mustard, or pickles on the side!
What to Serve It With
These Hawaiian roll cheeseburger sliders are so incredibly versatile, you can really serve them with just about anything! For a classic breakfast vibe, they’re surprisingly delightful alongside a strong cup of coffee. The sweetness of the rolls and the savory kick of the burger can be a fantastic start to the day, especially on a weekend when you have a little extra time.
For brunch, they’re a fantastic addition to a buffet spread. Imagine these alongside some fresh fruit salad, maybe some breakfast potatoes, and a mimosa bar. They add a fun, savory element that complements lighter dishes beautifully.
As a dessert? Hear me out! While not a traditional dessert, after a hearty meal, these sliders are so satisfying and comforting that they almost feel like a sweet finish. They pair wonderfully with something like my Lemon Blueberry Scones for a contrasting light and fruity note.
And for cozy snacks, these are an absolute dream. They’re perfect for game day gatherings where everyone can just grab and go. I also love them for movie nights! Serve them with a big bowl of popcorn and your favorite drinks. My family tradition is to have these during football games, and everyone just gravitates towards the platter. They’re also fantastic with a side of crispy sweet potato fries or a simple green salad to balance out the richness. Honestly, they’re a hit any time of day!
Top Tips for Perfecting Your Hawaiian Roll Cheeseburger Sliders
Over the years, I’ve learned a few little tricks that really take these sliders from good to absolutely phenomenal. For the ground beef, I always opt for 80/20. That little bit of extra fat is crucial for flavor and keeps the sliders from drying out. If you use leaner beef, you might find they’re a bit drier, so don’t be afraid of that little bit of fat! When mixing the meat, as I mentioned before, just gentle is best. You’re not making meatballs here, you’re making a burger spread, so no need to go crazy kneading it. Just get those seasonings and binders distributed evenly.
A really important tip for the assembly is to make sure your onions are chopped very finely, or even consider using onion powder if you have picky eaters or just prefer no onion bits. This ensures that every bite gets that savory onion flavor without any overpowering chunks. Also, don’t skimp on the cheese! A good amount of melted cheese is what holds everything together and adds that irresistible gooey factor. I love a sharp cheddar for its punchy flavor, but a blend with Monterey Jack or even some provolone works beautifully too.
When it comes to baking, the foil is your friend for the first part. It helps to steam the buns slightly and get everything warmed through without drying out the tops. Removing it for the last 10-15 minutes is key to getting that lovely golden-brown color and a slightly crisp texture on the rolls. And seriously, don’t skip the resting period after baking! It’s a game-changer. It allows the juices to redistribute and makes slicing so much cleaner. If you try to cut them too soon, you’ll end up with a messy situation, trust me on this one – I learned that the hard way!
The glaze, while optional, really does elevate these sliders. It adds an extra layer of savory flavor and a beautiful sheen. Make sure your butter is fully melted before whisking in the other ingredients. The poppy seeds are totally optional but add a nice visual and a slight textural pop. Lastly, if you’re a pickle lover like me, consider adding some thinly sliced dill pickles to the filling before baking, or serve them on the side. They add a fantastic tangy crunch that cuts through the richness of the beef and cheese.
Storing and Reheating Tips
These Hawaiian roll cheeseburger sliders are truly best enjoyed fresh, right out of the oven when they’re warm and gooey. However, they do store and reheat pretty well, which makes them a great option for meal prep or making ahead for parties. If you have any leftovers (which is rare in my house!), you can store them at room temperature for a couple of hours, but I wouldn’t leave them out much longer than that. For longer storage, definitely refrigerate them.
When storing in the refrigerator, it’s best to keep them in an airtight container. You can leave them in the baking dish and cover it tightly with plastic wrap or foil, or transfer them to a good quality food storage container. They should stay good in the fridge for about 2-3 days. The rolls might get a little softer as they sit, but the flavor is still fantastic.
Freezing is also an option if you want to make a big batch ahead of time. You can freeze the assembled sliders *before* baking. Wrap the unbaked sliders tightly in plastic wrap, then in foil, or place them in a freezer-safe bag or container. They’ll keep in the freezer for up to 2-3 months. To bake from frozen, remove the wrapping, place them in a baking dish, cover with foil, and bake at 350°F (175°C) for about 30-40 minutes, or until heated through. You may need to remove the foil for the last 10 minutes to get them golden. If you’re reheating already baked sliders, I find the best method is to pop them back into a 350°F (175°C) oven for about 10-15 minutes, or until warmed through. You can cover them with foil initially to prevent the tops from drying out. The glaze can be reapplied or brushed on after reheating if desired, but it’s not essential.
Frequently Asked Questions
Final Thoughts
Seriously, if you’re looking for a crowd-pleasing recipe that’s bursting with flavor, incredibly easy to make, and always a guaranteed hit, you’ve got to try these Hawaiian roll cheeseburger sliders. They are the perfect little packages of joy that bring smiles to everyone’s faces. I love that they’re so versatile – whether you’re hosting a big game day party or just want to make a weeknight dinner a little more fun, these sliders deliver. The combination of the sweet, soft rolls with the savory, cheesy burger filling is just irresistible, and the optional glaze adds that extra touch of deliciousness that makes them truly memorable.
I hope you give these a try and love them as much as my family and I do. If you make them, please, please let me know how they turn out in the comments below! I absolutely love hearing about your kitchen adventures and seeing your photos. Feel free to share any variations you try too – I’m always looking for new ways to enjoy these little wonders! You might also enjoy my Miniature Quiche Lorraine for another fun appetizer option. Happy baking (or should I say, happy assembling and baking)!
Hawaiian Roll Cheeseburger Sliders
Ingredients
Main Ingredients
- 12 pieces Hawaiian sweet rolls
- 1 pound ground beef 80/20 lean ratio recommended
- 0.5 teaspoon garlic powder
- 0.5 teaspoon onion powder
- 0.25 teaspoon salt
- 0.25 teaspoon black pepper
- 12 slices cheddar cheese or your favorite melting cheese
- 0.5 cup butter melted
- 1 tablespoon sesame seeds optional
Instructions
Preparation Steps
- Preheat your oven to 375°F (190°C). Lightly grease a baking sheet.
- Slice the Hawaiian rolls in half horizontally. Place the bottom halves on the prepared baking sheet.
- In a medium bowl, combine the ground beef with garlic powder, onion powder, salt, and pepper. Mix well.12 pieces Hawaiian sweet rolls
- Form the beef mixture into 12 thin patties that are roughly the size of the bottom roll halves. You can also cook one large patty and then cut it to size.
- Cook the beef patties in a skillet over medium-high heat until browned and cooked through. Drain any excess grease.
- Place one cooked beef patty on each bottom roll half. Top each patty with a slice of cheddar cheese.12 pieces Hawaiian sweet rolls
- Place the top halves of the Hawaiian rolls over the cheese.
- Brush the tops of the assembled sliders with melted butter. Sprinkle with sesame seeds, if desired.12 pieces Hawaiian sweet rolls
- Bake in the preheated oven for 10-15 minutes, or until the cheese is melted and bubbly and the tops are golden brown.
- Let cool slightly before serving. Enjoy your delicious Hawaiian Roll Cheeseburger Sliders!