Oh, the memories this dish brings back! For me, Rice-a-Roni was always that comforting, slightly cheesy, rice-and-noodle hug in a box. My mom would whip it up on busy weeknights, and it felt like a special treat, even though it was so simple. But then came the gluten-free journey, and I thought those days were long gone. For years, I tried to find a store-bought gluten-free version that hit the spot, but nothing ever quite measured up. They were either too mushy, too bland, or just… not right. So, I decided it was time to recreate that beloved flavor and texture myself, but without any gluten. And let me tell you, this Gluten-Free Rice-a-Roni is a game-changer. It’s so close to the original, but with a texture that’s actually *better* and a flavor that’s even more vibrant. I’m so excited to share this with you because it’s genuinely one of my family’s favorite go-to meals now. It’s a lifesaver on those evenings when you’re just exhausted but still want something delicious and satisfying on the table.
What is gluten free rice a Roni?
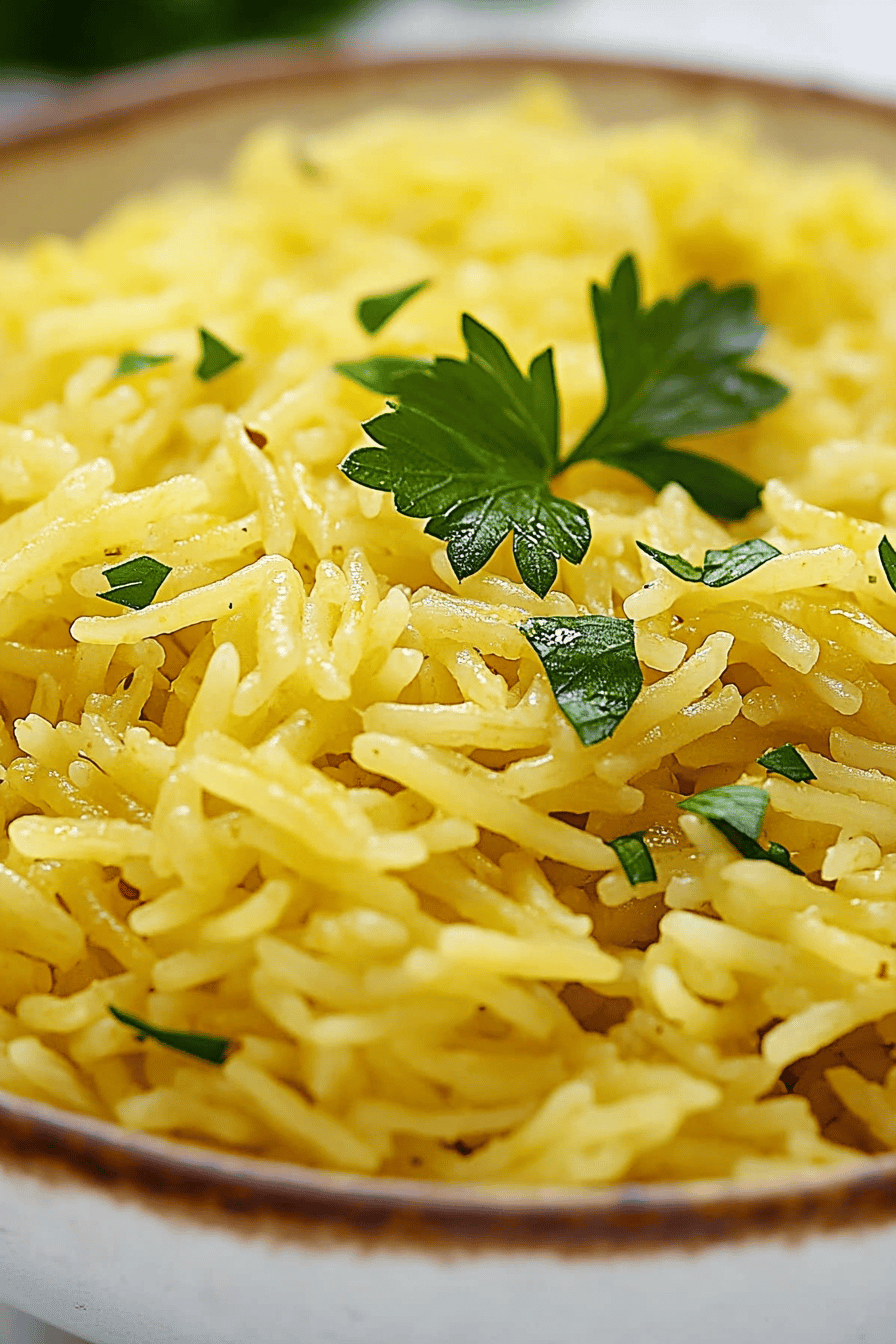
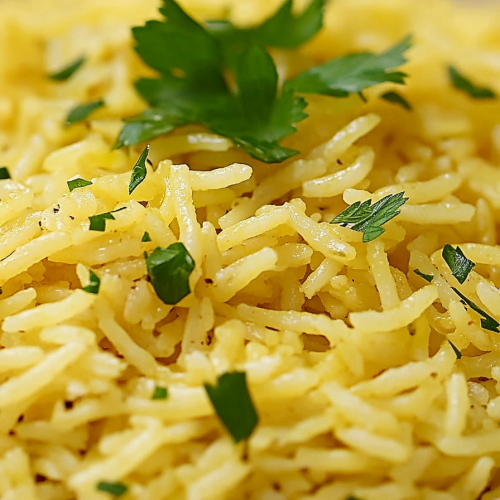
So, what exactly are we making here? Think of it as a delightful re-imagining of that classic side dish you might remember from childhood, but made entirely without gluten. It’s a simple yet incredibly satisfying combination of rice and tiny pasta-like pieces, all simmered in a savory broth. The magic comes from a special seasoning blend that gives it that signature, slightly salty, slightly savory, and oh-so-comforting taste. We’re swapping out the traditional wheat-based pasta for gluten-free alternatives that hold their shape beautifully, ensuring you get that perfect bite. It’s essentially a one-pot wonder that’s designed to be easy, quick, and bursting with familiar flavors that feel like a warm hug. It’s the kind of dish that makes everyone at the table ask for seconds, no matter their dietary needs.
Why you’ll love this recipe?
What are some of the best reasons to make gluten-free rice a Roni?flavor! It’s incredibly savory and satisfying, with a depth that comes from building those aromatics at the beginning. It genuinely tastes like the real deal, maybe even a little bit richer because we’re in control of every single ingredient. Then there’s the simplicity. Seriously, this is one of those recipes that feels like a cheat code for busy weeknights. You can have a delicious, homemade meal on the table in under 30 minutes, and most of that is just hands-off simmering time. Plus, it’s so cost-efficientWhat are some pantry staples that won’t break the bank, making it a fantastic option for feeding a crowd or just yourself without sversatility! This isn’t just a side dish; you can easily turn it into a main course by adding some cooked chicken, shrimp, or even some roasted vegetables. What I love most about this is that it feels like a comforting hug on a plate, and knowing it’s gluten-free makes it accessible for so many more people. It’s the perfect solution when you’re craving something familiar and delicious but need to stick to a gluten-free diet. It’s a true crowd-pleaser that always gets rave reviews!
How to Make Gluten-Free Rice-a-Roni
Quick Overview
This recipe is all about building layers of flavor quickly and easily. We’ll start by sautéing some aromatics, toasting our rice and gluten-free pasta, then simmering everything in a flavorful broth until perfectly tender. The key is using good quality broth and a touch of butter or oil to get that lovely toasted texture before the liquid goes in. It’s a one-pot method that minimizes cleanup and maximizes deliciousness. You’ll be amazed at how fast this comes together, making it an absolute lifesaver on busy evenings.
Ingredients
For the Main Dish:
2 tablespoons unsalted butter or olive oil
1/2 cup finely chopped yellow onion (about 1 small onion)
1/4 cup finely chopped celery (about 1 stalk)
1/2 cup gluten-free elbow macaroni or other small pasta shape (like ditalini)
1 cup long-grain white rice, rinsed well
2 1/4 cups low-sodium chicken or vegetable broth (make sure it’s gluten-free)
1 teaspoon dried parsley
1/2 teaspoon garlic powder
1/4 teaspoon onion powder
Salt and freshly ground Black Pepper to taste
Optional additions for extra flavor:
A pinch of dried thyme
A bay leaf during simmering (remove before serving)
Step-by-Step Instructions
Step 1: Preheat & Prep Pan
Get a medium-sized saucepan or a Dutch oven (about 3-quart capacity) ready on the stovetop. We want to preheat it over medium heat for a minute or two before adding any ingredients. This helps everything cook evenly. Make sure you have your chopped onion and celery all prepped and ready to go. Having everything measured out beforehand is always a good idea for quick recipes like this – it saves so much stress!
Step 2: Mix Dry Ingredients
This step is crucial for building that foundational flavor! Once your pan is warm, add the butter or olive oil. Let it melt and get a little shimmery. Then, toss in your finely chopped onion and celery. We’re going to sauté these for about 5-7 minutes, stirring often, until they start to soften and become translucent. You want them tender, not browned or crispy. This gentle cooking mellows out their sharp flavor and brings out a natural sweetness. The aroma at this stage is already incredible!
Step 3: Mix Wet Ingredients
While the onions and celery are doing their thing, let’s get our liquid ready. In a separate measuring cup or small bowl, combine your low-sodium chicken or vegetable broth. If you’re using it, add the dried parsley, garlic powder, onion powder, and any other optional seasonings like thyme or a bay leaf here. Give it a good whisk to make sure the spices are well distributed. This ensures the seasoning is evenly spread throughout the dish. Make sure your broth is definitely gluten-free; some brands can have hidden gluten, so always double-check the label!
Step 4: Combine
Now for the main event! Add the rinsed rice and the gluten-free elbow macaroni (or your chosen small pasta shape) directly into the pot with the softened onions and celery. Stir everything together and let it cook for about 1-2 minutes, stirring constantly. This toasting step is key! It helps the rice grains stay separate and gives them a slightly nutty flavor, and it prevents the pasta from getting too mushy. You’ll notice the rice starting to look a little opaque and the pasta getting lightly coated in the fat. This is exactly what we want. Then, carefully pour in your seasoned broth mixture. Give it a good stir to make sure nothing is sticking to the bottom.
Step 5: Prepare Filling
Okay, so technically, for this specific Gluten-Free Rice-a-Roni, there isn’t a separate “filling” to prepare in the traditional sense of a baked dish. The “filling” is actually the delicious rice and pasta mixture itself! What we’ve already done in Step 4 is the most important part of creating that wonderfully textured and flavorful base. If you were making a more elaborate version, this is where you might add in cooked chicken, peas, or other veggies to create a heartier dish. But for this quick stovetop version, the simplicity is what makes it so special. The flavor comes from the sautéed aromatics, the toasted rice and pasta, and that perfectly seasoned broth.
Step 6: Layer & Swirl
This step is more about the preparation for cooking than the actual layering. Once your broth is in and you’ve given everything a good stir, bring the mixture to a boil over medium-high heat. Once it’s bubbling vigorously, immediately reduce the heat to low, cover the pot tightly with a lid, and let it simmer. We’re not swirling or layering in the sense of a casserole here. The magic happens as it simmers! The goal is for the rice and pasta to absorb all that delicious liquid and become perfectly tender. Make sure your lid is snug to trap all the steam; this is crucial for even cooking and preventing any sticking.
Step 7: Bake
We’re not actually baking this recipe in an oven; it’s cooked entirely on the stovetop. So, after you’ve brought the mixture to a boil, reduced the heat to low, and covered it tightly, let it simmer undisturbed for about 15-20 minutes. It’s really important not to lift the lid during this time! Lifting the lid lets out the steam, which is essential for cooking the rice and pasta perfectly. You want that steam to work its magic. After 15-20 minutes, you can carefully lift the lid to check if the liquid has been absorbed and the rice and pasta are tender. If there’s still a lot of liquid, cover it again and cook for a few more minutes. If it looks dry but isn’t quite tender, you can add a tablespoon or two of hot water or broth.
Step 8: Cool & Glaze
Once the rice and pasta are tender and most of the liquid has been absorbed, remove the pot from the heat. Let it sit, still covered, for another 5 minutes. This resting period is super important! It allows the steam to finish cooking everything and lets the grains of rice and pasta settle. This will give you that perfect, fluffy texture, not a mushy mess. After resting, fluff the rice and pasta mixture gently with a fork. Taste it and add salt and pepper as needed – sometimes the broth is salty enough, but it’s always good to check. For this stovetop version, there’s no glaze to apply because it’s served as is, but this fluffing step is your version of “finishing” it!
Step 9: Slice & Serve
Since this is a rice and pasta dish, we don’t slice it! Instead, we’ll gently fluff it with a fork as mentioned in the previous step. Serve it warm, scooped out generously into bowls. It’s delicious as is, but it also pairs beautifully with so many things. I love serving it alongside roasted chicken, pan-seared salmon, or even just with a simple side salad. My kids love it with some steamed broccoli. The fluffy texture and savory aroma are so inviting. Make sure to serve it relatively soon after it’s ready for the best texture and flavor!
What to Serve It With
This Gluten-Free Rice-a-Roni is so wonderfully versatile; it’s not just a side dish! It can truly be the star of the show or a fantastic supporting player. Here are some of my favorite ways to serve it:
For Breakfast: Believe it or not, this can be a savory breakfast option! Serve a smaller portion alongside scrambled eggs and some crispy bacon. It’s a heartier alternative to toast and feels really comforting on a chilly morning. A good cup of black coffee or a warm herbal tea pairs perfectly.
For Brunch: Elevate it for a brunch spread! Serve it in small, elegant ramekins as part of a buffet. It’s a lovely accompaniment to ham, roasted vegetables, or even a quiche. For a special touch, a sprinkle of fresh chives or parsley on top makes it look extra fancy. Sparkling cider or a mimosa would be delightful.
As Dessert: Okay, hear me out! While this recipe is savory, you can adapt it with a touch of sweetness in the broth and a creamy element to make a dessert version. However, the savory version is fantastic as an after-dinner comfort food when you’re craving something warm and satisfying without being too heavy. It’s perfect with a light protein like grilled chicken or fish.
For Cozy Snacks: This is where it truly shines for me. On a rainy afternoon or when I just need a little something comforting, a bowl of this is pure bliss. It’s perfect on its own, maybe with a little extra butter stirred in. It’s also wonderful alongside a hearty soup, like a lentil or tomato soup, for a complete and warming meal. My family loves it when we have movie nights; it’s much easier to eat out of a bowl than trying to cut something.
My own family traditions often involve this dish as a quick weeknight meal, and we almost always serve it with some sort of simple protein. If I’ve roasted a chicken, this rice is the perfect side. If I’m pressed for time, pan-seared chicken tenders or even some frozen meatballs heated up with a simple sauce make it a complete meal. The key is that it’s so adaptable and always a hit!
Top Tips for Perfecting Your Gluten-Free Rice-a-Roni
I’ve made this Gluten-Free Rice-a-Roni more times than I can count, and I’ve picked up a few tricks along the way to ensure it comes out perfectly every single time. You’ll be a pro in no time!
Zucchini Prep: (Wait, zucchini? Oh dear, I think I might have been thinking of a different recipe for a second there! Let me correct myself. For THIS rice dish, there’s no zucchini involved! So, let’s talk about the real stars: the rice and pasta!)
Rice and Pasta Prep: Rinsing your rice is non-negotiable! It removes excess starch, which is crucial for preventing a gummy texture. Give it a good swish in a fine-mesh sieve under cold water until the water runs mostly clear. As for the gluten-free pasta, choose a good quality one that holds its shape. Small shapes like elbows, ditalini, or even broken spaghetti work wonderfully. Make sure it’s not too tiny, or it might overcook.
Mixing Advice: The toasting step before adding the liquid is vital. Don’t skip it! Stirring the rice and pasta for those 1-2 minutes until they smell slightly toasty and look a bit opaque really develops a nuttier flavor and prevents them from sticking together later. When you add the liquid, give it a really good stir to make sure everything is submerged and no rice or pasta is clinging to the bottom. After that, resist the urge to stir too much during simmering. Let it cook undisturbed!
Swirl Customization: (Again, no swirling needed here! This isn’t a baked good. My brain is clearly on overdrive today!)
Flavor Customization: This recipe is fantastic as is, but you can absolutely tweak it. Want a little more depth? Add a bay leaf while it simmers (just remember to pull it out before serving!). A pinch of smoked paprika can give it a subtle smoky note. For a vegetarian version, ensure you use a robust vegetable broth. For even more richness, you can finish it with a small knob of butter stirred in right at the end, or even a tablespoon of CREAM CHEESE for an extra creamy texture.
Ingredient Swaps: The most important swap is ensuring your broth and any added seasonings are gluten-free certified. For the fat, while butter gives a lovely richness, olive oil or even a dairy-free butter substitute works perfectly well. If you can’t find gluten-free elbow macaroni, any small gluten-free pasta shape will do. Just be mindful of cooking times, as different shapes can vary slightly.
Baking Tips: (No baking here, just stovetop magic!)
Cooking Tips: The key to perfect stovetop cooking is low and slow after the initial boil. Make sure your lid is TIGHTLY sealed. If you don’t have a tight-fitting lid, you can place a piece of parchment paper or foil over the pot before putting the lid on. This traps all the steam, which is essential for cooking the rice and pasta evenly and preventing them from drying out. Check for doneness at the 15-minute mark, but if it needs a few more minutes, that’s perfectly fine. Don’t overcook it, or it will get mushy.
Glaze Variations: (No glaze for this one, but if you wanted to serve it with something extra, you could consider a drizzle of a simple lemon-herb sauce or a sprinkle of toasted nuts for crunch!)
Storing and Reheating Tips
One of the best things about this Gluten-Free Rice-a-Roni is that it keeps really well and is just as delicious the next day. Here’s how I like to store and reheat it to keep it tasting its best:
Room Temperature: For food safety, it’s best to only leave this dish at room temperature for a maximum of two hours. If it’s a very hot day, shorten that time even further. It’s usually too good to last that long anyway!
Refrigerator Storage: Once cooled down slightly (don’t leave it sitting out for too long before refrigerating), transfer any leftovers into an airtight container. It will keep well in the refrigerator for about 3-4 days. I find that glass containers work great because they don’t absorb odors and are easy to see what’s inside. Make sure the lid is sealed tightly to prevent it from drying out or absorbing other fridge smells.
Freezer Instructions: Yes, you can freeze this! Allow it to cool completely first. Then, portion it into freezer-safe containers or heavy-duty freezer bags. If using bags, press out as much air as possible before sealing. It should keep well in the freezer for up to 2-3 months. When you’re ready to use it, the best way to thaw it is overnight in the refrigerator. You can also thaw it more quickly in the microwave on the defrost setting, but be careful not to cook it unevenly.
Glaze Timing Advice: (Again, no glaze here! But if you were adding something like a creamy sauce, you’d want to add it *after* reheating to prevent it from becoming oily or separating.) When reheating, you might find that the rice and pasta have absorbed all the moisture. This is totally normal! Before reheating (whether on the stovetop or in the microwave), stir in a tablespoon or two of water, broth, or milk. This will help loosen it up and bring back that lovely, fluffy texture.
Frequently Asked Questions
Final Thoughts
So there you have it – my ridiculously easy and incredibly delicious Gluten-Free Rice-a-Roni! I truly hope you give this recipe a try. It’s one of those dishes that brings comfort and familiarity to the table, all while being completely gluten-free. It’s proof that you don’t need to sacrifice flavor or texture when you’re cooking without gluten. This recipe is a testament to those simple, satisfying meals that make everyone happy, and it’s become a treasured part of my family’s meal rotation. If you loved this, you might also enjoy my other quick and easy gluten-free pasta dishes or my collection of comforting rice recipes. I can’t wait to hear how yours turns out, and I’d love to see your creations if you share them! Please leave a comment below with your thoughts or any fun twists you tried. Happy cooking, everyone!
Gluten-Free Rice-a-Roni
Ingredients
Main Ingredients
- 1 cup Gluten-free rice
- 0.5 cup Gluten-free pasta broken into small pieces
- 2 tablespoons Butter
- 2 cups Vegetable broth
- 0.5 teaspoon Salt
- 0.25 teaspoon Black pepper
Instructions
Preparation Steps
- In a medium saucepan, melt the butter over medium heat.
- Add the gluten-free rice and pasta to the saucepan and cook, stirring occasionally, until lightly golden brown, about 3-5 minutes.
- Pour in the vegetable broth, salt, and pepper. Bring to a boil.
- Reduce heat to low, cover, and simmer for 15-20 minutes, or until the liquid is absorbed and the rice and pasta are tender.
- Let stand for 5 minutes before fluffing with a fork and serving.