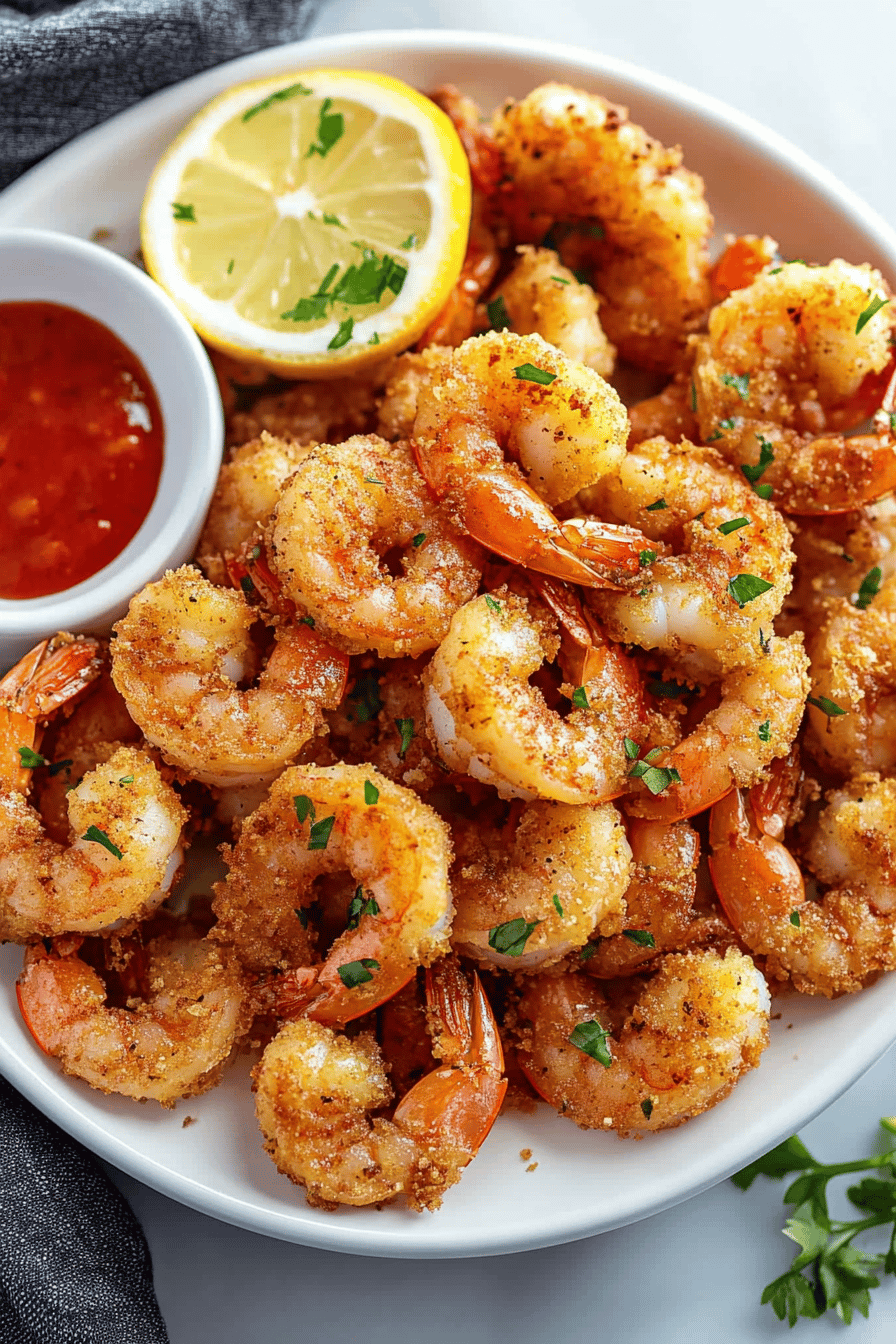
Oh, friends, gather ’round because I’m about to share a recipe that’s been passed down, tweaked, and perfected in my kitchen for years. We’re talking about fried shrimp – not just any fried shrimp, but the kind that’s impossibly crispy on the outside, perfectly tender and juicy on the inside, and glows with this gorgeous, golden hue. I remember my Grandma Mae making this for Sunday dinners when I was just a little sprout. The aroma alone would fill our entire house, a tantalizing mix of warm oil, seasoned flour, and that distinct, sweet brininess of fresh shrimp. It was always the star of the show, disappearing from platters faster than you could say “more, please!” Honestly, if you’ve ever been intimidated by making fried shrimp at home, thinking it’s too finicky or messy, I promise you, this is the recipe that will change your mind. It’s my go-to when I want something that feels a little special but is surprisingly straightforward to whip up, even on a weeknight. Forget those soggy, bland versions; this is the real deal, a true crowd-pleaser that will have everyone asking for your secret. It’s simpler than many other popular seafood recipes, and the result is just… magic.
What is a Fried Shrimp Recipe?
So, what exactly is this glorious fried shrimp recipe we’re diving into? Think of it as the ultimate comfort food, elevated. At its heart, it’s about taking beautiful, fresh shrimp and coating them in a light, seasoned batter that fries up to an incredible crunch. But it’s more than just coating and frying; it’s about the little things – the specific blend of seasonings, the right temperature of the oil, and the technique that ensures every single bite is perfect. It’s the kind of dish that makes you close your eyes and savor the moment. It’s not heavily breaded like some fried chicken recipes, nor does it rely on complex marinades. Instead, it’s a celebration of the shrimp itself, enhanced by a delicate, flavorful crust. It’s essentially a fuss-free way to achieve that irresistible restaurant-quality fried shrimp right in your own home, no fancy equipment needed. It’s that simple, that delicious, and that wonderfully approachable.
Why you’
Honestly, there are so many reasons why this fried shrimp recipe has earned a permanent spot in my recipe box and why I’m so excited to share it with you. First off, the flavor is just out of this world. The shrimp itself is sweet and succulent, and the batter provides this amazing savory, slightly peppery counterpoint. It’s not just “fried”; it’s seasoned to perfection, with hints of garlic and onion powder that really make the shrimp sing. Then there’s the crunch. Oh, the crunch! It’s the kind of satisfying crispiness that you just can’t get enough of. It’s incredibly satisfying, a textural delight that makes every bite an event.
Beyond the sheer deliciousness, what I absolutely adore about this recipe is its simplicity. I know, I know, “fried” can sometimes sound daunting, but trust me, this is far easier than you might imagine. The steps are clear, the ingredients are readily available, and you don’t need any special culinary degrees to nail it. It’s the kind of recipe that’s a lifesaver on busy nights when you want to impress your family without spending hours in the kitchen. Plus, it’s surprisingly budget-friendly! Shrimp, especially when bought frozen and thawed, can be quite economical, and the batter ingredients are pantry staples. You get so much bang for your buck with this one.
And let’s talk versatility! While it’s amazing on its own, I love serving these golden beauties in so many ways. They’re fantastic piled high on a platter for appetizers, tucked into soft tacos, tossed with pasta, or served alongside a crisp salad for a lighter meal. It’s a dish that adapts beautifully to whatever you’re craving. What I love most about this recipe is that it consistently delivers. I’ve made it countless times, for casual weeknight dinners and for festive gatherings, and it never fails to get rave reviews. It’s a true testament to simple ingredients and a well-loved method.
How do I make crispy fried shrimp?
Quick Overview
This fried shrimp recipe is all about creating that perfect crispy coating without overcooking the shrimp. We’ll start by preparing a simple, flavorful batter, dredging our shrimp, and then frying them in hot oil until they’re a beautiful golden brown. The key is to work in batches to maintain the oil temperature, ensuring maximum crispiness. It’s a quick process, and the results are truly spectacular, making this recipe a winner for any occasion when you crave that satisfying crunch and succulent seafood flavor.
Ingredients
What are some basic things to do to get started with a business.?
For the Shrimp:
2 lbs large shrimp (about 21-25 count per pound), peeled and deveined, tails left on if you like (this makes them easier to hold!)
1 tablespoon lemon juice
1 teaspoon salt
1/2 teaspoon Black Pepper
For the Batter:
1 ½ cups all-purpose flour
1/2 cup cornstarch (this is my secret for extra crispiness!)
1 teaspoon salt
1 teaspoon garlic powder
1 teaspoon onion powder
1/2 teaspoon paprika
1/4 teaspoon cayenne pepper (optional, for a little kick!)
1 ½ cups ice-cold water or beer (beer gives it an even lighter, crispier crust – trust me on this one!)
For Frying:
Vegetable oil, canola oil, or peanut oil, for frying (enough to reach about 2 inches deep in your pot)
Step-by-Step Instructions
Step 1: Preheat & Prep Shrimp
First things first, let’s get our shrimp ready and our frying station set up. If your shrimp are frozen, make sure they’re fully thawed. Rinse them under cold water and pat them thoroughly dry with paper towels. This is a crucial step – dry shrimp means a crispier coating! In a medium bowl, toss the shrimp with the lemon juice, 1 teaspoon of salt, and 1/2 teaspoon of black pepper. Let them sit for about 5-10 minutes while you prepare the batter. This little bit of seasoning right on the shrimp makes a big difference. While they’re resting, get your frying setup ready. Pour your chosen oil into a heavy-bottomed pot or Dutch oven – you want at least 2 inches of oil. Place a wire rack over a baking sheet nearby; this is where your perfectly fried shrimp will drain and stay crispy. Get your thermometer ready too, if you have one. We’re aiming for an oil temperature of 350°F (175°C).
Step 2: Mix Dry Ingredients
In a large bowl, whisk together the all-purpose flour, cornstarch, 1 teaspoon salt, garlic powder, onion powder, paprika, and cayenne pepper (if you’re using it). Whisking thoroughly ensures all those lovely seasonings are evenly distributed throughout the flour mixture, so you don’t get clumps of just one spice. This is also where you can adjust things to your liking! If you love garlic, add a little extra. If you want more heat, bump up the cayenne. The cornstarch is key here; it helps create a lighter, crispier coating that doesn’t get soggy.
Step 3: Mix Wet Ingredients
Now for the wet ingredients. This is where the magic happens. In a separate bowl or a large measuring cup, combine the ice-cold water or beer. Using ice-cold liquid is super important for achieving a light and crispy batter. The cold water hitting the hot oil creates a steam reaction that puffs up the batter. I personally love using beer because it adds a subtle flavor and the carbonation contributes to the crispiness. Just make sure it’s nice and cold!
Step 4: Combine Wet and Dry
Here’s where it all comes together. Pour the wet ingredients into the dry ingredients. Whisk gently until just combined. You want a batter that’s the consistency of pancake batter – thick enough to coat the shrimp, but not so thick that it’s gloopy. A few small lumps are perfectly fine! Overmixing develops the gluten in the flour, which can lead to a tougher coating, and we definitely don’t want that. So, be gentle, whisk just until you don’t see any big dry patches of flour.
Step 5: Prepare Filling
This step is actually done in Step 1 with the shrimp prep. We’re seasoning the shrimp themselves with salt, pepper, and lemon juice. This ensures that the shrimp itself is flavorful and not just a vehicle for the batter. The lemon juice also helps to “cook” the shrimp slightly, giving it a firmer texture before it hits the hot oil, which helps prevent overcooking.
Step 6: Dredge & Coat Shrimp
Now it’s time to get those shrimp ready for their golden bath! Working with a few shrimp at a time (don’t overcrowd the bowl, or they’ll clump together), scoop them out of the seasoning bowl and let any excess drip off for a second. Then, drop them into the batter. Gently toss them to coat completely. Make sure every inch of the shrimp is covered in that delicious batter. As you coat them, place them onto your prepared wire rack over the baking sheet. Do this in a single layer so they don’t stick together while you’re battering the rest. You can do a few at a time, working in small batches so the shrimp don’t sit in the batter for too long before frying.
Step 7: Fry
This is the main event! Once your oil has reached 350°F (175°C), it’s time to fry. Carefully, one by one, gently lower the battered shrimp into the hot oil. Don’t crowd the pot! Fry in batches of about 6-8 shrimp at a time. This is crucial for maintaining the oil temperature and ensuring maximum crispiness. If you overcrowd the pot, the oil temperature will drop, and you’ll end up with greasy, soggy shrimp. Fry for about 2-3 minutes per side, or until they are beautifully golden brown and cooked through. You’ll see them float to the top when they’re almost done. Use a slotted spoon or spider strainer to carefully remove the shrimp from the oil, letting any excess oil drip back into the pot. Place them on your prepared wire rack to drain. Repeat with the remaining batches, making sure to let the oil come back up to temperature between batches.
Step 8: Cool & Glaze
The shrimp are best served immediately, while they’re piping hot and at their absolute crispiest. The draining on the wire rack is key here to prevent them from steaming and losing their crunch. If you choose to add a glaze, this is usually done right before serving, drizzled over the hot shrimp for an extra burst of flavor. However, for this basic fried shrimp recipe, the beauty is in the crunch, so I often skip a heavy glaze and let the seasoned batter shine. If you do want a glaze, think a light drizzle of sriracha mayo or a sweet chili sauce.
Step 9: Slice & Serve
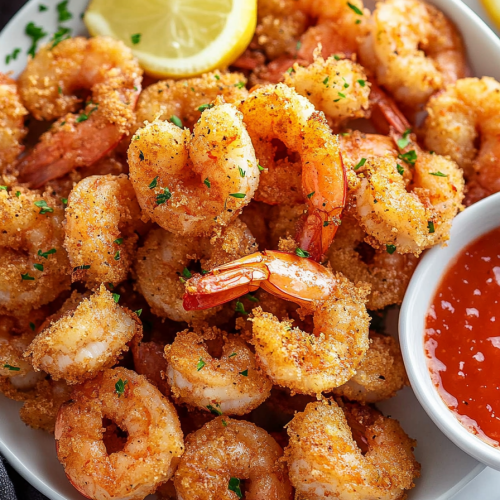
Serve these beauties up hot! They are absolutely divine on their own, perfect for picking at as an appetizer. If you’re serving them as a meal, I love to arrange them on a platter with some lemon wedges for squeezing. The tails left on make them easy to grab, and they look so appealing. The crisp exterior gives way to the tender, juicy shrimp inside, and the combination is just heavenly. They’re also fantastic in tacos or alongside some creamy coleslaw. The contrast of the hot, crispy shrimp with a cool, refreshing side is just perfection.
What to Serve It With
Oh, the possibilities are endless when it comes to serving these golden gems! They’re so versatile, and I love how they can fit into so many different meal occasions.
For Breakfast: Now, this might sound a little unconventional, but hear me out! Imagine a couple of these crispy shrimp alongside some perfectly poached eggs and a slice of toasted sourdough. It’s like a sophisticated seafood take on breakfast hash. The saltiness of the shrimp pairs beautifully with the richness of the yolk. And if you’re feeling adventurous, a small drizzle of hot sauce over the top is pure bliss.
For Brunch: This is where they really shine as an appetizer or a star component. Serve them on a beautiful platter with lemon wedges and a few dipping sauces – maybe a remoulade or a spicy aioli. They also make an incredible addition to a seafood salad for brunch, adding that delightful crispy texture. A crisp white wine or even a light, bubbly mimosa would be the perfect beverage pairing.
As Dessert: Okay, I know what you’re thinking, “shrimp for dessert?” But in some cultures, savory fried items are enjoyed at the end of a meal as a palate cleanser or a unique treat. If you’re feeling daring, serve a small portion with a slightly sweet chili sauce. It’s a bold move, but the sweet and savory combination can be surprisingly addictive. It’s definitely a conversation starter!
For Cozy Snacks: This is probably my most frequent way to enjoy them! When the craving hits for something crunchy and satisfying, but I don’t want to spend ages in the kitchen, these fried shrimp are my go-to. I’ll make a batch and just graze on them while watching a movie or chatting with friends. They’re also amazing tucked into sliders with some shredded lettuce and a creamy sauce, or even on top of a simple green salad for a hearty lunch. My family also devours these straight from the platter when they’re fresh out of the fryer – it’s the best kind of casual indulgence. We often have them with some homemade tartar sauce and extra lemon!
Top Tips for Perfecting Your Fried Shrimp
After countless batches, I’ve picked up a few tricks that I think make a world of difference in achieving that perfect, crispy fried shrimp every single time. These aren’t complicated, but they really do elevate the final result.
Shrimp Prep: Like I mentioned, drying the shrimp thoroughly is non-negotiable. Use paper towels and really get them as dry as possible. If you can, buy “peeled and deveined” shrimp, but make sure to remove the little vein line yourself if you see it – it can affect the texture. Leaving the tails on is purely aesthetic and makes them easier to handle, but feel free to remove them if you prefer. Also, don’t skip that initial seasoning of lemon juice, salt, and pepper directly on the shrimp before battering. It builds flavor from the inside out!
Mixing Advice: The batter consistency is key. Aim for something that coats the shrimp well but isn’t too thick. If it’s too thick, it will just fall off or become doughy. If it’s too thin, it won’t provide enough crispiness. A few small lumps in the batter are totally fine; in fact, they’re a sign you haven’t overmixed, which is exactly what we want. Overmixing develops gluten, leading to a tougher crust. Gentle is the name of the game here!
Frying Technique: This is probably the most important part. Maintaining the oil temperature is paramount. I can’t stress this enough: fry in small batches. If you throw too many shrimp in at once, the oil temperature plummets, and you end up with greasy, sad shrimp. Use a thermometer if you have one and aim for that sweet spot of 350°F (175°C). If you don’t have a thermometer, you can test the oil by dropping a tiny bit of batter in – it should sizzle immediately and float to the top. Also, give the shrimp a little space in the oil; don’t let them clump together, or they won’t fry evenly. Let them fry undisturbed for a couple of minutes before gently flipping them.
Ingredient Swaps: While the recipe calls for all-purpose flour, you can certainly experiment! For a gluten-free version, a good quality gluten-free all-purpose flour blend (one that contains xanthan gum) can work, though the texture might be slightly different. I’ve tested almond flour, but it tends to burn faster, so you’d need to adjust your frying temperature and time. For the liquid, beer is my absolute favorite for extra crispiness, but ice-cold seltzer water or club soda will also give you a nice light batter. Regular ice water works perfectly well too if you’re not a beer drinker or don’t have any on hand.
Baking Tips: Wait, baking? Nope, we’re frying! But if you wanted to do a “baked” version, you’d essentially be oven-frying. You’d need to coat the shrimp and then bake them at a high temperature (around 400-425°F or 200-220°C) on a greased baking sheet, flipping halfway through, possibly with a spritz of oil. It won’t be *exactly* the same as deep-frying, but it can get them nice and crispy. However, for that ultimate crunch, deep-frying is the way to go! Always place the fried shrimp on a wire rack, not paper towels, to allow air circulation. This is what keeps them crispy!
Glaze Variations: While this recipe is perfect on its own, if you love a sauce, keep it simple. A spicy aioli (mayonnaise mixed with sriracha or chili garlic sauce) is a classic. A sweet chili sauce is another great option, offering a nice contrast to the savory shrimp. A light drizzle of a tangy tartar sauce or even a simple lemon-dill yogurt sauce would be lovely. The key is not to drench the shrimp, or you’ll lose that precious crunch.
Storing and Reheating Tips
Ah, leftovers. While I can honestly say there are rarely any of these crispy beauties left, knowing how to store and reheat them properly is always a good idea. The main goal is to preserve that glorious crispiness as much as possible!
Room Temperature: Honestly, these are best enjoyed immediately. If you’ve made a batch and aren’t planning to eat them all right away, they’ll start to lose their crispness after about 30 minutes at room temperature. They’re still edible, of course, and will taste fine, but that super satisfying crunch will diminish. If you’re serving them as part of a larger spread and know they’ll be eaten within an hour or two, leaving them on the wire rack is still your best bet for maintaining some crispness.
Refrigerator Storage: If you do have leftovers that you want to save for another day, let them cool completely on the wire rack first. Then, transfer them to an airtight container. Here’s a little trick: place a piece of paper towel at the bottom of the container to absorb any residual moisture. This helps prevent sogginess. They’ll keep in the refrigerator for about 2-3 days. When you reheat them, the key is to try and crisp them up again.
Freezer Instructions: I don’t often freeze fried shrimp, as they do lose some of their texture upon thawing and reheating. However, if you must, cool them completely, then freeze them in a single layer on a baking sheet until solid. Once frozen, transfer them to a freezer-safe bag or container. They should last in the freezer for about 1-2 months. Thaw them in the refrigerator overnight before reheating.
Reheating Advice: This is where the magic happens (or doesn’t, if done wrong!). Microwaving is generally the enemy of crispy fried foods, as it tends to make them chewy and soft. Your best bet for reheating is to use your oven or an air fryer. Preheat your oven to around 375-400°F (190-200°C). Spread the cooled shrimp in a single layer on a baking sheet lined with parchment paper or foil. You can give them a light spritz of cooking spray for extra crispiness. Bake for about 8-12 minutes, flipping halfway through, until heated through and crisped up. An air fryer is even better – set it to 375°F (190°C) and air fry for about 5-7 minutes, shaking the basket halfway, until they’re nice and crispy again. This method will get you closest to that just-fried texture!
Glaze Timing Advice: If you’ve made a glaze to serve with the shrimp, store it separately in the refrigerator. Apply it just before serving the reheated shrimp. Never glaze them before storing or reheating, as the moisture from the glaze will only contribute to sogginess.
Frequently Asked Questions
Final Thoughts
So there you have it, my friends! My absolute go-to recipe for the most incredibly crispy, golden fried shrimp. It’s a recipe born from family traditions, perfected through years of happy kitchen experiments, and designed to bring a little bit of joy and deliciousness to your table. What I love most is how it proves that you don’t need to be a gourmet chef to create something truly spectacular. With just a few simple steps and some quality ingredients, you can achieve that perfect crunch and succulent seafood flavor that usually costs a fortune at a restaurant. It’s a recipe that truly embodies comfort and celebration, all rolled into one delightful bite. If you’re looking for other seafood favorites, you might also enjoy my [link to another seafood recipe] or my [link to another shrimp recipe] – they’re also family pleasers!
I really hope you give this fried shrimp recipe a try. I can’t wait to hear what you think! Please, if you make it, leave a comment below and tell me all about it – did your family love it? Did you try any fun variations? Share your photos with me on social media – I love seeing your culinary creations! Happy cooking, and enjoy every single crispy bite!
Crispy Fried Shrimp
Ingredients
Main Ingredients
- 1 pound large shrimp peeled and deveined, tails on
- 1 cup all-purpose flour
- 0.5 cup cornstarch
- 0.5 teaspoon salt
- 0.25 teaspoon black pepper
- 2 large eggs beaten
- 0.5 cup milk
- 4 cup vegetable oil for frying
Instructions
Preparation Steps
- In a shallow dish, whisk together the flour, cornstarch, salt, and pepper.
- In another shallow dish, whisk together the eggs and milk.
- Dip each shrimp into the egg mixture, allowing any excess to drip off, then dredge it in the flour mixture, ensuring it's fully coated. Place coated shrimp on a plate.
- Heat the vegetable oil in a large skillet or Dutch oven over medium-high heat to 350°F (175°C).
- Carefully add shrimp to the hot oil in batches, being careful not to overcrowd the pan. Fry for 2-3 minutes per side, or until golden brown and cooked through.
- Remove shrimp with a slotted spoon and drain on paper towels. Repeat with remaining shrimp.
- Serve immediately with your favorite dipping sauce.