Oh, friends, if there’s one appetizer that instantly transports me back to my childhood kitchen, it’s deviled eggs. Specifically, *my* mom’s deviled eggs. They were always the star of every picnic, holiday gathering, and Sunday supper. I remember sneaking into the fridge as a kid, just to steal one (or three!) before anyone else. They’re just… pure comfort, aren’t they? That creamy, tangy filling nestled into perfectly cooked whites, it’s a bite of pure joy. While there are a million ways to make deviled eggs, and I’ve certainly tried my fair share, this particular deviled eggs recipe is the one I always come back to. It’s not just a recipe; it’s a little slice of happiness, a guaranteed crowd-pleaser, and honestly, it’s surprisingly simple to pull off, even if you’re not usually one for fiddly appetizers. Forget those bland, dry versions you might have encountered; this one is rich, flavorful, and utterly irresistible. It’s the kind of dish that makes people ask for the recipe, and that’s exactly why I’m so excited to share it with you today.
What are Deviled Eggs?
So, what exactly are deviled eggs, you ask? At its heart, it’s one of the most brilliant culinary transformations. You take a humble hard-boiled egg, slice it in half, scoop out the yolk, mash it up with a few key ingredients to create a luscious, creamy filling, and then pipe or spoon that glorious mixture back into the egg white halves. Think of it as a savory, more elegant cousin to the deviled egg sandwich you might find at a deli, but so much more refined! The “deviled” part comes from the historically spicy or piquant ingredients that were added to dishes, like mustard or paprika. My recipe definitely leans into that with a bit of a kick, but it’s wonderfully balanced. It’s essentially a delightful way to elevate a simple egg into something truly special, perfect for parties or just a fancy snack when you’re craving something a little more exciting than toast.
Why you’ll love this recipe?
I can’t say enough about why this specific deviled eggs recipe has become my go-to. Firstly, the flavor is just *everything*. It’s that perfect harmony of creamy, tangy, slightly sweet, and a little bit zesty. The yolks are mashed to absolute silkiness, with no lumps in sight, and the additions are just right – not too much of any one thing, creating this beautifully balanced flavor profile that makes you want another bite immediately. What I love most is its sheer simplicity, too. Once you get the hang of hard-boiling eggs perfectly (which I’ll share my secrets for!), the rest is a breeze. You can whip these up in under 30 minutes, making them a lifesaver on busy days when you need to bring a dish to a potluck or have unexpected guests. And the cost-efficiency! Eggs are so budget-friendly, and the other ingredients are pantry staples. You get a ton of deliciousness for very little cost, which is always a win in my book. Plus, they’re just so darn versatile. Serve them at a fancy brunch, pack them for a picnic, or just have them as a satisfying snack. They really do fit every occasion. Honestly, the only downside is how quickly they disappear!
How do you make a Deviled Egg?
Quick Overview
This recipe is all about simple steps that yield spectacular results. We’ll start by perfectly hard-boiling your eggs – no grey yolks here! Then, it’s a matter of mashing those beautiful yolks with creamy mayonnaise, a touch of Dijon mustard for tang, a whisper of vinegar for brightness, and a dash of paprika for color and subtle warmth. The secret to my texture is a specific mashing technique that ensures ultimate smoothness. Finally, we’ll pipe or spoon that glorious filling back into the egg white halves and give them a final dusting of paprika. It’s a straightforward process, and the results are always impressive, proving that deliciousness doesn’t have to be complicated.
Ingredients
For the perfect hard-boiled eggs:
1 dozen large eggs
Ice bath (large bowl filled with ice and water)
For the Creamy Filling:
6-8 large egg yolks (from the hard-boiled eggs)
1/2 cup mayonnaise (I prefer a full-fat, good quality one – it makes a difference!)
1 tablespoon Dijon mustard (or yellow mustard if that’s what you have, but Dijon adds a lovely depth)
1 teaspoon white vinegar (apple cider vinegar works too, for a slightly fruitier tang)
1/4 teaspoon salt (or to taste)
1/8 teaspoon Black Pepper (freshly ground is best!)
Pinch of cayenne pepper (optional, but I love the subtle warmth it adds!)
Paprika, for garnish (smoked paprika is fantastic here for an extra layer of flavor)
For Optional Flair (but highly recommended!):
Finely chopped fresh chives or parsley, for garnish
A tiny sprinkle of celery seed
Step-by-Step Instructions
Step 1: Preheat & Prep Pan
This step is actually for the eggs, not the oven! I always start by getting my ice bath ready. Fill a large bowl with ice cubes and water. This is crucial for stopping the cooking process immediately after boiling, which prevents those dreaded grey rings around the yolk. Have it ready to go *before* your eggs are done boiling.
Step 2: Mix Dry Ingredients
This is less about “dry” ingredients in the traditional sense and more about preparing the base for our yolk mixture. Once your hard-boiled eggs are cooled and peeled, carefully slice them in half lengthwise. Gently scoop out all the yolks into a medium-sized mixing bowl. Now, take a fork and start mashing those yolks. You want to get them as fine and crumbly as possible. This is where you really work them into a smooth texture. Don’t be afraid to really get in there with the fork!
Step 3: Mix Wet Ingredients
To the mashed yolks, add the mayonnaise. Start with about half a cup, but you might need a little more or less depending on your preference and the size of your yolks. Add the Dijon mustard, white vinegar, salt, pepper, and the optional cayenne pepper. If you’re using celery seed, add a tiny pinch now too.
Step 4: Combine
Now, it’s time to bring it all together. Use your fork or a small whisk to thoroughly mix the ingredients. You want everything to be completely combined and creamy. Keep mashing and stirring until the filling is smooth, homogenous, and has a lovely, light texture. If it seems a little too thick, add another tablespoon of mayonnaise. If it feels too loose, you can add a tiny bit more yolk or a smidgen of mayo. Taste and adjust the salt and pepper as needed. This is your chance to make it *your* perfect deviled egg.
Step 5: Prepare Filling
The filling is already prepared in the previous step! The key here is the texture and flavor. You’re aiming for a filling that’s luscious, smooth, and perfectly seasoned. If you find any small lumps, just keep mashing or whisking them out. This is the heart of the deviled egg, so making it just right is paramount.
Step 6: Layer & Swirl
This is the fun part! You can either spoon the filling back into the egg white halves or, for a more elegant presentation, use a piping bag fitted with a star tip. If you’re spooning, use a small spoon to gently fill each white cavity. If you’re piping, fill the bag and pipe a beautiful swirl into each half, making sure it’s mounded nicely. Don’t worry if it’s not perfect; rustic charm is part of the appeal!
Step 7: Bake
Actually, these don’t get baked! They are served chilled or at room temperature. The “baking” step is really just the initial hard-boiling of the eggs. My method for perfect hard-boiled eggs: Place eggs in a single layer in a saucepan. Cover with cold water by about an inch. Bring to a rolling boil over high heat. Once boiling, immediately remove from heat, cover the pan, and let sit for 10-12 minutes. Then, plunge them into the ice bath.
Step 8: Cool & Glaze
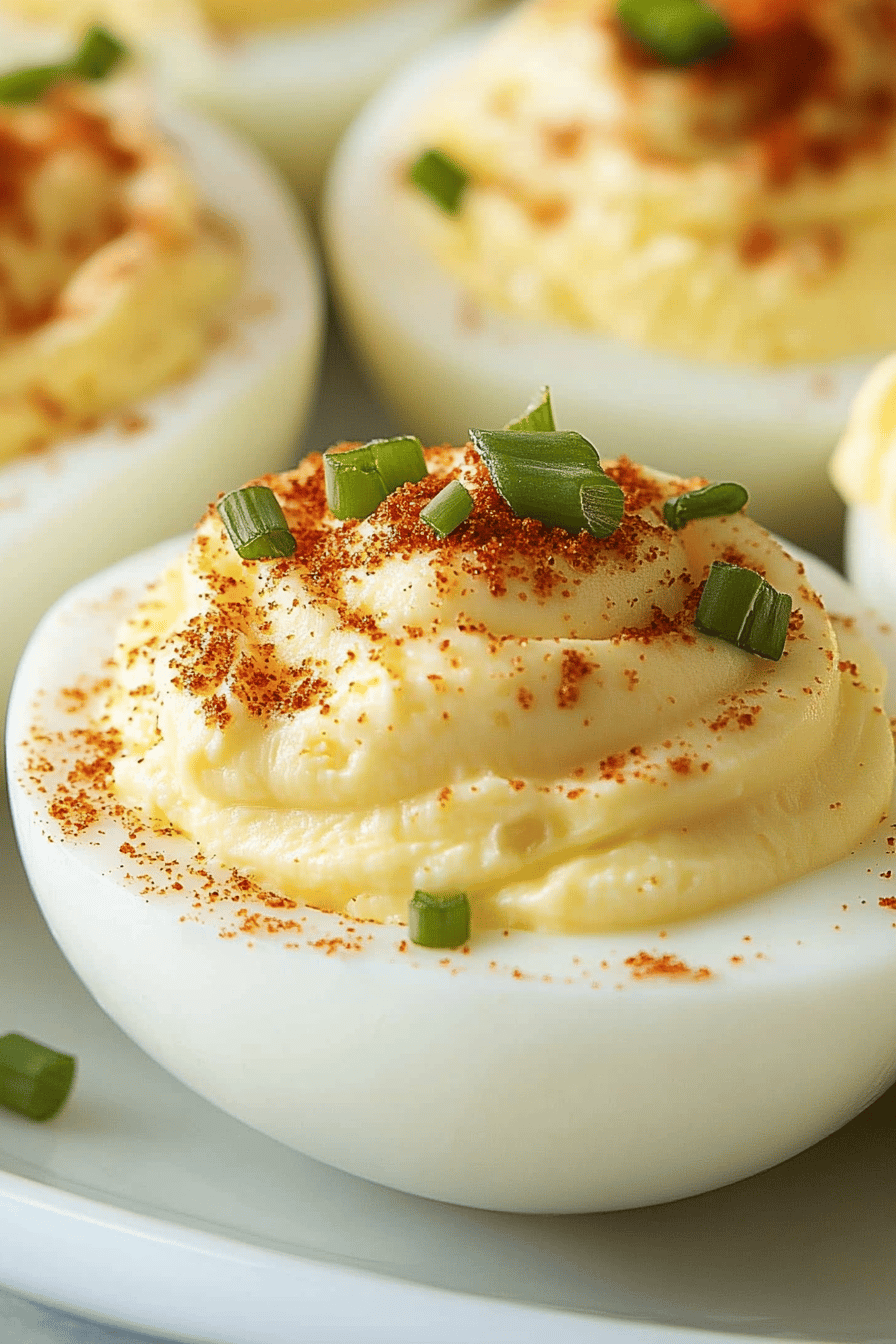
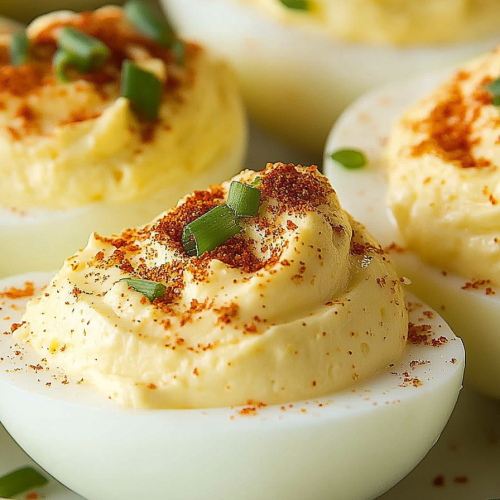
The eggs should be completely cooled in the ice bath before you peel and slice them. Once filled, these are ready to be garnished. Sprinkle generously with paprika for that signature look and flavor. If you like, add a pinch of celery seed and some finely chopped fresh chives or parsley for a pop of color and freshness. These are best chilled for at least 30 minutes before serving to allow the flavors to meld and the filling to firm up slightly.
Step 9: Slice & Serve
These are typically served as is, on a platter. They are best enjoyed chilled or at room temperature. Arrange them attractively on a serving dish, ensuring there’s a little space between each one so they don’t look overcrowded. The colors of the paprika and chives really pop against the white of the egg and the creamy filling. They are perfect for picking up with your fingers!
What to Serve It With
These deviled eggs are so incredibly versatile, they can truly fit into almost any meal or occasion. For breakfast, while a bit unconventional, they can be a surprisingly satisfying protein boost alongside some fresh fruit or a small piece of toast. Imagine them as a deconstructed egg salad on a tiny piece of sourdough! For a truly elegant brunch, I love arranging them on a tiered stand, perhaps with some mini quiches, smoked salmon blinis, and a glass of bubbly. They add that touch of classic sophistication. As a dessert? Okay, maybe not a traditional dessert, but for those of us who love savory treats at any hour, they make a fantastic lighter option when you’re craving something rich but don’t want a whole cake. Think of them as a savory amuse-bouche! And for those cozy snacks, there’s nothing better. Serve them on a lazy Sunday afternoon with a side of pickles and olives, or pack them in a cooler for a picnic with a good potato salad and some fried chicken. My family always requests these for Thanksgiving and Easter, and they disappear faster than any other dish on the table. They’re just that good!
Top Tips for Perfecting Your Deviled Eggs Recipe
Over the years, I’ve picked up a few tricks that elevate this simple deviled eggs recipe from good to absolutely unforgettable. First, and I can’t stress this enough, is the zucchini prep! Wait, what? No zucchini in this recipe! I must have been thinking of another recipe. For deviled eggs, the key is egg prep. For perfectly boiled eggs, the ice bath is non-negotiable. It stops the cooking immediately, preventing that slightly rubbery texture and the dreaded grey ring. Also, don’t overcook them! I learned this the hard way; overcooked yolks are dry and crumbly, making for a less-than-ideal filling. When it comes to mixing the filling, I always mash the yolks thoroughly with a fork before adding anything else. This ensures the smoothest, creamiest texture possible, without any eggy lumps. If you’re looking for swirl customization, don’t be afraid to get a little creative with your piping bag. A simple star tip is great, but you can also use a round tip for a cleaner look, or even just a Ziploc bag with a corner snipped off for a more rustic, homemade feel. For ingredient swaps, I’ve found that while classic mayonnaise is best, a good quality avocado oil mayo can add a subtle richness. Some people swear by a tiny bit of sour cream or Greek yogurt mixed in, but I find it can make the filling too loose for my liking. When it comes to baking – or rather, not baking – the initial hard-boiling is the most critical step. My timing of bringing water to a boil, then removing from heat, is a game-changer for consistent results. Don’t be afraid to experiment with glaze variations either; a tiny sprinkle of smoked paprika can add a whole new dimension!
Storing and Reheating Tips
Keeping your deviled eggs fresh and delicious is actually quite simple, though there are a few things to keep in mind. For storing at room temperature, I honestly recommend serving them within two hours maximum, especially if it’s warm out. They’re so tempting, but we don’t want any food safety worries! For refrigerator storage, this is where they shine. Make sure to store them in an airtight container. I usually put them on a plate or in a shallow dish, cover it tightly with plastic wrap, and then place that inside another container or a zip-top bag for extra protection. They’ll stay wonderfully fresh in the fridge for up to 2-3 days. The filling might firm up a little more as they chill, which is perfectly fine. Freezer instructions aren’t ideal for deviled eggs. The texture of the boiled egg whites can become a bit watery and mealy upon thawing, and the creamy filling might separate. It’s best to make them fresh! For glaze timing advice, I always add the paprika and any other garnishes just before serving. This keeps the paprika from getting clumpy and ensures the chives or parsley look their freshest. If you’re making them ahead, fill the whites and store them covered in the fridge, and then add the yolk mixture and garnish right before you plan to serve them. This keeps everything looking its best!
Frequently Asked Questions
Final Thoughts
There you have it, my friends – my tried-and-true Deviled Eggs Recipe. It’s more than just a recipe; it’s a bundle of happy memories, a guarantee of smiles at any gathering, and proof that sometimes, the simplest things are the most delicious. I truly hope you give this a try. It’s that perfect balance of creamy, tangy, and satisfying that just hits all the right notes. If you’re looking for other appetizers that are always a hit, you might also enjoy my Easy Bruschetta or my Classic Caprese Skewers. They share that same spirit of fresh, vibrant flavors and simple preparation. I can’t wait to hear how your deviled eggs turn out! Please leave a comment below and let me know your thoughts, or share any fun twists you add. Happy cooking!
Deviled Eggs Recipe
Ingredients
Main Ingredients
- 12 large eggs
- 0.5 cup mayonnaise
- 1 tablespoon Dijon mustard
- 1 teaspoon white vinegar
- 0.5 teaspoon salt
- 0.25 teaspoon black pepper
- paprika, for garnish
Instructions
Preparation Steps
- Place eggs in a large saucepan and cover with cold water by 1 inch. Bring to a boil over high heat, then reduce heat to medium-low and simmer for 10 minutes.
- Drain hot water and immediately cover eggs with ice water to stop the cooking. Let sit for 10 minutes.
- Peel eggs. Cut each egg in half lengthwise. Scoop the yolks into a medium bowl.
- Add mayonnaise, Dijon mustard, white vinegar, salt, and pepper to the bowl with the yolks. Mash with a fork until smooth. Taste and adjust seasoning if needed.
- Spoon or pipe the yolk mixture into the egg white halves.
- Garnish with paprika before serving.