You know those days? The ones where a serious craving hits, like a freight train, and you *need* something sweet and chocolatey, but the thought of baking a whole cake feels like scaling Mount Everest? Yeah, I’ve been there more times than I care to admit. And on those days, my absolute go-to, my kitchen superhero, is this recipe for chocolate quinoa crisps. They’re so incredibly satisfying, bursting with rich chocolate flavor, and have this wonderfully chewy-crisp texture that just hits all the right notes. Honestly, people always guess they’re some fancy brownie or cookie, and I just smile. It’s my little secret, and one I’m so excited to share with you because they’re surprisingly simple to whip up. Think of them as a magical bridge between a brownie and a chewy granola bar, but with a sophisticated chocolate twist. They’re a lifesaver on busy nights, a perfect pick-me-up with a cup of tea, and my kids, bless their little hearts, ask for these chocolate quinoa crisps constantly!
What are chocolate quinoa crisps?
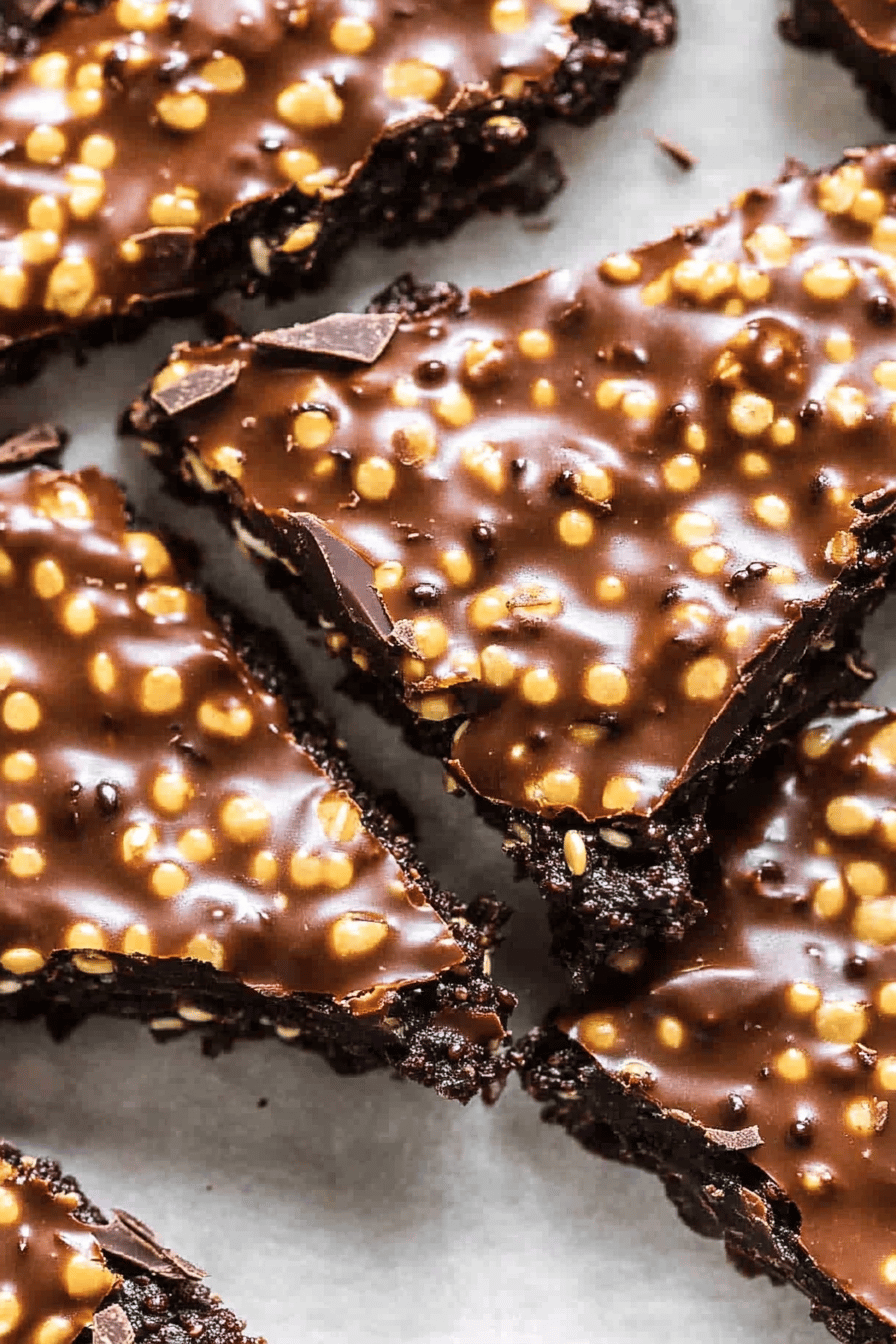
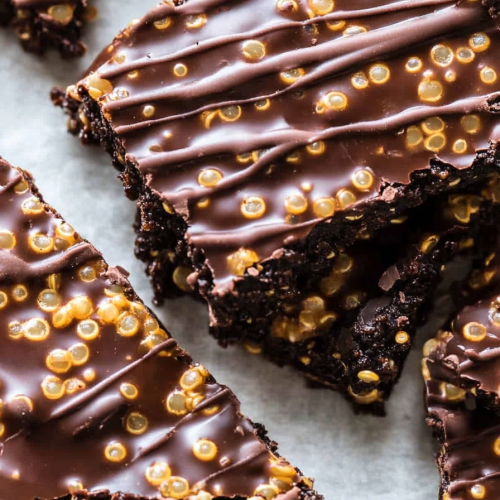
So, what exactly *are* these delightful little things? At their heart, chocolate quinoa crisps are a baked treat that uses cooked quinoa as a base, mixed with classic Chocolate Chip cookie or brownie ingredients like flour, sugar, eggs, and of course, plenty of chocolate. The “crisps” part comes from how they bake up – they get delightfully chewy in the center with these lovely, slightly crisp edges that are just divine. I think the name just perfectly captures that textural magic. It’s not a cookie in the traditional sense, nor is it a dense brownie. It’s its own wonderful thing! Essentially, we’re taking humble, healthy quinoa and giving it a decadent chocolate makeover, making it the star of a treat that feels indulgent but is surprisingly wholesome. It’s the kind of recipe that makes you feel like a kitchen wizard, turning simple ingredients into something truly special.
Why you’ll love this
Oh, where do I even begin with why this recipe is a keeper? It’s one of those recipes I’ve made countless times, and it never fails to impress, both me and anyone lucky enough to snag a bite. First off, the flavor is just out of this world. You get that deep, satisfying chocolate goodness, but it’s not overwhelmingly sweet. The quinoa adds a subtle, nutty undertone that really rounds everything out and makes it taste more complex and interesting. Then there’s the texture – this is where the magic truly happens. They’re chewy in the middle, with those wonderfully crisp edges that I can’t get enough of. They’re a far cry from those dry, crumbly baked goods that leave you feeling disappointed. And the best part? They are ridiculously easy to make. Seriously, if you can stir things together in a bowl, you can make these. I often whip up a batch when I’ve got about 20 minutes to spare, and they’re ready to go. This makes them incredibly cost-effective too; the ingredients are pretty basic and readily available, meaning you can make a big batch without breaking the bank. Plus, they’re super versatile! I love them warm, straight from the oven, but they’re also fantastic at room temperature for a snack on the go. You can easily adapt them, too – swap out the chocolate chips for nuts, add a sprinkle of sea salt on top, or even swirl in some peanut butter. They’re a fantastic alternative to my double Chocolate Chip Cookies when I want something a little different but equally delicious.
How do I make chocolate quinoa
Quick Overview
This recipe is all about bringing together simple ingredients in a straightforward way. You’ll cook your quinoa, then mix it with a few wet ingredients, followed by the dry. Fold in your chocolate, spread it into a pan, bake until golden and fudgy, and then let it cool before slicing. The beauty is in its simplicity – no fancy techniques required! It’s a one-bowl wonder for the wet and dry ingredients, and the cooking process itself is really forgiving. You’ll get that incredible chewy-crisp texture without any fuss.
Ingredients
For the Main Batter:
1 cup cooked quinoa (make sure it’s cooled a bit!) – I always cook mine with water, but vegetable broth can add a subtle savory note if you’re feeling adventurous.
1/2 cup unsalted butter, softened – Make sure it’s properly softened, not melted! This helps with the texture.
3/4 cup packed light brown sugar – The brown sugar is key for that chewy texture and caramel-like flavor.
1 large egg – Room temperature is best for even mixing.
1 teaspoon vanilla extract – Don’t skimp on this, it really boosts the chocolate flavor.
1 1/4 cups all-purpose flour – You can use a gluten-free blend if needed, just make sure it has a binder like xanthan gum.
1/2 teaspoon baking soda – This gives us a nice lift and helps with the crisp edges.
1/4 teaspoon salt – Just a pinch to balance the sweetness.
For the Chocolatey Goodness:
1 cup chocolate chips or chunks – I love a mix of semi-sweet and dark chocolate for complexity, but use your favorite!
For the Optional Glaze (Trust me, you want this!):
1/2 cup powdered sugar
2-3 tablespoons milk (dairy or non-dairy works great) – Start with 2 tablespoons and add more if needed to reach drizzling consistency.
1/4 teaspoon vanilla extract
Step-by-Step Instructions
Step 1: Preheat & Prep Pan
First things first, let’s get our oven ready. Preheat it to 350°F (175°C). Then, grab an 8×8 inch baking pan. I like to line mine with parchment paper, leaving an overhang on the sides. This makes it a breeze to lift the whole thing out once it’s baked. Lightly grease the parchment paper or the pan itself if you’re not using parchment.
Step 2: Mix Dry Ingredients
In a medium bowl, whisk together your flour, baking soda, and salt. Give it a good whisk so everything is evenly distributed. This ensures the baking soda and salt don’t clump up in one spot, which would mess with the texture. It’s a simple step, but it makes a difference!
Step 3: Mix Wet Ingredients
In a larger bowl, cream together the softened butter and light brown sugar until it’s nice and fluffy. This is where you get that classic cookie base started. Beat in the egg and vanilla extract until everything is well combined and smooth. Make sure the egg is fully incorporated.
Step 4: Combine
Now, gradually add the dry ingredients from Step 2 to the wet ingredients. Mix on low speed or stir with a spatula until just combined. Be careful not to overmix here! Overmixing can make baked goods tough, and we definitely don’t want that. A few streaks of flour are okay; they’ll disappear when you add the quinoa.
Step 5: Prepare Filling
Gently fold in the cooked and slightly cooled quinoa into the batter. You want to distribute it evenly throughout. This is where our secret ingredient gets incorporated! Make sure it’s mixed in thoroughly but again, don’t go overboard with mixing.
Step 6: Layer & Swirl
Now for the chocolate! Stir in the chocolate chips or chunks. Spread the batter evenly into your prepared baking pan. It will be thick, so use your spatula or the back of a spoon to press it down and smooth the top. If you’re feeling fancy, you can press a few extra chocolate chips on top for visual appeal before baking.
Step 7: Bake
Bake for 20-25 minutes, or until the edges are golden brown and the center looks set. You can test for doneness by inserting a toothpick into the center; it should come out with moist crumbs attached, not wet batter. If you want them chewier, err on the shorter side of the baking time. If you prefer them a bit firmer, bake a few minutes longer. Keep an eye on them, as ovens can vary!
Step 8: Cool & Glaze
This is perhaps the hardest part – waiting! Let the chocolate quinoa crisps cool in the pan for at least 15-20 minutes before attempting to remove them. This helps them firm up. While they’re cooling, whisk together the powdered sugar, 2 tablespoons of milk, and vanilla extract for the glaze. Add more milk, a teaspoon at a time, until it’s a drizzly consistency. Once the crisps are mostly cool, lift them out of the pan using the parchment paper overhang. Drizzle the glaze over the top. If you like a thicker glaze, let the crisps cool completely before drizzling. For a thinner glaze that seeps in a bit, drizzle when they’re still warm.
Step 9: Slice & Serve
Once the glaze has set a bit, cut the chocolate quinoa crisps into squares or bars. I usually aim for about 16 squares from an 8×8 pan. They are absolutely divine served warm, but they’re also delicious at room temperature. Enjoy the amazing texture and rich chocolate flavor!
What to Serve It With
These chocolate quinoa crisps are so versatile, they fit into almost any part of your day! For breakfast, they’re a fantastic treat alongside a steaming mug of coffee or a glass of cold milk. They give you that little something sweet to start your day without being too heavy, and the quinoa adds a touch of protein to keep you going. For a more elaborate brunch spread, imagine these cut into smaller, elegant squares arranged on a platter with fresh berries and perhaps some yogurt. They add a lovely, unexpected element that guests will rave about. As a dessert, they’re simply perfect. Serve them warm with a scoop of vanilla bean Ice Cream – the contrast between the warm crisps and cold ice cream is pure bliss! Or, a light dusting of powdered sugar can make them feel extra special for an after-dinner treat. And for those cozy snack moments, when you just need something comforting? These are your answer. Pair them with a warm cup of herbal tea or hot chocolate for ultimate coziness. My family loves them as an after-school snack, and they’re always gone in a flash!
Top Tips for Perfecting Your Chocolate Quinoa Crisps
I’ve made these chocolate quinoa crisps so many times, I’ve picked up a few tricks that I think really elevate them from good to absolutely fantastic. First, when it comes to the quinoa, make sure it’s cooked and has cooled down a bit. Hot quinoa can mess with the butter and egg mixture, potentially making it greasy or curdled. I usually cook a batch of quinoa ahead of time and keep it in the fridge, so it’s ready to go. For the mixing, remember my earlier note about not overmixing the flour – that’s crucial for tenderness. You want to mix until *just* combined. If you see a few tiny streaks of flour, that’s perfectly fine. It’s better to be slightly under-mixed than over-mixed. When it comes to the chocolate, don’t be afraid to mix it up! I often use a combination of semi-sweet and dark chocolate chips, and sometimes I’ll even toss in a few chopped chocolate chunks for bigger pockets of melty goodness. If you’re feeling adventurous, a pinch of flaky sea salt sprinkled on top before baking or over the glaze after it sets is absolutely divine and cuts through the sweetness beautifully. For baking, I’ve learned that ovens can be really different. My oven tends to run a bit hot, so I often reduce the temperature by about 10-15 degrees Fahrenheit or keep a closer eye on them to prevent the edges from getting too dark. A toothpick test is your best friend here – aim for moist crumbs, not wet batter. If you find your batter is a little too wet to spread evenly, don’t panic! It happens. Just use the back of a spoon or a small spatula to gently press it into the pan. And the glaze – while optional, it really takes these to the next level. I like to aim for a consistency that’s thick enough to coat but thin enough to drizzle easily. If it’s too thick, add milk a teaspoon at a time. If it’s too thin, add a touch more powdered sugar. Trust me, a little extra effort with the glaze makes these truly irresistible!
Storing and Reheating Tips
One of the best things about these chocolate quinoa crisps is how well they store, which means you can have a batch ready to go whenever a craving strikes! If you’re planning to eat them within a day or two, you can simply keep them stored in an airtight container at room temperature. Make sure the container is sealed tightly to keep them from drying out. They usually stay wonderfully chewy and delicious for about 3-4 days this way. If you think you might not get through them that quickly, or if your kitchen is particularly warm, popping them into the refrigerator is a great option. Store them in an airtight container in the fridge for up to a week. They’ll be firmer when cold, so I often let them sit out for about 15-20 minutes before enjoying them if I want that softer texture. For longer storage, these crisps freeze beautifully! Once they’ve cooled completely and the glaze has set (or if you’re not glazing them), you can wrap them individually in plastic wrap or parchment paper, then place them in a freezer-safe bag or container. They’ll keep well in the freezer for up to 2-3 months. To thaw, simply take them out of the freezer and let them come to room temperature. If you plan to reheat them, the microwave is your friend for a quick warm-up. Just a few seconds in the microwave will bring back that gooey, melty chocolate goodness. For the glaze, it’s usually best to add it just before serving if you’re going to reheat them, as the heat can sometimes make the glaze a bit messy. If you’ve stored them with the glaze on and they’re at room temp, they’re ready to go. If refrigerated, a short reheat in the microwave or a few minutes in a warm oven (around 300°F/150°C) will do the trick.
Frequently Asked Questions
Final Thoughts
So there you have it, my recipe for these absolutely delightful chocolate quinoa crisps. They’re the perfect example of how you can take simple, wholesome ingredients and turn them into something truly special and incredibly satisfying. They’re the answer to those late-night sweet cravings, the perfect addition to your baking rotation, and a guaranteed crowd-pleaser. I love that they feel a little bit healthier thanks to the quinoa, but they deliver all the indulgence you could want with that rich chocolate flavor and irresistible chewy-crisp texture. If you enjoy this recipe, I think you might also love my Chewy Chocolate Chip Blondies or my Easy No-Bake Energy Bites, which also use simple ingredients to create delicious treats! I truly hope you give these chocolate quinoa crisps a try. I can’t wait to hear how yours turn out and what your favorite variations are. Happy baking, my friends!
Chocolate Quinoa Crisps
Ingredients
Main Ingredients
- 1 cup cooked quinoa
- 0.5 cup oat flour
- 0.25 cup unsweetened cocoa powder
- 0.5 cup maple syrup
- 0.25 cup coconut oil, melted
- 1 teaspoon vanilla extract
- 0.5 teaspoon salt
- 0.5 cup dark chocolate chips
Instructions
Preparation Steps
- Preheat oven to 300°F (150°C). Line a baking sheet with parchment paper.
- In a large bowl, combine the cooked quinoa, oat flour, cocoa powder, maple syrup, melted coconut oil, vanilla extract, and salt. Mix until well combined.
- Stir in the dark chocolate chips.
- Spread the mixture evenly onto the prepared baking sheet in a thin layer.
- Bake for 20 minutes, or until the edges are set and lightly crisp. The crisps will firm up as they cool.
- Let cool completely on the baking sheet before breaking into pieces.