You know those nights, right? The ones where the clock is ticking, the kids are hovering like tiny, hungry hummingbirds, and the thought of chopping a million things and dirtying every pan in the kitchen makes you want to just… order pizza. Yeah, I’ve been there more times than I care to admit! But over the years, I’ve collected a few secret weapons, recipes that feel like a warm hug and taste like pure magic, all while keeping my sanity intact. This Chicken Fajita Bubble Bake is *that* recipe. Seriously, it’s become my go-to when I need something incredibly flavorful and satisfying without the fuss. It’s got all the vibrant, zesty goodness of your favorite fajitas, but in this wonderfully comforting, easy-to-throw-together bake. It’s honestly a lifesaver, and the smell that fills the house while it’s baking? Pure happiness.
What is chicken fajita bubble bake?
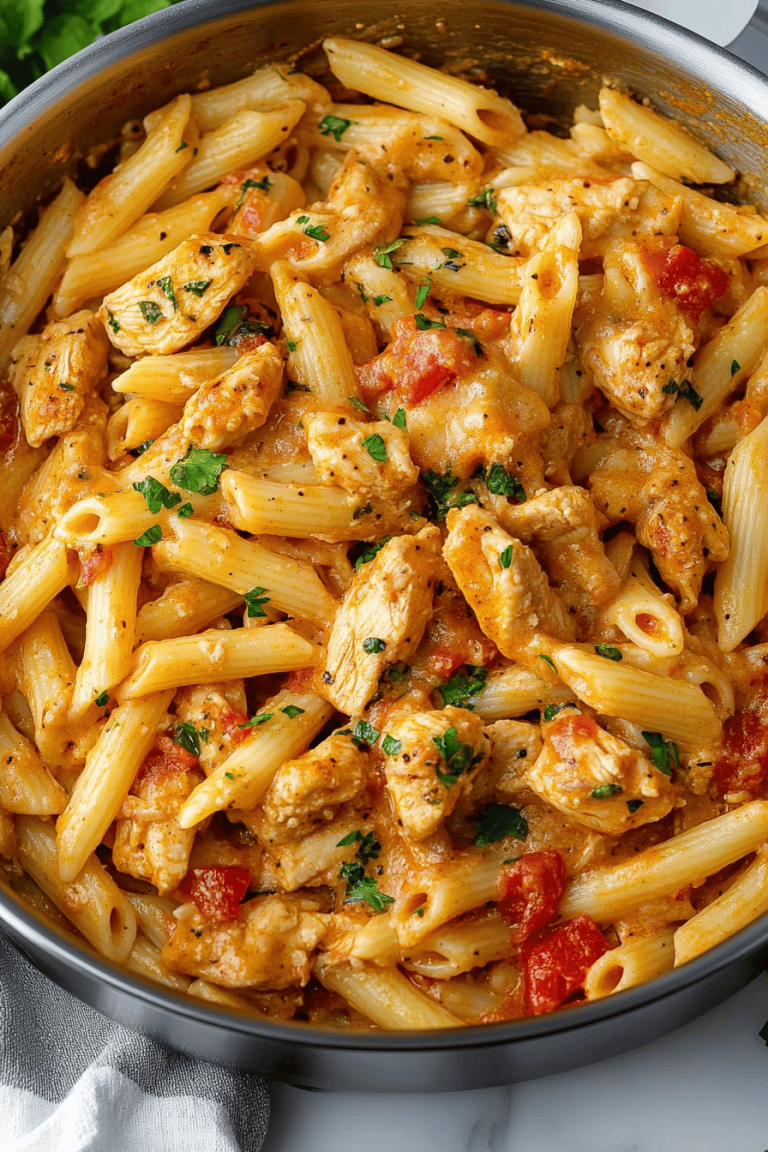
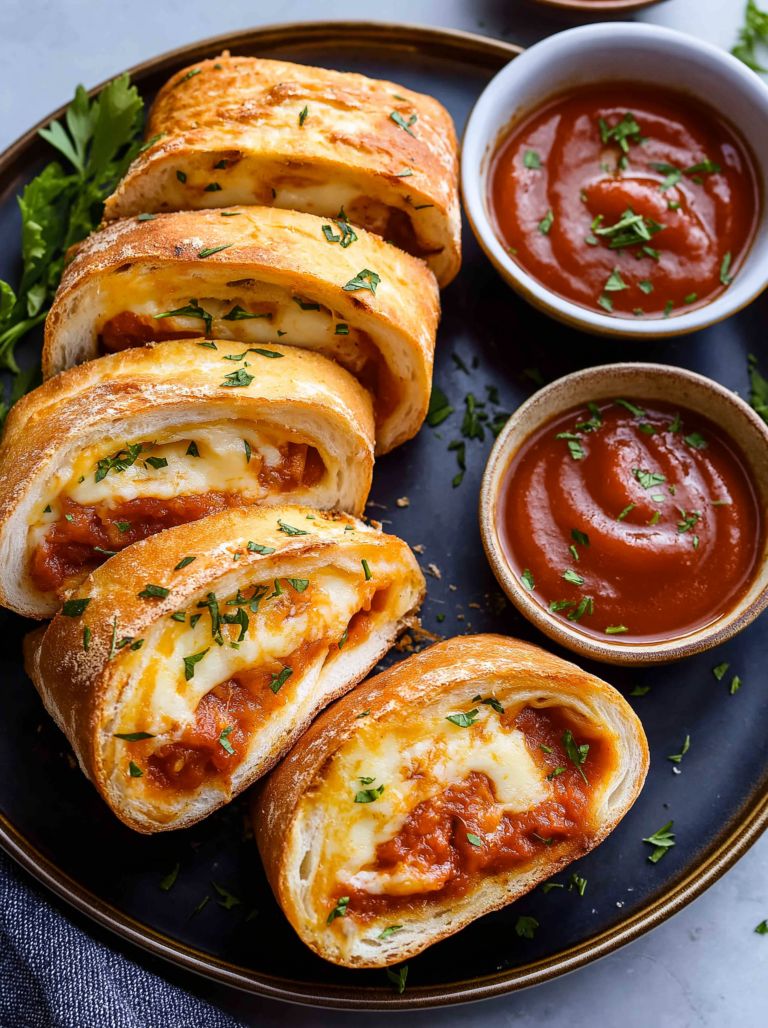
So, what exactly *is* this Chicken Fajita Bubble Bake? Think of it as a delicious deconstructed fajita, but baked into a glorious, fluffy, casserole-like dish. The name comes from the way the chicken and veggies bubble up through a light, savory batter, creating these delightful pockets of flavor. It’s not a heavy casserole, not quite a cornbread, but somewhere wonderfully in between. It’s inspired by those classic Mexican flavors – the smoky paprika, the zingy lime, the sweet peppers, and of course, tender chicken. I call it a “bubble bake” because when it’s fresh out of the oven, the top is all golden and slightly crisp, and you can see all those beautiful pockets of filling peeking through, practically bubbling with flavor. It’s the kind of dish that feels both comforting and exciting, familiar yet new.
Why you’ll love this recipe?
Honestly, the list of reasons to adore this Chicken Fajita Bubble Bake is practically endless, but I’ll try to narrow it down to the highlights that make it a staple in my kitchen. First off, the flavor is just out of this world! You get that authentic fajita taste – the warmth of the spices, the sweetness of the bell peppers and onions, all mingling perfectly with the tender chicken. It’s savory, a little tangy, and just has this incredible depth. But beyond the taste, the sheer simplicity of this dish is a revelation. It’s mostly hands-off once everything is in the pan, which is a huge win on busy weeknights. And let’s talk about cost-effectiveness! You probably have most of the ingredients already in your pantry, and the ones you need to pick up are usually budget-friendly staples. This recipe is also incredibly versatile. I love it just as is, but it’s also amazing with a dollop of sour cream, some guacamole, or even wrapped in warm tortillas if you’re feeling fancy. It’s a crowd-pleaser, from my picky eaters to my husband, who devours it every single time. It stands out because it delivers that complex fajita flavor without any of the traditional sautéing and assembling chaos. What I love most is that it’s so forgiving, and no matter how many times I make it, it always turns out perfectly delicious.
How do I make a chicken fajita bubble bake?
Quick Overview
This recipe is designed for ultimate ease. You’ll simply mix up a quick batter, sauté your fajita fillings briefly, then layer them into a baking dish and bake until golden and bubbly. The beauty lies in its straightforward process – minimal fuss, maximum flavor. It’s the kind of meal that makes you feel like a kitchen superhero, even when you’re running on fumes. The result is a moist, flavorful bake with a tender, slightly cakey top layer that’s just divine. It truly comes together in under an hour, active time included, which is a dream for busy evenings.
Ingredients
For the Main Batter:
1 ½ cups all-purpose flour (I always use unbleached, it seems to make a difference in texture!)
2 teaspoons baking powder (don’t skimp here, it makes it fluffy!)
½ teaspoon salt
¼ teaspoon Black Pepper
1 cup milk (whole milk gives the best richness, but I’ve had success with 2% and even unsweetened almond milk for a creamier result than you might expect!)
⅓ cup vegetable oil (or any neutral-flavored oil like canola or avocado)
For the Filling:
1 pound boneless, skinless Chicken Breasts or thighs, cut into bite-sized pieces (thighs are my favorite for extra juiciness!)
1 tablespoon olive oil
1 medium onion, thinly sliced
1 medium bell pepper (any color works, but I love a mix of red and green for visual appeal), thinly sliced
1 teaspoon chili powder
½ teaspoon cumin
½ teaspoon smoked paprika (this is key for that smoky fajita flavor!)
¼ teaspoon garlic powder
Pinch of cayenne pepper (optional, for a little kick)
Salt and black pepper to taste
For the Glaze (Optional, but highly recommended!):
2 tablespoons butter, melted
1 tablespoon lime juice
Pinch of chili powder or paprika
Step-by-Step Instructions
Step 1: Preheat & Prep Pan
First things first, get your oven preheated to 375°F (190°C). While that’s heating up, grab an 8×8 or 9×9 inch baking dish. You don’t need to grease it heavily, just a light spray or a thin brush of oil is fine. This helps prevent sticking and ensures a nice, golden crust on the bottom.
Step 2: Mix Dry Ingredients
In a medium bowl, whisk together the flour, baking powder, salt, and pepper. Make sure everything is well combined. This ensures your batter rises evenly. I usually give it a good whisk for about 30 seconds, just to make sure there are no lumps and everything is distributed nicely.
Step 3: Mix Wet Ingredients
In a separate bowl, whisk together the milk and vegetable oil. It’s important not to overheat the milk; room temperature or slightly warmed is perfect. Overheating can affect the texture of the batter. Just a quick whisk until they’re emulsified is all you need.
Step 4: Combine
Now, pour the wet ingredients into the dry ingredients. Stir gently until just combined. It’s really important not to overmix here! A few small lumps are perfectly okay. Overmixing will develop the gluten in the flour, leading to a tough, dense bake, and we definitely don’t want that. Think of it as just bringing everything together until there are no dry streaks of flour visible.
Step 5: Prepare Filling
While your batter is resting, let’s get the filling ready. Heat the tablespoon of olive oil in a large skillet over medium-high heat. Add your chicken pieces and cook until they’re browned on all sides and almost cooked through. Then, add the sliced onion and bell pepper to the skillet. Sauté until the vegetables are tender-crisp, about 5-7 minutes. Now, sprinkle in the chili powder, cumin, smoked paprika, garlic powder, and cayenne (if using). Stir everything well to coat the chicken and veggies. Season with salt and pepper to taste. Cook for another minute or two until fragrant. This brief sauté brings out the best in the veggies and infuses the chicken with those amazing fajita spices. I usually give it a taste test here to make sure the seasoning is just right before moving on.
Step 6: Layer & Swirl
Pour about half of the batter into your prepared baking dish, spreading it evenly. Then, spoon the chicken and vegetable filling evenly over the batter. Finally, pour the remaining batter over the filling. Now, for the fun part: I like to gently swirl the filling into the top layer of the batter with a knife or skewer. You don’t need to go too deep, just enough to create some pretty marbling and ensure pockets of filling are distributed throughout. It doesn’t have to be perfect; rustic charm is what we’re going for!
Step 7: Bake
Pop the dish into your preheated oven. Bake for 30-40 minutes, or until the top is golden brown and a toothpick inserted into the center comes out clean. The edges should be set, and you might see some lovely bubbling around the sides. Oven temperatures can vary, so keep an eye on it towards the end. If the top is browning too quickly, you can always loosely tent it with foil.
Step 8: Cool & Glaze
Once it’s baked to perfection, carefully remove the dish from the oven. Let it cool for about 10-15 minutes before slicing. This resting period is crucial for the bake to set properly. While it’s cooling, whisk together the melted butter, lime juice, and a pinch of chili powder or paprika for that optional glaze. Drizzle this over the warm bake. The glaze adds an extra pop of flavor and a beautiful sheen. I love doing this while it’s still warm so it soaks in just a little.
Step 9: Slice & Serve
Slice the Chicken Fajita Bubble Bake into squares and serve warm. It’s delicious on its own, but even better with your favorite fajita toppings. I’ll talk more about serving ideas next!
What to Serve It With
This Chicken Fajita Bubble Bake is so wonderfully versatile, you can honestly serve it for almost any meal! For breakfast, it’s surprisingly fantastic alongside a strong cup of coffee. The savory flavors are a nice change from sweet breakfast dishes, and a small square is quite satisfying. Imagine cutting into a warm piece on a chilly morning – pure comfort. For brunch, it really shines. You can make it a bit more elegant by serving it with a side of fresh Fruit Salad and perhaps some avocado slices. A mimosa or a Bloody Mary would be the perfect beverage pairing. For a dessert-like feel (yes, I’ve done it!), I sometimes serve it with a light dusting of powdered sugar and a dollop of whipped cream, especially if I’ve made it a little sweeter. But it truly excels as a cozy snack. On a rainy afternoon, a generous portion with a glass of iced tea or even a cold beer is absolute heaven. My family also loves to take the squares and wrap them in warm flour tortillas, kind of like a handheld fajita meal, which is always a hit with the kids. I’ve also found it pairs wonderfully with a simple side salad dressed with a zesty vinaigrette to balance out the richness.
Top Tips for Perfecting Your Chicken Fajita Bubble Bake
I’ve made this Chicken Fajita Bubble Bake more times than I can count, and over the years, I’ve picked up a few tricks that really elevate it. For the chicken, don’t be afraid to use thighs! They stay incredibly moist and tender, even if you accidentally overcook them slightly, which is a lifesaver for me as I’m often multitasking. When you’re prepping your veggies, aim for consistent slices so they cook evenly. If your onions and peppers are cut too thick, they might not soften up as much as you’d like. For the batter, the biggest tip I can give you is *do not overmix*. Seriously, stop stirring as soon as you don’t see any dry flour. A few lumps are the secret to a tender, fluffy bake, not a dense brick. I learned this the hard way when I was rushing one evening and stirred it way too much, and it just wasn’t the same. When it comes to the swirl, don’t stress about making it look like a professional baker’s creation. A few gentle passes with a knife are all you need to create beautiful visual appeal and distribute the filling. For ingredient swaps, if you don’t have bell peppers, zucchini or even mushrooms would work in the filling, though they’ll change the flavor profile a bit. You can also adjust the spices to your liking – add more chili powder for heat, or a pinch of smoked salt for an extra smoky depth. If your oven tends to run hot, keep an eye on the bake after about 25 minutes and consider loosely tenting it with foil to prevent the top from burning before the center is cooked through. Testing for doneness with a toothpick is always the best bet. And for the glaze, if you’re out of butter, a bit of olive oil mixed with lime juice and spices works in a pinch, though the butter adds a lovely richness.
Storing and Reheating Tips
This Chicken Fajita Bubble Bake is fantastic for leftovers, which is another reason I love it so much. If you have any that is! If it does make it to the next day, storing it is super simple. At room temperature, it’s best to cover it loosely with foil or plastic wrap and leave it out for no more than a couple of hours, especially if your kitchen is warm. For longer storage, pop it into the refrigerator. I usually keep it in the baking dish and cover it tightly with plastic wrap or foil. It should stay good in the fridge for up to 3-4 days. The texture might change slightly after a day or two, becoming a bit denser, but it’s still delicious. If you’re looking to freeze it, I recommend letting it cool completely first. Then, either wrap the entire dish tightly in plastic wrap and then foil, or cut it into individual portions, wrap each portion well, and place them in a freezer-safe container. It should last in the freezer for about 2-3 months. To reheat, the best method is usually in the oven. Pop a covered portion back into a 350°F (175°C) oven for about 15-20 minutes, or until heated through. If you’re in a real hurry, the microwave works too, but the texture might be a little softer. I usually skip the glaze when storing, and add a fresh drizzle of the melted butter and lime mixture after reheating for the best flavor and appearance.
Frequently Asked Questions
Final Thoughts
So there you have it – my absolute favorite Chicken Fajita Bubble Bake! I truly hope you give this recipe a try. It’s more than just a meal; it’s one of those comforting, reliable dishes that I know will bring smiles to the table. It’s the perfect answer to “What’s for dinner?” and a fantastic way to get those delicious fajita flavors into a super easy, baked format. It’s proof that you don’t need complicated steps to create something truly spectacular. If you’re a fan of this recipe, you might also enjoy my Skillet Chicken Fajita Nachos or my Speedy Sheet Pan Fajitas for more quick and flavorful Tex-Mex inspired meals. I can’t wait to hear what you think! Let me know in the comments below how yours turned out, or if you tried any fun variations. Happy baking, everyone!

Chicken Fajita Bubble Bake
Ingredients
Main Ingredients
- 1.5 pounds boneless, skinless chicken breasts cut into 1-inch pieces
- 1 tablespoon olive oil
- 0.5 cup chopped onion
- 0.5 cup chopped red bell pepper
- 0.5 cup chopped green bell pepper
- 1 tablespoon fajita seasoning
- 0.5 cup shredded cheddar cheese
- 1 can refrigerated biscuit dough cut into quarters
Instructions
Preparation Steps
- Preheat oven to 400°F (200°C).
- In a large skillet, heat olive oil over medium-high heat. Add chicken and cook until browned on all sides.1.5 pounds boneless, skinless chicken breasts
- Add onion and bell peppers to the skillet and cook until tender, about 5-7 minutes.1.5 pounds boneless, skinless chicken breasts
- Stir in the fajita seasoning and cook for 1 minute more.1.5 pounds boneless, skinless chicken breasts
- Transfer the chicken and vegetable mixture to a 9x13 inch baking dish.
- Sprinkle with shredded cheddar cheese.1.5 pounds boneless, skinless chicken breasts
- Arrange the cut biscuit pieces over the chicken and cheese mixture.1.5 pounds boneless, skinless chicken breasts
- Bake for 20-25 minutes, or until the biscuits are golden brown and cooked through.
Notes
Nutrition

Ava Brooks is the home cook behind RecipeSharingHub, sharing dependable, step‑by‑step recipes for busy weeknights and easy weekend bakes. When not testing dishes, Ava snaps kitchen photos and answers reader questions in the comments. Discover the latest recipes or join the newsletter for new ideas each week.