Oh, where do I even begin with this Caesar Chicken Recipe? It’s one of those dishes that’s become an absolute staple in our house, the kind of meal that makes everyone at the table breathe a sigh of contentment. I remember the first time I tried making it myself – I was a bit intimidated by recreating that creamy, tangy Caesar flavor without all the usual fuss. But let me tell you, after a few tries, I’ve landed on a version that’s not just easy but ridiculously flavorful. It’s funny, because people always rave about the classic Caesar salad, right? Well, this Caesar chicken recipe takes all those beloved elements – the sharp parmesan, the hint of garlic, that certain je ne sais quoi of anchovy (don’t worry, it’s subtle!) – and elevates them into a hearty, satisfying main course. It’s the ultimate comfort food, but with a sophisticated twist. Honestly, if you’re looking for a weeknight wonder that feels a little bit fancy without demanding hours in the kitchen, you’ve found your winner.
What is Caesar chicken?
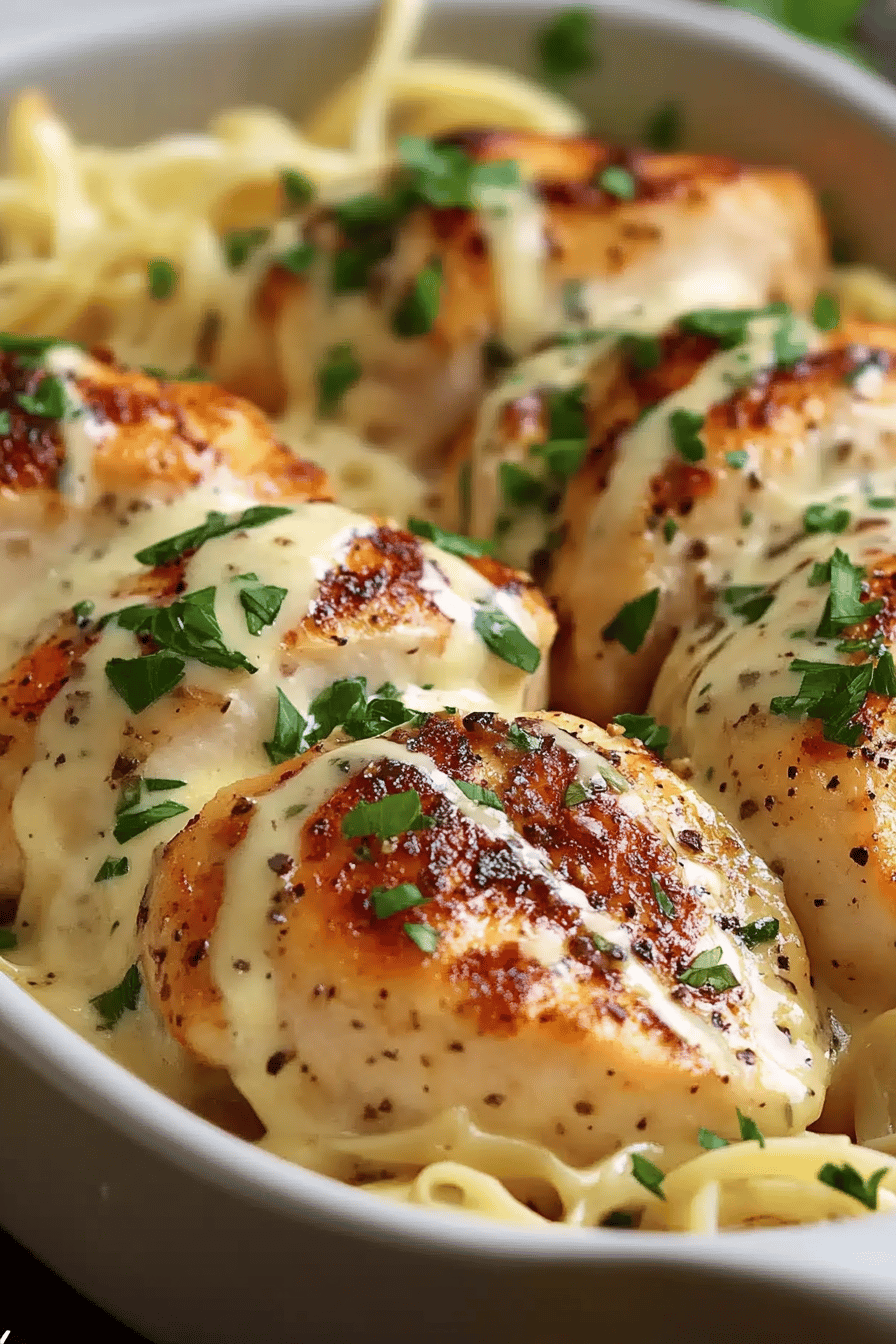
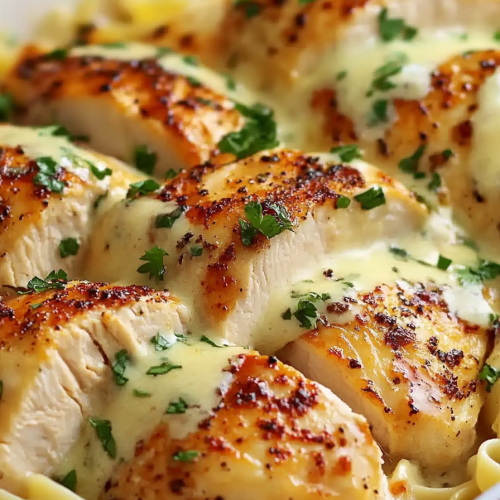
So, what exactly is this Caesar Chicken Recipe we’re talking about? Think of it as a culinary hug in dish form. It’s essentially tender chicken breasts (or thighs, if you prefer!) that are coated in a rich, creamy, and incredibly flavorful Caesar-inspired sauce. It’s not a salad, and it’s not just plain chicken; it’s a harmonious blend where the chicken soaks up all those incredible Caesar dressing vibes. The magic happens when the chicken is cooked until it’s perfectly juicy, and then it’s bathed in this luscious, umami-packed sauce that has that unmistakable tang, a whisper of garlic, the salty punch of Parmesan cheese, and just a touch of anchovy for depth. It’s the sort of dish that makes you want to lick your plate clean, and honestly, I’ve done it more times than I care to admit. It’s familiar enough to be comforting, yet exciting enough to feel like a special treat. It’s essentially taking all the things you love about a Caesar salad and turning them into a main event.
Why you’ll love this recipe?
Honestly, if I had to pick just one reason to make this Caesar chicken recipe, it would be the pure, unadulterated deliciousness. The flavor profile is just out of this world. You get that creamy, tangy sauce that clings perfectly to the chicken, with every bite delivering that satisfying combination of savory, salty, and a hint of garlic. It’s a flavor explosion, but in the best possible way. What I also adore is how surprisingly simple it is. I know, I know, sometimes recipes sound more complicated than they are, but this one is a genuine lifesaver on those busy weeknights when you want something amazing but don’t have hours to spend. You can whip it up in under an hour, and that’s including prep! And let’s talk about cost-effectiveness – the ingredients are pretty standard pantry staples or easy to find at any grocery store, so you don’t need to break the bank to create something truly special. Plus, it’s so versatile! I’ve served this over pasta, with fluffy rice, alongside roasted vegetables, and even tucked into tortillas for a Caesar Chicken Wrap. It’s a dish that truly adapts to whatever you’re in the mood for. It stands out from other chicken dishes because it has that unique Caesar flair that is so universally loved. It’s the kind of meal that makes even the pickiest eaters happy, and that, my friends, is a win in my book.
How do I make a Caesar chicken recipe?
Quick Overview
This Caesar chicken recipe is all about simplicity and big flavor. You’ll start by searing your chicken to get a nice golden crust, then create a luscious, creamy Caesar sauce right in the same pan. The chicken finishes cooking in this glorious sauce, soaking up all those amazing flavors. It’s a one-pan wonder that minimizes cleanup and maximizes taste. The whole process is remarkably straightforward, making it perfect for beginners and seasoned cooks alike. You’ll end up with incredibly tender, flavorful chicken that’s bathed in a sauce you’ll want to drizzle over everything.
Ingredients
For the Chicken:
4 boneless, skinless Chicken Breasts (about 6-8 ounces each), or 6-8 boneless, skinless chicken thighs. I find that chicken breasts give you a leaner result, but thighs stay incredibly moist. Whichever you choose, aim for them to be roughly the same thickness so they cook evenly. If your breasts are super thick, you can always pound them slightly to even them out – this is a trick I learned early on to avoid dry chicken!
For the Creamy Caesar Sauce:
2 tablespoons olive oil. This is for searing the chicken and building the sauce base.
3 cloves garlic, minced. Don’t be shy with the garlic; it’s crucial for that authentic Caesar flavor!
1/2 cup chicken broth. This forms the liquid base for our sauce. Low-sodium is great because we can control the saltiness later.
1/2 cup heavy cream. This is what makes the sauce wonderfully rich and decadent. If you want a lighter version, you can try half-and-half, but heavy cream truly delivers that luxurious texture.
1/4 cup grated Parmesan cheese. Use the good stuff, the real Parmigiano-Reggiano if you can find it. It melts beautifully and adds so much nutty, salty depth.
1 tablespoon Dijon mustard. This adds a subtle tang and helps emulsify the sauce.
1 teaspoon Worcestershire sauce. This is where a little bit of that anchovy essence comes in without being overpowering. Trust me, it makes a difference!
1/2 teaspoon dried oregano. Just a little herby note to round things out.
Salt and freshly ground Black Pepper, to taste. Remember, Parmesan is salty, so season carefully at the end.
Step-by-Step Instructions
Step 1: Preheat & Prep Pan
Get your skillet ready! You want a large, oven-safe skillet – cast iron is my absolute favorite for this. Heat 2 tablespoons of olive oil over medium-high heat. You’re looking for the oil to shimmer, but not smoke. While the pan heats up, pat your chicken dry with paper towels. This is a super important step for getting a nice sear, which means more flavor! Season both sides generously with salt and freshly ground black pepper.
Step 2: Sear the Chicken
Carefully place the seasoned chicken breasts into the hot skillet. Don’t overcrowd the pan; cook in batches if necessary. You want to sear them for about 4-5 minutes per side, until they’re beautifully golden brown. We’re not cooking them all the way through just yet; we’re just building that delicious crust. Once seared, remove the chicken from the skillet and set it aside on a plate. Don’t wipe out the pan – all those browned bits (that’s called “fond”) are pure flavor gold!
Step 3: Sauté Garlic
Reduce the heat to medium. Add the minced garlic to the same skillet. Sauté for about 30-60 seconds until fragrant. Be careful not to burn the garlic; burnt garlic is bitter and will ruin the sauce. You just want to gently toast it to release its aroma.
Step 4: Build the Sauce Base
Pour in the chicken broth, scraping up all those browned bits from the bottom of the pan. Let it simmer for about a minute to deglaze the pan and get all that delicious flavor incorporated into the broth. Then, whisk in the heavy cream, Dijon mustard, Worcestershire sauce, and dried oregano. Bring the sauce to a gentle simmer, stirring occasionally.
Step 5: Add Cheese and Simmer
Stir in the grated Parmesan cheese until it’s melted and the sauce is smooth. Let the sauce simmer gently for another 2-3 minutes, allowing it to thicken slightly. Taste the sauce and add salt and pepper as needed. Remember that the Parmesan adds saltiness, so taste before you add too much!
Step 6: Return Chicken to Pan
Nestle the seared chicken breasts back into the skillet, submerging them into the creamy Caesar sauce. Spoon some of the sauce over the top of the chicken as well. Make sure the chicken pieces aren’t too crowded so they can cook evenly in the sauce.
Step 7: Finish Cooking
Cover the skillet and let the chicken simmer gently in the sauce for about 8-12 minutes, or until the chicken is cooked through and reaches an internal temperature of 165°F (74°C). The exact time will depend on the thickness of your chicken. You can also pop the oven-safe skillet into a preheated oven at 375°F (190°C) for this step if you prefer, which can help cook it more evenly.
Step 8: Rest & Serve
Once the chicken is cooked, remove the skillet from the heat and let it rest for 5 minutes. This allows the juices to redistribute, ensuring super moist chicken. Spoon the extra sauce from the pan over the chicken before serving. Garnish with extra Parmesan cheese, or some fresh parsley if you’re feeling fancy!
Step-by-Step Instructions (Alternative for Chicken Thighs)
If you’re using chicken thighs, the process is almost identical! You’ll sear them for about 5-6 minutes per side until nicely browned. Then, return them to the simmering sauce and let them cook through, which might take just a few minutes longer than breasts, often around 10-15 minutes, until they’re tender and juicy. Thighs are pretty forgiving and hard to overcook, which is why I love them!
What to Serve It With
This Caesar chicken recipe is so wonderfully versatile, you can dress it up or down depending on the occasion! For a proper breakfast treat that feels like a weekend indulgence, I love serving a smaller portion of the saucy chicken alongside some fluffy scrambled eggs and a piece of toasted sourdough. The creamy sauce is surprisingly good with eggs! For a more elegant brunch, think about plating the chicken beautifully over a bed of creamy polenta or even some roasted asparagus. A crisp, dry white wine like a Pinot Grigio is perfect here. As a dessert? Well, this is definitely not a dessert dish, but if you’re having a light dinner and want something to finish, perhaps a small scoop of this chicken with some crusty bread to mop up every last bit of sauce is heavenly. For those cozy snack moments or a casual weeknight dinner, my go-to is a big bowl of pasta tossed with the saucy chicken, or serving it with a simple side of roasted potatoes. We also love making Caesar chicken wraps for an easy lunch – just shred the chicken and tuck it into a tortilla with some romaine lettuce and a drizzle more of the sauce. My kids also absolutely love this served with some simple steamed broccoli; they’re usually too busy devouring the chicken to even notice the green stuff!
Top Tips for Perfecting Your Caesar Chicken Recipe
There are a few little tricks I’ve picked up over the years that really elevate this Caesar chicken recipe from good to downright spectacular. First off, when it comes to the chicken, don’t skip the step of patting it completely dry before searing. Seriously, this is the secret to a beautiful golden-brown crust, and that crust adds so much depth of flavor. If you use chicken breasts, pounding them slightly to an even thickness is also key to preventing dry, overcooked edges while the center catches up. For the sauce, using fresh garlic is a must; it makes such a difference compared to powder. And while you might be tempted to skip the Worcestershire sauce, please don’t! It provides that essential umami that makes Caesar dressing so addictive, and it’s not overtly fishy in this context. I’ve experimented with lighter cream options, and while they work, they just don’t yield that same rich, luscious texture that makes this dish so comforting. If you can, use real grated Parmesan cheese – the pre-shredded stuff often has anti-caking agents that can make your sauce a bit grainy. For mixing, there’s not much to go wrong here, but just ensure you scrape up all those delicious browned bits from the pan when you add the broth; that’s where so much flavor is hiding. When it comes to ingredient swaps, I’ve tried using Greek yogurt instead of heavy cream for a lighter version, and it worked in a pinch, but the texture was definitely different, a bit tangier and less rich. For those who are sensitive to anchovy flavor but still want that depth, a tiny bit of miso paste can sometimes be a good substitute, but I haven’t tested that extensively in this specific recipe. Baking the chicken in the sauce is a fantastic way to ensure it stays super moist, especially if you’re worried about overcooking. Just keep an eye on it and use a meat thermometer if you’re unsure – 165°F (74°C) is your golden ticket to perfectly cooked chicken.
Storing and Reheating Tips
One of the best things about this Caesar chicken recipe is how well it stores and reheats, which makes it perfect for meal prep. If you have leftovers, let the chicken and sauce cool down completely before storing. For room temperature storage, I’d say it’s best to refrigerate it within two hours of cooking. In the refrigerator, you can store the cooked chicken and sauce in an airtight container for up to 3-4 days. The sauce actually tends to thicken up a bit more as it cools, which is perfectly fine! When it comes to reheating, my preferred method is on the stovetop. Transfer the chicken and sauce to a skillet over low heat, stirring gently until heated through. You might need to add a tiny splash of chicken broth or cream to loosen the sauce up again. If you’re in a rush, you can microwave it, but I find the stovetop method preserves the texture of the chicken and sauce much better. For freezing, it’s best to freeze the chicken and sauce separately if possible, or together in a freezer-safe container. It should keep well in the freezer for about 2-3 months. When you’re ready to use it, thaw it overnight in the refrigerator and then reheat as directed. I wouldn’t recommend adding the glaze if you plan on storing it for more than a day, as it can get a bit sticky. It’s best to glaze right before serving if you’re not eating it all at once!
Frequently Asked Questions
Final Thoughts
So there you have it – my absolute go-to Caesar chicken recipe! It’s one of those dishes that proves you don’t need a ton of fancy ingredients or complicated techniques to create something truly spectacular. The way the chicken becomes so tender and flavorful, all bathed in that creamy, tangy sauce… it’s just pure comfort. What I love most is that it’s so adaptable; it’s a lifesaver for busy weeknights but impressive enough for company. If you’re a fan of classic Caesar flavors, I promise you’ll fall head over heels for this. If you’ve tried it, I’d be absolutely thrilled to hear how it turned out for you in the comments below! Did you serve it over pasta? Did your kids devour it? I’m always eager to hear your family’s reactions and any special twists you might have added. And if you’re looking for other quick and delicious dinner ideas, be sure to check out my [link to another relevant recipe, e.g., Lemon Herb Roasted Chicken] – it’s another family favorite! Happy cooking, and I can’t wait to see your beautiful Caesar chicken creations!
Caesar Chicken Recipe
Ingredients
Main Ingredients
- 4 each boneless, skinless chicken breasts
- 0.5 cup Caesar salad dressing
- 0.5 cup grated Parmesan cheese
- 0.25 cup breadcrumbs
- 1 tablespoon olive oil
- 0.5 teaspoon garlic powder
- 0.25 teaspoon black pepper
- 0.25 teaspoon salt
Instructions
Preparation Steps
- Preheat oven to 375°F (190°C).
- In a shallow dish, combine Parmesan cheese, breadcrumbs, garlic powder, salt, and pepper.
- Brush each chicken breast with Caesar dressing, then dredge in the Parmesan mixture, pressing to coat evenly.
- Heat olive oil in an oven-safe skillet over medium-high heat. Sear chicken for 2-3 minutes per side, until golden brown.
- Transfer skillet to the preheated oven and bake for 20-25 minutes, or until chicken is cooked through and reaches an internal temperature of 165°F (74°C).
- Let chicken rest for a few minutes before serving.