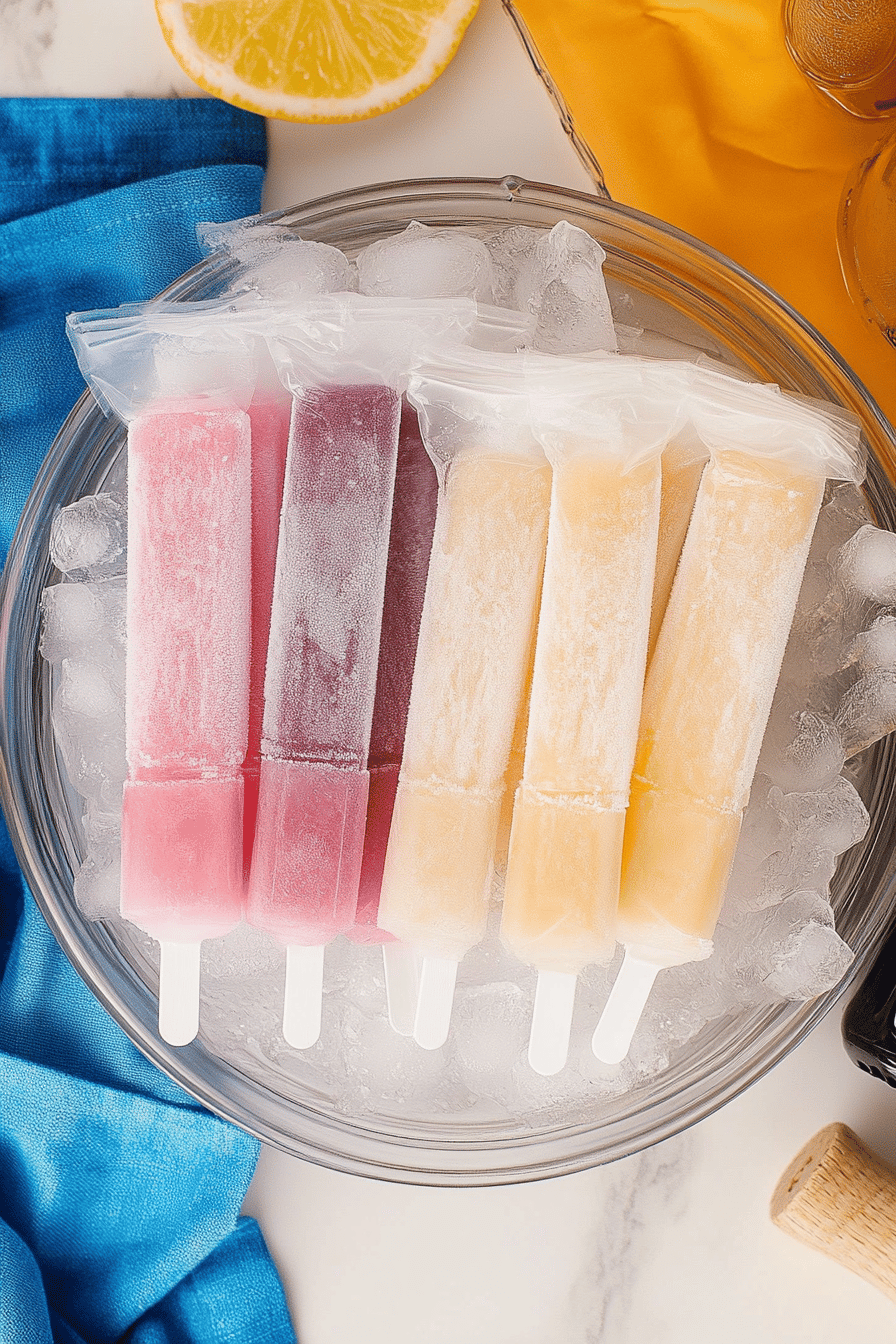
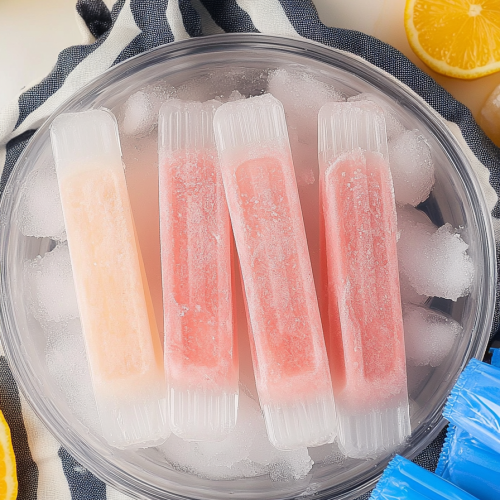
There are some days, aren’t there? The kind where the sun beats down with an almost aggressive warmth, and all you can think about is finding a way to escape it, even just for a little while. On those sweltering afternoons, I’m always rummaging through my freezer, not for a pint of rocky road, but for something a little more… sophisticated. Something that screams “I’ve earned this!” My absolute favorite antidote to a scorching day? Boozy ice pops. Seriously, forget those sugary, artificial-tasting popsicles from your childhood. These are for us, the grown-ups, who appreciate a little something extra to make a hot day feel like a mini-vacation. They’re so simple, yet so incredibly satisfying. I first started making them years ago when I was looking for a way to use up some leftover Prosecco and berries, and honestly, it was a game-changer. If you love the idea of a refreshing treat that also happens to have a little kick, then you are in for a real treat. They’re way more exciting than a simple cocktail, and so much more fun to eat!
What are Boozy Ice Pops?
So, what exactly are these magical creations? Think of them as the elegant older sibling of the ice pops you remember. Instead of just juice or artificial flavoring, we’re talking about a delightful blend of fruits, mixers, and, yes, a splash of your favorite spirit. It’s essentially a frozen cocktail in a portable, handheld format. The beauty of boozy ice pops is their incredible versatility. You can go classic with a gin and tonic vibe, tropical with rum and pineapple, or even something a bit more adventurous like a spicy margarita. The core idea is to balance the sweetness of the fruit or other mixers with the punch of the alcohol, ensuring they freeze properly without becoming rock hard. I love to think of them as edible summer cocktails, perfect for sipping (or, well, licking!) on a patio, at a barbecue, or just while lounging in the backyard. They’re not just a dessert; they’re an experience.
Why you’ll love this recipe?
There are so many reasons why I keep coming back to this boozy ice pop recipe, and I just know you’re going to fall in love with them too. First and foremost, the FLAVOR. Oh my goodness, the flavor! When you blend fresh, ripe fruit with a good quality spirit, you get a depth of taste that you just can’t replicate with store-bought options. It’s vibrant, it’s refreshing, and it’s perfectly balanced. My personal favorite is a berry and vodka concoction – the tartness of the berries cuts through the sweetness and the vodka adds just the right amount of warmth without being overpowering. Secondly, the SIMPLICITY. I cannot stress this enough. You can whip up a batch of these in about 15 minutes, pour them into your molds, and let the freezer do the rest. It’s a lifesaver on busy summer evenings when you want something special but don’t have the energy for elaborate desserts. Plus, they’re incredibly COST-EFFECTIVE. Instead of buying expensive pre-made frozen cocktails or complicated mixers, you’re using ingredients you likely already have on hand, with just a small addition of your preferred alcohol. And finally, the VERSATILITY is just unmatched. I’ve experimented with so many variations, and they all turn out wonderfully. You can swap out fruits, change the type of alcohol, add herbs like mint or basil, or even a dash of spice. They’re fantastic for adult parties, but I’ve also found they’re a huge hit when my nieces and nephews are over, and I make a non-alcoholic version for them by just omitting the liquor – they disappear in minutes! What I love most is that they feel like a real treat, a little indulgence, without being heavy or overly sweet. It’s the perfect way to cool down and feel a bit fancy, all at the same time.
How do you make ice pops?
Quick Overview
The process is ridiculously straightforward. You’re essentially blending your chosen fruits with a liquid base and your spirit of choice, then freezing them in molds. The key is getting the alcohol-to-liquid ratio just right so they freeze beautifully without becoming icy or too hard to bite into. It’s about creating a harmonious frozen treat that’s both refreshing and has that lovely grown-up twist. Trust me, this is about as simple as dessert gets, and the payoff is huge!
Ingredients
For the Main “Pop” Base:
You’ll want about 2 cups of fresh or frozen fruit. Berries are fantastic – think strawberries, raspberries, blueberries, or a mix. Peaches, mangoes, and watermelon also work wonderfully. If using frozen fruit, you might need a tiny splash more liquid. I usually opt for whatever is in season and looks best at the market, or whatever I have tucked away in my freezer.
1/2 cup of your favorite spirit: This is where you can get creative! Vodka is neutral and lets the fruit shine. Rum adds a tropical flair. Gin brings botanical notes that are lovely with citrus. Tequila is perfect for a margarita vibe. You can even use a liqueur like Limoncello for an extra zing.
1/2 cup of a mixer: This could be water, coconut water (for a tropical feel), unsweetened fruit juice (like cranberry or pineapple), or even a fizzy drink like club soda or a light tonic water if you want some bubbles even when frozen. For creamier pops, a splash of milk or a dairy-free alternative can work, but it’s not my go-to for this recipe.
1-2 tablespoons of sweetener (optional, to taste): Depending on the sweetness of your fruit, you might want a little extra. Maple syrup, agave nectar, or simple syrup are all great options. I often skip this step if my fruit is super ripe and sweet.
For Added Texture or Flavor Boosts (Optional):
A few fresh mint leaves or basil leaves for an herbaceous kick.
A squeeze of fresh lemon or lime juice to brighten flavors.
A pinch of cayenne pepper for a surprising little warmth, especially with tropical fruits or berries.
Small pieces of fruit, like diced mango or whole berries, to add texture within the pop.
Step-by-Step Instructions
Step 1: Prepare Your Fruit
If you’re using fresh fruit, give it a good wash. Hull strawberries, pit cherries, or peel and dice larger fruits like mangoes or pineapple. If you’re using frozen fruit, you can often skip this step, just make sure it’s ready to go.
Step 2: Blend the Base
In a blender, combine your chosen fruit, your spirit, and your chosen mixer. If you’re adding sweetener, a touch of citrus juice, or herbs, toss them in now too. Blend everything until it’s smooth and well combined. Don’t over-blend if you want little bits of fruit suspended in your pops – that adds a nice texture. For a smoother consistency, blend until it’s completely puréed. Taste the mixture and adjust the sweetness or tartness if needed. Remember that the flavors will be slightly muted when frozen, so don’t be afraid to make it a little more intense than you think you need.
Step 3: Add Textural Elements (If Using)
If you’re adding small pieces of fruit or herbs that you want to remain somewhat intact, gently stir them into the blended mixture. This way, they won’t get completely pulverized in the blender and you’ll have little surprises in your pops.
Step 4: Pour into Molds
Carefully pour the mixture into your ice pop molds. Leave a little bit of headspace at the top, as liquids tend to expand slightly when they freeze. If your molds have built-in sticks, make sure they are inserted correctly. If you’re using molds that require separate sticks, you might want to freeze them for about 1-2 hours first until they’re partially set, then insert the sticks so they stand up straight. This is a trick I learned after a few lopsided pops!
Step 5: Freeze
Place the filled molds in your freezer. Allow them to freeze completely. This usually takes at least 4-6 hours, but I often leave them overnight to be absolutely sure they are solid and ready to pop out.
Step 6: Unmold and Enjoy!
When you’re ready to enjoy, briefly run the outside of the mold under warm water. This helps release the pop easily. Gently pull the pop out and enjoy your delicious, homemade boozy ice pop immediately!
What to Serve It With
These boozy ice pops are pretty much a standalone star, but they do pair wonderfully with a variety of occasions and accompanying treats. For a casual backyard barbecue, they’re the perfect refreshing finale to grilled burgers and corn on the cob. Imagine handing them out as a fun, grown-up treat after everyone’s had their fill of savory food. For a more elegant affair, like a summer brunch or a cocktail party, they can be served in pretty glasses, perhaps with a tiny edible flower or a sprig of mint as a garnish. They look so chic and are a delightful surprise for guests. They also make for a fantastic, light dessert if you’ve had a richer meal earlier in the day. Picture this: a cozy evening on the porch after a hearty dinner, and you pull out a few of these to enjoy with a good book. They’re also perfect for a “treat yourself” moment on a Tuesday afternoon – you know, the kind of day that just calls for something special. I often pair mine with a simple glass of iced water or a light herbal tea, but really, they’re their own beverage and dessert all rolled into one!
Top Tips for Perfecting Your Boozy Ice Pops
After making countless batches of these, I’ve picked up a few tricks that I think really elevate them from good to absolutely amazing. Firstly, when it comes to the fruit, fresh is often best for vibrant flavor, but don’t discount frozen fruit! It’s often picked at peak ripeness and can be more budget-friendly. If you use frozen, you might need a tiny bit more liquid to get it to blend smoothly. My personal favorite “secret” is using coconut water as my liquid base for tropical flavors – it adds a subtle creaminess and a hint of sweetness that’s just divine. When you’re blending, don’t be afraid to taste and adjust. Remember that cold dulls flavors, so your mixture should taste slightly bolder than you want the final pop to be. I always add a squeeze of fresh lime or lemon juice, even if it’s just a teaspoon, because it really brightens up the fruit flavors and prevents the sweetness from becoming cloying. For the alcohol, the type you choose will significantly impact the flavor, so pick something you enjoy drinking on its own! Vodka is a safe bet if you want the fruit to be the star, but a good quality white rum can add a wonderful depth to pineapple or mango pops. I’ve learned that the alcohol content can affect freezing – too much, and your pops will be slushy and never fully freeze; too little, and they might be too icy. A ratio of about 1 part spirit to 1 part liquid (plus the fruit) usually works perfectly for me. If you’re using molds that require separate sticks, freezing the pops for about 1-2 hours until they’re semi-solid before inserting the sticks is a game-changer. It ensures your sticks stand up straight and don’t tilt, giving you perfectly upright pops every time. Lastly, if your fruit isn’t very sweet, a touch of agave nectar or maple syrup adds sweetness without that processed sugar taste. I’ve tried them all, and agave tends to blend in the most seamlessly. Experimentation is key here – have fun with it!
Storing and Reheating Tips
These boozy ice pops are best enjoyed fresh, right after they’re unfrozen. However, if you happen to have any leftovers (which is rare in my house!), storing them is pretty simple. The best way to keep them is by keeping them in their molds and storing the entire mold in the freezer. If you’ve already unfrozen them and want to store them individually, wrap them tightly in plastic wrap or parchment paper, and then place them in a freezer-safe bag or container. This helps prevent freezer burn and keeps them tasting their best. They should stay good in the freezer for about 1-2 months. If you notice they’re starting to look a little frosty or less vibrant, it’s a sign they might be getting a bit old, but they’ll still be perfectly safe to eat. Because they’re already frozen, there’s no “reheating” needed – you just let them thaw slightly on the counter for a few minutes until they’re easy to bite into, but still wonderfully cold and refreshing. If you’re planning a party and want to get ahead, making the pops a day or two in advance and keeping them in the molds in the freezer is a great strategy. Just make sure your freezer isn’t too crowded so they freeze evenly!
Frequently Asked Questions
Final Thoughts
There you have it – my absolute favorite way to beat the heat and enjoy a little grown-up indulgence. These boozy ice pops are more than just a frozen treat; they’re a little bit of sunshine, a whole lot of flavor, and ridiculously easy to make. They’ve become a staple in my summer rotation, and I honestly can’t imagine hot days without them. The fact that they’re so customizable means you can always create something new and exciting, whether you’re a berry lover, a tropical fruit fan, or someone who enjoys a bit of citrus zing. They’re perfect for parties, lazy afternoons, or just because you deserve something special. If you’re a fan of fruity cocktails or just looking for a refreshing way to enjoy your favorite spirits, I truly hope you’ll give these boozy ice pops a try. I’d love to hear what combinations you come up with and how much your friends and family enjoy them! Please share your thoughts, ratings, and any fun variations you discover in the comments below. Happy freezing, and more importantly, happy sipping!
Boozy ice pops
Ingredients
Main Ingredients
- 2 cups Fruit puree (e.g., strawberry, mango, or raspberry)
- 0.5 cup Alcohol (e.g., vodka, rum, or tequila)
- 0.25 cup Simple syrup or other sweetener (adjust to taste)
- 0.25 cup Lime or lemon juice
Instructions
Preparation Steps
- In a blender, combine the fruit puree, alcohol, simple syrup, and lime/lemon juice.
- Blend until smooth and well combined. Taste and adjust sweetness or tartness as needed.
- Pour the mixture into ice pop molds, leaving a little space at the top for expansion.
- Insert popsicle sticks and freeze for at least 4-6 hours, or until solid.
- To unmold, run the molds under warm water for a few seconds.