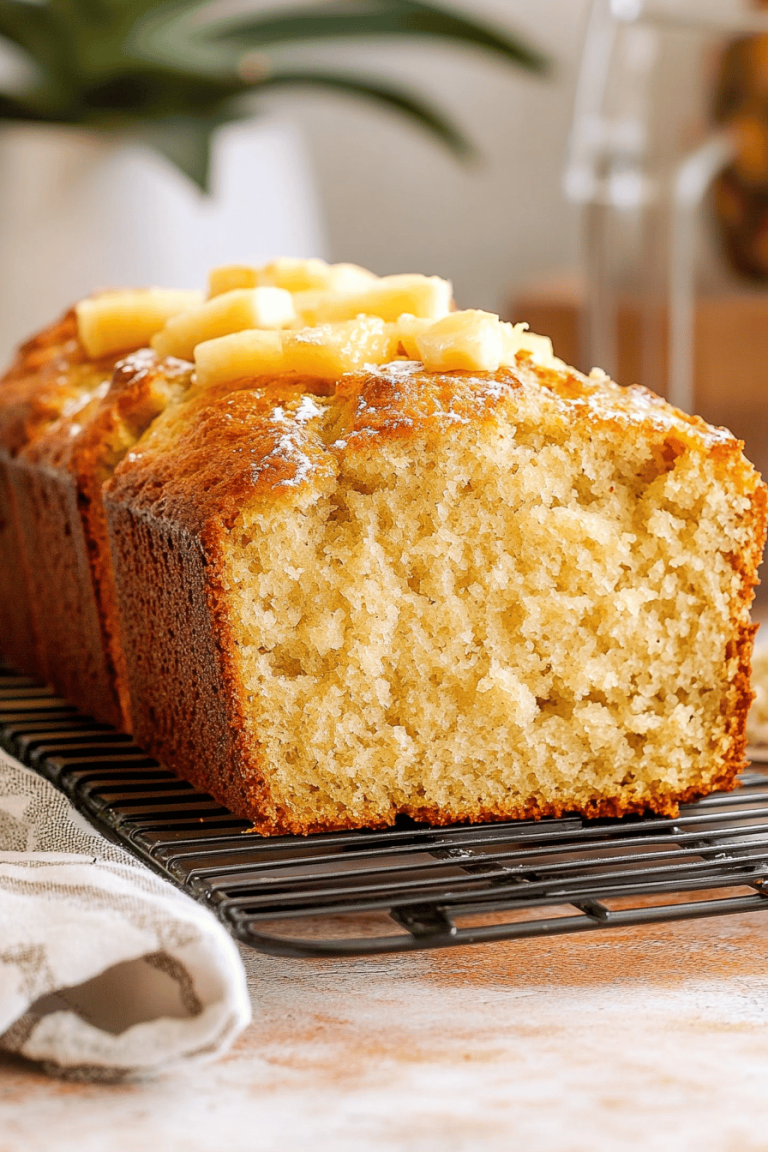
You know those mornings? The ones where the alarm feels like a personal attack and the thought of making anything more complex than toast sends you spiraling? Yeah, I’ve been there. More times than I care to admit, actually. But lately, my secret weapon for conquering those chaotic mornings (and frankly, any time I need a little comforting sweetness) has been this blended baked oatmeal. Seriously, it’s a game-changer. It’s like a hug in a pan, but way more sophisticated than my grandma’s old-school baked oatmeal. This version is unbelievably smooth, tender, and has this decadent, cake-like quality that just makes your day better. The best part? It’s ridiculously easy. So easy, in fact, that my kids can help make it, and they absolutely love it. It’s become a weekend staple, and frankly, I’m surprised it took me this long to share it with you all. Get ready to have your breakfast world rocked!
What is Blended Oat
So, what exactly *is* blended baked oatmeal? It’s exactly what it sounds like! Instead of mixing up traditional rolled oats with liquids and baking them into a rustic, sometimes chewy, dish, we take a shortcut – a delicious shortcut, I might add. We blend most of the ingredients together first, including a good portion of the oats, which creates this incredibly smooth, almost pudding-like batter before it even hits the oven. Think of it as the love child between a dense, moist cake and a comforting bowl of oatmeal. It’s essentially a way to get all the wholesome goodness of baked oatmeal but with a texture that’s far more refined and luxurious. It’s perfect for anyone who finds traditional baked oatmeal a bit too chewy or grainy. This blended version is pure velvet.
Why you’ll love this
Oh, where do I even begin with why this blended baked oatmeal is a keeper? First off, the flavor is just out of this world. It’s subtly sweet, incredibly moist, and you can customize it with whatever spices or mix-ins you love. My current obsession is adding cinnamon and a touch of nutmeg, but a little vanilla extract goes a long way too. Then there’s the simplicity. I’m talking about dump-and-blend ease. No precise measuring of oats and liquid separately, no worrying about overmixing. You literally throw most of the ingredients into a blender, give it a whirl, and pour it into a baking dish. It’s a lifesaver on busy weekday mornings when you still want something homemade and satisfying. And the cost-efficiency? Fantastic. Oats are one of the most budget-friendly staples you can have in your pantry, and the other ingredients are pretty standard. This recipe proves you don’t need fancy or expensive ingredients to make something truly special. What I love most about this blended baked oatmeal is its versatility. It’s perfect on its own, but it’s also a fantastic base for adding fruits, nuts, or even a drizzle of chocolate chips. It’s a recipe that adapts to your mood and your pantry. It’s also incredibly satisfying. It keeps you full for hours, which is a huge bonus for me, especially on those days when I’m running errands or trying to get a lot done.
How do I make a Blended
Quick Overview
Making this blended baked oatmeal is incredibly straightforward. You’ll essentially combine your wet ingredients, some of your oats, and flavorings in a blender and give it a good whirl until it’s smooth. Then, you’ll fold in any remaining whole oats for texture, pour it into a greased baking dish, and bake it until it’s puffed up and golden brown. It’s a process that takes minimal active time, and the result is a warm, comforting, and utterly delicious breakfast or dessert.
Ingredients
For the Main Batter:
2 cups rolled oats (not instant or steel-cut)
1.5 cups milk (dairy or non-dairy like almond, soy, or oat milk work beautifully – I tested almond milk and it actually made it even creamier!)
2 large eggs
1/3 cup melted unsalted butter or coconut oil (adds richness and helps it not stick)
1/4 cup maple syrup or honey (adjust to your sweetness preference)
1 teaspoon vanilla extract
1 teaspoon baking powder (for that lovely lift)
1/2 teaspoon cinnamon (or a blend of cinnamon and nutmeg for extra warmth)
1/4 teaspoon salt
For the Filling (Optional, but highly recommended for extra flavor!):
1/2 cup fresh or frozen berries (blueberries, raspberries, or chopped strawberries are divine)
OR
1/4 cup chopped apples or pears
OR
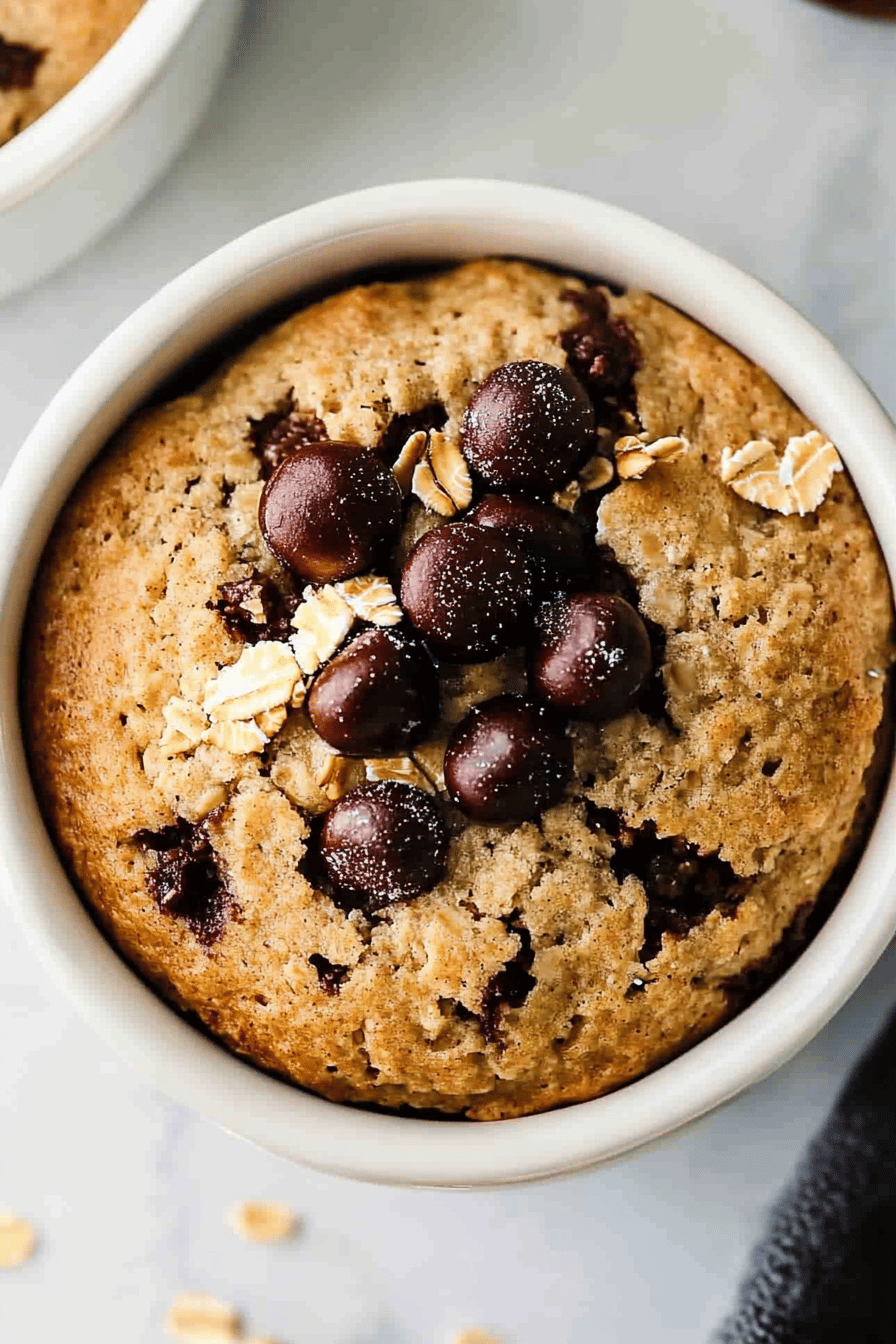
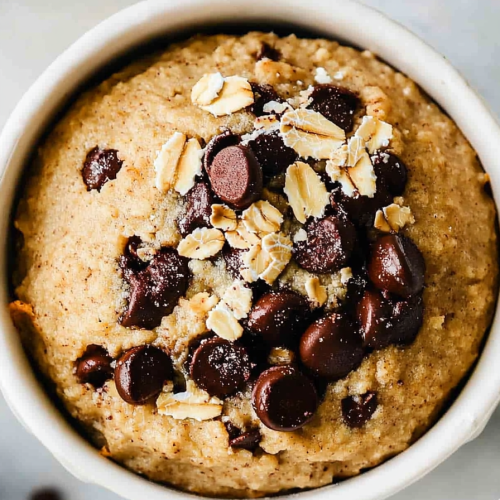
2 tablespoons chocolate chips (mini ones are great for even distribution)
For the Glaze (Optional, for that extra touch of indulgence):
1/2 cup powdered sugar
1-2 tablespoons milk (start with 1 and add more until you reach desired drizzling consistency)
1/2 teaspoon vanilla extract
Step-by-Step Instructions
Step 1: Preheat & Prep Pan
First things first, get your oven preheated to 375°F (190°C). Grab an 8×8 inch baking dish, or a similar-sized oven-safe dish. Give it a generous coating of butter, cooking spray, or line it with parchment paper. This step is crucial to prevent any sticking – trust me, you want to get this beauty out in one piece!
Step 2: Mix Dry Ingredients
In your blender, combine 1.5 cups of the rolled oats (we’re saving 1/2 cup for texture later!), milk, eggs, melted butter or oil, maple syrup or honey, vanilla extract, baking powder, cinnamon, and salt. Blending the oats not only helps create that super smooth texture but also breaks them down so they bake up beautifully tender.
Step 3: Mix Wet Ingredients
Secure the lid on your blender. Blend everything together until the mixture is mostly smooth. You might have a few tiny speckles of oat left, which is totally fine and even desirable for texture. Blend for about 30-60 seconds, making sure to scrape down the sides if needed to incorporate everything.
Step 4: Combine
Pour the blended mixture into a medium bowl. Now, add the remaining 1/2 cup of rolled oats to the bowl. Gently fold them in using a spatula or spoon. We want these whole oats to remain intact so you get little pockets of chewiness throughout the smooth batter. Don’t overmix; just ensure they’re evenly distributed.
Step 5: Prepare Filling
If you’re using fruit or chocolate chips, now’s the time to get them ready. If you’re using fresh berries or chopped fruit, give them a quick rinse and chop if necessary. If using frozen berries, you can add them straight from the freezer. This is also where you can get creative! A swirl of nut butter or some toasted nuts could be amazing here.
Step 6: Layer & Swirl
Pour about half of the blended oatmeal batter into your prepared baking dish. Scatter your chosen filling evenly over the batter. Then, carefully pour the remaining batter over the filling, making sure to cover it completely. If you’re feeling artistic, you can take a knife or skewer and gently swirl the filling through the batter for a pretty marbled effect. I always do this when I have berries in there!
Step 7: Bake
Place the baking dish in your preheated oven. Bake for 30-40 minutes, or until the edges are golden brown and the center is set and slightly puffed up. A toothpick inserted into the center should come out mostly clean (a few moist crumbs are okay, especially if you’ve added fruit). The smell that fills your kitchen at this stage is just heavenly!
Step 8: Cool & Glaze
Once baked, carefully remove the dish from the oven and let it cool on a wire rack for at least 10-15 minutes. This is important for it to set up properly. While it’s cooling, whisk together the powdered sugar, 1 tablespoon of milk, and vanilla extract for the glaze. Add more milk, a tiny bit at a time, until you reach a drizzling consistency. Drizzle it over the slightly cooled baked oatmeal. I love doing this because it adds a touch of sweetness and a beautiful finish.
Step 9: Slice & Serve
After it’s cooled sufficiently (warm is delicious, but not piping hot), slice it into squares. Serve warm, perhaps with an extra dollop of yogurt, a splash of milk, or a few more fresh berries. It’s pure comfort!
What to Serve It With
This blended baked oatmeal is so versatile, it truly works for any meal of the day! For breakfast, it’s fantastic on its own, but a simple cup of good coffee or tea is its perfect morning companion. I sometimes add a small spoonful of Greek yogurt on top for a bit of tang. For a more leisurely brunch, I like to present it in slightly larger portions, perhaps with a side of crispy bacon or some fresh fruit salad. A mimosa or a sparkling cider would be lovely alongside it to make it feel extra special. As a dessert, it’s surprisingly elegant. A scoop of vanilla bean Ice Cream melting over a warm slice is pure bliss, or a drizzle of chocolate sauce takes it to another level. For those cozy snack times when you just need something sweet and satisfying, it’s perfect with a glass of milk or even a warm mug of hot chocolate. My family has a tradition of having this on Sunday mornings, often with some scrambled eggs on the side to make it a complete meal. I’ve also found it pairs beautifully with a side of fresh peach slices when they’re in season – the sweetness of the peaches complements the warm spices in the oatmeal perfectly.
Top Tips for Perfecting Your Blended Baked Oatmeal
I’ve made this blended baked oatmeal more times than I can count, and over the years, I’ve picked up a few tricks that make it even better. First, regarding the oats: use good quality rolled oats. Instant oats will get too mushy, and steel-cut oats won’t blend properly and will affect the texture. Make sure you’re using at least 1.5 cups in the blender for that signature smoothness. When it comes to mixing, the key is *not* to over-blend the batter after you add the remaining whole oats. You want those little bits of texture; they are what give it that satisfying chew. Just a gentle fold is all it takes. For swirling the filling, don’t go crazy! A few gentle passes with a knife or skewer will give you a lovely marbled effect without making the batter too messy. If you’re adding berries and they’re particularly juicy, you might want to give them a very light pat with a paper towel, especially if you’re not using them immediately. This helps prevent excess moisture from making the final baked oatmeal too wet. My go-to ingredient swap that I’ve tested extensively is using oat milk for an even creamier result, but almond or soy milk are excellent too. If you’re dairy-free, just make sure your butter substitute is a good quality one that melts well. For baking, ovens can be finicky. If yours tends to run hot, you might want to check it a few minutes earlier. If it’s a bit cooler, it might take a few extra minutes. The toothpick test is your best friend here – it should come out with just a few moist crumbs, indicating it’s perfectly cooked through but still moist. And for the glaze! Don’t be afraid to adjust the milk. You want it to be thin enough to drizzle but not so thin that it just runs off everywhere. It’s all about finding that perfect, luscious consistency. One mistake I made early on was not greasing my pan well enough, and let me tell you, trying to scrape stuck-on oatmeal from a baking dish is NOT my idea of fun. So, really coat that pan!
Storing and Reheating Tips
One of the best things about this blended baked oatmeal is how well it keeps. You can totally make it ahead of time, which is a lifesaver for busy mornings. If you have any leftovers, store them covered at room temperature for up to 24 hours if your kitchen isn’t too warm. For longer storage, it’s best to pop it into the refrigerator. Make sure it’s in an airtight container or well-covered with plastic wrap. It will stay good in the fridge for about 3-4 days. The texture might change slightly, becoming a bit firmer, but it’s still delicious. If you want to keep it even longer, you can freeze it! Cut it into individual portions, wrap each piece tightly in plastic wrap, and then place them in a freezer-safe bag or container. It should last in the freezer for about 2-3 months. To reheat, you have a few options. You can gently warm individual slices in the microwave for about 30-60 seconds, or if you have a larger piece, you can pop it in a toaster oven or a regular oven at around 350°F (175°C) for about 10-15 minutes until heated through. If you froze it, I recommend thawing it in the refrigerator overnight before reheating. For the glaze, I usually recommend adding it just before serving if you plan on storing leftovers. If you add it before storing, it can sometimes make the baked oatmeal a bit soggy, especially in the fridge. If you want to glaze it before reheating, you can do so after it’s warmed up.
Frequently Asked Questions
Final Thoughts
Honestly, this blended baked oatmeal has earned its spot in my recipe rotation because it’s just so darn good and so incredibly easy. It’s the perfect way to enjoy a wholesome, satisfying breakfast without spending hours in the kitchen. The velvety texture, the comforting flavors, and the sheer simplicity make it a winner every single time. Whether you’re rushing out the door on a Tuesday or having a lazy Sunday brunch, this recipe has got you covered. It’s a testament to how simple ingredients can transform into something truly special with just a little blending and baking. If you love this recipe, you might also enjoy my recipes for [Link to another related recipe, e.g., Overnight Oats] or [Link to another related recipe, e.g., Healthy Banana Bread]. They share that same spirit of easy, delicious, homemade goodness! I can’t wait to hear how yours turns out! Please leave a comment below and let me know your favorite flavor combinations or any fun twists you’ve tried. Happy baking!
Blended Baked Oatmeal
Ingredients
Main Ingredients
- 1 cup rolled oats
- 1 cup milk dairy or non-dairy
- 0.5 cup banana ripe, mashed
- 1 large egg
- 0.25 cup maple syrup or other sweetener
- 1 teaspoon vanilla extract
- 0.5 teaspoon baking powder
- 0.25 teaspoon cinnamon
- 0.125 teaspoon salt
Instructions
Preparation Steps
- Preheat your oven to 375°F (190°C) and grease a small baking dish.
- In a blender, combine rolled oats, milk, mashed banana, egg, maple syrup, vanilla extract, baking powder, cinnamon, and salt.
- Blend until smooth and creamy. The consistency should be like thick pancake batter.
- Pour the blended mixture into the prepared baking dish.
- Bake for 25-30 minutes, or until the center is set and the edges are lightly golden.
- Let it cool slightly before serving. Serve warm with your favorite toppings.