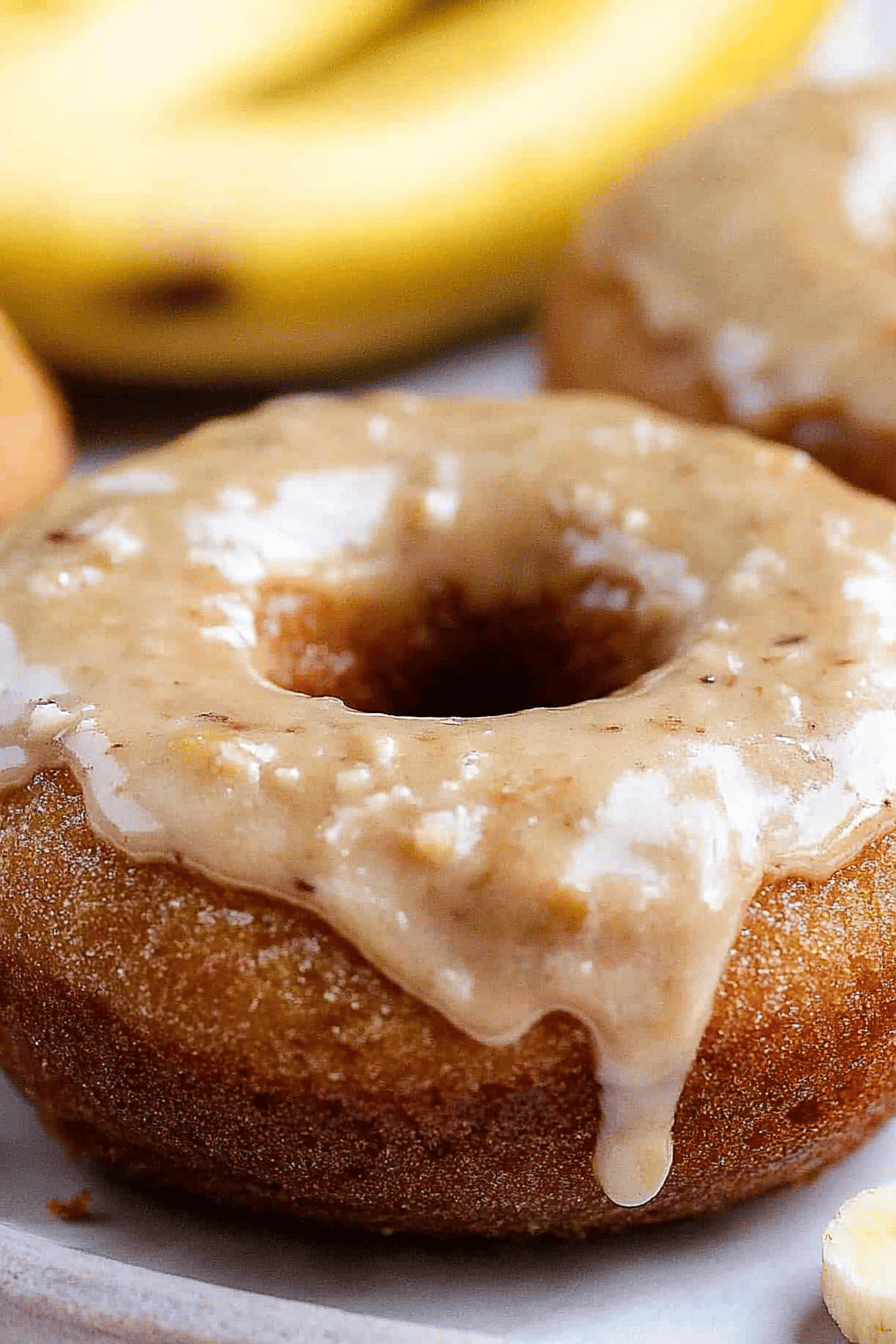
You know those days? The ones where the pantry is looking a little sad, but you’ve got a few browning bananas staring you down, practically begging to be used? Yeah, me too. And usually, my go-to is my famous Banana Bread. But lately, I’ve been craving something a little more… fun. Something that feels a bit more like a treat, but still uses up those overripe gems. Enter these incredible banana bread donuts. Seriously, if you love the comforting, moist goodness of banana bread, but want it in a portable, bite-sized, bakery-worthy package, you absolutely *have* to try these. They’re like a hug in donut form, and way easier than you might think. They’ve become my absolute lifesaver on busy mornings and a guaranteed hit whenever friends pop over unexpectedly.
What is banana bread donuts?
So, what exactly are banana bread donuts? Think of it as your favorite classic Banana Bread Recipe, but transformed into individual, baked donuts. Instead of a loaf pan, we bake them in a donut pan, which gives them that iconic ring shape. The batter is wonderfully moist and rich, packed with mashed banana flavor, and often has a hint of cinnamon or nutmeg. The magic really happens with the topping or glaze, which takes them from “delicious baked good” to “oh-my-goodness-I-need-another-one.” It’s essentially the best of both worlds: the familiar comfort of banana bread and the irresistible appeal of a fresh donut. They’re not fried, so they feel a little lighter, and you can customize them so many ways!
Why you’ll love this recipe?
There are so many reasons why this Banana Bread donuts recipe has earned a permanent spot in my recipe binder, and I just know you’re going to feel the same way. First off, the FLAVOR. Oh my gosh, the flavor. They taste exactly like the banana bread you know and love, but somehow even better because they’re warm, slightly sweet, and perfectly spiced. The bananas really shine through, and if you use really ripe ones, you get this incredible natural sweetness and moisture that’s just divine. Secondly, the SIMPLICITY. I’m not kidding when I say this is easy. You just mix a few things together, pour them into a donut pan, and bake. There’s no complicated rising or kneading involved. It’s honestly one of the most straightforward baking projects you can tackle, even if you’re not usually a baker. What I love most is how cost-efficient they are, too. You’re using up ingredients you probably already have, like those bananas sitting on the counter, and a few pantry staples. Plus, they are SO VERSATILE. I’ll get into more ideas later, but you can dress them up or down so easily. They’re perfect for a quick breakfast, a delightful afternoon snack, or even a simple dessert. They’re a step up from just a slice of banana bread, making them feel extra special without adding extra effort. Honestly, when I’m craving something sweet at 10 pm but don’t want to bake a whole cake, this is my go-to. They bake up so quickly!
How do you make banana bread donuts?
Quick Overview
Making these banana bread donuts is incredibly straightforward. We’ll start by mashing our ripe bananas and then mixing them with wet ingredients like eggs, oil, and vanilla. Separately, we’ll whisk together our dry ingredients – flour, sugar, leavening agents, and spices. Then, we combine the wet and dry ingredients just until they’re incorporated. The batter gets spooned into a greased donut pan, baked until golden and springy, and then finished off with a delicious glaze or topping while they’re still warm. It’s a quick process that yields incredibly satisfying results. This method ensures a moist, tender donut every time.
Ingredients
For the Main Batter:
2-3 very ripe bananas, mashed (about 1 ½ cups)
2 large eggs
½ cup vegetable oil (or melted coconut oil for a slightly different flavor)
1 teaspoon vanilla extract
¾ cup granulated sugar (you can reduce slightly if your bananas are super sweet)
1 ½ cups all-purpose flour
1 teaspoon baking soda
½ teaspoon salt
½ teaspoon ground cinnamon
¼ teaspoon ground nutmeg (optional, but adds a lovely warmth)
For the Filling (Optional but Recommended!):
½ cup chocolate chips (mini or regular)
½ cup chopped walnuts or pecans (optional)
For the Glaze:
1 cup powdered sugar
2-3 tablespoons milk (or buttermilk for a tangier flavor)
½ teaspoon vanilla extract
Step-by-Step Instructions
Step 1: Preheat & Prep Pan
First things first, get your oven preheating to 350°F (175°C). This is crucial because you want the oven to be at the right temperature from the moment the donuts go in. Next, grab your donut pan. You know, the one with the little rings? Give each cavity a good coating of baking spray or brush it with melted butter. Don’t skimp here! A well-greased pan is your best friend when it comes to getting those donuts out cleanly. I usually give mine an extra little spray just to be safe.
Step 2: Mix Dry Ingredients
In a medium bowl, whisk together the all-purpose flour, baking soda, salt, cinnamon, and nutmeg (if you’re using it). Whisking them together ensures that the baking soda and spices are evenly distributed throughout the flour. This step is super important for a consistent rise and even flavor. You don’t want pockets of spice or, worse, a donut that didn’t rise properly because the baking soda wasn’t mixed in well. Give it a good whisk until everything looks uniform.
Step 3: Mix Wet Ingredients
In a separate, larger bowl, mash your super ripe bananas. I like to use a fork and get them nice and smooth, but a few little lumps are totally okay – they add character! Then, add in your eggs, vegetable oil, vanilla extract, and granulated sugar. Give this a good whisk until everything is well combined and the mixture is smooth. The oil is what gives these donuts their signature moistness. And for the bananas, the riper the better! Those dark spots mean maximum sweetness and flavor.
Step 4: Combine
Now, it’s time to bring the wet and dry ingredients together. Pour the dry ingredients into the wet ingredients. Here’s a little trick I learned: don’t overmix! Gently fold everything together with a spatula or wooden spoon until *just* combined. A few streaks of flour are perfectly fine. Overmixing develops the gluten in the flour too much, which can lead to tough donuts, and we definitely don’t want that. We’re aiming for a thick, but pourable batter.
Step 5: Prepare Filling
If you’re adding chocolate chips or chopped nuts, now’s the time to gently fold them into the batter. This is totally optional, but I find that a few chocolate chips scattered throughout makes these donuts absolutely irresistible. It’s like little pockets of gooey chocolatey goodness!
Step 6: Layer & Swirl
Carefully spoon or pipe the batter into your prepared donut pan. Fill each cavity about two-thirds to three-quarters full. Don’t overfill, or they’ll spread out too much and lose their shape. If you’re doing a swirl, like with Cinnamon Sugar or a simple jam, you can spoon about half the batter in, add a dollop of your swirl, and then top with the rest of the batter. You can also just swirl the top with a toothpick once they’re in the pan for a little visual flair. I love to do a simple cinnamon sugar sprinkle right on top of the batter before baking for an extra crunchy layer.
Step 7: Bake
Pop the donut pan into your preheated oven. Bake for about 15-20 minutes. The exact time will depend on your oven and how full you filled the pans. You’ll know they’re done when they’re golden brown around the edges and a toothpick inserted into the center comes out clean. They should also spring back slightly when you gently touch the top. Once they’re done, let them cool in the pan for just a few minutes before gently transferring them to a wire rack to cool completely.
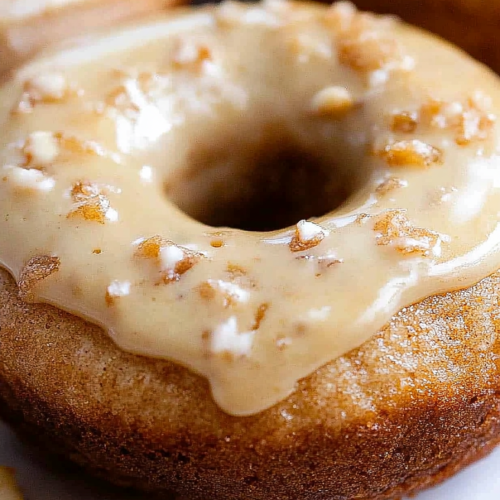
Step 8: Cool & Glaze
While the donuts are cooling on the wire rack, you can whip up the glaze. In a small bowl, whisk together the powdered sugar, milk, and vanilla extract until smooth. You want a consistency that’s thick enough to coat the donuts but thin enough to drizzle. If it’s too thick, add a tiny bit more milk; if it’s too thin, add a bit more powdered sugar. Once the donuts are completely cool, you can dip them in the glaze or drizzle it over the tops. This is where they really get that bakery-perfect finish!
Step 9: Slice & Serve
Once the glaze has set, your beautiful banana bread donuts are ready to be enjoyed! The best way to serve them is usually fresh, within a day or two of baking. They’re perfect just as they are, or you can serve them with a cup of coffee or tea. They slice beautifully with a serrated knife if you need to cut one in half, but honestly, they’re the perfect handheld size for a quick treat.
What to Serve It With
These banana bread donuts are so versatile, they really fit into almost any occasion. For a classic BREAKFAST treat, I love pairing them with a hot cup of coffee – the aroma just makes the morning so much better! They’re also great with a glass of cold milk for the kids. For a more elegant BRUNCH spread, consider arranging them on a tiered stand with some fresh fruit and maybe a light yogurt parfait. They look so pretty with a drizzle of glaze! As a simple DESSERT, they’re wonderful served warm with a scoop of vanilla Ice Cream. The contrast of the warm, spiced donut with the cold, creamy ice cream is pure bliss. And for COZY SNACKS, well, that’s their natural habitat, isn’t it? They’re perfect with a mug of hot cocoa on a chilly afternoon or shared with friends over a cup of tea. My family has a tradition of having these on Saturday mornings after a big week, and it just feels so special without being a huge fuss.
Top Tips for Perfecting Your Banana Bread Donuts
I’ve made these banana bread donuts more times than I can count, and through a few little mishaps, I’ve learned a thing or two that really helps them turn out perfectly every time. Let’s talk ZUCCHINI PREP, for example, though in this case it’s BANANA PREP! Using really ripe bananas is key. I mean, the spottier and browner, the better. They mash up so easily and contribute so much more natural sweetness and moisture than just slightly yellow bananas. Make sure you mash them well, but don’t stress about getting them perfectly smooth; a few small lumps are totally fine and actually add a nice texture. For MIXING ADVICE, the golden rule is: don’t overmix the batter once you add the dry ingredients to the wet. Seriously, just mix until it’s *barely* combined. A few streaks of flour are okay. Overmixing develops gluten, making your donuts tough, and we want them tender and fluffy. You can even stop mixing when it looks a little under-mixed, as the residual heat will help finish the job. When it comes to SWIRL CUSTOMIZATION (if you decide to add one, like chocolate chips or nuts), gently fold them in at the very end. Don’t over-stir, or you’ll break them up too much. For INGREDIENT SWAPS, I’ve tested using half whole wheat flour with all-purpose flour, and it works well, giving them a slightly nuttier flavor and denser texture. You can also experiment with different spices – a pinch of cardamom or allspice can be lovely additions. For BAKING TIPS, make sure your oven is fully preheated. I also like to rotate my donut pan halfway through baking if I notice one side browning faster than the other. And don’t overbake! A toothpick should come out with moist crumbs, not completely dry. For GLAZE VARIATIONS, if you want a thicker glaze, use less milk. For a thinner glaze that’s more like a soak, use a bit more milk. You can also add a tiny pinch of salt to the glaze to balance the sweetness, or even a bit of lemon zest for a bright counterpoint to the banana flavor. Trust me, these little tweaks make a big difference!
Storing and Reheating Tips
These banana bread donuts are truly best when they’re fresh, but they do store quite well, which is part of why I love them. If you’re keeping them at ROOM TEMPERATURE, store them in an airtight container for up to 2 days. They’ll maintain their lovely moisture for that time. If you plan on glazing them, it’s best to do it just before serving if they’ve been stored for more than a few hours, as the glaze can get a bit sticky in a container. For REFRIGERATOR STORAGE, they can last up to 4 days. Again, keep them in an airtight container. The glaze might become a little less crisp, but they’ll still be delicious. I usually find that they lose a little bit of their tender texture in the fridge, so if you’re going to refrigerate them, I’d recommend reheating them slightly before eating. For FREEZER INSTRUCTIONS, these are great to make ahead! Once they are completely cooled and the glaze is set (or if you’re glazing them later), wrap them individually in plastic wrap, then place them in a freezer-safe bag or container. They’ll keep well in the freezer for up to 3 months. To thaw, let them sit at room temperature for an hour or so, or gently reheat them in a low oven or toaster oven for a few minutes. For GLAZE TIMING ADVICE, if you’re freezing them, it’s best to glaze them *after* thawing and reheating. This way, the glaze stays fresh and vibrant. If you’re just storing them for a day or two at room temperature, glazing them right after they cool is perfect!
Frequently Asked Questions
Final Thoughts
So there you have it, my friends! These banana bread donuts are proof that you can take something comforting and familiar, like a classic banana bread, and give it a fun, exciting twist. They’re surprisingly simple to make, use up those overripe bananas before they go to waste, and are guaranteed to bring smiles all around. Whether you’re looking for an easy weekend breakfast, a sweet treat to share, or just a little pick-me-up, these donuts deliver. I truly hope you give them a try. I can’t wait to hear how yours turn out and what variations you come up with! Don’t forget to share your photos or leave a comment below – I love seeing your baking adventures!
Banana Bread Donuts
Ingredients
Donuts
- 0.3 cup unsalted butter melted
- 0.75 cup granulated sugar
- 2 large eggs
- 0.5 cup mashed ripe bananas
- 0.25 cup milk
- 1.5 cup all-purpose flour
- 1 teaspoon baking soda
- 0.5 teaspoon cinnamon
- 0.25 teaspoon nutmeg
- 0.25 teaspoon salt
Glaze
- 1 cup powdered sugar
- 2 tablespoons milk
- 0.5 teaspoon vanilla extract
Instructions
Preparation Steps
- Preheat oven to 350°F (175°C). Grease and flour a donut pan, or line it with parchment paper.
- In a large bowl, whisk together melted butter and granulated sugar. Beat in the eggs one at a time, then stir in the mashed bananas and milk.
- In a separate medium bowl, whisk together the flour, baking soda, cinnamon, nutmeg, and salt.
- Gradually add the dry ingredients to the wet ingredients, mixing until just combined. Do not overmix.
- Spoon the batter into the prepared donut pan, filling each cavity about two-thirds full.
- Bake for 10-12 minutes, or until a toothpick inserted into the center of a donut comes out clean.
- Let the donuts cool in the pan for a few minutes before transferring them to a wire rack to cool completely.
- While the donuts are cooling, prepare the glaze. In a small bowl, whisk together powdered sugar, milk, and vanilla extract until smooth.
- Dip the cooled donuts into the glaze, or drizzle the glaze over them.
- Let the glaze set before serving.