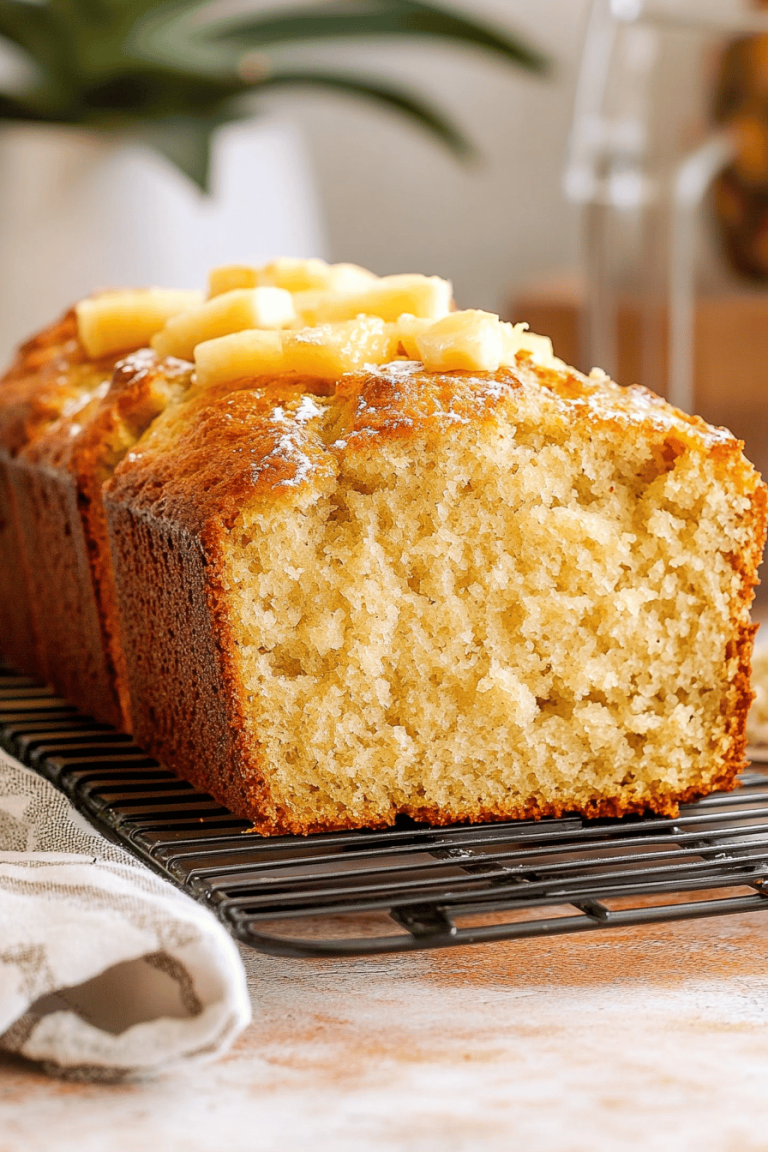
There are some recipes that just, well, *feel* like home. For me, that’s this baked omelet recipe. It’s not fancy, it’s not complicated, but oh my goodness, it’s one of those dishes that I can whip up when I’m completely exhausted and still get rave reviews. I remember the first time I tried making an omelet this way – I was so used to the stovetop flip-and-fold dance, which often ended in a messy scramble (no judgment, we’ve all been there, right?). This baked omelet, though? It’s a revelation. It’s fluffy, it’s packed with whatever deliciousness you want to throw in, and the best part? It bakes itself in the oven. Seriously, it’s a lifesaver on busy mornings when the kids are clamoring for breakfast and I’m still trying to find my slippers. Think of it as a super-powered, fuss-free frittata that’s even easier to manage. If you’ve ever admired those beautiful, tall, golden omelets in cafes and thought, “I could never do that,” then you’re my people, and this recipe is for you.
What is baked omelet?
So, what exactly *is* a baked omelet recipe, you ask? Well, it’s exactly what it sounds like – an omelet that’s cooked in the oven instead of on the stovetop. Instead of the traditional method where you pour eggs into a hot pan and swirl them around, you mix your eggs with a few other simple ingredients, pour them into a greased baking dish, add your fillings, and pop it in the oven. It puffs up beautifully as it bakes, creating a wonderfully light and airy texture that’s just divine. It’s like a shortcut to omelet perfection, minus the stress of trying to flip it gracefully. You get all the eggy goodness, all the delicious mix-ins, and a satisfying, hearty meal without any fuss. It’s essentially a wonderfully forgiving, baked Egg Casserole that happens to resemble a glorious, golden omelet.
Why you’ll love this recipe?
Why do I love this baked omelet recipeflavor is just incredible. It’s so satisfyingly eggy, and when you load it up with your favorite fillings – crispy bacon, sautéed mushrooms, vibrant bell peppers, a sprinkle of sharp cheddar – it’s pure comfort food. But the real magic is in its simplicity. I can’t stress this enough: it’s ridiculously easy. You just whisk, pour, and bake. No flipping, no worries about sticking, no last-minute panic if it’s not cooking evenly. For busy parents like me, this is a game-changer. It’s also surprisingly cost-efficient. Eggs are usually pretty budget-versatility! This isn’t just a breakfast thing. I’ve had it for a light lunch, a quick dinner, and even a decadent weekend brunch. It’s perfect when you’re craving something satisfying but don’t want to spend ages in the kitchen. What I love most about this recipe is that it feels so indulgent and impressive, yet it requires almost no effort. It’s one of those recipes that makes you feel like a culinary wizard without actually doing any wizardry. Plus, the smell that fills the house as it bakes? Absolutely irresistible. It’s the kind of dish that brings everyone running to the kitchen, eager for a slice.
How to Make Baked Omelet
Quick Overview
Making this baked omelet is a breeze! You’ll simply whisk together your eggs, milk, and seasonings, pour the mixture into a prepared baking dish, scatter your desired fillings over the top, and bake until puffed and golden. The oven does all the heavy lifting, resulting in a light, fluffy, and completely delicious meal in no time. It’s foolproof, which is exactly what I need on most days!
Ingredients
For the Main Batter:
6 large eggs: I always go for large eggs; they give the best volume. Make sure they’re at room temperature if you can – they incorporate better.
1/2 cup milk: Whole milk gives the creamiest result, but I’ve tested this with almond milk and it actually made it even creamier! Even 2% works great.
1/4 teaspoon salt: Just enough to enhance the flavor without making it too salty.
1/8 teaspoon Black Pepper: Freshly ground is always best for that little punch of spice.
Optional: A pinch of garlic powder or onion powder can add a lovely subtle savory note, especially if you’re not using onion in your fillings.
For the Filling:
This is where you can really get creative! I usually go for about 1.5 to 2 cups of chopped goodies. Some of my family’s favorites include:
- Cooked crumbled bacon or sausage
- Sautéed mushrooms and onions
- Diced bell peppers (any color!)
- Chopped spinach or kale (wilted slightly first if using a lot)
- Shredded cheese (cheddar, Monterey Jack, feta, or a blend work wonderfully)
- Diced tomatoes (seeds removed to avoid excess moisture)
- Leftover cooked chicken or ham
For the Glaze:
This isn’t a traditional glaze like you’d find on a cake, but rather a simple final touch to add a little extra something. I usually skip this step if I’m really pressed for time, but when I have a moment, I love adding:
- A tablespoon of melted butter, brushed over the top just before serving.
- A sprinkle of fresh chives or parsley for color and freshness.
- A tiny drizzle of hot sauce for those who like a little kick.
Step-by-Step Instructions
Step 1: Preheat & Prep Pan
First things first, get your oven preheating to 375 degrees Fahrenheit (190 degrees Celsius). While it’s warming up, grab an 8×8 inch baking dish or a similar-sized oven-safe skillet. I love using a cast-iron skillet because it heats so evenly, but any oven-safe dish will do. Grease it really well with butter or cooking spray. I always like to give it a good coating, especially the corners, to make sure nothing sticks. A little extra effort here saves so much heartache later!
Step 2: Mix Dry Ingredients
In a medium-sized bowl, whisk together your eggs, milk, salt, and pepper. Don’t go crazy with the whisking – you don’t want to whip too much air into it like you would for a soufflé. Just a good, thorough mix until everything is combined and there are no streaks of egg white. If you’re adding any dry seasonings like garlic powder or onion powder, now’s the time to stir them in. I usually do this step while the oven is preheating so the eggs have a moment to rest.
Step 3: Mix Wet Ingredients
Actually, I already covered this in Step 2! That’s how easy this recipe is. You’re essentially mixing your “wet” ingredients – the eggs and milk – with your seasonings. The key is just to get everything nicely incorporated. No need for fancy techniques here.
Step 4: Combine
This step is actually about combining the egg mixture with the *idea* of your fillings. You’ll be pouring the egg mixture into the prepared dish and then adding your fillings. There’s no separate “wet and dry” to combine here in the traditional baking sense. The “combination” happens when you add your fillings to the egg mixture in the dish.
Step 5: Prepare Filling
Before you pour the egg mixture, make sure all your chosen fillings are prepped and ready to go. This means any meats should be cooked, vegetables should be chopped (and sautéed if you prefer them softer, like mushrooms or onions), and cheeses should be shredded. Having everything ready to sprinkle over the eggs will make the whole process super smooth. For things like spinach or tomatoes, I like to give them a quick pat dry with a paper towel to remove excess moisture. Nobody likes a watery omelet!
Step 6: Layer & Swirl
Pour your whisked egg mixture evenly into the greased baking dish. Now, sprinkle all your delicious fillings over the top of the egg mixture. Don’t be shy! You can gently press them down a little so they’re partially submerged, which helps them integrate nicely into the baked omelet. I don’t really “swirl” in the traditional sense; it’s more about distributing the fillings evenly across the surface. You can get creative with patterns if you like, especially with different colored vegetables!
Step 7: Bake
Pop that dish into your preheated oven. Bake for about 20-25 minutes, or until the omelet is puffed up, golden brown around the edges, and the center is set. You can test for doneness by gently pressing the center with your finger; it should spring back. If it seems a little wobbly, give it a few more minutes. Oven temperatures can vary, so keep an eye on it, especially the first time you make it. You’re looking for that lovely, slightly domed appearance.
Step 8: Cool & Glaze
Once it’s perfectly baked, carefully remove the dish from the oven. Let it rest for about 5 minutes. This is crucial for allowing the omelet to set up properly so it doesn’t fall apart when you cut it. While it’s resting, if you’re going for that extra touch, you can brush it with a little melted butter, sprinkle with fresh herbs, or add a drizzle of your favorite sauce. I find the butter glaze adds a wonderful subtle richness and shine.
Step 9: Slice & Serve
After the short resting period, slice the baked omelet into squares or wedges, just like you would a cake or a casserole. Serve it immediately while it’s warm and fluffy. It’s absolutely delightful on its own, but I’ll share some serving ideas next!
What to Serve It With
This baked omelet is so versatile, it truly fits into any mealtime scenario. For a simple, comforting breakfast, I love pairing it with a perfectly brewed cup of coffee or a glass of freshly squeezed orange juice. It’s filling enough on its own, but a slice of toasted whole-wheat bread on the side is always a welcome addition. When we’re hosting a leisurely brunch, I’ll plate a generous slice with some fresh fruit salad, maybe a side of crispy home fries, and a mimosa or a sparkling rosé. The colorful fruit and the fluffy omelet make for a really elegant presentation. For those times when I’m craving something sweet after dinner but don’t want to bake a whole cake, this baked omelet can be surprisingly decadent as a light dessert. A tiny dusting of powdered sugar and a few fresh berries can transform it into something truly special. And for those ultra-lazy cozy snacks when you just need something warm and satisfying, a smaller portion is perfect with a mug of hot chocolate or a calming herbal tea. My kids, who can be notoriously picky, also love it served with a side of their favorite ketchup for dipping – which I used to think was a bit odd, but now I totally get it!
Top Tips for Perfecting Your Baked Omelet
I’ve made this baked omelet recipe so many times, and over the years, I’ve picked up a few tricks that I think really make a difference. For starters, when it comes to the eggs, don’t over-whisk them. You’re not making meringue here! Just a gentle whisk until everything is combined is perfect. Too much air can make it tough. Also, using room temperature eggs really does help them blend more smoothly with the milk, leading to a more even texture. When it comes to the fillings, my biggest piece of advice is to manage moisture. If you’re using watery vegetables like tomatoes or mushrooms, give them a good squeeze or pat them dry with paper towels before adding them. This prevents your omelet from becoming soggy. I learned this the hard way after a particularly watery mushroom incident years ago! For cheese, I always prefer shredded over sliced; it melts more evenly and incorporates better into the bake. When it comes to baking, don’t be afraid to adjust the time slightly based on your oven. Ovens can be so finicky! I usually start checking around the 20-minute mark. You’re looking for that beautiful puffed-up, golden-brown look. If it’s still jiggly in the center, give it another 5 minutes. The 5-minute resting period after it comes out of the oven is non-negotiable for me. It’s so tempting to dive right in, but letting it sit for a few minutes allows it to firm up, making it much easier to slice cleanly. For ingredient swaps, I’ve had great success using oat milk or even unsweetened cashew milk if you’re avoiding dairy. The texture is slightly different but still delicious. If you don’t have fresh herbs for garnish, a sprinkle of smoked paprika on top before baking adds a lovely subtle smoky flavor. Trust me on this one – it’s a game-changer for adding an extra layer of flavor!
Storing and Reheating Tips
One of the things I love most about this baked omelet is how well it keeps. If you have any leftovers (which is rare in my house, but it happens!), you can store them easily. For room temperature storage, it’s generally best to eat it within two hours. After that, it’s safer to refrigerate. When storing in the refrigerator, make sure the omelet has cooled down completely. Then, transfer it to an airtight container or cover the baking dish tightly with plastic wrap or aluminum foil. It should stay fresh in the fridge for about 3 to 4 days. The texture is still pretty good, though not quite as fluffy as when it’s freshly baked. For longer storage, you can definitely freeze portions of the baked omelet. Once it’s completely cooled, cut it into individual servings, wrap each piece tightly in plastic wrap, and then place them in a freezer-safe bag or container. It will keep well in the freezer for up to 2 to 3 months. When you’re ready to enjoy it, you can thaw it overnight in the refrigerator or reheat it directly from frozen, though it might take a little longer. For reheating, I usually pop a slice in a toaster oven or a regular oven at around 300-325 degrees Fahrenheit (150-160 degrees Celsius) for about 10-15 minutes, or until heated through. You can also gently reheat it in a skillet over low heat, or even in the microwave for a quick fix, though the microwave can sometimes make eggs a bit rubbery. If you’re freezing the omelet without any glaze, you can add that fresh herb or butter drizzle after reheating for the best flavor and appearance.
Frequently Asked Questions
Final Thoughts
So there you have it – my go-to, no-fail baked omelet recipe! It’s one of those dishes that has truly earned its place in my regular rotation because it’s just so darn reliable and delicious. Whether you’re making it for a busy weeknight dinner, a lazy weekend brunch, or just a satisfying snack, it always delivers. It’s the perfect canvas for whatever ingredients you have on hand, making it both economical and incredibly adaptable. I really hope you give this baked omelet recipe a try; I have a feeling it might just become a favorite in your kitchen too. If you do try it, please let me know how it turns out in the comments below! I love hearing about your culinary adventures and seeing what delicious fillings you’ve used. And if you enjoyed this, you might also like my recipe for Fluffy Pancakes from Scratch or my quick and easy Sheet Pan Roasted Vegetables. Happy baking!

Baked Omelet Recipe
Ingredients
Main Ingredients
- 6 large eggs
- 0.125 cup milk
- 0.5 teaspoon salt
- 0.25 teaspoon black pepper
- 0.5 cup shredded cheese cheddar or your favorite
- 0.25 cup diced bell pepper
- 0.25 cup diced onion
- 0.1 cup cooked ham or bacon, chopped optional
Instructions
Preparation Steps
- Preheat oven to 375°F (190°C). Grease a 9-inch pie plate or oven-safe skillet.
- In a medium bowl, whisk together the eggs, milk, salt, and pepper until well combined and slightly frothy.
- Stir in the shredded cheese, diced bell pepper, diced onion, and optional ham or bacon into the egg mixture.
- Pour the mixture into the prepared pie plate or skillet.
- Bake for 20-25 minutes, or until the omelet is set and lightly golden brown around the edges.
- Let it cool for a few minutes before slicing and serving.