Oh, where do I even begin with this Cotton Candy Fudge? It’s one of those recipes that just makes my heart sing. I remember the first time I ever tried making something like this, it was pure happy accident. I was trying to replicate that fluffy, sweet cloud of cotton candy flavor we all know and love, but in a form that wouldn’t melt into a sticky mess on a hot summer day. And let me tell you, this cotton candy fudge? It’s the answer to all my sweet cravings, and then some! It’s ridiculously easy, uses ingredients you probably already have tucked away in your pantry, and the flavor is just… pure joy. If you’re a fan of those nostalgic, childhood treats that make you feel like you’re at the fair, but want something a bit more substantial and less messy, this is your jam. It’s like a hug in fudge form, honestly. It’s incredibly similar to a classic no-bake Chocolate Fudge, but with this whimsical, sweet twist that just brightens everything up.
What is cotton candy fudge?
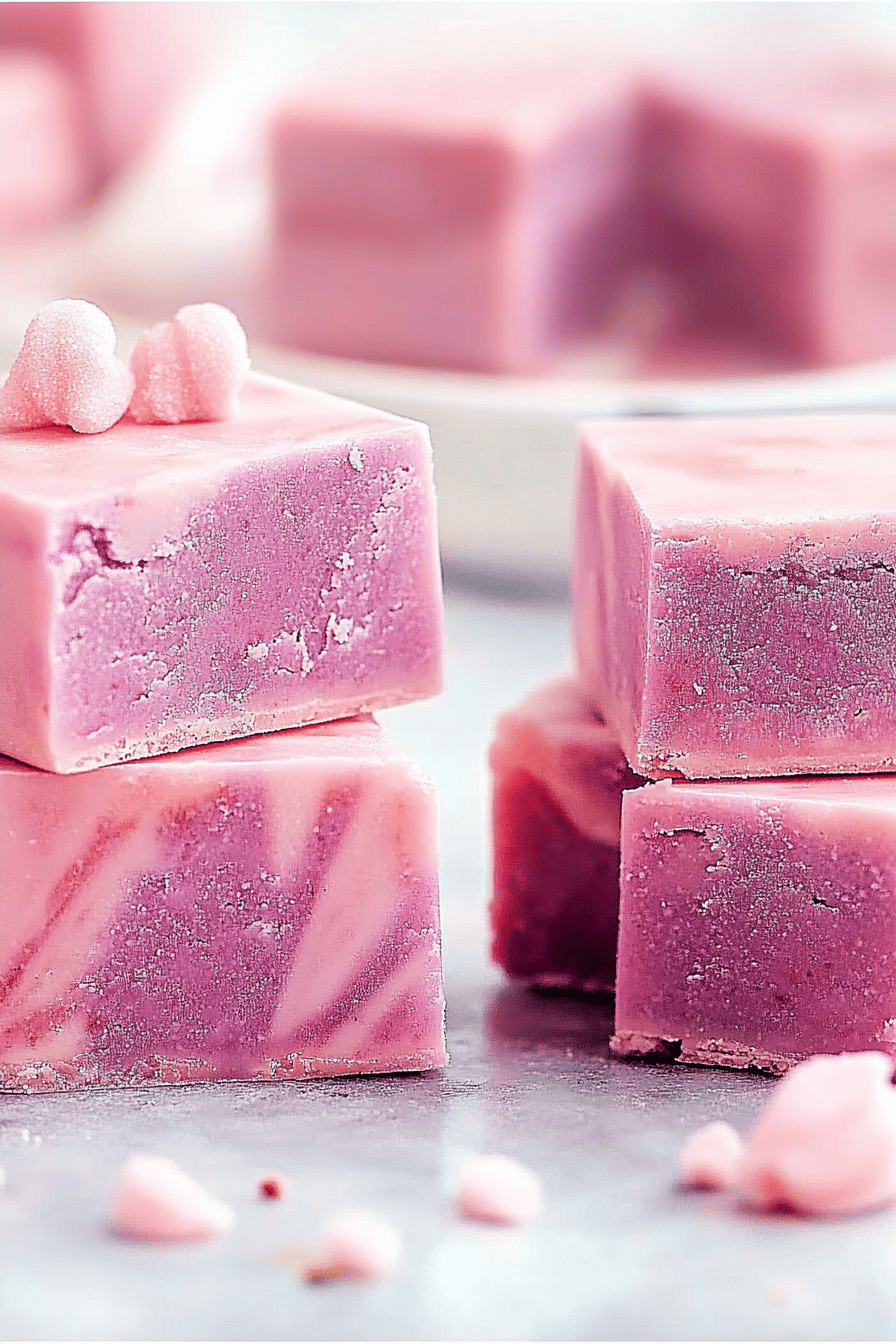
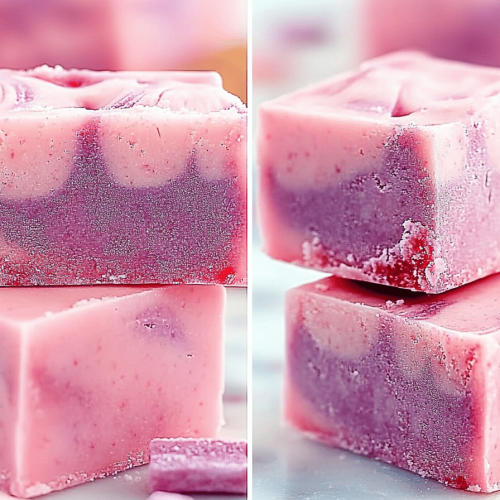
So, what exactly *is* Cotton Candy Fudge? Think of it as a delightful, no-bake fudge that captures the exact essence of spun sugar – that light, airy, impossibly sweet flavor that reminds us of carnivals and happy childhood memories. It’s essentially a creamy, sweet, melt-in-your-mouth confection that’s infused with the distinct taste of cotton candy. We achieve this magical flavor using a combination of sweet CREAM CHEESE, powdered sugar, a touch of vanilla, and, of course, the secret weapon: cotton candy flavoring. It’s not made with actual spun sugar, but the flavoring extract does an incredible job of mimicking that unique taste. It’s surprisingly simple; it’s not like traditional fudge that requires candy thermometers and a lot of careful stirring. This is more about whipping ingredients together until they’re smooth and delicious. It’s the kind of treat that looks fancy, but is secretly super easy to whip up. It’s essentially a shortcut to pure bliss, in fudge form!
Why you’ll love this recipe?
There are so many reasons why this Cotton Candy Fudge has become a staple in my kitchen, and I just know you’re going to fall head over heels for it too. Let’s talk about the flavor first because, oh my goodness, it’s divine. It’s sweet, yes, but not overwhelmingly so. The cotton candy flavor is subtle yet distinct, hitting those nostalgic notes perfectly. It’s like sunshine and happy memories all rolled into one bite. And the texture? It’s unbelievably creamy and smooth. It just melts on your tongue, leaving behind that delightful sweet finish. What I love most, though, is the sheer simplicity of it all. I mean, we’re talking about a no-Bake Recipe here! No fussing with stovetops or worrying about crystallization. You literally just whip, mix, and chill. It’s a lifesaver on busy weeknights when you need a quick sweet fix, or when unexpected guests pop over. Plus, it’s incredibly budget-friendly. The ingredients are pretty standard pantry staples, making it an affordable way to create a truly special treat. And versatility? Oh yes! You can easily adapt this. Feel like adding sprinkles? Go for it! Want a different color? A drop of food coloring works wonders. It’s perfect for parties, holidays, or just because you deserve something sweet. It stands out from regular fudge because of its unique flavor profile and its almost cloud-like texture, which is pretty remarkable for something so easy to make. It’s a guaranteed crowd-pleaser, and the smiles it brings to faces are absolutely priceless.
How do you make cotton candy fudge?
Quick Overview
Making this Cotton Candy Fudge is almost as easy as eating it! We’re talking about a simple process of beating together softened cream cheese and butter until smooth, then whipping in powdered sugar and that magical cotton candy flavoring. A touch of vanilla rounds out the flavor. The key is to get everything beautifully combined into a luscious, thick batter. Once it’s mixed, you’ll press it into a prepared pan and let it chill until firm. That’s it! No baking, no complicated steps, just pure, sweet goodness waiting to happen. It’s the ultimate stress-free dessert that delivers maximum flavor and fun.
Ingredients
For the Main Batter:
Cream Cheese: 16 ounces, softened. Make sure it’s truly softened, at room temperature. This is crucial for a smooth, lump-free texture. Don’t try to rush this by microwaving it, as it can make it greasy!
Unsalted Butter: 1 cup (2 sticks), softened. Similar to the cream cheese, soft butter is essential for a smooth, well-emulsified batter. I always unsalt mine so I have complete control over the saltiness, though for this recipe, it’s less critical.
Powdered Sugar: 4 cups, sifted. Sifting is your best friend here! It gets rid of any little lumps and ensures an ultra-smooth consistency. I usually sift it right into the bowl as I add it.
Vanilla Extract: 1 teaspoon. This adds a lovely depth and complements the cotton candy flavor beautifully. Use a good quality one for the best taste.
Cotton Candy Flavoring Extract: 1-2 teaspoons, or to taste. This is the star! You can find this online or in specialty baking stores. Start with 1 teaspoon and add more if you want a more intense flavor. Be careful, as some extracts can be quite potent!
Optional: Pink Food Coloring: A few drops, if you want that classic pink cotton candy look. Gel food coloring works best for vibrant colors without adding extra liquid.
For the Swirl (Optional but Recommended!):
White Chocolate Chips: 1 cup. These will form a creamy white swirl that contrasts beautifully with the colored fudge. Use good quality chips!
Coconut Oil or Vegetable Oil: 1 tablespoon. This helps the melted white chocolate become smooth and pourable, perfect for drizzling.
Optional: Sprinkles: For extra sparkle and fun!
Step-by-Step Instructions
Step 1: Preheat & Prep Pan
This is where we lay the groundwork for our delicious fudge. Grab an 8×8 inch baking pan. I like to line it with parchment paper, leaving an overhang on the sides. This makes lifting the fudge out later a breeze – trust me, it’s a lifesaver when it comes to clean-up! Make sure the parchment paper goes up the sides a bit, so you have handles to pull it out. You don’t need to grease the pan if you’re using parchment paper, but if you’re not, a light spray of cooking oil or a thin layer of butter works too.
Step 2: Mix Dry Ingredients
In a large mixing bowl, add your sifted powdered sugar. I always sift it in stages as I add other dry ingredients to ensure it’s perfectly smooth. While this recipe doesn’t have many dry ingredients besides the sugar, keeping it in a large bowl is important for when we start adding the wet ingredients. Having a big bowl gives you plenty of room to work with, preventing spills and making the mixing process much more enjoyable. This step is all about setting ourselves up for that incredibly smooth fudge texture we’re aiming for.
Step 3: Mix Wet Ingredients
In a separate, larger mixing bowl (if you’re using a stand mixer, this is where the magic happens!), beat the softened cream cheese and softened butter together. You want this mixture to be super smooth and creamy. Use an electric mixer (handheld or stand mixer) on medium speed. Beat them until there are no lumps of cream cheese or butter visible, and the mixture is light and fluffy. This usually takes about 2-3 minutes. It’s important they are both at room temperature for this to work properly!
Step 4: Combine
Now, we bring everything together! Gradually add the sifted powdered sugar to the cream cheese and butter mixture. Start on low speed to prevent a sugar cloud from erupting in your kitchen. Once it’s partially incorporated, increase the speed to medium-high and beat until everything is combined and the mixture is thick and smooth. Now, add in the vanilla extract and the cotton candy flavoring. If you’re using pink food coloring, add a few drops now, too. Beat again until everything is fully incorporated and the color is uniform. Don’t overmix at this stage; we just want everything well combined and beautifully smooth.
Step 5: Prepare Filling
If you’re adding a swirl, now’s the time to prepare it! In a small microwave-safe bowl, combine the white chocolate chips and the tablespoon of coconut oil (or vegetable oil). Microwave in 30-second intervals, stirring well after each, until the chocolate is completely melted and smooth. Be careful not to overheat it, as white chocolate can seize up easily. You want it to be pourable but not too thin.
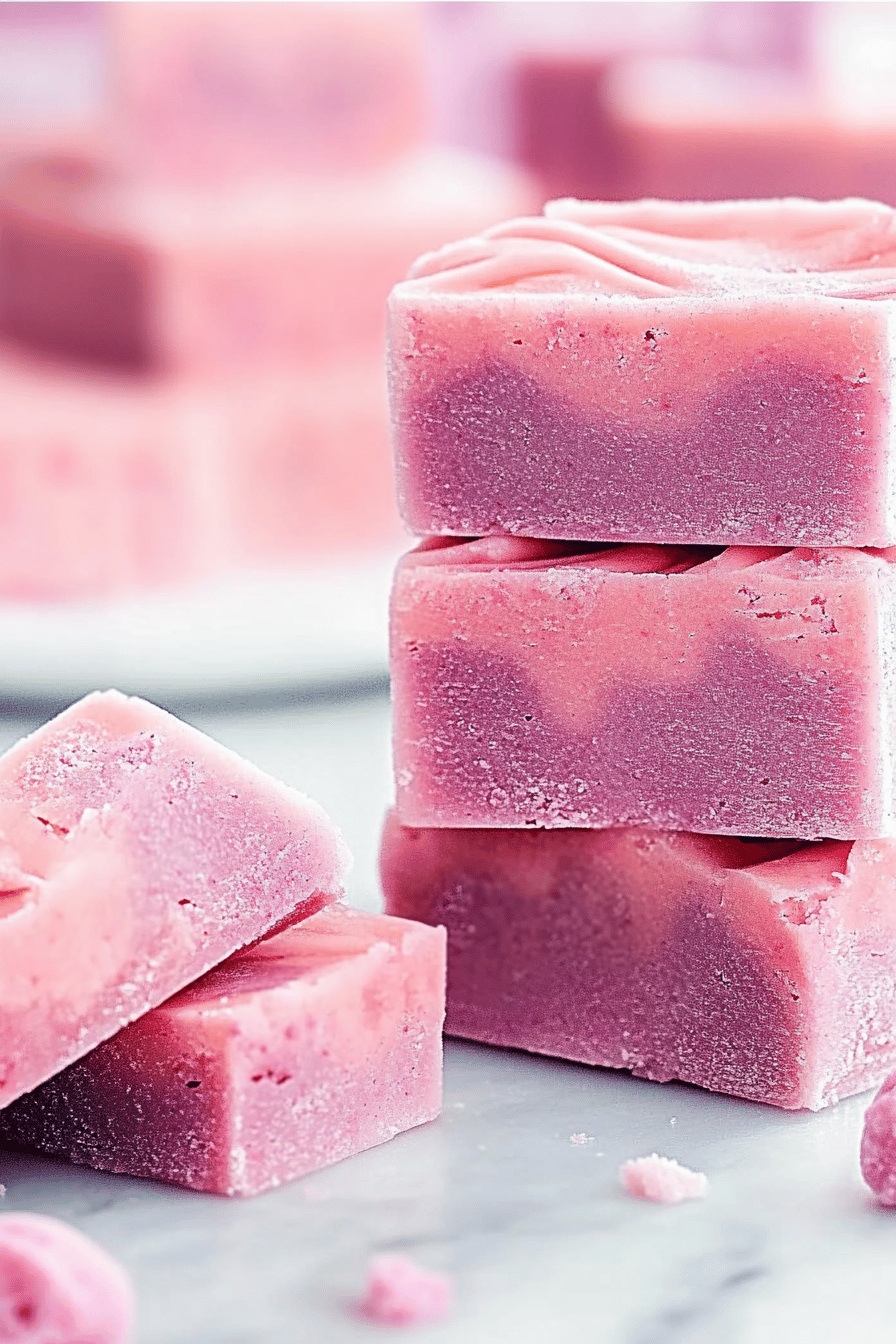
Step 6: Layer & Swirl
Spoon about two-thirds of the cotton candy fudge mixture into your prepared pan. Spread it out evenly with a spatula. Now, drizzle about half of the melted white chocolate over the fudge layer. If you’re using sprinkles, sprinkle some over the white chocolate. Spoon the remaining cotton candy fudge mixture on top of the white chocolate layer. Spread this top layer gently to cover the white chocolate. Drizzle the rest of the melted white chocolate over the top layer. Now, grab a toothpick or a skewer and gently swirl the white chocolate into the pink fudge. Don’t over-swirl, or the colors will blend too much! You want distinct swirls for that pretty visual appeal.
Step 7: Bake
This is the “no-bake” part, so technically, we’re not baking! But we *are* chilling. Cover the pan tightly with plastic wrap or aluminum foil and place it in the refrigerator. You’ll want to let it chill for at least 2-3 hours, or until it’s firm enough to slice. I usually let mine chill overnight because I find it firms up beautifully that way, but a few hours will do the trick if you’re impatient (I know the feeling!).
Step 8: Cool & Glaze
Once your fudge is firm, it’s time to get it out of the pan! Use the parchment paper overhangs to lift the entire block of fudge out of the pan and place it on a cutting board. If you’re adding a glaze, now is the time. You can simply drizzle more melted white chocolate over the top, or you can make a simple powdered sugar glaze (powdered sugar mixed with a tiny bit of milk and vanilla). Let the glaze set for about 15-20 minutes in the fridge before slicing.
Step 9: Slice & Serve
For the cleanest slices, use a sharp knife dipped in hot water and wiped dry between each cut. This prevents the fudge from sticking and gives you nice, clean edges. Cut the fudge into small, bite-sized squares. Serve at room temperature for the best texture, or slightly chilled if you prefer. Garnish with extra sprinkles if you like! This fudge is best enjoyed fresh, but will keep well for several days.
What to Serve It With
This Cotton Candy Fudge is so versatile, it works with almost anything! It’s a fantastic treat on its own, of course, but here are some of my favorite ways to serve it up:
For Breakfast: Honestly, I wouldn’t typically serve fudge for breakfast (unless it’s a special occasion!), but if you’re feeling indulgent, a tiny piece with a strong cup of coffee or a creamy latte is surprisingly delightful. It’s like a sweet little treat to kick off the day with a smile.
For Brunch: This is where it shines! Arrange small squares on a festive platter alongside fresh berries, mini pastries, and maybe even some yogurt parfaits. It adds that pop of color and fun, making your brunch spread extra special. It pairs wonderfully with a mimosa or a sparkling cider.
As Dessert: This is the classic spot for fudge! Serve a small piece after a meal, perhaps alongside a scoop of vanilla Ice Cream or a delicate fruit tart. It’s also a showstopper on a dessert table. I love serving it with a hot chocolate, especially during colder months. The sweetness of the fudge and the richness of the chocolate are a match made in heaven.
For Cozy Snacks: This is my personal favorite! When that 10 pm craving hits, a couple of pieces of this cotton candy fudge with a glass of cold milk is pure comfort. It’s the perfect sweet ending to a long day, no baking required. It’s also a hit when we have movie nights at home – everyone grabs a piece (or two!) while we settle in.
My kids always ask for this when we have friends over, and it’s always the first thing to disappear! It brings such a sense of fun and nostalgia to any occasion.
Top Tips for Perfecting Your Cotton Candy Fudge
I’ve made this Cotton Candy Fudge more times than I can count, and over the years, I’ve picked up a few tricks that I think really elevate it from good to absolutely phenomenal. Here are my go-to tips:
Cream Cheese & Butter Prep: This is non-negotiable. Make sure your cream cheese and butter are truly at room temperature. I can’t stress this enough! If they’re too cold, your mixture will be lumpy. If they’re too warm or melted, it can make the fudge greasy or too soft. I usually leave them on the counter for a good hour or two before I start. Trust me on this one; it makes all the difference for that silky-smooth texture.
Sifting is Key: Don’t skip sifting your powdered sugar! It might seem like a pain, but it’s essential for achieving that perfectly smooth, melt-in-your-mouth consistency. Lumps of powdered sugar in fudge are just… sad. Sifting ensures an even texture throughout. I usually sift it directly into the bowl I’m using for the wet ingredients.
Cotton Candy Flavoring Control: Cotton candy extract can be really potent. Always start with the lower amount (1 teaspoon) and taste the batter before adding more. You can always add more, but you can’t take it out! Different brands have different strengths, so it’s best to test it. I’ve accidentally made it too strong before, and it can be a bit overwhelming.
The Swirl Technique: For the prettiest swirls, don’t overdo it. You want distinct ribbons of white chocolate running through the pink. Use a toothpick or a thin knife and make just a few passes through the fudge. Think of it as creating art, not mixing colors. If you swirl too much, you’ll end up with a uniformly pale pink or off-white fudge, and you’ll lose that visual appeal.
Chill Time Matters: Patience is a virtue, especially with no-bake treats! While 2-3 hours in the fridge will set the fudge, letting it chill overnight really allows the flavors to meld and the texture to become perfectly firm and sliceable. If you’re in a hurry, stick it in the freezer for about 30-45 minutes, but watch it closely so it doesn’t freeze solid. I usually make mine the day before I need it.
Clean Cuts: This is a trick I learned from my grandmother. To get really clean slices, use a sharp knife. Dip it in hot water, wipe it dry with a paper towel, and then make your cut. Repeat this with each slice. It prevents the fudge from sticking to the knife and gives you those beautiful, sharp edges. It makes the final presentation look so much more professional!
Ingredient Substitutions: I’ve tested this with both unsalted butter and salted butter (just reduced the powdered sugar slightly) and it turned out great. For a dairy-free option, you could try a good quality vegan butter substitute and dairy-free cream cheese, though the texture might be slightly different. I haven’t personally tried milk alternatives for the glaze, but I imagine a splash of almond or soy milk would work.
Storing and Reheating Tips
Once you’ve made this delightful Cotton Candy Fudge, you’ll want to store it properly to keep it tasting its best. Luckily, it’s pretty forgiving!
Room Temperature: This fudge holds up well at room temperature for about 3-4 days, especially if your kitchen isn’t too warm. Store it in an airtight container, ensuring it’s not exposed to direct sunlight or humidity, which can make it soft. If it’s a very warm day, it might be best to keep it in the fridge.
Refrigerator Storage: For longer storage, or if you live in a warmer climate, the refrigerator is your best bet. Place the fudge in an airtight container. It will stay fresh and delicious for up to 2 weeks. The texture might become a bit firmer when chilled, so I usually let it sit out for about 10-15 minutes before serving if it’s been in the fridge.
Freezer Instructions: If you need to store it for an extended period, freezing is an excellent option. Wrap individual pieces tightly in plastic wrap, then place them in a freezer-safe bag or container. It can be stored in the freezer for up to 2-3 months. To thaw, simply transfer the frozen fudge to the refrigerator overnight, or let it sit at room temperature for a couple of hours. The texture will be perfectly restored!
Glaze Timing Advice: If you’ve added a glaze (like white chocolate or a simple powdered sugar glaze), it’s best to add it just before you plan to serve or store it. If you’re refrigerating or freezing with a glaze, make sure the glaze has fully set first. This prevents it from becoming sticky or smearing during storage.
Frequently Asked Questions
Final Thoughts
There you have it – my tried-and-true recipe for Cotton Candy Fudge! I just adore this recipe because it’s so incredibly joyful and surprisingly simple. It’s the perfect example of how you can take a familiar concept, like fudge, and give it a whimsical, fun twist that brings a smile to everyone’s face. It’s that perfect combination of nostalgia and deliciousness, all wrapped up in a no-bake package. It’s one of those treats that feels special enough for holidays and parties, but easy enough to whip up whenever a craving strikes. I really hope you give this a try. It’s such a rewarding bake (or rather, no-bake!) that delivers big on flavor and fun. If you love this, you might also enjoy my classic No-Bake Chocolate Fudge or my fun Rainbow Sprinkle Cookies!
I can’t wait to hear what you think! If you make this Cotton Candy Fudge, please leave a comment below and let me know how it turned out. Share your own variations or any fun memories it brings back for you! Happy baking (or chilling!)!
Cotton Candy Fudge
Ingredients
Main Ingredients
- 4 cups granulated sugar
- 2 cans evaporated milk 12 oz each
- 1 tablespoon butter
- 0.5 teaspoon salt
- 0.5 teaspoon vanilla extract
- 0.25 teaspoon cotton candy flavoring
- 0.5 teaspoon pink food coloring
- 0.5 teaspoon blue food coloring
Instructions
Preparation Steps
- Grease and line an 8x8 inch baking pan with parchment paper.
- In a large heavy-bottomed saucepan, combine sugar, evaporated milk, butter, and salt.
- Cook over medium heat, stirring constantly, until the mixture comes to a boil.
- Reduce heat to low and simmer, stirring constantly, for 5 minutes.
- Remove from heat and stir in vanilla extract and cotton candy flavoring.
- Divide the mixture into two equal parts. Tint one part pink and the other blue with food coloring. Swirl the colors together gently, being careful not to overmix.
- Pour the swirled mixture into the prepared pan. Smooth the top with a spatula.
- Let the fudge cool completely at room temperature for at least 4 hours, or until firm.
- Once firm, lift the fudge out of the pan using the parchment paper. Cut into squares.