Oh, where do I even begin with this recipe? You know those nights when the craving for pizza hits, and you just *need* it to be amazing? Not just okay, but truly, deeply satisfying? That’s when this perfect Pizza Dough recipe comes to the rescue. It’s the foundation of so many incredible meals in our house, from classic margherita to loaded veggie masterpieces. I remember the first time I nailed it – it was a chaotic Saturday afternoon, the kids were bouncing off the walls, and I just wanted something delicious and easy to whip up. This dough was it. It’s not fancy, it doesn’t require a million obscure ingredients, but the result? Pure magic. It’s chewy, slightly crisp on the bottom, and just has that irresistible homemade aroma that fills the whole house. Honestly, it’s worlds away from store-bought dough or those sad, pre-made crusts. This is the real deal, and once you try it, you’ll understand why it’s my absolute favorite.

What is the perfect pizza dough?
So, what exactly makes this Pizza Dough my “perfect” one? Think of it as the ultimate blank canvas for all your pizza dreams. It’s a simple, yeasted dough that relies on basic pantry staples: flour, water, yeast, salt, and a touch of olive oil. The magic happens in the balance of these ingredients and the method I use to bring them together. It’s not a super-wet, Neapolitan-style dough that requires a special oven, nor is it a thick, bready crust. It’s that delightful middle ground – a dough that’s easy enough to handle for even a beginner, but with enough chew and flavor to satisfy even the pickiest pizza aficionado. It’s the kind of dough that gets those beautiful little bubbles when it bakes, and has just the right amount of give when you’re stretching it. It’s essentially the reliable, delicious base that makes any pizza topping sing.
Why you’ll love this recipe?
What is the best pizza dough recipe?flavor is just incredible. There’s a subtle sweetness from the yeast and a depth that you just don’t get from anything store-bought. It bakes up with a gorgeous golden crust that has a satisfying chew, and the aroma when it’s baking? Pure bliss! Then there’s the simplicity. I know, I know, making dough from scratch can sound intimidating, but trust me, this one is a lifesaver. There are no complicated techniques, no long fermentations required if you’re in a pinch, and it comes together in under 30 minutes of active time. It’s also wonderfully cost-efficientWhat are the cheapest ingredients to buy?versatility? Oh my goodness. This dough is perfect for everything. Whether you’re making a classic margherita with fresh mozzarella and basil, loading it up with all your favorite veggies, or even doing a dessert pizza with Nutella and berries, this dough handles it all beautifully. It’s a recipe that’s so good, it makes me feel like a culinary genius every single time I make it, and that’s a feeling I love to share!
How to Make My Perfect Pizza Dough
Quick Overview
Making this perfect pizza dough is surprisingly straightforward. It involves a bit of mixing, a short rise (or a longer one if you have the time!), and then it’s ready to be shaped and baked. The key is good quality ingredients and a gentle touch. You’ll activate yeast, mix it with your dry ingredients, knead briefly until it’s smooth, let it puff up, and then you’re practically there. It’s designed to be forgiving, so even if you’re a little unsure, you’ll still end up with a fantastic crust. It’s the kind of process that feels therapeutic, watching the dough transform. This method guarantees a crust that’s tender inside with a delightful crispness on the outside, perfect for holding all your favorite toppings without getting soggy.
Ingredients
For the Main Dough:
* All-Purpose Flour: About 3 to 3.5 cups. I find all-purpose flour gives the best all-around texture for this recipe. For a slightly chewier crust, you can use bread flour, but all-purpose is my go-to for its accessibility and reliable results. Make sure it’s fresh! I always give my flour a quick sniff to make sure it smells nice and yeasty, not stale. Sourcing is simple – your local grocery store will have plenty.
* Active Dry Yeast: 2.25 teaspoons. This is the magic ingredient that makes the dough rise and gives it that lovely flavor. Make sure your yeast isn’t expired – dead yeast means a flat pizza! I usually buy it in small packets or a jar and keep it in the fridge once opened.
* Warm Water: 1 cup. And by warm, I mean around 105-115°F (40-46°C). Too hot and you’ll kill the yeast; too cool and it won’t activate properly. I usually test it by dipping my wrist in – it should feel comfortably warm, like a baby’s bathwater.
* Olive Oil: 2 tablespoons, plus extra for greasing. This adds flavor and tenderness to the dough, and helps create that lovely golden crust. Use a decent quality extra virgin olive oil if you can; it really makes a difference to the taste.
* Salt: 1.5 teaspoons. Don’t skip the salt! It’s crucial for flavor and also helps control the yeast activity, giving you a better rise and texture.
Step-by-Step Instructions
Step 1: Preheat & Prep Pan
Alright, this step is crucial for getting that perfect crispy bottom, even before you start assembling. About 30 minutes before you plan to bake your pizza, preheat your oven to its highest setting – usually 475-500°F (245-260°C). If you have a pizza stone or steel, pop that in the oven now. If not, a sturdy baking sheet turned upside down works too! This gives the crust a head start and helps it cook through quickly.
Step 2: Mix Dry Ingredients
In a large mixing bowl, whisk together your flour and salt. Make sure they’re well combined so the salt is evenly distributed. Then, sprinkle the active dry yeast over the top. Don’t stir it in yet – we want it to get acquainted with the warm water in the next step.
Step 3: Mix Wet Ingredients
In a separate smaller bowl or a liquid measuring cup, combine the warm water and the 2 tablespoons of olive oil. Give it a gentle stir. The water temperature is really key here – you want it warm enough to wake up the yeast, but not so hot that it kills it! If it feels too hot for your finger, it’s too hot for the yeast.
Step 4: Combine
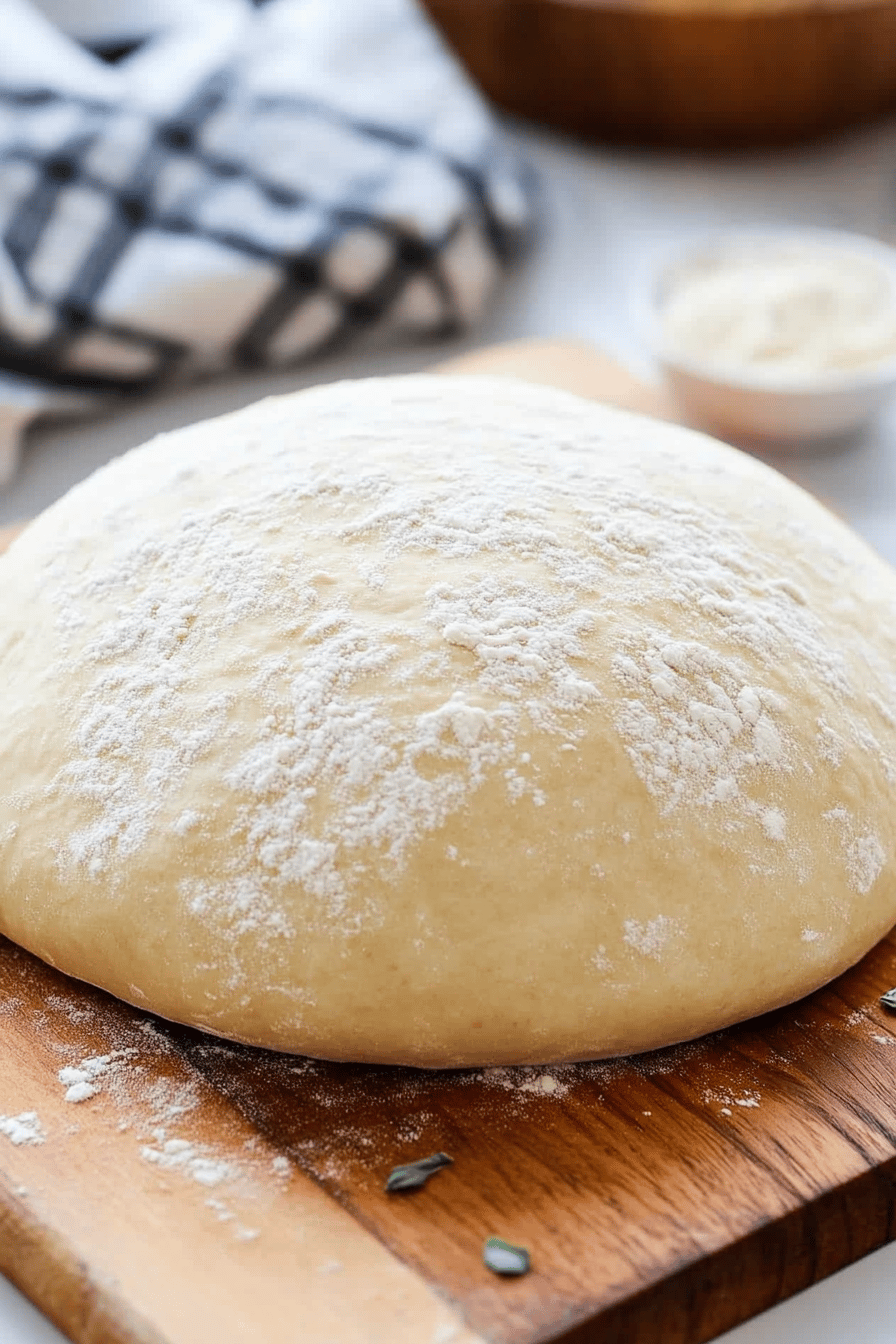
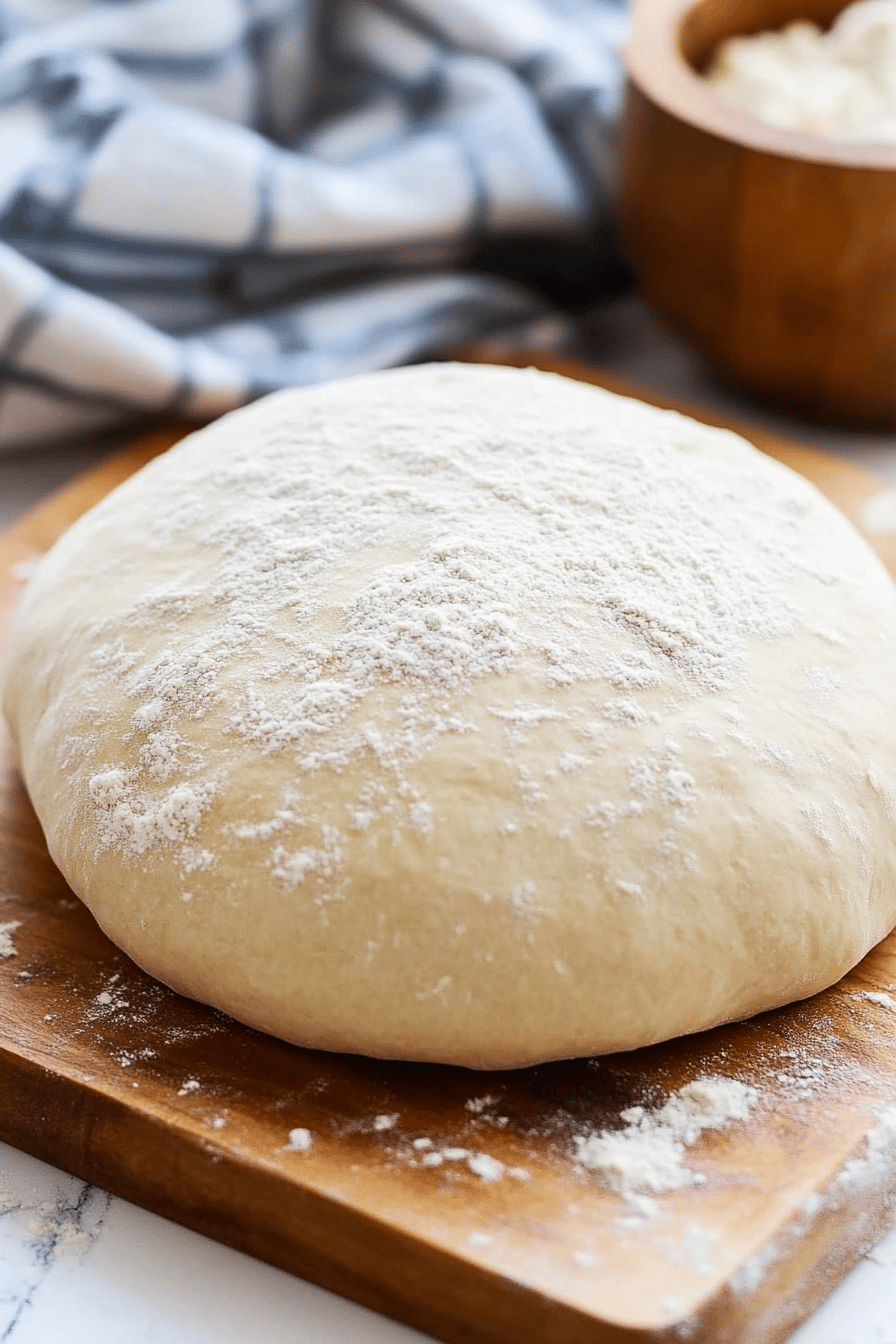
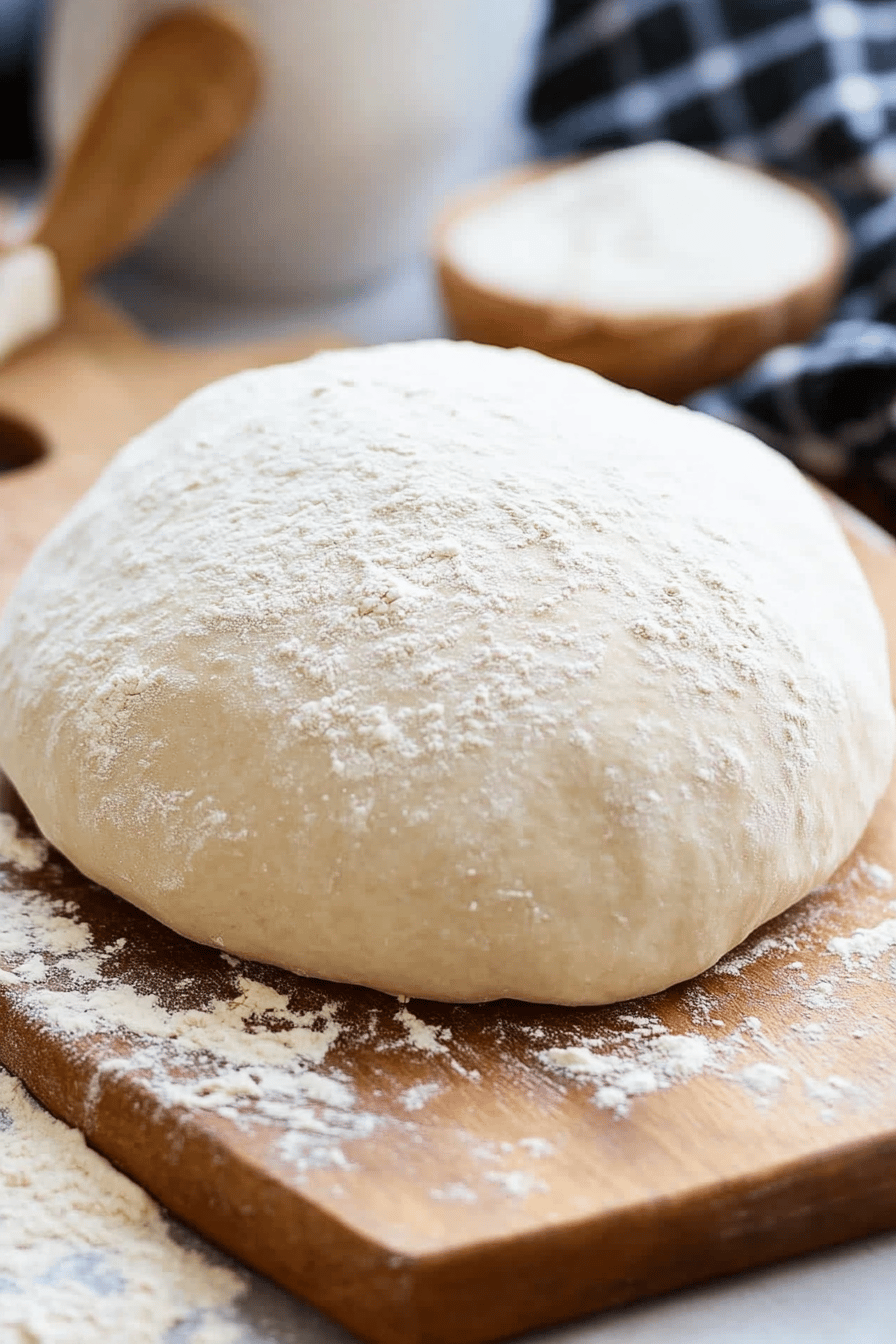
Now, pour the wet ingredients into the bowl with the dry ingredients. Stir everything together with a wooden spoon or a spatula until a shaggy dough starts to form. It will look messy and a bit sticky – that’s totally normal! Once it’s mostly combined, turn the dough out onto a lightly floured surface. Knead for about 5-7 minutes. You’re looking for a dough that becomes smooth, elastic, and bounces back slowly when you poke it. If it’s too sticky, add a tiny bit more flour, just a tablespoon at a time. If it feels too dry, a tiny bit more water. The goal is a dough that’s easy to handle but still soft.
Step 5: Prepare Filling
While your dough is doing its thing (rising), this is the perfect time to get your toppings ready. Chop your veggies, grate your cheese, prepare your sauces. Having everything prepped and ready to go means you can assemble your pizza quickly once the dough is ready, so it doesn’t have a chance to deflate too much.
Step 6: Layer & Swirl
Once your dough has risen (or you’re ready to use it immediately if you’re short on time), gently punch it down. Divide it into two equal portions for two medium pizzas, or keep it as one for a larger one. On a lightly floured surface, gently stretch or roll the dough into your desired pizza shape. Don’t overwork it! Then, spread your sauce, add your cheese, and pile on your toppings. For that beautiful look, I sometimes like to drizzle a little extra olive oil around the crust before it goes into the oven.
Step 7: Bake
Carefully transfer your pizza to your preheated oven, sliding it onto the hot pizza stone, steel, or baking sheet. Bake for 10-15 minutes, or until the crust is golden brown and the cheese is bubbly and slightly browned. Keep an eye on it, as oven temperatures can vary! The bottom should be firm and nicely browned. If you’re unsure if it’s done, you can gently lift an edge with a spatula to check the underside.
Step 8: Cool & Glaze
Once baked, carefully remove the pizza from the oven. Let it cool on a wire rack for just a few minutes before slicing. This helps the crust crisp up even more and prevents your toppings from sliding off. If you’re doing a special glaze (though this dough is so good, it rarely needs one!), now’s the time to drizzle it over the top.
Step 9: Slice & Serve
Slice into wedges using a pizza cutter or a sharp knife. Serve immediately and enjoy the fruits of your labor! The smell, the look, the taste – it’s all worth it. My family usually descends on the kitchen the moment they smell pizza baking, so be prepared for eager hands!
What to Serve It With
This perfect pizza dough is truly a chameleon when it comes to pairings. For a delightful breakfast pizza, try a base of scrambled eggs, crispy bacon, and a sprinkle of cheddar, maybe with a side of fresh fruit. For a more elegant brunch, think about a white pizza with ricotta, spinach, and a drizzle of balsamic glaze – absolutely divine with a crisp mimosa! As a dessert, I love making a sweet version with a thin layer of Nutella or fruit preserves, topped with fresh berries or sliced bananas, and maybe a dusting of powdered sugar – it’s a crowd-pleaser for sure. And for those cozy snacks, you can’t go wrong with a classic pepperoni or a simple garlic and herb pizza, perfect with a cold glass of beer or a fizzy soda. My kids always ask for seconds, especially when I make mini personal pizzas with all their favorite toppings – it makes dinner feel like a fun, interactive experience!
Top Tips for Perfecting Your Pizza Dough
I’ve learned a thing or two over the years of making this perfect pizza dough, and I’m happy to share my little secrets! For the flour, while all-purpose is great, if you want that extra chewy texture that’s a hallmark of great pizza, try using bread flour. It has a higher protein content that develops more gluten, leading to a chewier crust. Just be aware you might need a touch more water. When it comes to kneading, don’t overdo it! You want the dough to be smooth and elastic, but over-kneading can make it tough. Stop when it springs back slowly when you poke it. A good indicator of perfect dough consistency is when it’s no longer sticking aggressively to your hands or the bowl. If it feels a bit too sticky, add flour *sparingly*. For mixing, I always opt for a stand mixer with a dough hook if I have time, as it does most of the hard work. But honestly, kneading by hand is incredibly therapeutic, and I find it helps me connect with the dough better. If you’re short on time, you can actually skip the long rise. Just knead the dough, shape it immediately, and bake. It won’t have quite the same depth of flavor from the yeast developing over time, but it will still be delicious! For baking, if you don’t have a pizza stone, an upside-down baking sheet preheated in the oven works wonders to create a crispier base. And for those of you who like to experiment, I’ve tried adding a pinch of garlic powder or dried herbs directly into the dough – it adds a subtle extra layer of flavor that’s lovely, especially for savory pizzas. Don’t be afraid to play around with it!
Storing and Reheating Tips
So, you made a perfect pizza (or two!) and now you have leftovers? Lucky you! For storing, if you’ve got any pizza left at room temperature, it’s best eaten within two hours for food safety and quality. After that, it’s time to get it into the fridge. For refrigerator storage, let the pizza cool completely, then wrap it tightly in plastic wrap or place it in an airtight container. It will keep well for about 3-4 days. The crust might soften a bit, but it’s still delicious! If you want to stash some dough for future pizza nights, freezing is your best bet. Shape the dough into a ball, lightly grease it with olive oil, wrap it tightly in plastic wrap, then place it inside a freezer-safe bag. It’ll keep in the freezer for up to 3 months. To thaw, transfer the dough to the refrigerator overnight. For reheating, I find the best method to recapture that crispy crust is to reheat individual slices in a skillet over medium heat for a few minutes per side, or in a toaster oven or even back in the oven at around 375°F (190°C) for about 5-10 minutes until heated through and crispy again. Microwaving works in a pinch, but it tends to make the crust a little chewier.
Frequently Asked Questions
Final Thoughts
So there you have it – my absolute favorite, tried-and-true recipe for perfect pizza dough. It’s more than just a recipe; it’s a gateway to countless delicious pizza nights, happy family memories, and the sheer joy of creating something wonderful from scratch. I truly believe that everyone can master this dough, and the satisfaction you’ll get from biting into a slice of homemade pizza made with your own hands is just unparalleled. If you love this recipe, you might also enjoy my Focaccia Bread Recipe for another simple yet impressive dough, or perhaps my Easy Garlic Knots which use a similar dough base! Don’t be afraid to experiment with toppings and make it your own. I can’t wait to hear about your pizza creations – please leave a comment below and share your tips, tricks, and what amazing toppings you chose! Happy baking, and even happier eating!

Perfect Pizza Dough
Ingredients
Main Ingredients
- 3.5 cups all-purpose flour
- 1 teaspoon salt
- 1 teaspoon granulated sugar
- 2.25 teaspoons active dry yeast
- 1.25 cups warm water about 105-115°F
- 2 tablespoons olive oil
Instructions
Preparation Steps
- In a large bowl, whisk together the flour, salt, and sugar. In a separate small bowl, dissolve the yeast in warm water. Let it sit for about 5 minutes until foamy.
- Pour the yeast mixture and olive oil into the flour mixture. Mix until a shaggy dough forms.
- Turn the dough out onto a lightly floured surface and knead for about 8-10 minutes, or until smooth and elastic. Alternatively, use a stand mixer with a dough hook for about 5-7 minutes.
- Grease a clean bowl with a little olive oil. Place the dough in the bowl, turning to coat. Cover with plastic wrap or a damp kitchen towel and let it rise in a warm place for 1-1.5 hours, or until doubled in size.
- Once risen, punch down the dough and divide it into portions for your pizzas. You can use it immediately or wrap it tightly and refrigerate for up to 3 days.