Oh, where do I even begin with these CHEESY GARLIC breadsticks? They’re not just breadsticks, you guys. They’re little golden logs of pure happiness, dripping with garlic butter and that perfect, gooey cheese pull. I remember the first time I made these, it was for a family potluck, and I was so nervous. I’d tried making garlic bread before, but it always felt a bit… ordinary. Like something was missing. Then, my Aunt Carol, who is basically a culinary wizard, shared this gem with me, and let me tell you, it changed everything. These aren’t your average appetizer; they’re the kind of thing that disappears in minutes, leaving everyone begging for the recipe. Honestly, if you’re looking for a guaranteed crowd-pleaser that tastes like it came from a fancy Italian restaurant but is surprisingly simple to whip up at home, you’ve found it. These cheesy garlic breadsticks are my absolute go-to, and I just know they’re going to become yours too!
What are some Cheesy Garlic Breadsticks?
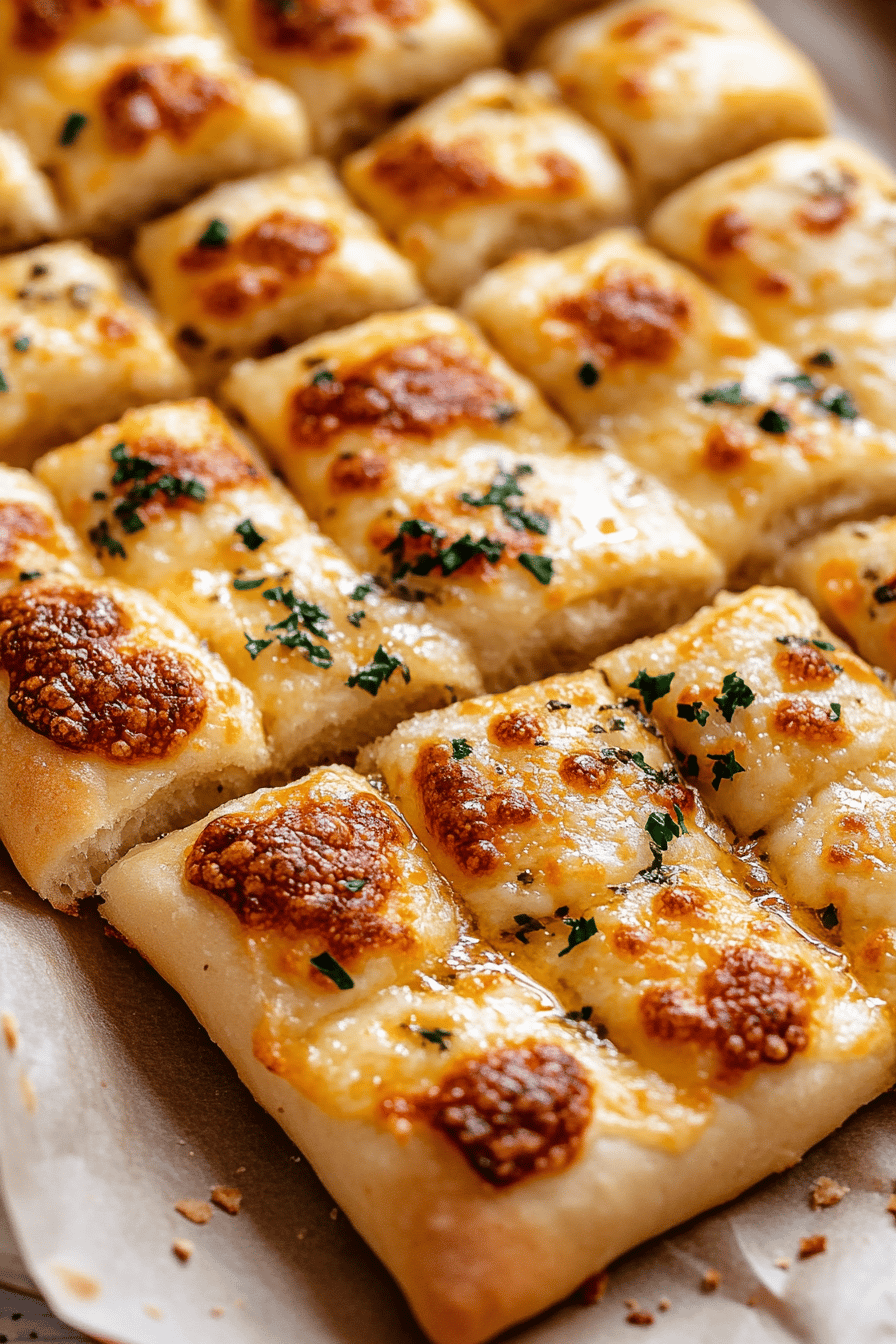
So, what exactly are these magical cheesy garlic breadsticks? Think of them as the ultimate upgrade to your favorite garlic bread. Instead of a flat slice, we’re talking about fluffy, pillowy dough baked into perfect little sticks, generously slathered with a fragrant garlic-butter mixture, and then absolutely blanketed with melty, golden cheese. It’s that glorious combination of tender bread, savory garlic, and irresistible cheese that just makes everything better. The “breadsticks” part means they’re super easy to grab and dunk, making them perfect for sharing (or not sharing, I won’t judge!). They’re essentially a warm hug in edible form, and the “cheesy garlic” aspect? Well, that’s just pure, unadulterated comfort food bliss. It’s simple, it’s classic, and it’s ridiculously delicious.
Why you’ll love this recipe?
There are so many reasons why this cheesy garlic breadsticks recipe has earned a permanent spot in my recipe box, and I’m so excited for you to experience them too! First off, the FLAVOR. Oh my goodness, the flavor! It’s this incredible symphony of warm, toasted garlic, rich butter, and that salty, stretchy cheese. Every bite is just perfection. And then there’s the SIMPLICITY. Honestly, I was intimidated by making bread from scratch for a while, but this recipe is surprisingly foolproof. Even if you’re a beginner baker, you’ll find these steps easy to follow. The ingredients are super budget-friendly too, making them a fantastic option when you want something special without breaking the bank. What I love most, though, is the VERSATILITY. Serve these alongside pasta, soup, salad, or just by themselves as a snack. My kids ask for these all the time when we have pizza night – they’re the perfect accompaniment! Compared to just regular garlic bread, these have that extra something-something. The texture of the breadstick itself is so much fluffier and more satisfying, and the cheese… well, more cheese is always a good idea, right?
How do I make garlic breadsticks?
Quick Overview
The process is wonderfully straightforward: we’ll mix up a simple dough, let it rise briefly, then shape it into sticks. After a quick second rise, they’re brushed with a glorious garlic-butter mixture and loaded with cheese before heading into the oven for a golden bake. It’s a process that yields incredibly fluffy breadsticks with a perfectly crispy, cheesy exterior. Trust me, the aroma that fills your kitchen during baking is simply divine and will have everyone gathering in anticipation!
Ingredients
For the Main Batter:
- Warm Water: About 1 ½ cups. Make sure it’s warm, not hot – think cozy bathwater temperature. This is crucial for waking up our yeast!
- Active Dry Yeast: 2 ¼ teaspoons (one standard packet). You can usually find this in the baking aisle.
- Granulated Sugar: 1 tablespoon. A little food for the yeast, helps it get bubbly and active.
- All-Purpose Flour: 3 ½ to 4 cups, plus more for dusting. I find King Arthur or Bob’s Red Mill work wonderfully here. If you have a favorite all-purpose flour, go with that!
- Salt: 1 ½ teaspoons. Don’t skip this! It enhances all the other flavors and balances the sweetness.
- Olive Oil: 2 tablespoons, plus a little extra for greasing the bowl. A good quality extra virgin olive oil adds a nice subtle flavor.
For the Filling:
- Unsalted Butter: ½ cup (1 stick), softened. This is our flavor base for the garlic goodness.
- Garlic: 4-6 cloves, minced. Fresh garlic is a MUST here. I love using my garlic press for a fine mince. You can adjust this to your garlic preference – I’m a garlic fiend, so I lean towards more!
- Dried Parsley: 1 tablespoon. Adds a lovely bit of color and herbaceousness.
- Salt and Black Pepper: To taste.
- Shredded Mozzarella Cheese: 2 cups. The star of the show! Make sure it’s good quality for the best melt. Part-skim works fine, but whole milk gives an even richer flavor.
- Grated Parmesan Cheese: ½ cup. Adds that salty, nutty depth.

Step-by-Step Instructions
Step 1: Preheat & Prep Pan
First things first, let’s get our oven ready. Preheat it to 375°F (190°C). Then, grab a large baking sheet – the standard 13×18 inch kind works perfectly. Lightly grease it with a bit of olive oil or butter, or line it with parchment paper for super easy cleanup. I usually opt for parchment because, let’s be honest, who has time for scrubbing when you could be eating breadsticks?
Step 2: Mix Dry Ingredients
In a large mixing bowl, whisk together 3 ½ cups of the all-purpose flour, the salt, and the sugar. Give it a good stir to make sure everything is evenly distributed. This is our dry foundation for those lovely breadsticks.
Step 3: Mix Wet Ingredients
In a separate, smaller bowl or a liquid measuring cup, combine the warm water and the active dry yeast. Give it a gentle whisk and let it sit for about 5-10 minutes. You want to see it get foamy and bubbly on top – that’s your yeast saying “hello!” and getting ready to work its magic. If it doesn’t foam, your yeast might be old, or the water was too hot or too cold, and you’ll need to start over with new yeast.
Step 4: Combine
Now, pour the foamy yeast mixture and the 2 tablespoons of olive oil into the bowl with the dry ingredients. Stir everything together with a wooden spoon or a spatula until a shaggy dough forms. It will look a bit messy, and that’s totally okay. If the dough seems too wet and sticky, gradually add in the remaining ½ cup of flour, a tablespoon at a time, until the dough just starts to pull away from the sides of the bowl. Be careful not to add too much flour, as that can make your breadsticks tough. Once it’s mostly combined, turn the dough out onto a lightly floured surface and knead it for about 5-7 minutes. You’re looking for a smooth, elastic dough. It should spring back slowly when you poke it. Place the kneaded dough into a lightly oiled bowl, cover it with a clean kitchen towel or plastic wrap, and let it rise in a warm place for about 30-45 minutes, or until it’s roughly doubled in size. I usually pop mine in a slightly warm, turned-off oven!
Step 5: Prepare Filling
While the dough is rising, let’s whip up that glorious garlic-butter mixture. In a medium bowl, combine the softened unsalted butter, minced garlic, dried parsley, and a pinch of salt and pepper. Mix it all up until it’s well combined and spreadable. This stuff is liquid gold, seriously. In a separate small bowl, toss together your shredded mozzarella and grated Parmesan cheeses. Having them ready to go makes assembly a breeze.
Step 6: Layer & Swirl
Once the dough has risen, punch it down gently to release the air. Turn the dough out onto your lightly floured work surface again. Roll or stretch the dough into a rectangle, about 12×16 inches. Now, this is where the magic happens! Spread the garlic-butter mixture evenly over the dough, all the way to the edges. Don’t be shy! Then, sprinkle the mozzarella and Parmesan cheese mixture all over the garlic butter. Gently press the cheese down so it adheres to the butter. Now, carefully roll the dough up tightly, lengthwise, like you’re making a jelly roll. Pinch the seam to seal it. Using a sharp knife, slice the log into 1-inch thick pieces. You should have about 16-20 breadsticks. Arrange them cut-side up on your prepared baking sheet, leaving a little bit of space between each one. You can gently press them down a little if they look too tall. You can also let them rest for another 10-15 minutes on the baking sheet if you have time, they’ll get even fluffier.
Step 7: Bake
Pop that baking sheet into your preheated oven. Bake for 18-25 minutes, or until the breadsticks are golden brown on top and the cheese is bubbly and melted. The exact time will depend on your oven, so keep an eye on them. You want them cooked through but still soft in the center. If the tops start browning too quickly, you can loosely tent them with foil.
Step 8: Cool & Glaze
Once they’re out of the oven, let them cool on the baking sheet for a few minutes. This is the perfect time to make a quick extra glaze if you like! Melt another 2-3 tablespoons of butter with a minced clove of garlic and a sprinkle of parsley, then brush it over the hot breadsticks. The cheese will be incredibly hot and gooey right now, so let them cool just enough so you don’t burn your fingers off!
Step 9: Slice & Serve
Transfer the cheesy garlic breadsticks to a serving platter. They are absolutely best served warm, when the cheese is still melty and the bread is at its fluffiest. Go ahead and dig in! These disappear so fast, so if you want any leftovers (ha!), make sure you grab them quickly!
What to Serve It With
These cheesy garlic breadsticks are so versatile, they’re practically superheroes in the kitchen! For a leisurely BREAKFAST, I love serving them alongside scrambled eggs and some fresh fruit. They’re surprisingly good with a smear of CREAM CHEESE or even a light drizzle of honey. For BRUNCH, imagine them arranged artfully on a platter next to a frittata or a quiche. They add a lovely savory element that balances richer dishes beautifully. And don’t forget a mimosa or a sparkling rosé! As DESSERT? Yes, you read that right! While they’re savory, a slightly sweeter version (think a touch more sugar in the dough and maybe a sprinkle of cinnamon with the cheese) can be incredible with a light dusting of powdered sugar and a side of raspberry coulis for dipping. For COZY SNACKS, they are unparalleled. Serve them alongside a hearty tomato soup or a comforting bowl of chili. My family absolutely devours these when we have spaghetti or lasagna, and they’re also fantastic with a big green salad for a lighter meal. Honestly, they’re perfect for just about any occasion where delicious food is involved!
Top Tips for Perfecting Your Cheesy Garlic Breadsticks
After making these countless times, I’ve picked up a few little tricks that really make a difference. So, let’s dive into how you can achieve cheesy garlic breadstick perfection every single time!
Dough Prep: The key to fluffy breadsticks is not overworking the dough. Knead until it’s smooth and elastic, but don’t go overboard. Over-kneading can lead to tough bread. Also, ensure your yeast is active by letting it bloom in warm water. If it doesn’t get foamy, your yeast is probably dead, and you’ll need to start over. Warmth is your friend for the rise; find a cozy spot for your dough. I’ve learned that if my kitchen is a bit cool, I pop the bowl in my oven with just the light on – it creates the perfect little microclimate.
Garlic Infusion: Don’t skimp on the fresh garlic! Minced garlic gives you the best flavor. If you have a garlic press, use it. For an even more intense garlic flavor, you can roast your garlic cloves before mincing them and adding them to the butter. It mellows the sharp bite and brings out a lovely sweetness. For the parsley, dried is fine for color and a subtle flavor, but if you have fresh, a tablespoon of finely chopped fresh parsley would be heavenly.
Cheese Strategy: Use a good quality mozzarella that melts well. Pre-shredded cheese can sometimes have anti-caking agents that affect the melt, so shredding your own block of cheese is often best. A mix of mozzarella and Parmesan is my favorite for that perfect balance of stretch and savory flavor. Don’t be afraid to experiment with other cheeses too – a little cheddar or provolone could be amazing!
Shaping Savvy: When you roll out the dough, try to get an even rectangle. This ensures all your breadsticks cook at the same rate. For the slicing, a sharp serrated knife works best to get clean cuts without squishing the dough too much. Arrange them on the baking sheet so they have a little room to expand; overcrowding leads to steamed, not baked, breadsticks.
Baking Brilliance: Ovens vary, so my best advice is to watch them! The baking time is a guideline. You’re looking for that beautiful golden-brown color on top and melted, bubbly cheese. If the tops are browning too fast but the inside isn’t cooked, loosely tent the baking sheet with foil. For an extra burst of flavor right out of the oven, I sometimes melt a little extra butter with a tiny bit more minced garlic and brush it over the tops. It adds another layer of garlicky goodness and makes them extra shiny!
Ingredient Swaps: If you don’t have active dry yeast, you can use instant yeast, usually about 20% less, and you can often skip the blooming step and add it directly to the dry ingredients. If you’re out of olive oil, a neutral vegetable oil can work in a pinch, but olive oil really adds a nice subtle flavor to the dough. For the cheese, a blend of provolone and mozzarella is fantastic, or even a sharp white cheddar for a punchier flavor.
Storing and Reheating Tips
These cheesy garlic breadsticks are truly at their best when they’re fresh and warm, but life happens, and sometimes you have leftovers! Thankfully, they store and reheat pretty well. For ROOM TEMPERATURE storage, I like to keep them in an airtight container or a large zip-top bag once they’ve cooled completely. They’ll usually stay good for about 1-2 days, but they lose some of their crispness. REFRIGERATOR STORAGE is your best bet for longer freshness. Store them in an airtight container or wrap them tightly in plastic wrap followed by foil. They can last in the fridge for up to 3-4 days. Just be aware that refrigeration can slightly dry them out. For FREEZER INSTRUCTIONS, I recommend freezing them once they’ve cooled completely, before adding any extra glaze. Wrap them individually or in small batches in plastic wrap, then place them in a freezer-safe bag or container. They can stay frozen for up to 2-3 months. When you’re ready to enjoy them, thaw them overnight in the refrigerator. I often add the glaze AFTER reheating to maintain the freshest flavor and texture. For reheating, the oven is your friend! Reheat them on a baking sheet at around 350°F (175°C) for 5-10 minutes, or until warmed through and the cheese is re-melted. You can also reheat them briefly in a toaster oven or even a hot skillet over medium-low heat, though the oven usually gives the best results.
Frequently Asked Questions
Final Thoughts

There you have it – my absolute favorite cheesy garlic breadsticks recipe! I really hope you give these a try. They’re just so satisfying to make, and even more satisfying to eat. The smell alone is enough to make anyone happy, and the taste? Well, it’s pure comfort. They’re perfect for almost any meal, from a casual weeknight dinner to a more festive gathering. If you love these, you might also enjoy my recipe for [Link to another popular bread or appetizer recipe, e.g., “Garlic Knots”]. I can’t wait to hear how your cheesy garlic breadsticks turn out! Let me know in the comments below if you try them, and if you have any fun variations or personal touches you add. Happy baking, and enjoy every cheesy, garlicky bite!
Cheesy Garlic Breadsticks
Ingredients
Main Ingredients
- 1 package refrigerated biscuit dough
- 0.125 cup butter, melted
- 2 cloves garlic, minced
- 0.5 teaspoon dried parsley
- 0.25 teaspoon garlic powder
- 0.25 teaspoon salt
- 1 cup shredded mozzarella cheese
- 0.5 cup shredded Parmesan cheese
Instructions
Preparation Steps
- Preheat your oven to 400°F (200°C). Lightly grease a baking sheet.
- In a small bowl, combine the melted butter, minced garlic, dried parsley, garlic powder, and salt. Stir well.
- Unroll the biscuit dough and cut each biscuit into 3 or 4 pieces.
- Place the biscuit pieces on the prepared baking sheet.
- Brush the butter and garlic mixture evenly over the biscuit pieces.
- Sprinkle the mozzarella cheese and Parmesan cheese over the top of the biscuit pieces.
- Bake for 12-15 minutes, or until golden brown and the cheese is melted and bubbly.
- Serve hot and enjoy!