You know those recipes that just feel like a warm hug? The ones that have that magical ability to instantly transport you back to childhood or make even the most mundane Tuesday feel like a special occasion? Well, this Cheesy Texas Toast is exactly that for my family. It’s not just bread and cheese; it’s a masterpiece of melty, garlicky goodness that I swear disappears faster than any cookie I’ve ever baked. Honestly, it’s even better than most restaurant versions, and so much easier to whip up when a craving hits hard. Forget those fancy appetizers; this is the real crowd-pleaser, the dish that has everyone asking for the secret. I’ve tried countless variations of GARLIC BREAD and cheese toasts over the years, but this one? This is the one that’s earned a permanent spot in our weekly rotation. It’s got that perfect balance of crispy edges and soft, gooey center, all infused with an incredible garlic and cheese flavor that just can’t be beat. It’s truly my go-to when I need something incredibly satisfying without a lot of fuss.

What is a Cheesy Texas Toast?
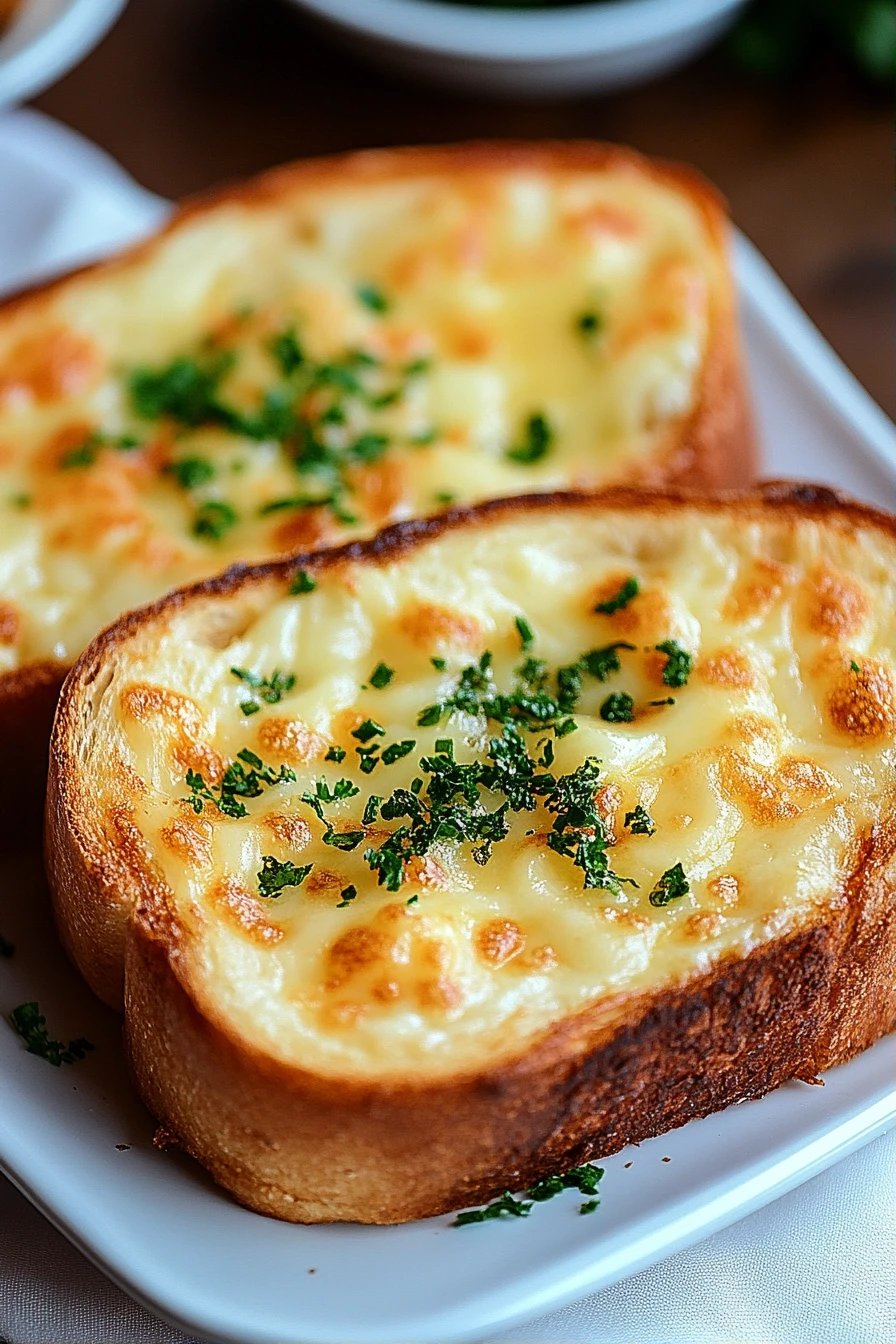
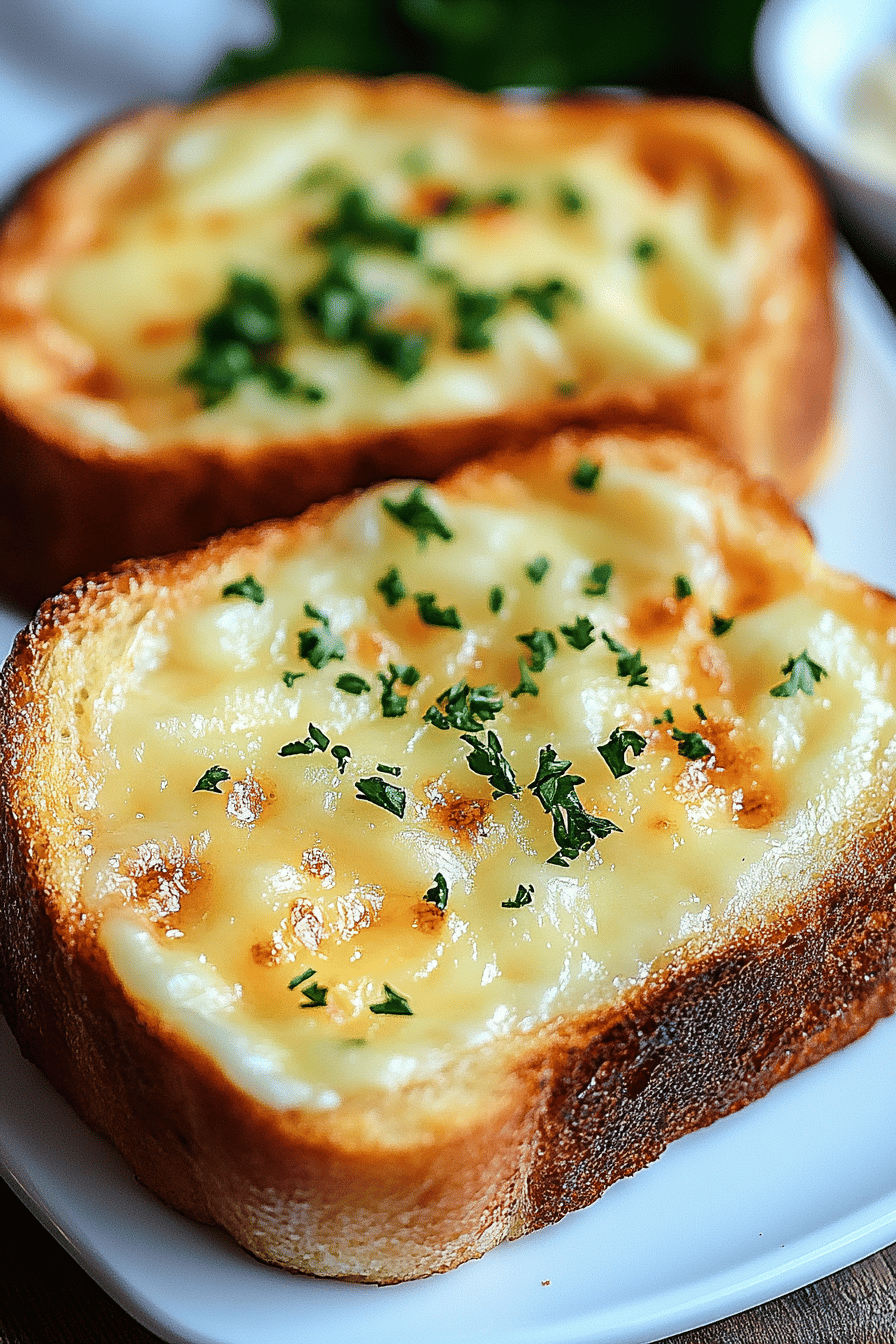
So, what exactly is this magical Cheesy Texas Toast I’m raving about? Think of it as the ultimate upgrade to your classic garlic bread. It’s essentially thick slices of bread, generously slathered with a rich, buttery garlic spread, piled high with a dreamy blend of cheeses, and then baked until golden brown and bubbly. It’s not just a side dish; it’s a star in its own right. The “Texas” in the name, as far as I can tell, just signifies its generous, over-the-top nature – everything’s bigger and better in Texas, right? This isn’t your thin, dry toast; it’s hearty, decadent, and utterly satisfying. It’s that perfect comfort food that hits all the right notes: salty, savory, a little bit tangy from the cheese, and that irresistible aroma of toasted garlic. It’s simple, yes, but the way the flavors meld together is pure culinary magic.
Why you’ll love this recipe?
Oh, where do I even begin with why you’ll fall head over heels for this Cheesy Texas Toast? Let’s break it down. First off, the **flavor**. It’s just out-of-this-world amazing. The garlic isn’t overpowering; it’s mellowed and enhanced by the creamy butter and the sharp, salty cheeses. Each bite is a symphony of textures and tastes – a slightly crisp exterior giving way to a soft, chewy interior that’s absolutely drenched in cheesy goodness. It smells incredible while it’s baking, and trust me, the aroma alone will have your family gathering in the kitchen like little hungry puppies!
Then there’s the **simplicity**. This recipe is a lifesaver on busy nights. I can literally pull it together in under 10 minutes and have it baking while I finish up dinner. There’s no complex technique involved, just good old-fashioned slathering and baking. It’s so straightforward that even my kids can help make it (and they love doing just that!).
And let’s talk **cost-efficiency**. The ingredients are super basic and likely already in your pantry or fridge. A good loaf of bread, some butter, garlic, and your favorite cheeses. It’s a fraction of the cost of ordering takeout or picking up a fancy appetizer, but it delivers so much more in terms of satisfaction and flavor. It’s a total budget-friendly win!
The **versatility** is another huge plus. While it’s phenomenal on its own, it’s also the perfect partner to practically any meal. Serve it with pasta, soups, salads, chili, grilled meats – you name it. It’s also fantastic as a standalone snack when you’re just craving something cheesy and comforting. I’ve even had it for breakfast on occasion (don’t judge!). It’s truly a recipe that keeps on giving. Compared to a basic garlic bread, the cheese adds that extra layer of indulgence and flavor that makes it truly special. It’s my secret weapon for making any meal feel a little more exciting.
How do I make a tasty Texas Toast?
Quick Overview
Making this Cheesy Texas Toast is ridiculously easy. You’ll start by preparing a luscious garlic-butter mixture, then slather it onto thick slices of bread. Layer on your favorite cheeses, and bake until everything is golden, bubbly, and irresistible. The beauty of this recipe lies in its simplicity and speed, turning humble ingredients into a show-stopping treat in minutes. It’s the kind of dish that makes you feel like a kitchen wizard, even if you’re just starting out.
Ingredients
What is the best way to make a Texas toast?
You’ll want a good, sturdy loaf of bread for this. Sourdough, Italian, or even a thick-cut white bread works beautifully. Avoid anything too airy or delicate, as it won’t hold up to all that delicious topping. About half a cup of unsalted butter, softened, is key for that rich base. For the garlic, I highly recommend fresh garlic! About 3-4 cloves, minced, but if you’re a garlic lover like me, go for more. I sometimes even use a good garlic powder if I’m in a real pinch, but fresh really makes a difference. A generous cup of shredded cheese is essential. My go-to is a sharp cheddar and a mild mozzarella blend – it gives you the best of both worlds: sharp flavor and gooey stretch. But feel free to experiment! A sprinkle of dried parsley for a pop of color and a touch of herbaceousness is nice, but totally optional. And a pinch of salt and Black Pepper to really bring out all those flavors.
For the optional extra flavor boost:
Sometimes, I like to add a little something extra to my garlic spread. A tablespoon of mayonnaise can make it even creamier and richer – it’s a little trick I learned from my aunt. A pinch of red pepper flakes can add a tiny kick if you like a little heat. And a tablespoon of finely grated Parmesan cheese adds another layer of nutty, salty goodness. These are all optional, of course, but they really do take it over the top!
Step-by-Step Instructions
Step 1: Preheat & Prep Pan
First things first, get that oven preheating to 400 degrees Fahrenheit (200 degrees Celsius). While the oven is warming up, I like to grab a baking sheet. You can line it with parchment paper if you want super easy cleanup, but it’s not strictly necessary. The bread gets a little toasty on the bottom, which I actually love. Slice your bread into thick slices, about 1 inch thick. You want them substantial enough to hold all that goodness. If your loaf is very large, you might only get 6-8 slices, and that’s perfectly fine!
Step 2: Mix Dry Ingredients
In a small bowl, I combine the softened butter with the minced garlic. Now, here’s a little trick I’ve learned: let the butter sit out for a good hour or so to get really soft. It makes mixing in the garlic and other ingredients so much easier and ensures you don’t have clumps of hard butter. If you’re in a hurry, you can microwave it for just a few seconds, but be careful not to melt it completely – we want it spreadable, not liquid.
Step 3: Mix Wet Ingredients
To the softened butter and garlic, I add the dried parsley (if using), a pinch of salt, and a good grind of black pepper. If you’re adding any of the optional flavor boosters like mayonnaise, Parmesan, or red pepper flakes, now’s the time to stir them all in. Give it a really good mix until everything is well combined and you have a beautifully fragrant, creamy spread. You want it to be smooth and easy to spread on the bread.
Step 4: Combine
Now for the fun part! Take your bread slices and lay them out on the prepared baking sheet. Generously slather each slice with the garlic-butter mixture, making sure to get it all the way to the edges. Don’t be shy with this step; it’s where all that amazing flavor comes from!
Step 5: Prepare Filling
Once the bread is coated, it’s time for the cheese! Sprinkle your shredded cheddar and mozzarella (or whatever cheese blend you’re using) evenly over each slice of bread. You want a good, generous layer – don’t skimp! The more cheese, the better, in my opinion.
Step 6: Layer & Swirl
This is where the “Texas” part really comes in – we’re going big! Ensure the cheese covers the entire surface of the bread, right up to the edges. If you want a little extra visual appeal, you can add a few more flakes of parsley on top for color. The goal here is maximum cheesy coverage!
Step 7: Bake
Pop the baking sheet into your preheated oven. Bake for about 10-15 minutes, or until the cheese is melted, bubbly, and starting to turn golden brown around the edges. Keep an eye on it, especially towards the end, because ovens can vary, and we don’t want it to burn!
Step 8: Cool & Glaze
Once it’s out of the oven, let it cool for just a minute or two on the baking sheet. This helps it set up slightly. The aroma at this stage is absolutely divine! I usually resist the urge to dive in immediately, but it’s so tempting!
Step 9: Slice & Serve
Transfer the Cheesy Texas Toast to a serving platter. You can cut each slice in half if you want to make them easier to share, or just serve them whole. I love serving this warm, right out of the oven, when the cheese is still super gooey and stretchy. It’s truly the best way to enjoy it!
What to Serve It With
This Cheesy Texas Toast is so versatile, it’s practically begging to be paired with something delicious! For a classic **Breakfast** treat, I love serving it alongside a perfectly brewed cup of coffee. It’s like the ultimate breakfast sandwich without the sandwich part! The savory garlic and cheese are a wonderful contrast to a rich, dark roast.
When it comes to **Brunch**, this toast really shines. Imagine it as part of a larger spread with scrambled eggs, bacon, and a fresh fruit salad. For an elegant plating, I’ll sometimes cut it into smaller, bite-sized pieces and arrange them artfully on a platter. A mimosa or a sparkling rosé is the perfect beverage to accompany it.
As a **Dessert**, this might sound a little unconventional, but hear me out! A slightly sweeter version, perhaps with a touch of honey in the garlic butter, served with a dollop of CREAM CHEESE frosting, is surprisingly decadent. It’s perfect after-dinner styling for when you want something comforting but not overly sweet. A late-night snack is also when this really hits the spot for me. It’s that perfect quick fix when you’re craving something warm and cheesy.
For **Cozy Snacks**, this is unbeatable. It’s the ultimate comfort food. Pair it with a creamy tomato soup on a chilly evening, or alongside a fresh, crisp salad for a light yet satisfying lunch. My kids also love it dipped in marinara sauce, almost like a cheesy breadstick! It’s so adaptable and always a hit with everyone.
Top Tips for Perfecting Your Cheesy Texas Toast
Over the years, I’ve definitely picked up a few tricks that elevate this Cheesy Texas Toast from good to absolutely phenomenal. Let’s talk about getting that perfect texture and flavor every single time.
Zucchini Prep: Okay, wait, I think I might have gotten ahead of myself! I was channeling my other favorite recipe for a second there. My apologies! Let’s get back to the Cheesy Texas Toast. There’s no zucchini involved here, thankfully!
Bread Choice: This is crucial. As I mentioned, a sturdy, thick-cut bread is your best friend. Think of a good country loaf, sourdough, or even a thick-cut challah. Avoid anything too soft or airy like standard sandwich bread, as it can get soggy. I often find that day-old bread works even better because it has a little more structure.
Butter Softness: Seriously, don’t skip softening your butter! If it’s too cold, you’ll end up with annoying lumps of butter in your spread, and it won’t distribute evenly. Let it sit on the counter for at least an hour, or pop it in the microwave for *very* short bursts (5-10 seconds), checking and stirring in between, until it’s just pliable and spreadable, not melted.
Garlic Level: My personal rule is that you can never have too much garlic. If the recipe calls for 3 cloves, I often use 4 or 5. If you’re sensitive to raw garlic flavor, you can mince it very finely and let it sit in the butter for about 15-20 minutes before spreading; this mellows its bite. Or, you can use roasted garlic for a sweeter, milder flavor!
Cheese Blend: While cheddar and mozzarella are my go-to, don’t be afraid to experiment! A mix of Gruyère for nuttiness, Monterey Jack for meltiness, or even a little Parmesan for a salty kick can be fantastic. Just make sure your cheese is shredded; it melts more evenly and quickly than slices. And shred it yourself if you can – pre-shredded cheese often has anti-caking agents that can affect meltiness.
Baking Temperature and Time: 400°F (200°C) is the sweet spot. It’s hot enough to get the bread golden and the cheese bubbly quickly, but not so hot that it burns before the cheese melts. Keep an eye on it. If your oven runs hot, you might need to lower the temperature slightly or reduce the baking time. The edges should be golden brown, and the cheese should be fully melted and starting to get those lovely browned bits.
Don’t Overcrowd the Pan: Give your bread slices some breathing room on the baking sheet. If they’re crammed together, the steam can get trapped, leading to soggier toast instead of crispy edges.
Taste and Adjust: Always taste your garlic-butter mixture before spreading it! A little pinch of salt or pepper can make a big difference. If you accidentally added too much salt, a touch more butter can balance it out.
Storing and Reheating Tips
This Cheesy Texas Toast is truly best enjoyed fresh, right out of the oven. The bread is perfectly crisp, the cheese is melty and gooey, and the aroma is intoxicating. However, life happens, and sometimes you’ll have leftovers! Here’s how I handle them to keep them as delicious as possible.
Room Temperature: If you know you’ll be eating the leftovers within a few hours, you can definitely leave them at room temperature. I like to cover them loosely with foil or plastic wrap to keep them from drying out too much. They’ll still be good, though the bread might lose a little of its crispness.
Refrigerator Storage: For longer storage, pop your leftovers into an airtight container or wrap them tightly in plastic wrap and then foil. They should stay good in the refrigerator for up to 2-3 days. The bread will soften, but the flavor will still be there!
Freezer Instructions: If you want to make a big batch and freeze some for later, I highly recommend freezing them *before* baking. Lay the prepared, unbaked toast slices in a single layer on a baking sheet and freeze until solid. Then, transfer them to a freezer-safe bag or container. They’ll keep in the freezer for up to 2-3 months. You can also freeze baked leftovers, but the texture of the bread might not be as good upon reheating.
Glaze Timing Advice: If you’re freezing the unbaked toast, obviously, there’s no glaze to worry about. If you’re freezing baked leftovers, I’d recommend waiting to add any fresh parsley or extra herbs after reheating to keep them vibrant.
Reheating: For the best results, reheat your Cheesy Texas Toast in a preheated oven at around 350°F (175°C) for about 5-10 minutes. This will help crisp up the bread again and re-melt the cheese. If you’re reheating from frozen unbaked slices, you’ll likely need to bake them for about 15-20 minutes at the same temperature. You can also reheat individual slices in a toaster oven or even a skillet over medium-low heat, although the oven method usually yields the crispiest results.
Frequently Asked Questions
Final Thoughts
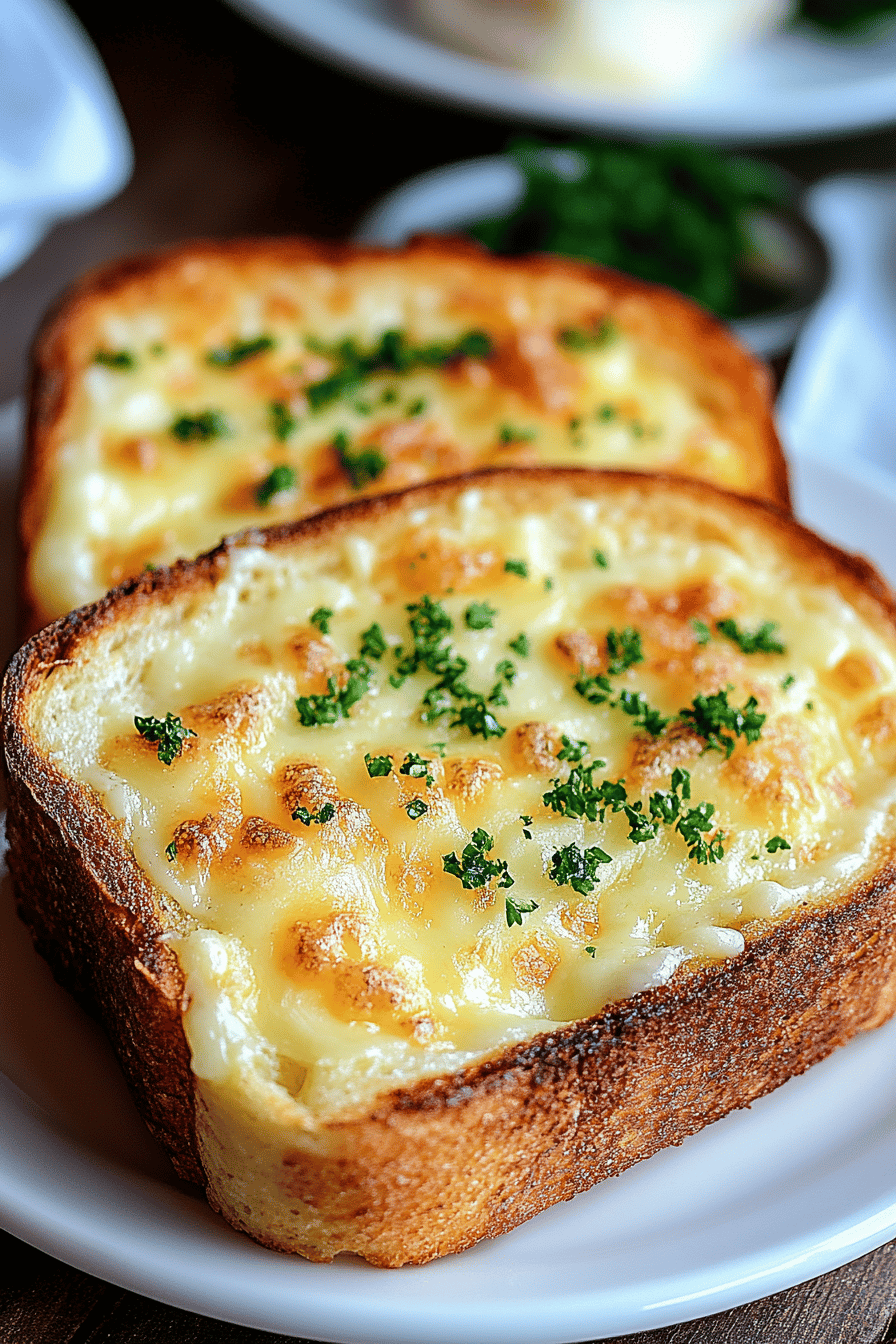
There you have it – my absolute favorite Cheesy Texas Toast! It’s a recipe that’s so simple yet so incredibly satisfying. It’s the kind of dish that makes you feel good about cooking, and it’s guaranteed to be a hit with anyone who tries it. Whether you’re serving it alongside a weeknight dinner, as part of a festive brunch, or just enjoying it as a comforting snack, it never disappoints. The blend of crispy bread, fragrant garlic butter, and bubbly, melted cheese is just pure perfection. It’s a recipe that brings people together and creates happy memories around the table, and that’s what cooking is all about for me. If you love this recipe, you might also enjoy my other easy appetizer recipes or my guide to making the perfect garlic bread. I truly hope you give this Cheesy Texas Toast a try. I can’t wait to hear how it turns out for you and what your family thinks! Don’t forget to leave a comment below and let me know your favorite cheese combinations or any fun variations you come up with. Happy baking!
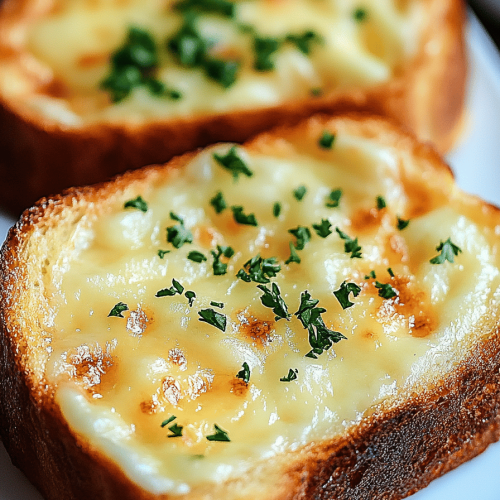
Cheesy Texas Toast
Ingredients
Main Ingredients
- 4 slices Texas Toast bread
- 0.5 cup butter, softened
- 2 cloves garlic, minced
- 1 teaspoon dried parsley
- 1 cup shredded cheddar cheese
- 0.5 cup shredded mozzarella cheese
Instructions
Preparation Steps
- Preheat your oven to 375°F (190°C).
- In a small bowl, combine the softened butter, minced garlic, and dried parsley. Mix well.
- Spread the butter mixture evenly over one side of each slice of Texas toast.
- Place the bread slices on a baking sheet, butter-side up.
- In another small bowl, combine the cheddar and mozzarella cheeses.
- Sprinkle the cheese mixture generously over the buttered side of each toast slice.
- Bake for 8-10 minutes, or until the cheese is melted and bubbly and the edges are golden brown.
- Serve immediately.

