Oh, you guys are going to LOVE this one. Seriously. There are some recipes that just feel like a warm hug, and this Hobo Casserole Recipe is hands-down one of them for me. It takes me right back to my childhood kitchen, with the smell of something baking that made the whole house feel cozy and loved. It’s the kind of dish that’s surprisingly simple but tastes like you spent hours slaving away. If you’re anything like me, you’re always on the hunt for that perfect weeknight meal that’s both incredibly satisfying and doesn’t require a culinary degree. This is it! Think of it as the ultimate comfort food mashup, a little bit like a shepherd’s pie but with a sweeter, more cake-like personality. It’s become a staple in my home, especially when the weather turns a bit chilly or when I just need something to lift everyone’s spirits. I always make a double batch because, trust me, it disappears faster than you can say “more, please!”

What is Hobo C
So, what exactly is this magical creation we call Hobo Casserole? Well, it’s not what you might initially think! It’s not about throwing random scraps into a pan, as the name might suggest (though the idea of resourceful cooking is pretty appealing!). This Hobo Casserole Recipe is actually a wonderfully sweet, moist, and utterly delicious baked dessert or breakfast treat. It’s essentially a dense, cake-like base, almost like a quick bread or a blondie, that’s studded with delicious bits of fruit and sometimes nuts, all baked together into a comforting casserole. The “hobo” part likely comes from its rustic, unpretentious nature – it’s honest, straightforward, and deeply satisfying without any fuss. It’s the kind of dessert that doesn’t need fancy decorations or elaborate techniques. It’s just good, honest food that makes you feel happy. It’s a lifesaver on busy mornings when you want something more substantial than cereal, or when you’re craving a sweet treat after dinner but don’t want to commit to a full-blown cake.
Why You’ll Love This Recipe
Let me tell you, there are so many reasons why this Hobo Casserole Recipe has earned a permanent spot in my recipe binder and my heart. First and foremost, the flavor is just divine. It’s perfectly sweet without being overwhelming, with a lovely tender crumb that melts in your mouth. The bits of fruit (I love using apples or berries here!) add bursts of juicy sweetness and a delightful texture contrast. And the smell when it’s baking? Oh my goodness. It fills your kitchen with the most incredible aroma of warm spices and baked goodness. It’s the kind of scent that draws everyone in, kids and adults alike, usually asking what’s for dessert (or breakfast!).
What I also adore about this recipe is its sheer simplicity. Honestly, you can whip this up in about 15 minutes, and the rest is just hands-off baking time. It uses pretty basic pantry staples, which is fantastic when you’re trying to stick to a budget or just don’t want to make a special trip to the grocery store. It’s incredibly cost-efficient! Plus, it’s so versatile. I’ve served it warm with a scoop of ice cream for dessert, as a sweet breakfast bake with a dollop of yogurt, and even as a delightful afternoon snack with a cup of tea. It truly shines in any setting. What makes it stand out from other baked goods? I think it’s the unique texture – it’s not quite a cake, not quite a cookie, but something wonderfully in between. It’s more substantial than a muffin but has a lovely tenderness. It’s a real crowd-pleaser, and I can guarantee you’ll be asked for the recipe. It’s definitely one of my go-to recipes when I need something reliable and delicious!
How do I make Ho
Quick Overview
Making this Hobo Casserole Recipe is ridiculously easy! You basically mix up a simple batter, fold in your chosen fruits and any add-ins, pour it into a baking dish, and bake until golden and fragrant. That’s it! The beauty is in its simplicity and the minimal steps involved. It’s the perfect recipe for beginners or when you’re short on time but still want to whip up something special. You’ll be amazed at how quickly you can go from basic ingredients to a delightful baked treat. It’s a real showstopper without any of the usual stress.
Ingredients
For the Main Batter
You’ll need all-purpose flour – about 1 and 3/4 cups. Make sure it’s spooned and leveled, not scooped directly from the bag, to avoid making it too dense. A touch of baking soda, about 1 teaspoon, to give it a lovely lift. And a pinch of salt, just half a teaspoon, to balance out the sweetness and enhance all those yummy flavors. For sweetness, I use granulated sugar, about 1 cup. Feel free to adjust this slightly based on how sweet your fruit is, but this is a good starting point. Then comes the fat – we need softened unsalted butter, about half a cup (1 stick). Make sure it’s soft enough to cream easily, but not melted!
For the Filling:
This is where the fun really begins! You can go with fresh or frozen berries – about 1 and 1/2 cups. My favorites are blueberries or raspberries, but a mix is fantastic. If you’re using apples, finely dice about 2 medium apples. You can also add in chopped nuts like walnuts or pecans for a nice crunch, about half a cup. For a little extra warmth and flavor, I love adding a teaspoon of ground cinnamon and a quarter teaspoon of nutmeg. These spices really make the casserole sing!
For the Glaze:
This is optional, but highly recommended for that extra touch of sweetness and shine! You’ll just need powdered sugar, about 1 cup, and a tablespoon or two of milk or a liquid from your fruit. You can also use lemon juice for a bit of tang. Mix it until it’s a drizzly consistency. Sometimes, I’ll add a tiny drop of vanilla extract to the glaze too, just for an extra layer of flavor.

Step-by-Step Instructions
Step 1: Preheat & Prep Pan
First things first, get your oven preheating to 350 degrees Fahrenheit (175 degrees Celsius). While that’s warming up, grab an 8×8 inch baking dish. I like to grease it lightly with butter or cooking spray, and then maybe dust it with a little flour or sprinkle it with some granulated sugar. This helps prevent sticking and gives the bottom a nice, slightly crisp edge. My mom always did this, and I swear it makes a difference!
Step 2: Mix Dry Ingredients
In a large bowl, whisk together your all-purpose flour, baking soda, salt, and granulated sugar. You want to make sure everything is really well combined. Give it a good whisk for about 30 seconds to break up any lumps and ensure the leavening agents are evenly distributed. This is a crucial step for an even bake and the perfect texture!
Step 3: Mix Wet Ingredients
In a separate medium bowl, I usually melt my butter slightly in the microwave (just until softened, not completely liquid) and then beat it with an electric mixer or a whisk until it’s nice and creamy. Then, I’ll add in an egg and about half a teaspoon of vanilla extract. Beat until everything is well combined and smooth. If you don’t have an electric mixer, don’t worry! Just beat it vigorously with a whisk or a fork until it looks smooth.
Step 4: Combine
Now, we’re going to add the wet ingredients to the dry ingredients. Pour the creamy butter and egg mixture into the bowl with your flour mixture. Using a spatula or wooden spoon, mix everything together until *just* combined. It’s really important not to overmix here! A few streaks of flour are totally fine. Overmixing can make the casserole tough, and nobody wants that. We’re going for a thick, slightly lumpy batter.
Step 5: Prepare Filling
If you’re using fruits, gently fold them into your batter. If you’re using apples, dice them up nice and small. If you’re using berries, you can toss them with a tablespoon of flour to help them keep their shape and not sink to the bottom. Add your cinnamon and nutmeg now too, and give it a gentle stir to distribute. This is where you can really customize! I sometimes throw in a handful of chocolate chips if I’m feeling decadent.
Step 6: Layer & Swirl
Pour the batter into your prepared baking dish. Spread it out evenly with your spatula. Now, this is where you can get creative! Some people like to swirl in a bit of jam or even a spoonful of chocolate hazelnut spread before baking. I find that just gently distributing the fruit evenly throughout the batter is usually enough. You want to ensure you have good coverage of those delicious fruit pockets in every bite.
Step 7: Bake
Pop that dish into your preheated oven. Bake for about 30 to 40 minutes. The exact time will depend on your oven, of course. You’ll know it’s ready when the edges are golden brown, and a toothpick inserted into the center comes out clean (or with just a few moist crumbs, not wet batter). The smell is usually a dead giveaway too – it’ll smell absolutely heavenly!
Step 8: Cool & Glaze
Once it’s done baking, take it out of the oven and let it cool in the dish on a wire rack for at least 15-20 minutes. This is important for it to set properly. While it’s cooling, you can whip up your glaze. In a small bowl, mix the powdered sugar with milk (or lemon juice) a tablespoon at a time until you reach a nice, drizzly consistency. Once the casserole is slightly cooled, drizzle the glaze all over the top. You can do this while it’s still warm, or wait until it’s completely cool, depending on your preference!
Step 9: Slice & Serve
After the glaze has set a bit, carefully slice the Hobo Casserole into squares. Serve it warm for the best experience. It’s absolutely delicious on its own, but it’s also fantastic with a scoop of vanilla ice cream, a dollop of whipped cream, or even some Greek yogurt for a slightly healthier touch. Enjoy that comforting, homemade goodness!
What to Serve It With
This Hobo Casserole Recipe is so wonderfully adaptable that it fits into almost any mealtime scenario. For breakfast, I love serving it warm with a dollop of thick Greek yogurt or a drizzle of honey. It makes for such a satisfying start to the day, far more exciting than plain toast! A good, strong cup of coffee or a soothing herbal tea is the perfect beverage pairing. When I’m planning a brunch, I’ll often cut it into smaller, more elegant squares and serve it alongside some fresh fruit salad and maybe a frittata. It adds a touch of sweetness and a comforting element to the spread. The golden-brown top with the drizzled glaze looks so inviting!
As a dessert, this is where it truly shines! A generous scoop of creamy vanilla bean ice cream melting into a warm slice is pure bliss. You could also serve it with a light berry compote or a dusting of powdered sugar. For those times when you just need a cozy snack, a smaller square with a cup of tea is just perfect. It’s humble yet incredibly rewarding. My family loves it after dinner, and it’s always a hit when I bring it to potlucks. It’s the kind of dish that feels both indulgent and comforting, making it a true all-rounder in my kitchen.
Top Tips for Perfecting Your Hobo Casserole
Over the years, I’ve learned a few tricks that really help make this Hobo Casserole Recipe absolutely perfect every single time. For the fruit, especially if you’re using berries, I highly recommend giving them a gentle toss with a tablespoon of flour before adding them to the batter. This prevents them from sinking to the bottom during baking and helps them hold their shape, giving you those lovely pockets of fruitiness throughout. If you’re using apples, dicing them quite small is key. I usually aim for about 1/4 inch cubes so they cook through nicely and distribute evenly without making the batter too wet.
When it comes to mixing, the golden rule for this recipe (and most baked goods!) is to avoid overmixing. Mix the wet and dry ingredients until they are *just* combined. A few little flour streaks are perfectly fine and often a sign that you haven’t overdone it. Overmixing develops the gluten too much, leading to a tougher, denser texture, and we want this to be wonderfully tender! For the swirl, if you decide to add one, a gentle swirl with a knife or toothpick is all you need. You don’t want to overdo it, or you might end up with a muddy-looking texture. For ingredient swaps, I’ve had great success using a mix of fruits – half apples, half berries is a favorite! If you’re out of butter, a neutral-flavored oil like canola or vegetable oil can work in a pinch, but you might need to adjust the amount slightly, maybe a touch less. And for the glaze, if it’s too thick, just add a tiny bit more liquid; if it’s too thin, add more powdered sugar until you get that perfect drizzly consistency.
Baking can be tricky, so always keep an eye on your casserole. Ovens vary, so the 30-40 minute timeframe is a guideline. Start checking around the 30-minute mark. The edges should be golden brown, and a toothpick inserted into the center should come out clean or with a few moist crumbs. If the top is browning too quickly but the inside isn’t cooked, you can always loosely tent the dish with aluminum foil. For the glaze, I find it’s best applied when the casserole has cooled for at least 15-20 minutes. This allows it to set up a bit so the glaze doesn’t just soak in immediately, giving you that lovely decorative finish.
Storing and Reheating Tips
One of the things I love most about this Hobo Casserole Recipe is how well it stores. If you happen to have any leftovers (which is rare in my house!), you can keep it at room temperature, well-covered with plastic wrap or in an airtight container, for up to two days. Just make sure your kitchen isn’t too warm, as the butter can soften. For longer storage, definitely tuck it into the refrigerator. Wrapped tightly, it will stay fresh and delicious in the fridge for about 4 to 5 days. I find that its flavor actually deepens a bit on the second day, which is always a bonus!
If you want to freeze it for future cravings, which I highly recommend doing if you make a double batch, let the casserole cool completely first. Then, wrap it very well in a couple of layers of plastic wrap, followed by a layer of aluminum foil, or place it in a freezer-safe container. It should keep well in the freezer for up to 2-3 months. When you’re ready to enjoy it, the best way to reheat it is slowly. You can gently warm individual slices in the microwave for about 30-60 seconds, or if you have a larger portion, pop it into a low oven (around 300°F or 150°C) for about 10-15 minutes, covered, until warmed through. If you plan to glaze it after storing, it’s best to wait until it’s cooled and ready to serve again. Reheating a glazed casserole can sometimes make the glaze sticky or melt it completely, so glazing just before serving often yields the prettiest results.
Frequently Asked Questions
Final Thoughts

So there you have it – my absolutely beloved Hobo Casserole Recipe! I really hope you give this one a try. It’s more than just a recipe; it’s a little slice of comfort and joy that’s so easy to bring into your own kitchen. Whether you’re looking for a simple yet impressive dessert, a hearty breakfast bake, or just a sweet treat to brighten your day, this casserole truly delivers. Its rustic charm, delightful flavor, and incredible ease of preparation make it a winner in my book. It’s the kind of recipe that you’ll come back to again and again because it’s reliable, delicious, and always brings a smile.
If you enjoyed this recipe and are always looking for more comforting and easy bakes, I highly recommend checking out my recipes for [link to a similar recipe, e.g., “Easy Apple Crumble Bars”] or my [link to another similar recipe, e.g., “One-Bowl Chocolate Chip Cookies“]. They share that same spirit of simple, satisfying goodness. I can’t wait to hear what you think of this Hobo Casserole Recipe! If you make it, please leave a comment below and let me know how it turned out, or share your favorite fruit combinations! Your feedback means the world to me and helps other bakers too. Happy baking, and enjoy every delicious bite!

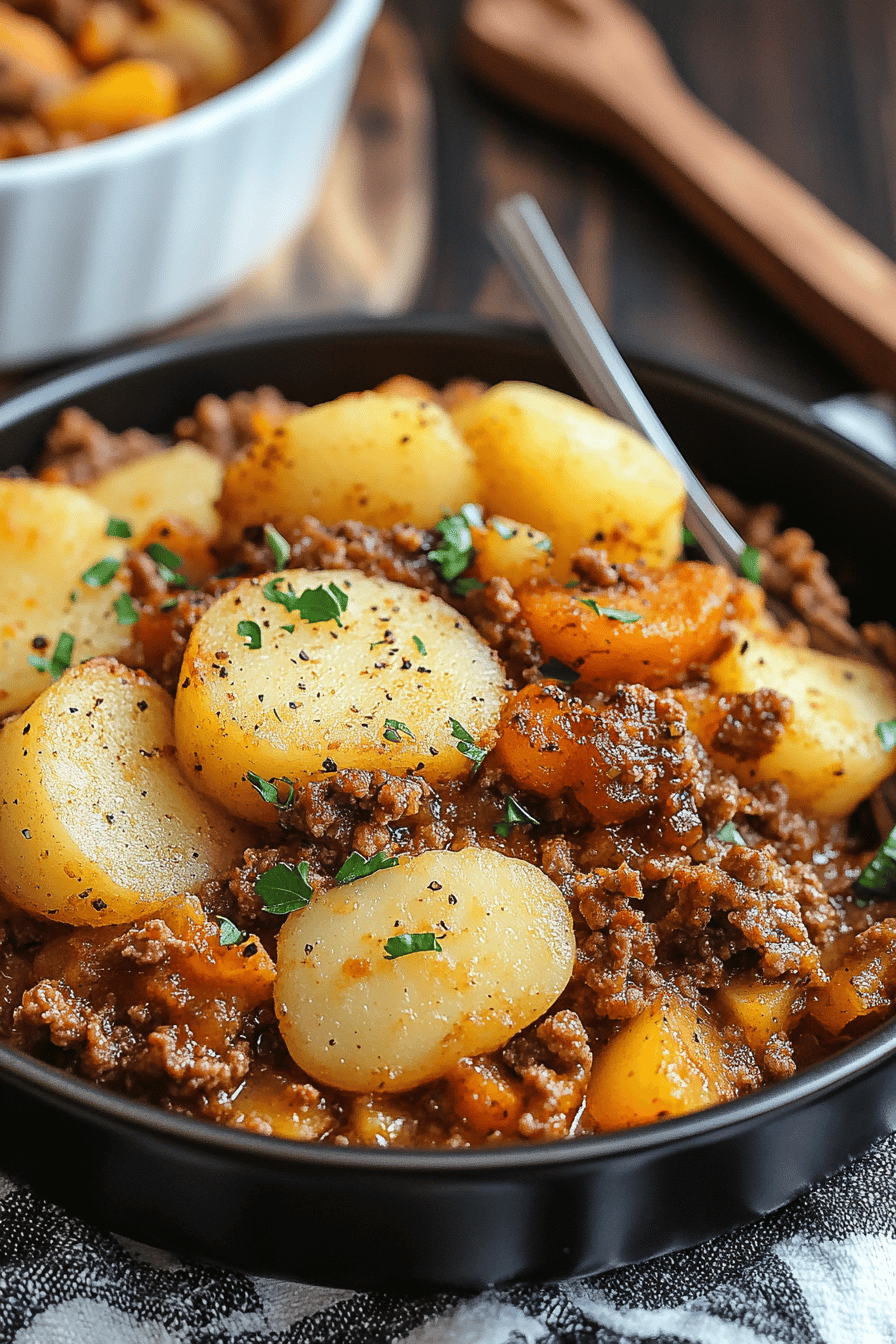
Hobo Casserole Recipe
Ingredients
Main Ingredients
- 1 pound ground beef
- 1 large onion chopped
- 3 cups potatoes peeled and thinly sliced
- 1.5 cups carrots sliced
- 0.5 cup canned corn drained
- 0.5 cup canned green beans drained
- 0.5 cup beef broth
- 1 teaspoon salt
- 0.5 teaspoon black pepper
Instructions
Preparation Steps
- Preheat your oven to 375 degrees F (190 degrees C).
- In a large oven-safe skillet or baking dish, brown the ground beef with the chopped onion. Drain off any excess grease.
- Layer the sliced potatoes, carrots, corn, and green beans over the browned beef mixture.
- Pour the beef broth over the ingredients and season with salt and pepper.
- Cover the skillet or baking dish tightly with foil.
- Bake for 45 minutes, or until the vegetables are tender and the casserole is bubbly. Remove the foil for the last 10-15 minutes of baking if you desire a crispier top.
- Let it rest for a few minutes before serving.