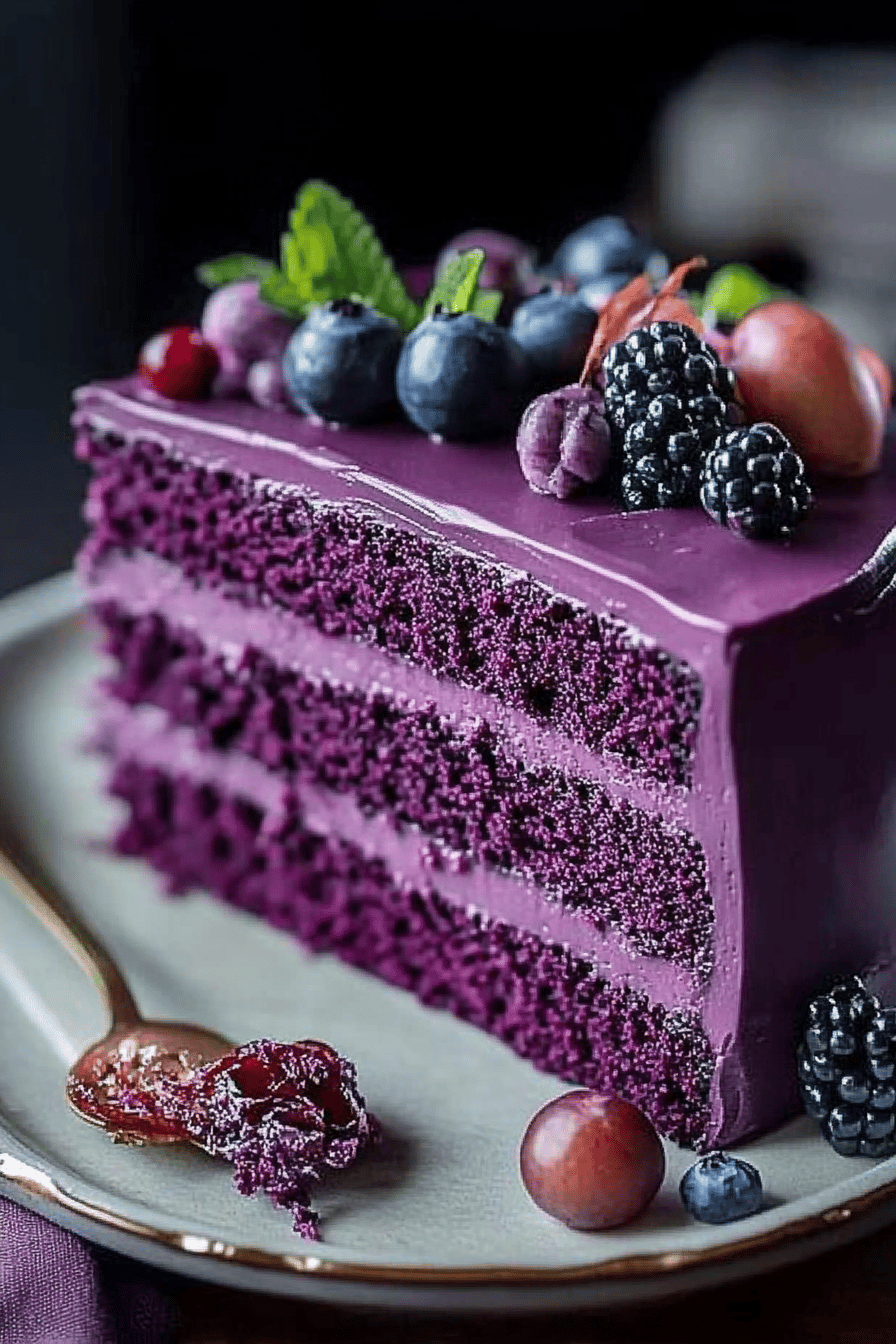
Oh my goodness, where do I even begin with this Purple Velvet Cake? It’s one of those recipes that just feels like pure magic. I remember the first time I made it, it was for my daughter’s birthday, and she’d been utterly obsessed with anything purple. We’re talking purple dresses, purple crayons, purple everything. So, of course, her cake had to be the most magnificent shade of purple imaginable. I was a little nervous, I’ll admit, because sometimes those vibrant food coloring shades can taste a bit… well, artificial. But this recipe? It’s a game-changer. It’s not just about the stunning color, although that’s a huge part of its charm. The flavor is this delicate, moist, almost ethereal sweetness that just melts in your mouth. It’s like a richer, more sophisticated version of a classic Red Velvet, but with that unexpected, delightful purple hue. Honestly, it’s become my go-to for special occasions, and even just for those days when you need a little bit of extra sparkle in your life. If you love a classic red velvet, you are going to adore this purple velvet cake recipe. It’s truly something special!
What is purple velvet cake?
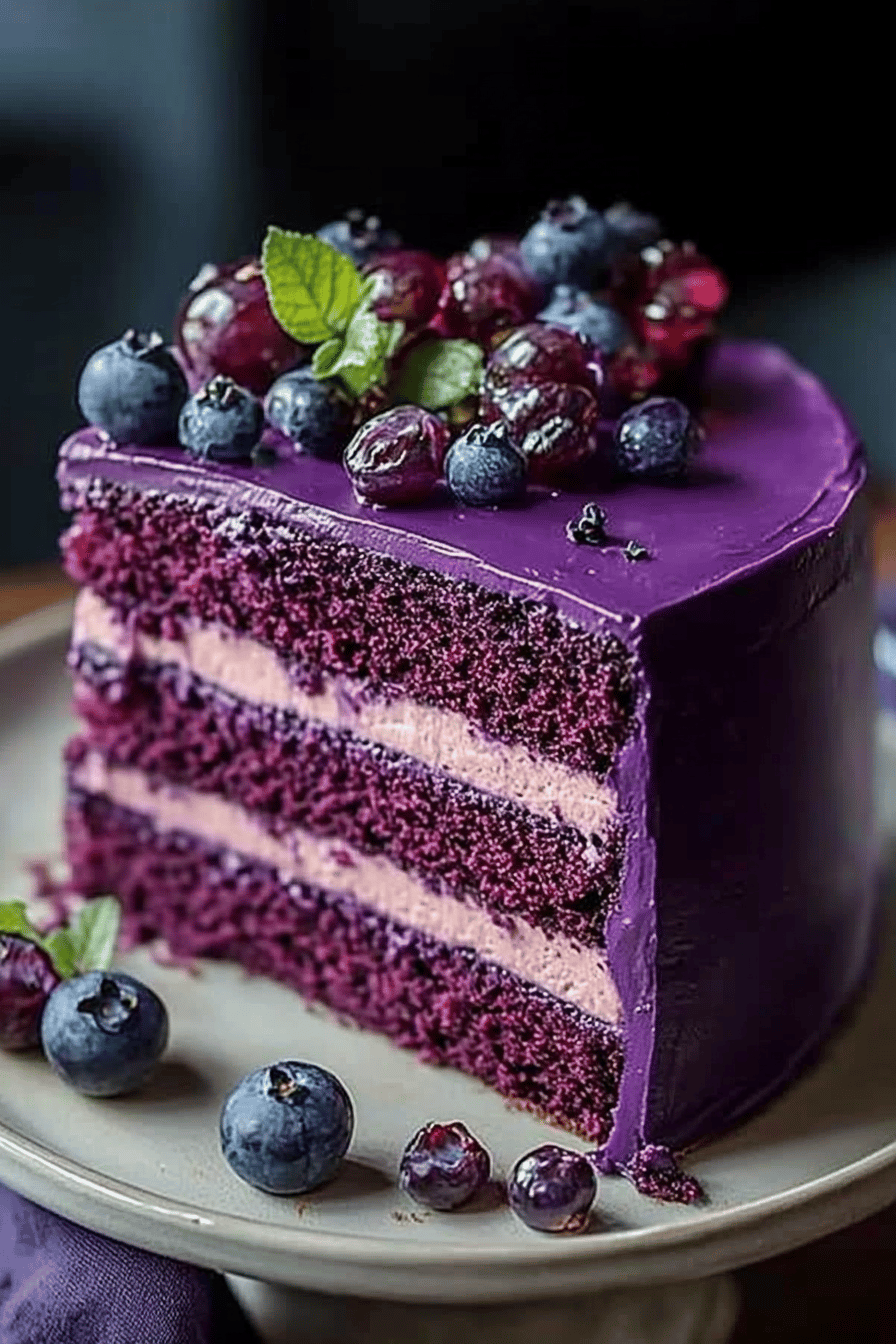
So, what exactly is this enchanting purple wonder? Think of it as the chic, glamorous cousin of the beloved Red Velvet cake. It boasts that same incredibly tender, moist crumb and that subtle, delightful tang that makes red velvet so special. The “velvet” part comes from the super-fine texture of the cake, achieved through a specific combination of ingredients and mixing techniques that create an unbelievably smooth crumb. What makes this one stand out, of course, is the stunning purple color. Instead of the traditional cocoa and red food coloring, we’re working with ingredients that naturally lend themselves to a beautiful violet hue, amplified just a touch with food coloring to make it truly pop. It’s essentially a perfectly balanced, richly flavored cake that happens to be a feast for the eyes as well as the palate. It’s not overly sweet, which I really appreciate, letting the nuanced flavors of buttermilk and vanilla really shine through. It’s a cake that feels both comforting and sophisticated, all wrapped up in a gorgeous purple package.
Why you’ll love this recipe?
There are so many reasons why this Purple Velvet Cake Recipe has become a staple in my kitchen, and I just know you’re going to fall head over heels for it too. First off, the flavor is just out of this world. It has this delicate sweetness, a hint of tang from the buttermilk, and a subtle vanilla warmth that’s just divine. It’s not overly rich or heavy, making it perfect for any time of year. Then there’s the texture – oh, the texture! It’s unbelievably moist and tender, truly living up to the “velvet” name. Every bite just melts in your mouth. What I love most, though, is how surprisingly simple it is to make. Seriously, even if you’re not a seasoned baker, you can whip this up with confidence. The ingredients are pretty standard pantry staples, and the steps are super straightforward. Plus, it’s wonderfully cost-efficient! You get that impressive, bakery-quality cake without breaking the bank. And talk about versatile! It’s amazing on its own, but it’s also a fantastic canvas for all sorts of frostings and fillings. I’ve seen it made with CREAM CHEESE frosting, chocolate ganache, and even a simple dusting of powdered sugar. This recipe is a lifesaver for birthdays, holidays, or honestly, just because you deserve a treat. It’s the kind of cake that makes everyone smile, and that’s really what baking is all about, isn’t it?
How do I make purple velvet cake?
Quick Overview
This Purple Velvet Cake Recipe is all about creating a Super Moist, tender cake with a beautiful, vibrant purple hue. We’ll start by whisking together our dry and wet ingredients separately before gently combining them. The magic happens when we prepare a simple, luscious filling and then swirl it through the batter for a gorgeous marbled effect before baking. It’s a straightforward process that yields stunning results, proving you don’t need to be a pastry chef to create something truly special. Trust me, the aroma as it bakes is simply irresistible!
Ingredients
For the Main Batter:
2 ¾ cups all-purpose flour: Make sure it’s fresh! Sifting it can make your cake even lighter.
1 ½ cups granulated sugar: For that perfect sweetness.
1 teaspoon baking soda: Our leavening agent, helps make it fluffy.
½ teaspoon salt: Balances out the sweetness and enhances flavors.
1 teaspoon unsweetened cocoa powder: Just a touch to add depth, don’t skip this!
1 cup buttermilk: This is key for moisture and that slight tang. If you don’t have buttermilk, you can make a quick substitute by adding 1 tablespoon of white vinegar or lemon juice to 1 cup of milk and letting it sit for 5-10 minutes.
½ cup vegetable oil: Or any neutral-flavored oil like canola. It keeps the cake incredibly moist.
2 large eggs, at room temperature: Room temperature eggs incorporate better.
1 teaspoon vanilla extract: Pure vanilla extract makes a big difference!
1 teaspoon white vinegar: Reacts with the baking soda for extra lift.
1-2 tablespoons purple food coloring: Gel food coloring is best for vibrant color without adding too much liquid. Start with one tablespoon and add more to achieve your desired shade.
For the Filling:
4 ounces cream cheese, softened: Make sure it’s properly softened for easy mixing.
¼ cup unsalted butter, softened: Again, softened is key.
½ cup powdered sugar: For sweetness and a smooth texture.
½ teaspoon vanilla extract: To complement the cake’s flavor.
For the Glaze:
1 cup powdered sugar: Sifted is always best for a smooth glaze.
2-3 tablespoons milk or cream: Start with 2 and add more until you reach your desired drizzling consistency.
½ teaspoon vanilla extract: For a touch of extra flavor.
Step-by-Step Instructions
Step 1: Preheat & Prep Pan
Alright, first things first! Preheat your oven to 350°F (175°C). You want it nice and ready. Now, grab your cake pan – I usually use a 9-inch round pan, but a 9×13 inch pan works too, you’ll just adjust the baking time. Grease it really well with butter or cooking spray, and then dust it with a little flour. Tap out any excess flour. This is my little trick to make sure the cake slides out like a dream. You can also line the bottom with parchment paper for extra insurance – I always do this when I’m feeling extra cautious!
Step 2: Mix Dry Ingredients
In a large mixing bowl, whisk together the all-purpose flour, granulated sugar, baking soda, salt, and cocoa powder. Give it a good whisk until everything is evenly distributed. You want to make sure there are no lumps of cocoa powder hanging around. This step ensures all your dry ingredients are perfectly combined, which means an evenly textured cake every single time.
Step 3: Mix Wet Ingredients
In a separate medium bowl, whisk together the buttermilk, vegetable oil, room temperature eggs, vanilla extract, white vinegar, and the purple food coloring. Whisk until everything is well combined and you have a beautiful, consistent purple hue. If you want an even more intense color, this is the time to add a little more food coloring, but be mindful not to add too much liquid!
Step 4: Combine
Now for the magic! Pour the wet ingredients into the bowl with the dry ingredients. Using a whisk or a rubber spatula, gently mix until just combined. Be super careful not to overmix! Overmixing develops the gluten in the flour, which can lead to a tough cake. A few little lumps are perfectly okay; they’ll bake out. Stop mixing as soon as you don’t see any dry streaks of flour anymore. It should be a thick, wonderfully purple batter.
Step 5: Prepare Filling
While the oven is preheating, let’s whip up that simple filling. In a small bowl, beat together the softened cream cheese and softened butter until smooth and creamy. Gradually beat in the powdered sugar until fully incorporated. Stir in the vanilla extract. You want a thick, spreadable mixture that will hold its shape when swirled. If it feels too stiff, you can add a tiny splash of milk, but usually, this ratio is perfect.
Step 6: Layer & Swirl
Pour about half of the purple batter into your prepared cake pan. Dollop spoonfuls of the cream cheese filling evenly over the batter. Now, carefully pour the remaining purple batter over the filling. Don’t worry if it doesn’t cover completely; the filling will spread as it bakes. To get that gorgeous swirl effect, take a knife or a skewer and gently swirl it through the batter, going down to the bottom of the pan a few times. Don’t overdo it – you want distinct swirls, not a muddy mess! Think of it like painting a beautiful marbled masterpiece.
Step 7: Bake
Pop that pan into your preheated oven. Bake for about 30-35 minutes for a round pan, or 35-40 minutes for a 9×13 inch pan, or until a wooden skewer or toothpick inserted into the center comes out clean or with a few moist crumbs attached. Ovens can be quirky, so start checking around the 30-minute mark. If the top starts to brown too much before it’s cooked through, you can loosely tent it with foil.
Step 8: Cool & Glaze
Once baked, let the cake cool in the pan for about 10-15 minutes. This is crucial for preventing it from breaking. Then, carefully invert it onto a wire rack to cool completely. Don’t even think about glazing it while it’s warm – the glaze will just melt right off! For the glaze, whisk together the sifted powdered sugar, vanilla extract, and milk or cream until you have a smooth, drizzle-able consistency. Add the liquid a tablespoon at a time until it’s just right. Once the cake is completely cool, drizzle the glaze all over the top, letting it drip down the sides. It’s so satisfying to watch!
Step 9: Slice & Serve
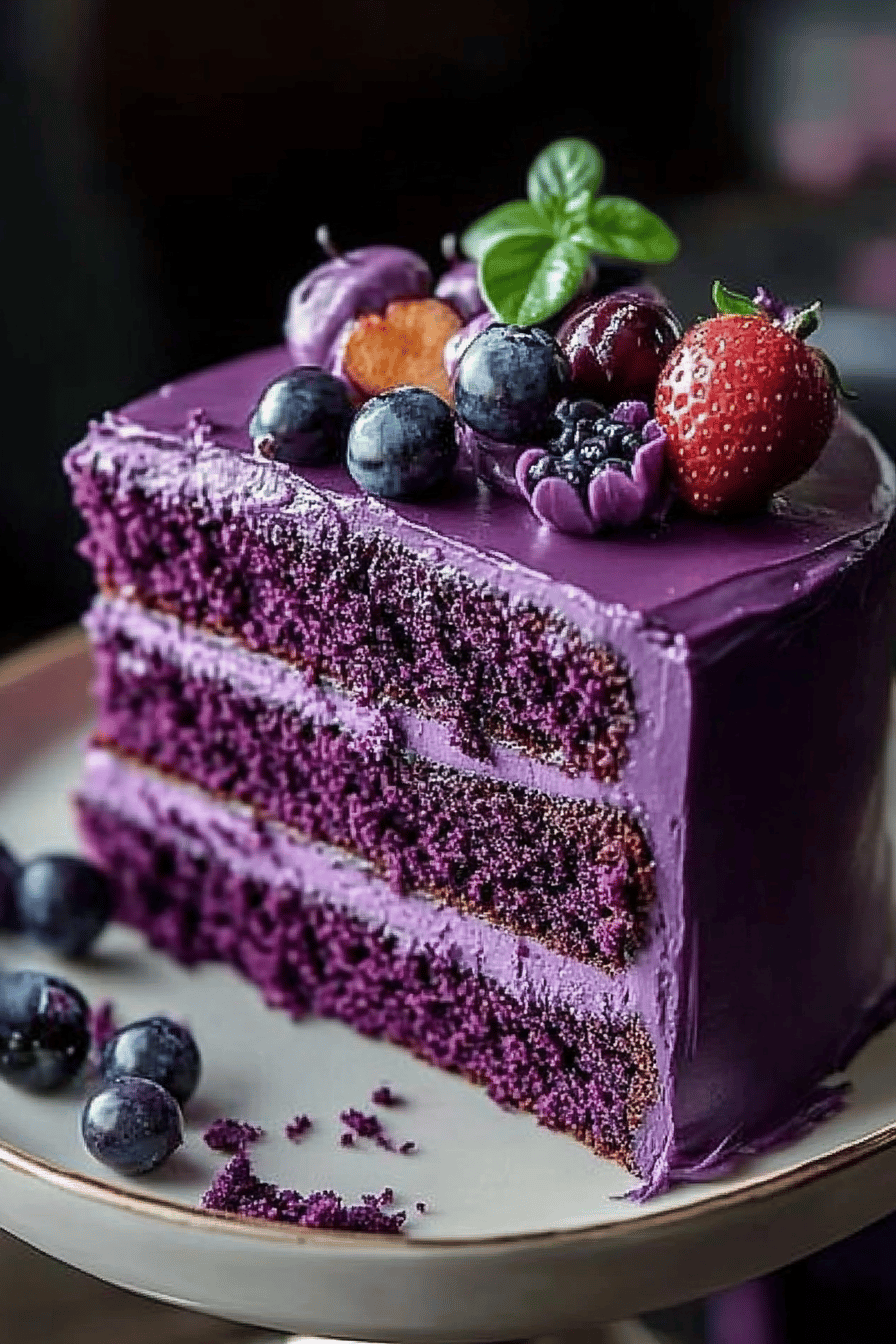
And there you have it! Your stunning Purple Velvet Cake is ready to be admired and devoured. For the cleanest slices, use a sharp knife and wipe it clean between cuts. This cake is fantastic at room temperature. It’s the perfect centerpiece for any celebration, or just a delightful way to brighten up an ordinary day. Enjoy every single bite!
What to Serve It With
This Purple Velvet Cake is pretty spectacular all on its own, but it also plays wonderfully with a few friends! For a special breakfast treat, imagine a slice with a steaming mug of coffee or a lovely Earl Grey tea. The subtle flavors complement each other beautifully, and it’s a much more elegant way to start the day than just toast, right? For brunch, I love serving it with a dollop of fresh whipped cream or a light berry compote. The tartness of berries cuts through the sweetness of the cake perfectly, and a few fresh mint leaves add a lovely pop of color. It’s always a hit when I bring it to a potluck! As a show-stopping dessert, it’s an absolute winner. Think after-dinner styling with a scoop of vanilla bean ice cream or a rich chocolate ganache. The contrast between the cool ice cream and the moist cake is heavenly. And for those moments when you just need a little something sweet and comforting – it’s perfect for cozy snacks. A simple glass of milk is all you really need, but if you’re feeling fancy, a drizzle of melted white chocolate adds an extra touch of decadence. My kids absolutely love it with a glass of cold milk after school; it’s their favorite after-school treat!
Top Tips for Perfecting Your Purple Velvet Cake
I’ve made this Purple Velvet Cake Recipe more times than I can count, and over the years, I’ve picked up a few tricks that really help ensure it turns out perfectly every single time. When it comes to the zucchini prep, while this recipe doesn’t use zucchini, the principle of moisture control is key in many cakes. For cakes that do, I always make sure to squeeze out as much liquid as possible – don’t be shy! Freshness is paramount; use zucchini that feels firm and looks vibrant. For the mixing advice, I cannot stress enough the importance of not overmixing the batter. Once the wet and dry ingredients come together, mix until you just see no more dry flour. A few small lumps are actually a good sign! Overmixing develops gluten, which makes your cake tough, and nobody wants that. For swirl customization, experiment with your design! Don’t be afraid to be artistic. Gently drag your knife or skewer through the batter to create those beautiful ribbons of filling. You can do simple straight lines, figure eights, or even just random swooshes. The goal is visible swirls, not to fully blend the filling into the batter. For ingredient swaps, I’ve successfully made this with almond milk and found it made the cake even creamier! You can also experiment with different oils, but a neutral one is generally best. For the filling, if you don’t have cream cheese, a thick Greek yogurt can be an interesting, tangier substitute, though the texture will be a bit different. When it comes to baking tips, always know your oven. If you find your cakes tend to brown too quickly on top, loosely tenting with foil is your best friend. Make sure your oven rack is in the center position for even heat distribution. And don’t rely solely on the timer; use the toothpick test religiously. For glaze variations, feel free to play with it! If you prefer a thicker glaze, simply use less liquid. For a thinner drizzle, add more. You can also add a tiny pinch of purple food coloring to the glaze for an extra pop of color, or even a bit of lemon zest for a bright flavor contrast. I once tried a lavender-infused glaze, and it was absolutely divine!
Storing and Reheating Tips
Knowing how to properly store this beautiful cake will keep it tasting fresh and delicious for days. For room temperature storage, if your house isn’t too warm, the cake can be kept out for about 2-3 days. Just make sure it’s covered tightly with plastic wrap or in an airtight container. This is perfect if you know you’ll be finishing it off relatively quickly – I always do! If you need to keep it for longer, refrigerator storage is your best bet. Wrap the cooled cake tightly in plastic wrap, then place it in an airtight container. It should stay fresh in the fridge for up to 5 days. When you’re ready to serve a slice from the fridge, I find it tastes best if you let it sit at room temperature for about 20-30 minutes to take the chill off. For freezer instructions, this cake freezes remarkably well! Wrap the completely cooled cake (without the glaze, if possible, or with a very thin layer) very tightly in a couple of layers of plastic wrap, then wrap it again in aluminum foil. It can stay frozen for up to 2-3 months. To thaw, unwrap it and let it sit at room temperature for several hours. For the glaze timing advice, it’s generally best to add the glaze just before serving if you plan to freeze the cake. If you’re storing it at room temperature or in the fridge, you can glaze it before storing, but be aware that the glaze might soften slightly over time. Honestly, I often store it unfrosted in the freezer and glaze it right before serving for the freshest look and taste!
Frequently Asked Questions
Final Thoughts
I truly hope you give this Purple Velvet Cake Recipe a try. It’s more than just a cake; it’s a little bit of joy, a splash of color, and a whole lot of deliciousness all rolled into one. The way it comes out so moist and tender, with that beautiful purple hue and the subtle tangy sweetness, is just incredibly satisfying. It’s the kind of recipe that makes you feel like a baking rockstar, even if you’re just starting out. It’s perfect for birthdays, anniversaries, or just for those days when you need a reminder that life can be beautifully vibrant. If you love this recipe, you might also enjoy my recipe for a Classic Red Velvet Cake or perhaps a Lemon Blueberry Bundt Cake for more delightful baking adventures. I can’t wait to hear what you think of this Purple Velvet Cake! Please leave a comment below and let me know how yours turned out, or if you tried any fun variations. Sharing your creations is what this is all about!
Purple Velvet Cake Recipe
Ingredients
Cake Batter
- 3 cups all-purpose flour
- 1.5 cups granulated sugar
- 1 teaspoon baking soda
- 0.5 teaspoon salt
- 1 tablespoon unsweetened cocoa powder
- 1 cup unsalted butter, softened
- 2 large eggs
- 1 teaspoon vanilla extract
- 1 cup buttermilk
- 2 tablespoons purple food coloring gel
- 1 tablespoon white vinegar
Cream Cheese Frosting
- 8 ounces cream cheese, softened
- 0.5 cup unsalted butter, softened
- 4 cups powdered sugar
- 1 teaspoon vanilla extract
- 2 tablespoons milk or cream
Instructions
Prepare the Cake
- Preheat your oven to 350°F (175°C). Grease and flour two 9-inch round cake pans. Line the bottoms with parchment paper.
- In a large bowl, whisk together the flour, sugar, baking soda, salt, and cocoa powder.
- In a separate bowl, cream together the softened butter and granulated sugar until light and fluffy.
- Beat in the eggs one at a time, then stir in the vanilla extract.
- In a small bowl or liquid measuring cup, combine the buttermilk, purple food coloring, and white vinegar. Stir until well combined. The vinegar will react with the buttermilk, creating a slightly curdled appearance.
- Alternately add the dry ingredients and the buttermilk mixture to the butter mixture, beginning and ending with the dry ingredients. Mix on low speed until just combined. Do not overmix.
- Divide the batter evenly between the prepared cake pans. Bake for 30-35 minutes, or until a wooden skewer inserted into the center comes out clean.
- Let the cakes cool in the pans for 10 minutes before inverting them onto a wire rack to cool completely.
Make the Cream Cheese Frosting
- In a large bowl, beat the softened cream cheese and butter until smooth and creamy.
- Gradually add the powdered sugar, mixing until well combined and smooth. If the frosting is too thick, add milk or cream, one tablespoon at a time, until desired consistency is reached.
- Stir in the vanilla extract.
Assemble the Cake
- Once the cake layers are completely cool, place one layer on a serving plate. Spread a generous amount of frosting over the top.
- Carefully place the second cake layer on top. Frost the top and sides of the entire cake with the remaining cream cheese frosting.
- Decorate as desired. Slice and enjoy your beautiful Purple Velvet Cake!