You know those days? The ones where you just crave something sweet, something comforting, something that feels like a warm hug but you *really* don’t have the energy to bake a whole cake? Yeah, me too. And for years, I’ve been reaching for this incredible pumpkin trifle. It’s the kind of dessert that looks like you spent hours on it, but honestly, it’s surprisingly simple. Think of it as my secret weapon for spontaneous gatherings or just those “treat yourself” moments that pop up unexpectedly. It’s got that perfect balance of spiced pumpkin, creamy goodness, and a delightful crunch that just makes everything feel right in the world. If you love my classic vanilla bean cake, you’re going to fall head over heels for this one, because it takes all those comforting flavors and elevates them into something truly spectacular.
What is a pumpkin tricep?
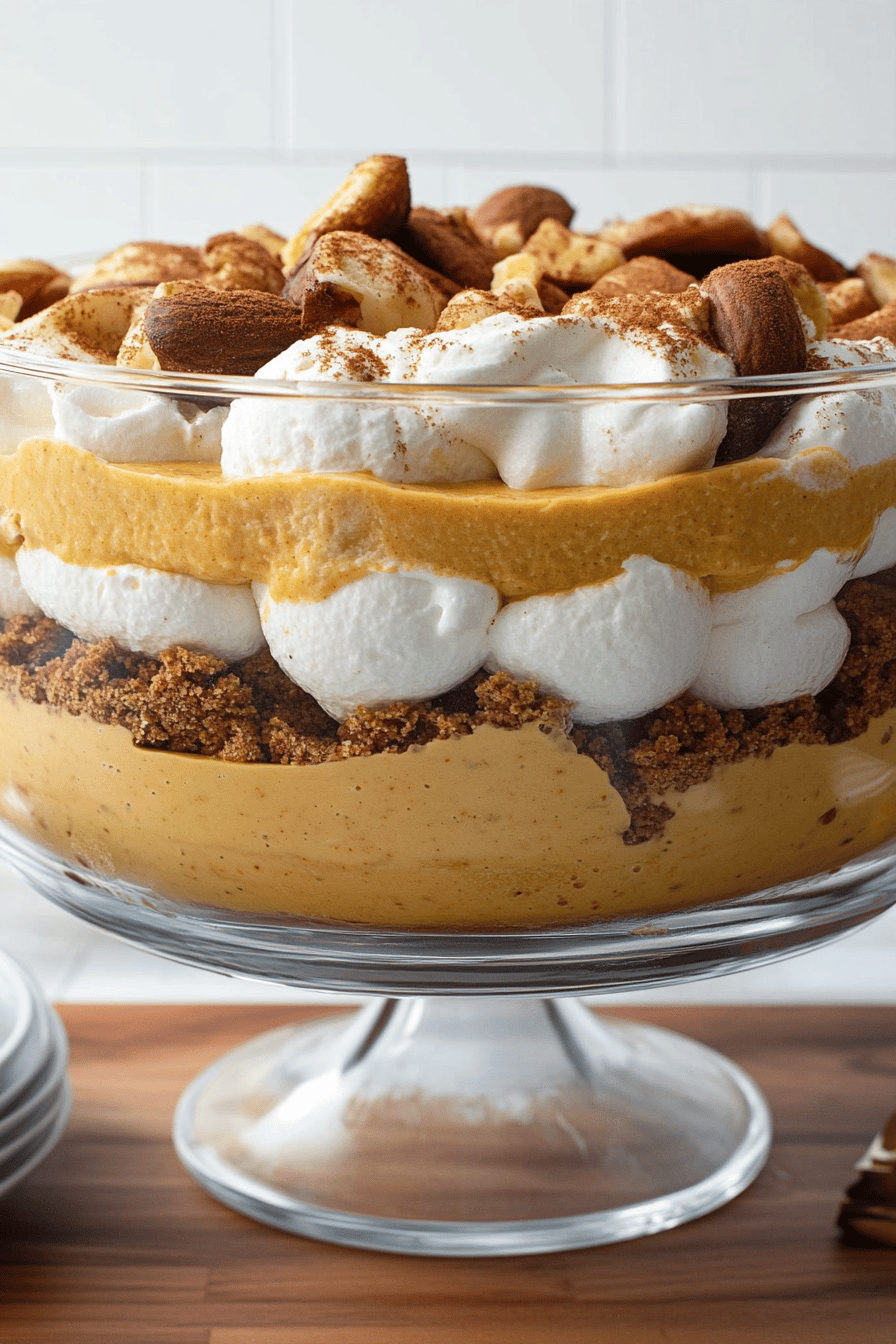
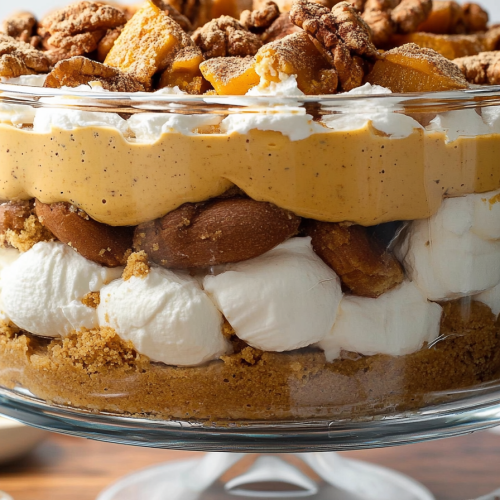
So, what exactly *is* a pumpkin trifle? At its heart, it’s a layered dessert, and the “trifle” part just means it’s made up of distinct layers of cake, cream, and often fruit or other delicious bits, all served in a clear glass dish so you can see all those beautiful strata. My version focuses on those quintessential autumn flavors we all adore. We’re talking about fluffy, spiced cake, a dreamy, cloud-like pumpkin cream, and a little something extra for texture. It’s not just a dessert; it’s an experience. The name itself, “pumpkin trifle,” conjures up images of cozy evenings and holiday gatherings, and I promise you, this recipe lives up to that feeling. It’s like a deconstructed Pumpkin Pie, but somehow even better because you get all the flavors in every single spoonful.
Why you’ll love this recipe?
Okay, let’s get down to why this pumpkin trifle is about to become your new favorite go-to. First off, the flavor is absolutely divine. We’re talking about warm, inviting spices like cinnamon, nutmeg, and ginger that perfectly complement the sweet, earthy notes of pumpkin. The cake itself is moist and tender, not too dense, and it just melts in your mouth. Then you have the cream – oh, the cream! It’s light, airy, and has just the right amount of sweetness and that lovely pumpkin essence. What I love most about this recipe is its deceptive simplicity. You can whip up most of the components ahead of time, which is a lifesaver when you’re hosting. And the cost-efficiency? Fantastic! Most of the ingredients are pantry staples, making it an affordable indulgence. Plus, it’s incredibly versatile. You can easily swap out ingredients or add your own little twists. It’s perfect for any occasion, from a casual family dinner to a more elegant holiday spread. Honestly, I’ve made this countless times, and it’s the first thing to disappear at any potluck I attend.
How do you make a pumpkin trifle?
Quick Overview
Making this pumpkin trifle is all about layering simple, delicious components. We’ll start by baking a light and airy spiced cake, then whip up a velvety pumpkin cream, and finally assemble everything in a beautiful glass dish. The beauty of this recipe is that you don’t need any fancy equipment, and the assembly itself is incredibly fun and forgiving. It’s a dessert that really lets you showcase your creation from the outside in. Trust me, it looks impressive, but it’s genuinely easy to pull off, even if you’re a beginner baker.
Ingredients
For the main cake:
2 cups all-purpose flour (I always use a good quality unbleached flour for the best texture)
1 ½ teaspoons baking soda
½ teaspoon salt
2 teaspoons ground cinnamon
1 teaspoon ground nutmeg
½ teaspoon ground ginger
¼ teaspoon ground cloves
1 ½ cups granulated sugar
½ cup vegetable oil (or canola oil)
2 large eggs, at room temperature
1 teaspoon vanilla extract
1 cup buttermilk, at room temperature (If you don’t have buttermilk, you can make your own by adding 1 tablespoon of lemon juice or white vinegar to 1 cup of milk and letting it sit for 5-10 minutes)
For the Pumpkin Cream Filling:
1 (15-ounce) can pumpkin puree (not pumpkin pie filling – just the pure pumpkin goodness!)
8 ounces CREAM CHEESE, softened (this is key for a smooth cream!)
½ cup powdered sugar, sifted (for no lumps)
1 teaspoon vanilla extract
1 ½ cups heavy whipping cream, cold
For Assembly & Topping:
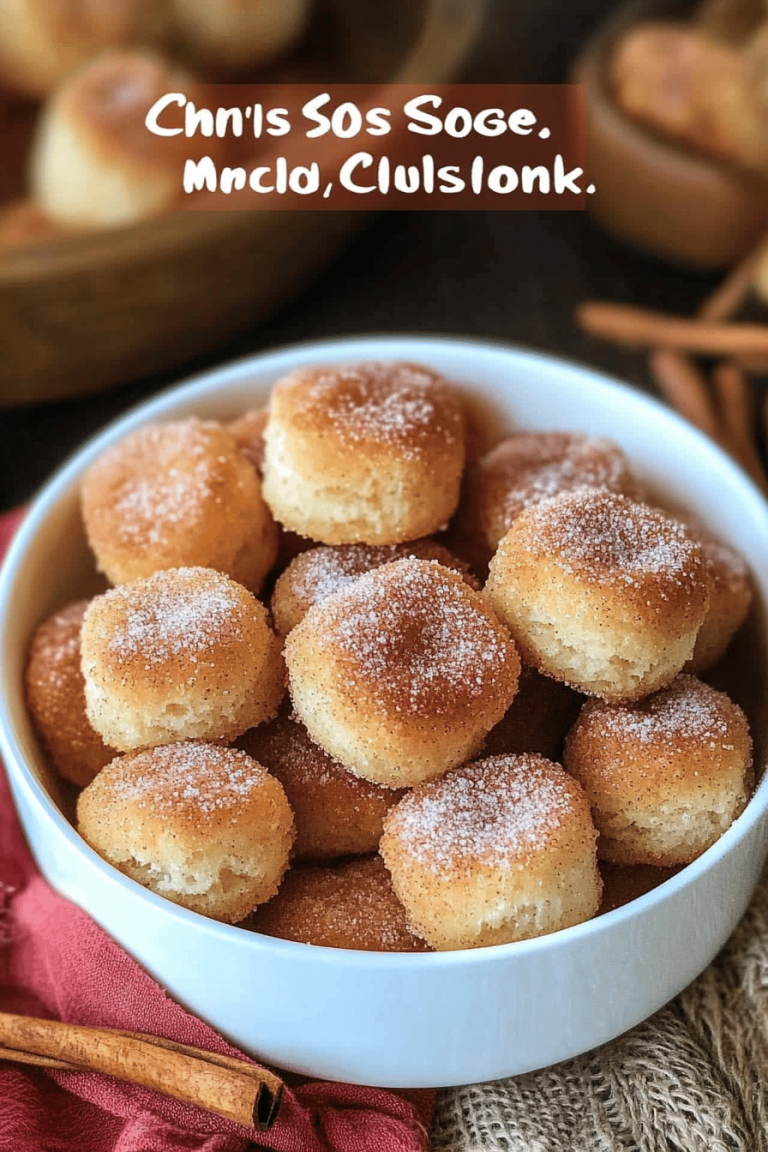
1-2 cups crumbled Gingersnap cookies or graham crackers (for that lovely crunch and spice)
Whipped cream, for topping (optional, but highly recommended!)
A sprinkle of cinnamon or nutmeg for garnish (optional)
Step-by-Step Instructions
Step 1: Preheat & Prep Pan
First things first, let’s get the oven fired up to 350°F (175°C). I like to lightly grease and flour a 9×13 inch baking pan. You can also line it with parchment paper if you prefer, which makes getting the cake out super easy. This preheating step is crucial – you want your oven nice and hot when the batter goes in, ensuring an even bake.
Step 2: Mix Dry Ingredients
In a large bowl, whisk together the flour, baking soda, salt, cinnamon, nutmeg, ginger, and cloves. Whisking them well ensures that all those lovely spices are distributed evenly throughout the cake. Nobody wants a bite that’s just pure cinnamon, right? Give it a good stir until everything is well combined and there are no pockets of baking soda or spices.
Step 3: Mix Wet Ingredients
In a separate medium bowl, combine the granulated sugar and vegetable oil. Beat them together until they’re well incorporated. Then, add the eggs one at a time, beating well after each addition. Stir in the vanilla extract. Finally, gradually add the buttermilk, mixing until just combined. The mixture might look a little separated, and that’s totally okay!
Step 4: Combine
Now, it’s time to bring the wet and dry ingredients together. Pour the wet ingredients into the bowl with the dry ingredients. Using a whisk or a spatula, mix until just combined. Be careful not to overmix! Overmixing develops the gluten in the flour, which can lead to a tough cake. A few small lumps are perfectly fine. We’re aiming for a moist, tender crumb, and gentle mixing is the secret to that.
Step 5: Prepare Filling
In a large bowl, beat the softened cream cheese until it’s smooth and creamy. Add the pumpkin puree, sifted powdered sugar, and vanilla extract. Beat until everything is well combined and smooth. In a separate, clean bowl, whip the cold heavy cream until stiff peaks form. Gently fold the whipped cream into the pumpkin-cream cheese mixture until it’s light and airy. Don’t overmix here either; we want to keep that lovely fluffiness!
Step 6: Layer & Swirl
This is where the magic happens! Grab your clear glass trifle bowl or individual serving glasses. Start with a layer of crumbled cake at the bottom. Spoon some of the pumpkin cream filling over the cake, spreading it gently to cover. Sprinkle a layer of crushed gingersnap cookies over the cream. Repeat these layers – cake, cream, cookies – until you’ve used up all your ingredients, finishing with a layer of the pumpkin cream. For an extra touch, you can swirl the cream a bit with a spoon or fork before adding the cookie layer for a pretty marbled effect. My kids love helping with this part – they think it’s like edible art!
Step 7: Bake
Wait, bake? Oh, right, this is a trifle so we don’t bake the final assembled dish! My apologies, I got ahead of myself dreaming about how delicious it is. The cake itself is baked separately in Step 4 and then cooled and crumbled. So, skip this step for the trifle assembly. You’ll be slicing and serving this delicious creation straight after assembly!
Step 8: Cool & Glaze
Since there’s no baking involved in the final assembly, the “cooling” step is about letting the flavors meld. I usually let my trifle sit in the refrigerator for at least 2-3 hours before serving. This allows the cake to absorb some of the creamy filling and for all those wonderful flavors to marry together. If you’re using extra whipped cream on top, add it just before serving so it stays light and fluffy. A light dusting of cinnamon or nutmeg makes it look extra special.
Step 9: Slice & Serve
Carefully spoon out a generous portion of trifle into bowls. The beauty of this dessert is that every serving will look slightly different and absolutely gorgeous, showcasing those distinct layers. It’s best served chilled, and honestly, it’s a showstopper all on its own. No need for much else!
What to Serve It With
This pumpkin trifle is so wonderfully versatile, it fits right in with almost any meal or occasion. For breakfast, believe it or not! A small, elegant serving alongside a strong cup of coffee can feel like a decadent start to your day. It’s not overly sweet in the morning, especially if you go easy on the cookie crumble. For brunch, it’s a dream. Imagine this sitting pretty on your table next to some Fluffy Pancakes or a savory quiche. I love to serve it in individual glasses for a touch of elegance. As a dessert, well, it’s obviously a star. It’s perfect after a hearty meal, especially during the fall and winter holidays. The warm spices are so comforting. And for those cozy, impromptu snack attacks? This is your answer. It’s so easy to just scoop some out, maybe add a dollop of whipped cream, and enjoy it while curled up on the couch with a good book or a movie. My family has a tradition of having a small slice on chilly evenings, even when it’s not a holiday. It just feels right.
Top Tips for Perfecting Your Pumpkin Trifle
Over the years, I’ve learned a few tricks that make this pumpkin trifle absolutely perfect every single time. For the cake, make sure your ingredients, especially the eggs and buttermilk, are at room temperature. This helps them emulsify better, leading to a lighter, more tender cake. When you’re mixing the dry and wet ingredients, I cannot stress enough: do not overmix. Seriously, stop as soon as you don’t see any dry streaks of flour. A few lumps are okay! Overmixing is the enemy of a tender cake. For the pumpkin cream, using softened cream cheese is non-negotiable. If it’s too cold, you’ll end up with lumps, and nobody wants that. And make sure your heavy cream is super cold when you whip it; that’s how you get those lovely stiff peaks. When it comes to assembly, don’t be afraid to be a little artistic with your layers. I sometimes use a piping bag for the cream filling to create cleaner lines, but honestly, a spoon works just as well and is way less fuss. For the cookie crumble, I love gingersnaps because their spice complements the pumpkin so well, but graham crackers are a great classic alternative. If you want to make it ahead, I find the trifle is actually *better* after a few hours in the fridge because the cake layers soften beautifully. I’ve tested this with a vegan cream cheese and almond milk in the cake, and it actually came out wonderfully, though the texture is slightly different. If you’re sensitive to spices, you can reduce the cinnamon and ginger slightly, but I find they really make the pumpkin flavor sing. Baking time can vary slightly depending on your oven, so always do the toothpick test – a toothpick inserted into the center should come out clean.
Storing and Reheating Tips
Storing this delicious pumpkin trifle is pretty straightforward. If you’ve got leftovers (which is rare in my house, but it happens!), you can keep it covered tightly with plastic wrap or in an airtight container in the refrigerator for up to 3 days. The flavors actually meld and deepen over time, making it even more delicious. I usually don’t bother reheating it, as it’s best served chilled. However, if you really prefer a warmer dessert, you could gently warm individual portions in a very low oven or microwave for a few seconds, but be very careful not to melt the cream. For freezing, I haven’t personally had much luck with freezing the assembled trifle because the cream can become a bit watery upon thawing. However, you could bake the cake layers, let them cool completely, and then freeze them wrapped well. Then, you’d prepare the cream and assemble fresh when you’re ready to serve. If you do happen to freeze the assembled trifle (at your own risk!), make sure it’s wrapped incredibly well in multiple layers of plastic wrap and then a layer of foil. Thaw it slowly in the refrigerator overnight. For the glaze, I always recommend adding any extra whipped cream topping just before serving to keep it light and fluffy. If you’re storing it without extra whipped cream, it holds up beautifully for those 3 days in the fridge.
Frequently Asked Questions
Final Thoughts
There you have it – my absolute favorite pumpkin trifle! It’s more than just a recipe; it’s a little slice of cozy comfort that always brings a smile to my face, and I truly hope it does the same for you. The combination of those warm spices, the creamy pumpkin goodness, and that delightful crumble is just unbeatable. It’s the kind of dessert that feels special enough for a holiday but is so easy to make, you can whip it up any time you need a little sweetness in your life. If you’re a fan of pumpkin desserts, you might also adore my Pumpkin Bread Recipe or my Spiced Pumpkin Cookies – they share that same comforting flavor profile. I can’t wait to hear what you think! Please leave a comment below to share your experience, or if you’ve found any fun variations. And if you snap a picture, be sure to tag me! Happy baking, and more importantly, happy eating!
Pumpkin trifle
Ingredients
Pumpkin Cake Layers
- 1.5 cups all-purpose flour
- 1 teaspoon baking soda
- 0.5 teaspoon salt
- 1 teaspoon ground cinnamon
- 0.5 teaspoon ground nutmeg
- 0.25 teaspoon ground ginger
- 0.25 teaspoon ground cloves
- 1 cup granulated sugar
- 0.5 cup packed brown sugar
- 0.5 cup vegetable oil
- 2 large eggs
- 1 cup canned pumpkin puree
- 0.25 cup milk
Vanilla Custard
- 4 large egg yolks
- 0.5 cup granulated sugar
- 2 tablespoons cornstarch
- 2 cups whole milk
- 1 teaspoon vanilla extract
Whipped Cream Topping
- 2 cups heavy whipping cream
- 0.25 cup powdered sugar
- 1 teaspoon vanilla extract
Garnish (Optional)
- 0.5 cup chopped pecans or walnuts
- caramel sauce
Instructions
Prepare the Pumpkin Cake
- Preheat oven to 350°F (175°C). Grease and flour a 9x13 inch baking pan.
- In a large bowl, whisk together flour, baking soda, salt, cinnamon, nutmeg, ginger, and cloves.
- In a separate bowl, whisk together granulated sugar, brown sugar, vegetable oil, and eggs until well combined.
- Add the pumpkin puree and milk to the wet ingredients and mix until smooth.
- Gradually add the dry ingredients to the wet ingredients, mixing until just combined. Do not overmix.
- Pour the batter into the prepared baking pan and bake for 30-35 minutes, or until a toothpick inserted into the center comes out clean.
- Let the cake cool completely in the pan, then cut into 1-inch cubes.
Make the Vanilla Custard
- In a medium bowl, whisk together egg yolks, granulated sugar, and cornstarch until smooth.
- In a saucepan, heat the milk over medium heat until it is steaming but not boiling.
- Slowly pour about half of the hot milk into the egg yolk mixture, whisking constantly to temper the eggs.
- Pour the tempered egg mixture back into the saucepan with the remaining milk. Cook over medium-low heat, stirring constantly, until the custard thickens enough to coat the back of a spoon.
- Remove from heat and stir in the vanilla extract.
- Pour the custard into a clean bowl, cover with plastic wrap directly on the surface to prevent a skin from forming, and refrigerate until completely chilled.
Prepare the Whipped Cream
- In a large bowl, whip the heavy cream with an electric mixer on medium-high speed until soft peaks form.
- Add the powdered sugar and vanilla extract, and continue whipping until stiff peaks form.
Assemble the Trifle
- In a large trifle dish or individual serving glasses, layer about one-third of the pumpkin cake cubes.
- Spoon about one-third of the chilled custard over the cake layer.
- Spread about one-third of the whipped cream over the custard.
- Repeat the layers two more times, ending with a layer of whipped cream.
- Garnish with chopped nuts and drizzle with caramel sauce, if desired.
- Chill the trifle for at least 1 hour before serving to allow the flavors to meld.