There are certain recipes that just *feel* like home, aren’t there? The ones that, the moment you start making them, the kitchen fills with the most incredible aroma and suddenly everyone’s asking what’s for dessert. For me, that recipe is absolutely my Pineapple Upside-Down Cake. It’s not just a cake; it’s a memory. I remember my grandmother making this for special occasions, her hands dusted with flour, a little smile playing on her lips as she carefully arranged those pineapple rings. It’s funny, because when people think of upside-down cakes, they often think of the classic pineapple version, and for good reason! It’s just… perfection. This isn’t a fussy dessert; it’s surprisingly simple, but the results are always show-stopping. If you’ve ever felt intimidated by baking, I promise you, this Pineapple Upside-Down Cake Recipe is a fantastic place to start. It’s the kind of cake that makes you look like a baking pro without breaking a sweat, and honestly, that’s a win-win in my book.
What is a Pineapple Upside Down Cake?
So, what exactly is this magical creation? At its heart, Pineapple Upside-Down Cake is a type of cake where the topping is placed in the bottom of the baking pan before the batter is poured over it. Then, when the cake is baked and inverted, the topping becomes the beautiful, glossy crown of the cake. Think of it as a delightful surprise waiting for you when you flip it over! The name itself tells you exactly what’s happening: the fruit (in this case, sweet and tangy pineapple) is “upside down” while it bakes, caramelizing and becoming incredibly tender. It’s essentially a moist, tender cake with a rich, sticky, fruit-laden topping that is just out-of-this-world delicious. It’s a classic for a reason, a beautiful marriage of sweet cake and bright, caramelized fruit. It’s a dessert that always brings a smile, and honestly, who doesn’t love a bit of sunshine on their plate?
Why you’ll love this recipe?
What are some good reasons to make Pineapple Upside Down Cake?flavor is just sensational. You get that wonderfully moist, buttery cake base, but the real star is the topping. The pineapple rings caramelize beautifully in the brown sugar and butter, creating this rich, slightly tart, super sweet glaze that just melts in your mouth. It’s got that perfect balance of sweet and tangy that makes you want another slice before you’ve even finished your first. Then there’s the simplicity. Honestly, this cake is a lifesaver on busy nights when you want something special but don’t have hours to spare. The steps are straightforward, and you probably have most of the ingredients in your pantry already. It’s the kind of recipe that makes you feel accomplished without being stressed. And let’s talk about Cost-efficiency: What is the best way to measure cost-efficiency?. This isn’t a cake that requires fancy or expensive ingredients. You’re using pantry staples, and the results are far more impressive than the cost! My mom always said it was one of the most economical ways to make a truly decadent dessert. Plus, the versatility is fantastic. While pineapple is the classic, I’ve dabbled with other fruits (more on that later!), and it always turns out wonderfully. You can serve it warm with a dollop of whipped cream or a scoop of vanilla Ice Cream, and it’s pure bliss. I’ve made this countless times, and it never fails to impress. It’s just one of those reliable, comforting, absolutely delicious recipes that I know I can turn to, whether it’s for a casual family dinner or a more special occasion. It truly is a winner!
How to Make Pineapple Upside-Down Cake
Quick Overview
Making this Pineapple Upside-Down Cake is really quite straightforward. You’ll essentially be creating a caramel-like topping in the bottom of your pan, then pouring a simple Cake Batter over it, and baking it all together. The magic happens when you flip it! This method ensures the fruit is perfectly cooked and glazed, and the cake stays incredibly moist. It’s a foolproof process that yields stunning results every single time. You won’t believe how easy it is to create such a beautiful and delicious cake!
Ingredients
For the Main Batter:
Here’s what you’ll need for the cake itself. I always recommend using good quality ingredients for the best flavor, but don’t stress if you can’t find everything – this cake is pretty forgiving!
- 2 cups all-purpose flour: Make sure it’s fresh and hasn’t been sitting in the back of your pantry for too long. It makes a difference!
- 1 ½ teaspoons baking powder: This is what gives our cake its lovely lift.
- ½ teaspoon salt: Balances out the sweetness and enhances the other flavors.
- ¾ cup (1 ½ sticks) unsalted butter, softened: For that rich, tender crumb. Don’t skimp on the quality here!
- 1 ½ cups granulated sugar: Sweetness is key for the cake base.
- 2 large eggs: Room temperature eggs incorporate better, so take them out of the fridge about 30 minutes before you start.
- 1 teaspoon vanilla extract: The classic flavor enhancer. Pure vanilla extract is always best.
- 1 cup milk: Whole milk will give you the richest texture, but 2% works too. I’ve even tested this with almond milk and it actually made it even creamier!
For the Filling:
This is where the real showstopper begins!
- ⅓ cup (about ⅔ stick) unsalted butter: This melts down to create our luscious caramel base.
- 1 cup packed light brown sugar: The brown sugar is crucial for that deep caramel flavor and gorgeous color.
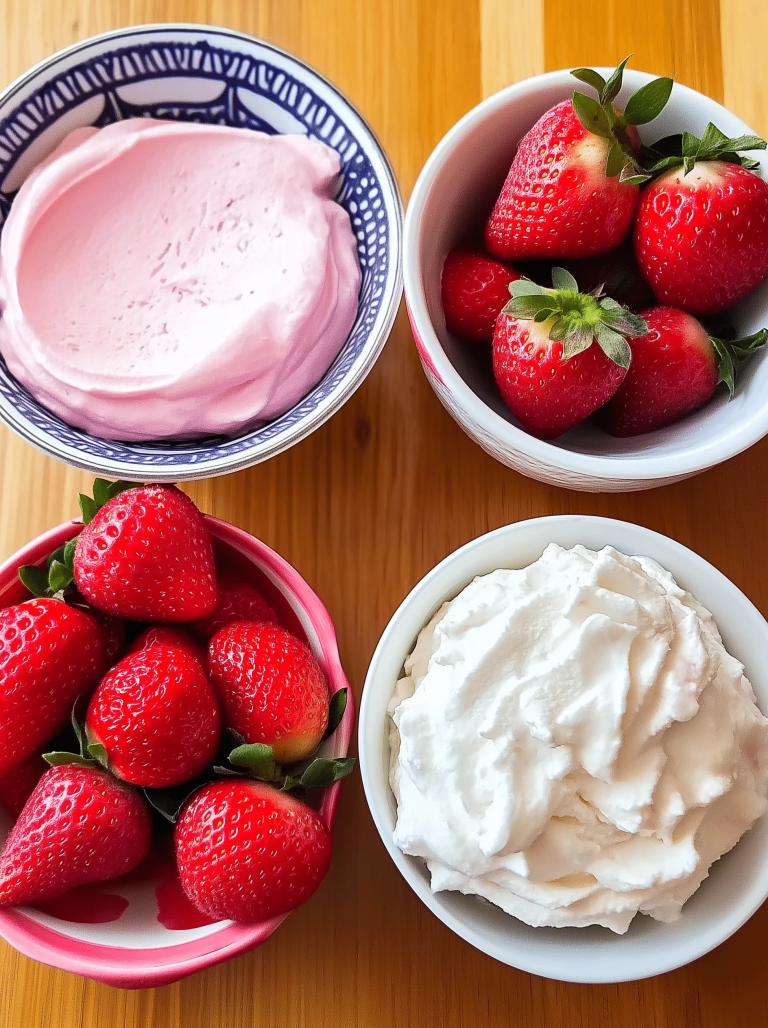
- 1 can (20 ounces) sliced pineapple, drained well: Make sure to drain it thoroughly to avoid a watery cake. Reserve a little juice if you like for another use!
- Maraschino cherries: (Optional, but I think they add such a lovely pop of color!) About 8-10, drained.
For the Glaze:
This is technically part of the filling, but it’s what makes the topping so irresistible!
- The melted butter and brown sugar mixture you create forms the glaze as it bakes. The key is to let it get nice and bubbly and caramelized.
Step-by-Step Instructions
Step 1: Preheat & Prep Pan
First things first, let’s get our oven preheated to 350°F (175°C). While the oven is warming up, grab a 9-inch round cake pan. You don’t need to grease and flour it in the traditional sense for this recipe. Instead, we’re going to melt the butter and brown sugar directly in the pan. This is the base of our glorious topping! So, in your cake pan, melt the ⅓ cup of butter over low heat on the stovetop, or pop it in the microwave for a minute. Once melted, sprinkle the packed light brown sugar evenly over the melted butter. This mixture is going to create that beautiful, sticky caramel layer. Spread it out as evenly as possible. Now, arrange your drained pineapple slices over the brown sugar mixture. I usually fit about 6-8 slices around the edge. Then, I pop a maraschino cherry right in the center of each pineapple ring if I’m using them. This step is so satisfying – it starts to look like a beautiful flower!
Step 2: Mix Dry Ingredients
While our topping is chilling in the pan, let’s get the cake batter going. In a medium bowl, whisk together the all-purpose flour, baking powder, and salt. Give it a good whisk to make sure everything is evenly distributed. This ensures your cake rises evenly and doesn’t have any pockets of baking powder. Just a quick, gentle whisk is all you need. Don’t overthink this part!
Step 3: Mix Wet Ingredients
In a large bowl, cream together the softened unsalted butter and granulated sugar. You want this to be light and fluffy, almost like pale yellow clouds. This usually takes a few minutes with an electric mixer, or a good arm workout with a whisk. Once it’s nice and creamy, beat in the eggs, one at a time, making sure to scrape down the sides of the bowl after each addition. Then, stir in the vanilla extract. Your mixture should look smooth and emulsified. This is where all that lovely flavor starts to build.
Step 4: Combine
Now, it’s time to bring our wet and dry ingredients together. Add about half of the dry ingredients to the wet ingredients and mix on low speed (or gently by hand) until just combined. Then, add the milk and mix again until just combined. Finally, add the remaining dry ingredients and mix *just* until no streaks of flour remain. The key here is NOT to overmix. Overmixing develops the gluten in the flour, which can lead to a tough cake. A few little lumps are perfectly fine; they’ll bake out. We’re aiming for a smooth, but not overworked, batter. It should be thick but pourable.
Step 5: Prepare Filling
Okay, you’ve already done the heavy lifting for the filling in Step 1! The “filling” is really just the caramelized pineapple and brown sugar mixture that’s sitting in the bottom of your prepared cake pan. The butter and brown sugar will melt and bubble up around the pineapple as it bakes, creating that gorgeous, sticky glaze that makes this cake so special. It’s so simple, yet so effective!
Step 6: Layer & Swirl
This step is actually already done when you prepared your pan in Step 1! You’ve laid down your caramelized pineapple slices and cherries over the butter and brown sugar mixture. Now, you’re going to gently pour your cake batter evenly over the fruit. Try to get it as level as possible. Don’t worry if a little bit of batter gets onto the fruit; it’s all going to bake together into one delicious masterpiece. There’s no swirling needed for this classic version, just a nice, even layer of batter. The magic happens when you flip it!
Step 7: Bake
Carefully place your filled cake pan into the preheated oven. Bake for 35-45 minutes, or until a wooden skewer or toothpick inserted into the center of the cake comes out clean. The exact baking time can vary depending on your oven, so keep an eye on it. The top of the cake should be golden brown and spring back lightly when touched. You’ll know it’s done when the edges are pulling away slightly from the sides of the pan and the center looks set. The aroma filling your kitchen at this point will be absolutely divine!
Step 8: Cool & Glaze
This is a crucial step for getting that perfect flip! Once the cake is out of the oven, let it cool in the pan for about 10-15 minutes. This allows the caramel to set up slightly but not harden completely, which is important for easy release. If you wait too long, the topping can stick to the pan. If you try to flip it too soon, it might be too loose. So, that 10-15 minute window is your sweet spot. After cooling, place a serving plate or platter (one that’s larger than your cake pan) upside down over the cake pan. With oven mitts on, carefully and confidently flip the pan and plate together. Lift the pan straight up. Voila! Your beautiful Pineapple Upside-Down Cake should slide out, revealing that gorgeous, caramelized fruit topping. If any bits stick, gently nudge them back into place with a spatula. The glaze is already formed by the melted butter and brown sugar – no extra glazing needed!
Step 9: Slice & Serve
Now for the best part – serving! This cake is absolutely heavenly served warm. You can slice it into wedges and serve it as is, or for an extra treat, add a dollop of freshly whipped cream or a scoop of good quality vanilla ice cream. The warm, gooey topping with the cool cream or ice cream is just divine. The scent alone is enough to make everyone gather around the table. Trust me, this is a cake that disappears fast!
What to Serve It With
This Pineapple Upside-Down Cake is wonderfully versatile and pairs beautifully with all sorts of beverages and accompaniments, depending on the occasion.
For Breakfast: Honestly, a slice of this cake on its own with a strong cup of coffee is a dream start to the day. The sweetness of the fruit and caramel is a lovely treat to wake up to. I sometimes cut a smaller piece and pair it with a fresh piece of fruit, like a bowl of berries, for a more balanced morning meal. It feels indulgent without being heavy.
For Brunch: This cake really shines at brunch! Imagine it as the star dessert on your table. I love serving it alongside a light fruit salad to balance the richness. For beverages, a sparkling cider or a mimosa is just perfect. The bubbly and fruity notes complement the cake beautifully, and it feels so festive and special.
As Dessert: This is its classic role, and it excels here. Served warm, with a generous scoop of vanilla bean ice cream melting into the warm, sticky pineapple and caramel, it’s pure comfort. A drizzle of extra caramel sauce if you’re feeling extra decadent, or a dollop of lightly sweetened whipped cream, is also a fantastic choice. It’s a crowd-pleaser that always gets rave reviews.
For Cozy Snacks: Sometimes, you just need a little something sweet in the afternoon or evening. A warm slice of this cake with a mug of tea or even a glass of milk is incredibly comforting. It’s like a warm hug in dessert form. It’s also fantastic to have a slice with an espresso after dinner when you want something sweet but not overly heavy.
My family tradition is to have a slice (or two!) with a tall glass of cold milk. It’s simple, nostalgic, and always hits the spot. I’ve also found that a light dusting of powdered sugar over the top *after* flipping can add a lovely, delicate finish if you’re not serving it with ice cream or cream.
Top Tips for Perfecting Your Pineapple Upside-Down Cake
I’ve made this Pineapple Upside-Down Cake more times than I can count, and over the years, I’ve picked up a few tricks that I think really elevate it. Here are my top tips to ensure yours turns out absolutely perfect:
Pineapple Prep: The most crucial step here is draining the pineapple *really* well. Any excess liquid can make your caramel watery and prevent it from caramelizing properly. I like to lay the pineapple slices on a few layers of paper towels for about 10-15 minutes before arranging them in the pan. This extra step ensures you get that lovely, thick, glossy glaze. Also, don’t be afraid to use canned pineapple; it’s often softer and more tender than fresh for this application.
Mixing Advice: Remember what I said about not overmixing the batter? That’s probably the most common mistake people make with cakes. Overmixing develops gluten, leading to a tough, dense texture. Mix the wet and dry ingredients *just* until they are combined. A few small lumps in the batter are perfectly fine and will bake out. We’re aiming for a tender crumb, not a chewy one!
Caramelization Magic: When you’re melting the butter and brown sugar in the pan, try to get an even layer. This ensures that the caramelization is consistent across the bottom. If you have bare spots, you might end up with some dry areas or less flavorful bits. Let the brown sugar and butter bubble and get slightly syrupy. That’s the caramel forming!
Ingredient Swaps: While pineapple is the classic, this cake is fantastic with other fruits too! Peaches (canned or fresh, sliced), pears, or even mandarins work wonderfully. Just make sure they are drained well. For the cake batter, if you’re out of milk, you can substitute buttermilk or even plain yogurt thinned with a little water for extra richness and tang. I’ve also experimented with adding a pinch of cinnamon or nutmeg to the dry ingredients for a bit of warmth, which is lovely in the fall.
Baking Tips: Ovens can be finicky! My advice is to get to know yours. If you know it runs hot, you might want to reduce the temperature slightly or check the cake a few minutes earlier. Always use the toothpick test to check for doneness. A clean toothpick is your best friend. Also, ensure your oven rack is in the center of the oven for even heat distribution.
The Flip: This is where the suspense is! Don’t be scared. Make sure to let it cool for that 10-15 minutes – this is key. If the caramel is too hot and liquid, it can splash when you flip. If it’s too cool and hardened, it might stick. Use a sturdy plate that’s larger than the pan, and a confident, quick flip is best. If a pineapple ring or cherry gets stuck, don’t panic! Just gently lift it out of the pan and place it back onto the cake with a spatula. It’s fixable!
I learned the hard way years ago by flipping it too soon and having a sticky mess. Since then, I’ve been religious about that cooling time, and it makes all the difference!
Storing and Reheating Tips
One of the best things about this Pineapple Upside-Down Cake is that it actually keeps quite well, making it a great option for making ahead.
Room Temperature: If you’ve served the cake and have leftovers, you can store it loosely covered (or in an airtight container) at room temperature for up to 2 days. The caramel topping can sometimes become a bit stickier in humid weather, so if it’s warm where you are, the refrigerator might be a better bet. Just make sure it’s not directly exposed to air, as it can dry out.
Refrigerator Storage: For longer storage, or if your kitchen is warm, I always recommend refrigerating the cake. Wrap it tightly in plastic wrap, or store it in an airtight container. It will keep well in the fridge for about 4-5 days. The texture will firm up slightly in the fridge, but don’t worry, it’s easily revived.
Freezer Instructions: Yes, you can freeze this cake! It’s perfect for making ahead for holidays or special events. Once the cake is completely cooled, wrap it well in plastic wrap, then in a layer of aluminum foil, or place it in a freezer-safe airtight container. It should last in the freezer for up to 2-3 months. To thaw, transfer the cake to the refrigerator overnight. This allows it to thaw gradually and helps preserve its texture.
Glaze Timing Advice: If you’re storing the cake at room temperature or in the fridge, the glaze is already perfectly set from the initial cooling. If you’re freezing it, the glaze will be fine once thawed. For reheating, I find that warming a slice gently in the microwave for 15-20 seconds (just until slightly warm, not hot) brings back that wonderful gooeyness of the caramel topping. Alternatively, you can warm individual slices in a low oven (around 300°F/150°C) for about 5-10 minutes, which can help crisp up the cake slightly while warming the topping.
I often bake this cake the day before a party, and it’s always just as delicious the next day. It’s a real stress-saver!
Frequently Asked Questions
Final Thoughts
There you have it – my absolute favorite Pineapple Upside-Down Cake recipe! I truly hope you give this a try. It’s more than just a dessert; it’s a slice of sunshine, a trip down memory lane, and a guaranteed way to make any day feel a little more special. The combination of the moist, tender cake and that sticky, caramelized pineapple topping is just pure magic. It’s one of those recipes that makes you feel so proud when you flip it out and see that gorgeous, golden fruit glistening on top. If you love this recipe, you might also enjoy my Classic Yellow Cake recipe or my simple Apple Crumble – they’re other family favorites that bring a similar kind of comfort and joy to the kitchen. I can’t wait to hear what you think! Please leave a comment below and let me know how your Pineapple Upside-Down Cake turns out, or if you have any of your own family twists to share. Happy baking!

Pineapple Upside-Down Cake Recipe
Ingredients
For the Topping
- 0.5 cup unsalted butter
- 1 cup packed light brown sugar
- 1 can (20 ounces) sliced pineapple, drained reserve the juice
- 12 maraschino cherries, drained
For the Cake
- 1.5 cup all-purpose flour
- 1 teaspoon baking powder
- 0.5 teaspoon salt
- 0.5 cup unsalted butter, softened
- 1 cup granulated sugar
- 2 large eggs
- 1 teaspoon vanilla extract
- 0.5 cup reserved pineapple juice
Instructions
Preparation Steps
- Preheat oven to 350°F (175°C). Grease and flour a 9-inch round cake pan.
- In a small saucepan, melt the 0.5 cup of butter over medium heat. Stir in the brown sugar until combined.
- Pour the brown sugar mixture evenly into the prepared cake pan. Arrange the pineapple slices over the brown sugar, then place a maraschino cherry in the center of each pineapple ring.
- In a medium bowl, whisk together the flour, baking powder, and salt.
- In a large bowl, cream together the softened butter and granulated sugar until light and fluffy.
- Beat in the eggs one at a time, then stir in the vanilla extract.
- Gradually add the dry ingredients to the wet ingredients, alternating with the reserved pineapple juice, beginning and ending with the dry ingredients. Mix until just combined.
- Gently spread the cake batter over the pineapple and cherry layer in the pan.
- Bake for 40-45 minutes, or until a wooden skewer inserted into the center comes out clean.
- Let the cake cool in the pan for 10 minutes before inverting it onto a serving plate. Serve warm.