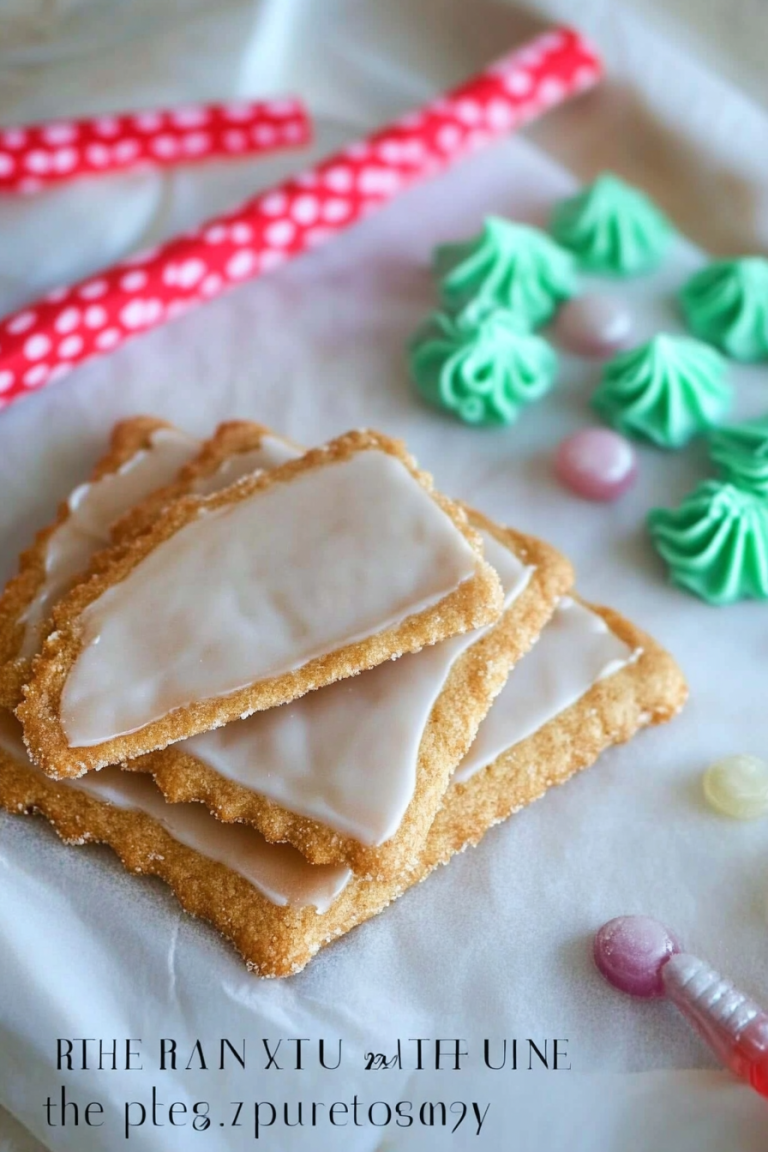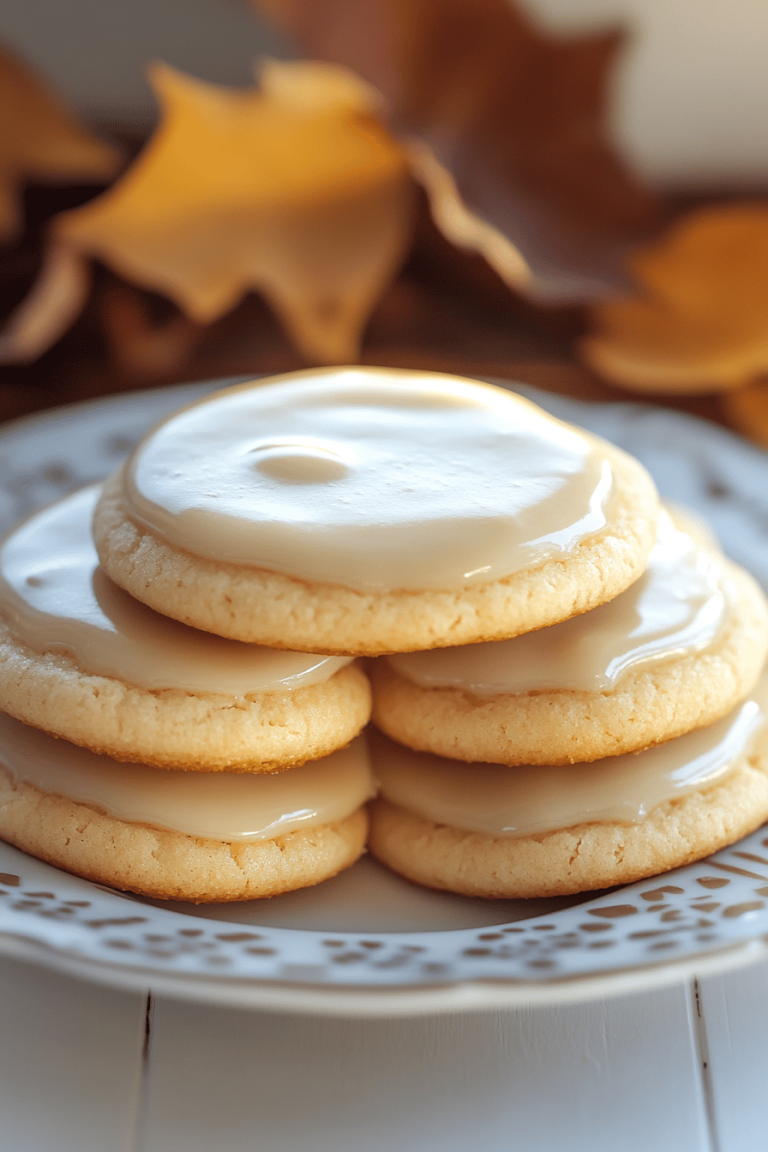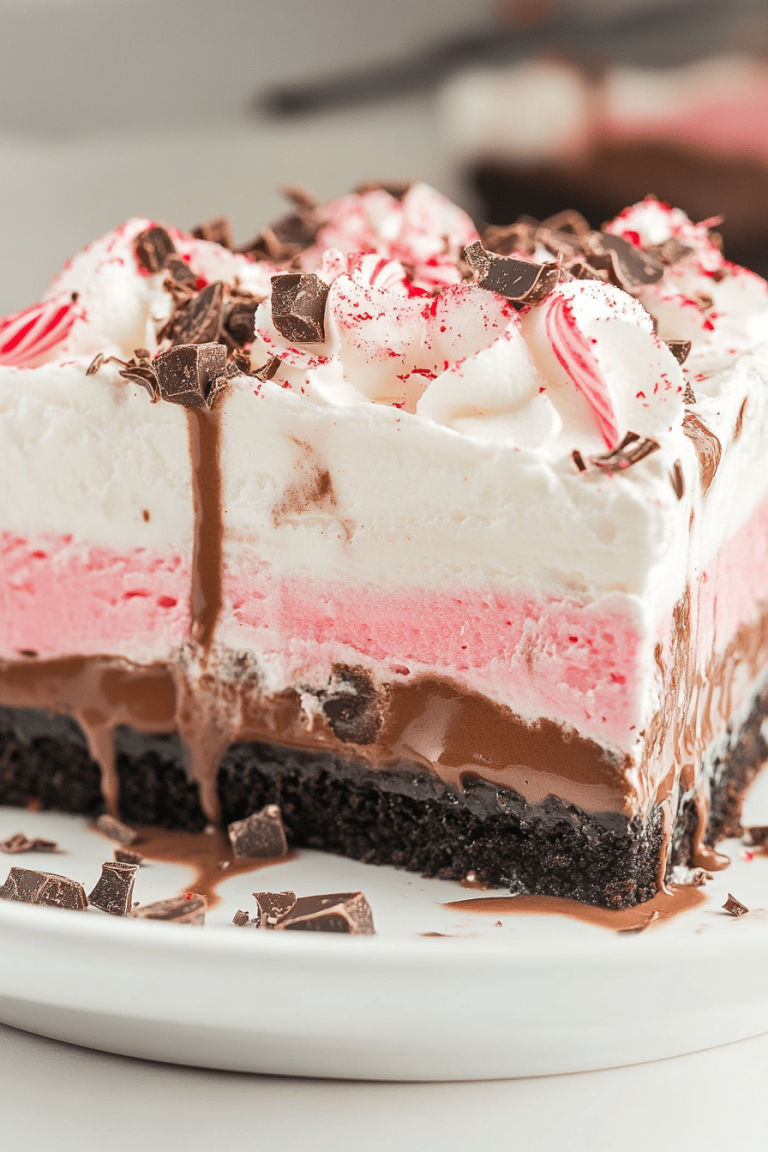
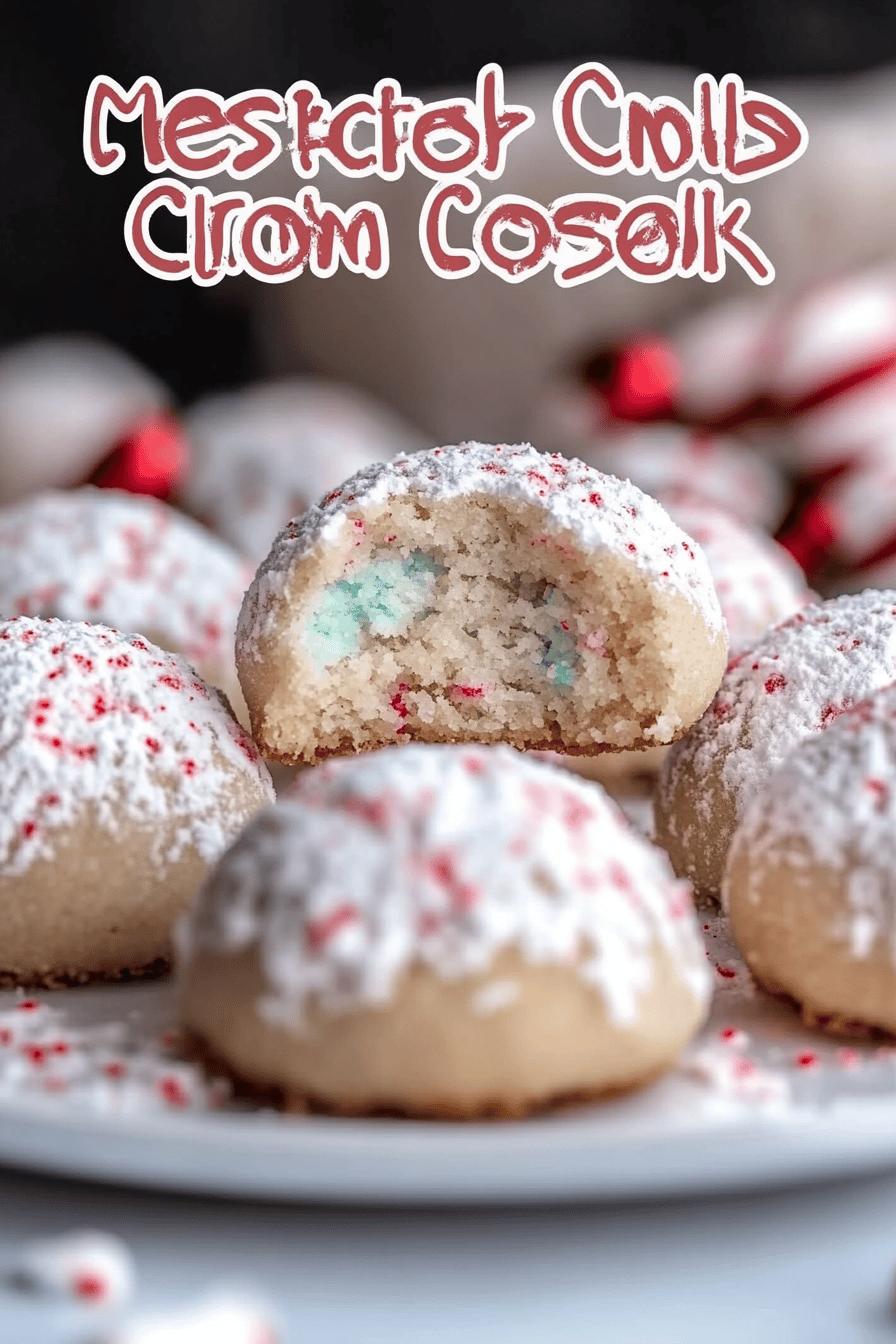
Oh, where do I even begin with these Peppermint Snowball Cookies? For me, they’re more than just a treat; they’re a little burst of pure holiday magic, a memory baked into every bite. I remember my Grandma Betty making these every single December, and the whole house would just fill with this impossibly sweet, minty aroma. They’re like delicate little clouds dusted with snow, and the peppermint flavor isn’t overpowering, it’s just this gentle, refreshing kiss that makes you want another one immediately. If you’ve ever loved those classic shortbread cookies but wished for a little something extra, a cheerful wintery twist, then these Peppermint Snowball Cookies are absolutely going to steal your heart. They’re a hug in cookie form, and honestly, they’re surprisingly simple to whip up, even when things get hectic this time of year.
What are Peppermint Snowball Cookies?
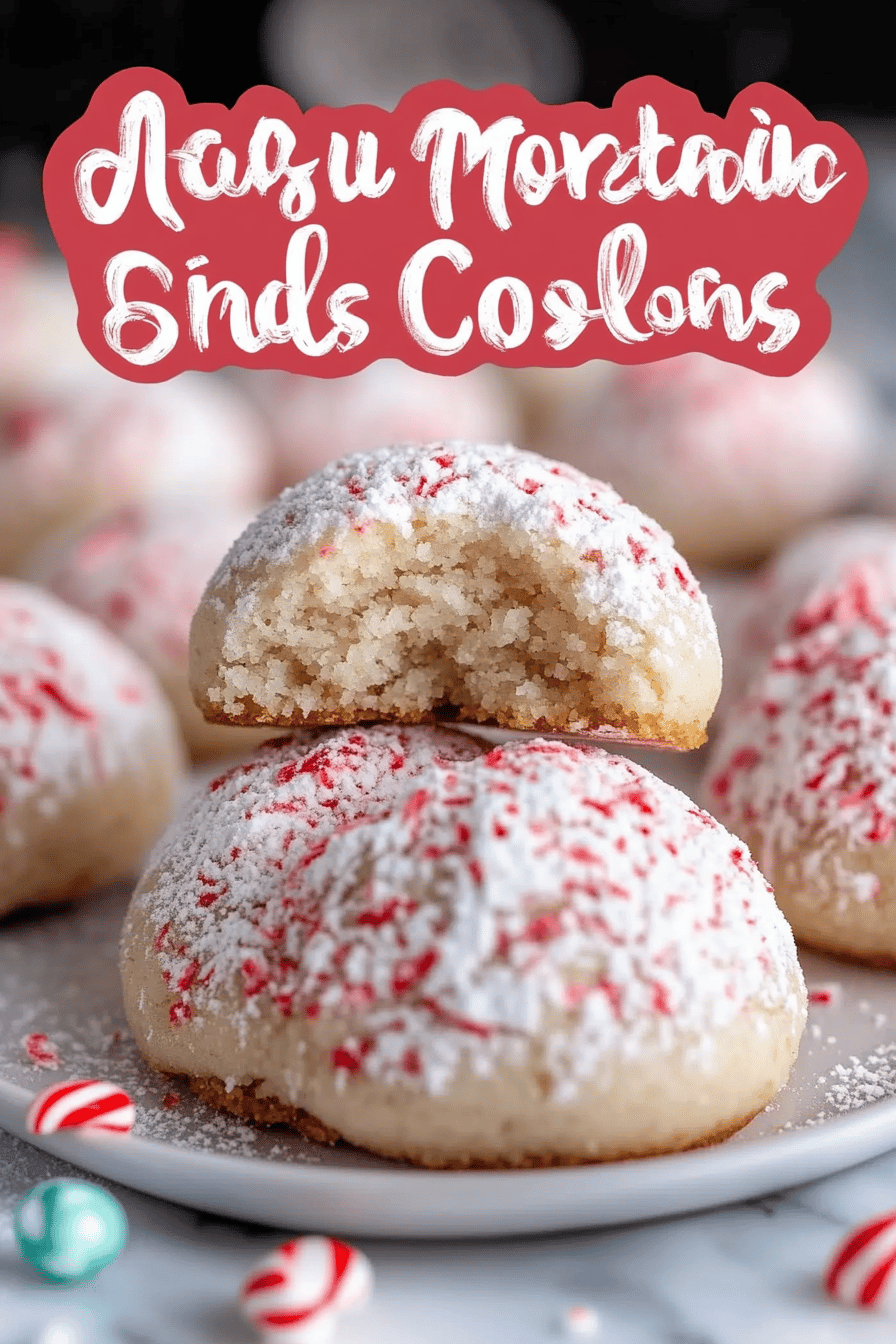
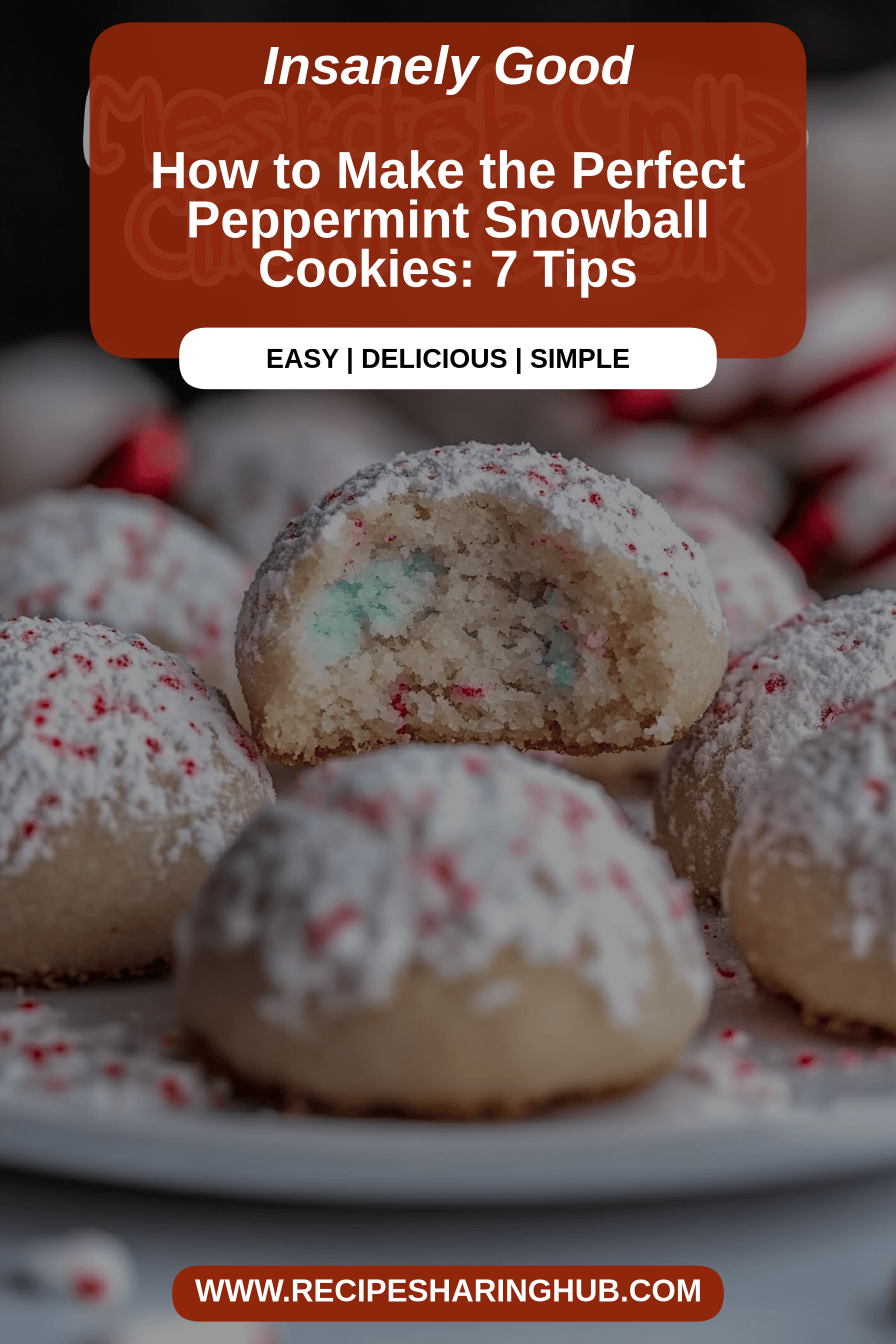
So, what exactly are these little wonders? Think of them as the sophisticated cousin of your everyday cookie. Peppermint Snowball Cookies are essentially a tender, buttery shortbread-style cookie that’s lightly flavored with peppermint and then often rolled in powdered sugar to give them that quintessential “snowball” look. They’re not overly sweet on their own, which is part of their charm, allowing the creamy butter and the subtle hint of mint to really shine. The texture is just divine – they practically melt on your tongue, leaving behind that lovely cool minty finish. It’s a simple concept, really, but the execution results in something truly special. They’re the kind of cookie you’d find at a fancy holiday bake sale, but I promise you, they’re way easier to make at home than you might think!
Why you’ll love this recipe?
Honestly, there are so many reasons why I keep coming back to this Peppermint Snowball Cookie recipe, year after year. First off, the flavor is just out of this world. It’s this delicate balance of rich, buttery cookie and that perfect, refreshing touch of peppermint. It’s not like biting into a candy cane; it’s much more nuanced and delightful. And then there’s the texture! They are unbelievably tender and crumbly, almost like they dissolve in your mouth. It’s a sensation that’s hard to beat. But beyond the taste and texture, the simplicity is a huge win for me. In those busy pre-holiday weeks, I need recipes that deliver big on flavor without demanding hours in the kitchen. This one is a lifesaver! You don’t need any fancy equipment, just basic pantry staples, and you’ll be rewarded with a batch of gorgeous cookies. Plus, they’re incredibly budget-friendly. I mean, butter, flour, sugar, peppermint extract – these are all things I usually have on hand. And the way they look? They’re just so pretty, dusted in powdered sugar like little snowballs. They make the cookie platter look instantly festive and elegant. If you’re looking for something that feels a bit more special than your average cookie but is still approachable for a weeknight bake, this is it. I’ve tried adding a little crunch with some finely chopped candy canes on top, which is fun, but for pure, melt-in-your-mouth bliss, the classic powdered sugar dusting is truly the way to go. They also pair so wonderfully with a hot mug of cocoa or a steaming cup of tea.
How do you make Peppermint Snowball Cookies?
Quick Overview
Making these delightful Peppermint Snowball Cookies is a straightforward process that centers around creaming butter and sugar, then gently incorporating the dry ingredients and a touch of peppermint. The dough comes together quickly, and once chilled, it’s rolled into small balls and baked until just golden. The final magical step is a generous dusting of powdered sugar, making them look like miniature snowballs. It’s a fuss-free method that guarantees beautiful, delicious cookies every time, perfect for holiday gatherings or just a sweet treat to brighten your day.
Ingredients
For the Main Batter:
This is where the magic starts! The key here is good quality butter – it really makes a difference in the final texture and flavor. I always opt for unsalted butter so I have complete control over the saltiness, but if you only have salted, just reduce the added salt a bit. Make sure your butter is softened to room temperature; it should yield slightly when you press it, but not be greasy or melted. This ensures it creams nicely with the sugar. For the flour, all-purpose is perfect. And for that lovely hint of peppermint, I use a good quality peppermint extract. Be careful not to go overboard with it; a little goes a long way to create that refreshing, delicate flavor without being overwhelming. It’s all about balance!
For the Filling:
Okay, confession time: these cookies don’t traditionally have a separate filling in the way a jam cookie does. The “filling” is really the heart of the cookie itself – that tender, buttery, mint-infused dough. However, if you’re feeling adventurous and want to add a little surprise, you could carefully press a single, tiny white Chocolate Chip or a miniature peppermint candy into the center of each ball before rolling it in powdered sugar. Just make sure it’s small enough not to disrupt the cookie’s shape too much. Most of the time, though, I stick to the classic method because the cookie itself is so satisfying.
For the Glaze:
Actually, for these Peppermint Snowball Cookies, we’re not using a traditional glaze. The signature look and delightful texture come from rolling them generously in powdered sugar after they’ve baked and cooled slightly. This gives them their name and their enchanting snowy appearance. If you *really* wanted a glaze, you could make a very simple one with powdered sugar and a tiny splash of milk or water, with a drop more peppermint extract, and drizzle it over the top *after* they’ve been dusted with powdered sugar. But honestly, the powdered sugar alone is perfection and keeps them from being too sweet or messy. It’s the way Grandma Betty made them, and I always stick to her tried-and-true method!
Step-by-Step Instructions
Step 1: Preheat & Prep Pan
First things first, let’s get our oven fired up and our baking sheets ready. You’ll want to preheat your oven to 350 degrees Fahrenheit (175 degrees Celsius). This is a pretty standard baking temperature, and it helps ensure even cooking. While the oven is heating, grab your baking sheets. I like to line mine with parchment paper. This is a game-changer, trust me! It prevents any sticking, makes cleanup a breeze, and helps the cookies bake more evenly without getting too brown on the bottom. Just lay a sheet of parchment paper flat on each baking sheet. No need to grease the parchment paper itself.
Step 2: Mix Dry Ingredients
In a medium-sized bowl, we’re going to whisk together our dry ingredients. This usually includes all-purpose flour and a pinch of salt. The salt might seem small, but it really does enhance all the other flavors and balance out the sweetness. Just grab a whisk and give them a good stir until they’re well combined and there are no visible streaks of salt. This step ensures that the salt is evenly distributed throughout the Cookie Dough, so you don’t get a salty bite in one place and none in another. Whisking also helps to aerate the flour a little, which can contribute to a lighter texture.
Step 3: Mix Wet Ingredients
Now for the heart of the cookie batter! In a large bowl, cream together your softened unsalted butter and granulated sugar until the mixture is light and fluffy. This is where an electric mixer really comes in handy, but you can totally do it by hand with a sturdy whisk or a wooden spoon if you’re feeling up for a workout! You want to beat them together for a good 2-3 minutes until it’s pale yellow and has a noticeably fluffy texture. Then, beat in your peppermint extract and vanilla extract until just combined. Be careful not to overmix at this stage, just get everything nicely incorporated. The aroma at this point is already starting to smell amazing!
Step 4: Combine
Time to bring it all together! Gradually add the dry ingredients (from Step 2) to the wet ingredients (from Step 3). Mix on low speed or stir with a wooden spoon until just combined. It’s really important *not* to overmix the dough at this stage. Overmixing can develop the gluten in the flour, leading to tough cookies instead of tender, melt-in-your-mouth ones. You want to mix until you no longer see any dry streaks of flour. The dough should look cohesive and might be a little crumbly, but it should hold together when you press it. If it seems too dry, you can add a teaspoon of milk or water, but usually, it’s just right as is.
Step 5: Prepare Filling
As I mentioned earlier, these cookies don’t have a traditional separate filling. The “filling” is the delicious, minty dough itself! However, if you’re feeling adventurous, this is the point where you *could* gently press a tiny white chocolate chip or a small piece of a crushed peppermint candy into the center of each cookie dough ball before rolling it in powdered sugar. Just a small piece is key so it doesn’t melt out or change the shape too much. I usually skip this and let the cookie’s natural goodness shine, but it’s an option if you want a little surprise inside!
Step 6: Layer & Swirl
This is more about shaping the dough than swirling. Grab your dough and start rolling it into small balls. I usually aim for about 1-inch in diameter. You can use a small cookie scoop or just your hands. Try to make them as uniform in size as possible so they bake evenly. Place the balls about 2 inches apart on your prepared baking sheets. They don’t spread a whole lot, but giving them a little space is always a good idea. You can gently flatten the tops of the balls if you want a slightly less domed cookie, but it’s entirely optional.
Step 7: Bake
Now, pop those baking sheets into your preheated oven. Bake for about 10-14 minutes, or until the edges are lightly golden and the centers are set. You don’t want them to get too brown; they should still look pale, almost white, which is part of their “snowball” charm. Keep an eye on them, as oven temperatures can vary. I usually start checking around the 10-minute mark. They will continue to firm up slightly as they cool on the baking sheet. The key is to pull them out when they’re just cooked through.
Step 8: Cool & Glaze
Once baked, let the cookies cool on the baking sheets for about 5-10 minutes. This allows them to set up properly. Then, carefully transfer them to a wire rack to cool completely. While they’re still warm but not piping hot – I find a little bit of warmth helps the powdered sugar adhere nicely – gently roll the cookies in a bowl of powdered sugar until they are thoroughly coated. You might want to do this in batches. Then, for an extra snowy effect, you can roll them in powdered sugar one more time once they’ve cooled down a bit more. This double-dusting gives them that perfect, fluffy snowball appearance.
Step 9: Slice & Serve
These Peppermint Snowball Cookies are best served at room temperature. Once they’ve been rolled in powdered sugar and have cooled completely, they’re ready to be devoured! Arrange them on a festive platter, maybe with some sprigs of rosemary or a few extra candy canes for decoration. They look absolutely beautiful and are always a huge hit. They’re perfect for dipping into a warm beverage, and the minty flavor really comes alive when you pair them with something rich and chocolatey.
What to Serve It With
These delightful Peppermint Snowball Cookies are so versatile, they fit into almost any occasion! For a cozy breakfast, I love pairing them with a strong cup of coffee. The sweetness of the cookie is just enough to complement the bitterness of the coffee, and the hint of mint is a refreshing start to the day. They also look so cute scattered on a plate next to a steaming mug. If you’re hosting a brunch, these cookies add an elegant touch to your spread. They look stunning alongside fruit salads, quiches, and maybe even a mimosa. For dessert, they’re the perfect light and refreshing end to a rich meal. They’re not overly heavy, so people can enjoy one (or two!) without feeling too full. I often serve them alongside a decadent chocolate cake or a warm apple crumble for contrast. And for those lazy, cozy evenings, when you just need a little something sweet? These are your go-to. They’re perfect with a glass of milk or a mug of hot chocolate. My family has a tradition of making a big batch and leaving a few out for Santa, always with a glass of milk. It’s these little traditions that make the holidays so special, and these cookies are a big part of that for us. They also make fantastic edible gifts, so remember to bake extra!
Top Tips for Perfecting Your Peppermint Snowball Cookies
Making these cookies is pretty foolproof, but I’ve learned a few tricks over the years that I think really elevate them. For the butter, make sure it’s *softened*, not melted or greasy. I usually leave mine on the counter for about an hour before I plan to bake. If you forget, you can cut it into small cubes and let it sit for 15-20 minutes. When you’re creaming the butter and sugar, don’t rush it! Letting it get light and fluffy incorporates air, which is key to that tender, melt-in-your-mouth texture. I’ve made the mistake of rushing this step before, and the cookies came out a bit denser than I like. When you add the dry ingredients to the wet, mix *just until combined*. Seriously, this is so important. Overmixing develops gluten, and you’ll end up with tough cookies. Stop as soon as you don’t see any dry flour anymore. The dough might seem a little crumbly, but it should hold together when you gently press it. For the peppermint extract, start with the amount in the recipe and taste a tiny bit of the dough (if you’re comfortable doing so, of course!). You can always add a tiny bit more if you want a stronger mint flavor, but you can’t take it away if you add too much. I’ve found that too much peppermint can taste medicinal, so subtlety is key. When rolling the dough into balls, try to make them uniform in size. This ensures they bake evenly. If you have a cookie scoop, that’s a great way to get consistent portions. When you’re dusting them with powdered sugar, I find it best to do it while they’re still a little warm – not hot, but warm enough that the sugar adheres. Rolling them twice, letting them cool a bit in between, gives that extra fluffy, snowy look that I adore. If your powdered sugar coating starts to melt into a sticky glaze, it usually means the cookies were still too hot. A little patience goes a long way here! I’ve also experimented with different flours for a gluten-free version, and using a good quality all-purpose gluten-free blend with a binder like xanthan gum works well, though you might need to slightly adjust the liquid. The texture can be a bit different, but still delicious!
Storing and Reheating Tips
Storing these Peppermint Snowball Cookies is pretty straightforward, and they actually keep quite well, which is great if you’re baking ahead for parties or just like having a sweet treat on hand. At room temperature, they’ll stay fresh in an airtight container for about 3-5 days. Make sure they’ve cooled completely before you put them in the container, otherwise, you might end up with condensation, which can make them a little soggy. I usually just use a good quality cookie tin or a plastic container with a tight-fitting lid. If you live in a very humid climate, you might find they absorb moisture faster, so check them periodically. For longer storage, you can absolutely refrigerate them. They’ll last in the fridge for about a week to 10 days, though I find the texture is best when they’re not in there for too long. Again, an airtight container is your best friend here. They’ll be perfectly fine, just a little firmer when cold. If you want to freeze them, they freeze beautifully! You can freeze them either before baking (roll them into balls, dust with powdered sugar, and freeze on a tray until firm, then transfer to a freezer bag) or after baking and rolling in powdered sugar. For baked cookies, wrap them individually in plastic wrap, then place them in a freezer-safe bag or container. They’ll keep in the freezer for up to 2-3 months. To reheat or thaw, just bring them to room temperature. If you froze them before baking, you can bake them directly from frozen, just adding a few extra minutes to the baking time. If you froze baked cookies, let them thaw at room temperature for a couple of hours. Honestly, they’re so delicate, I rarely even bother reheating them; they’re perfect at room temperature. The powdered sugar is best applied *after* baking and cooling, so if you’re freezing unfrosted cookies, you’ll want to dust them with powdered sugar once they’ve thawed.
Frequently Asked Questions
Peppermint Snowball Cookies
Ingredients
Main Ingredients
- 0.5 cup unsalted butter softened
- 0.5 cup powdered sugar
- 1 teaspoon peppermint extract
- 1 teaspoon vanilla extract
- 2 cup all-purpose flour
- 0.5 teaspoon salt
- 1 cup additional powdered sugar for rolling
Instructions
Preparation Steps
- Preheat oven to 325°F (160°C). Line baking sheets with parchment paper.
- In a large bowl, cream together the softened butter and 0.5 cup of powdered sugar until light and fluffy.0.5 cup unsalted butter
- Beat in the peppermint extract and vanilla extract.0.5 cup unsalted butter
- In a separate bowl, whisk together the flour and salt.0.5 cup unsalted butter
- Gradually add the dry ingredients to the wet ingredients, mixing until just combined. Do not overmix.
- Roll the dough into 1-inch balls.
- Place the balls on the prepared baking sheets.
- Bake for 10-12 minutes, or until the edges are lightly golden. The cookies should not spread too much.
- Let the cookies cool on the baking sheets for 5 minutes before transferring them to a wire rack to cool completely.
- Once completely cooled, roll the cookies in the additional powdered sugar until well coated.0.5 cup unsalted butter
Notes
Nutrition

Ava Brooks is the home cook behind RecipeSharingHub, sharing dependable, step‑by‑step recipes for busy weeknights and easy weekend bakes. When not testing dishes, Ava snaps kitchen photos and answers reader questions in the comments. Discover the latest recipes or join the newsletter for new ideas each week.