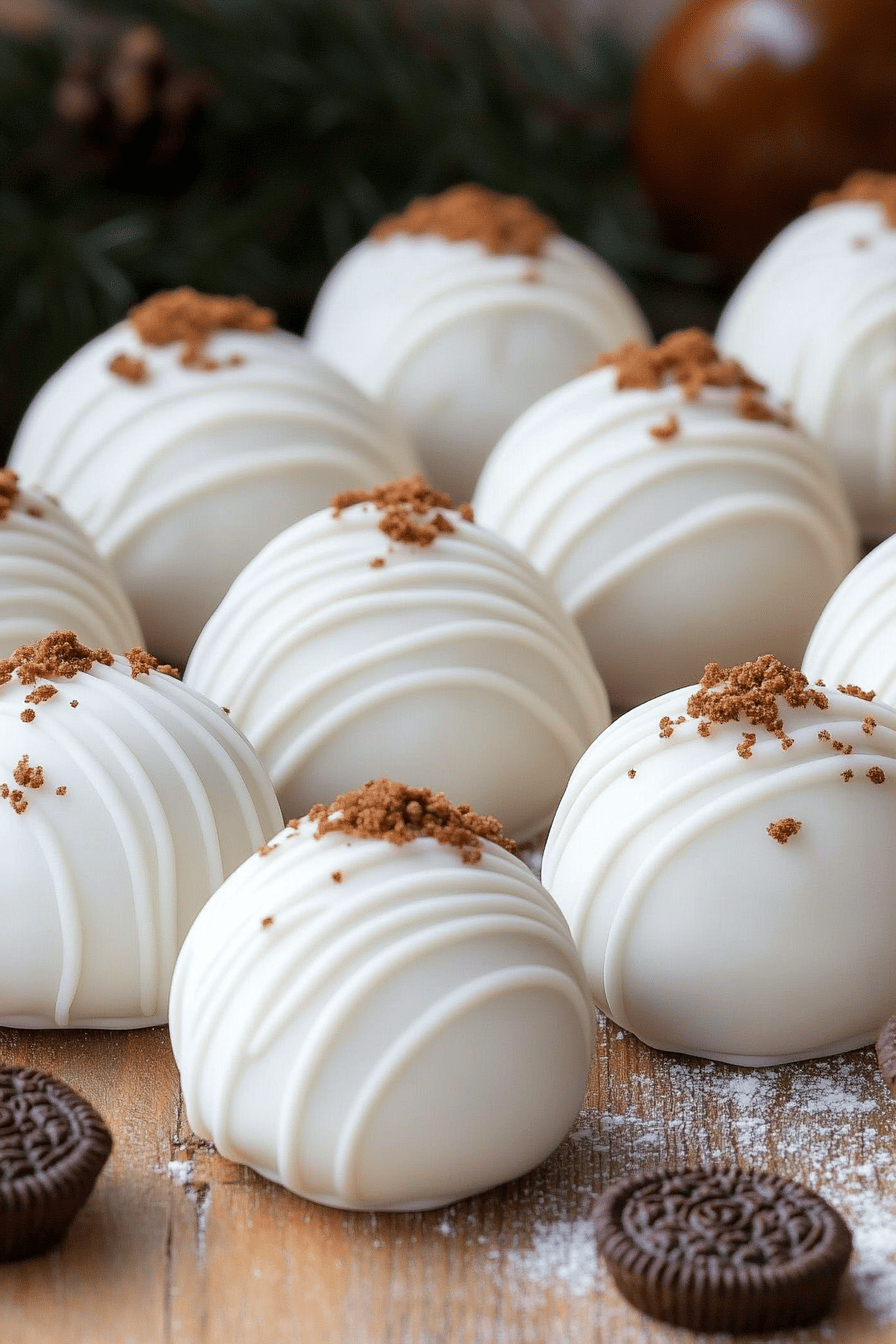
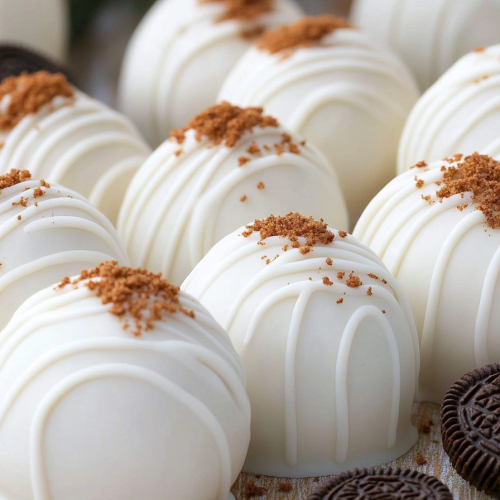
Oh, where do I even begin with these little bite-sized wonders? There are some recipes that just… stick with you, you know? They become your go-to, the ones you pull out for last-minute parties, unexpected guests, or just those moments when a serious sweet craving hits and you don’t want to spend hours in the kitchen. For me, that recipe is these Oreo truffles. Honestly, they’re ridiculously simple, but the payoff is just HUGE. Imagine: a creamy, decadent center that tastes exactly like the best part of an Oreo cookie, all enrobed in smooth, rich chocolate. They’re seriously addictive, and I swear they disappear faster than I can make them. If you’ve ever loved those little chocolate-covered cookie balls, these are like their cooler, more sophisticated cousin. They’re pure joy in every single bite, and trust me, they’ll become a staple in your dessert repertoire just like they have in mine.
What are Oreo Truffles?
So, what exactly are these magical little spheres of happiness? Essentially, Oreo truffles are what you get when you take the iconic Oreo cookie, crush it up into fine crumbs, mix it with a binder (usually CREAM CHEESE, which sounds a bit surprising, I know, but trust me on this!), roll it into little balls, and then dip them in melted chocolate. That’s it! It’s like deconstructing the cookie experience and rebuilding it into something even more irresistible. They’re not baked at all, which is a massive part of their charm. Think of it as a super-fancy, no-bake cookie ball that tastes *exactly* like the best part of an Oreo, but in a richer, more concentrated form. It’s the ultimate shortcut to pure chocolatey bliss, and the “truffle” part really does capture that luxurious, melt-in-your-mouth quality.
Why you’ll love this recipe?
There are so many reasons why I keep coming back to this Oreo truffle recipe, and I just know you’re going to fall in love with it too. First off, the flavor. It’s an absolute dream for any Oreo lover. You get that distinct, beloved Oreo taste, intensified and melded with the creamy cheese and smooth chocolate coating. It’s a flavor combination that’s universally loved. Then there’s the sheer simplicity. This is one of those recipes that feels like you’ve pulled off a major culinary feat, but in reality, it takes hardly any effort. I’ve made these on weeknights when the kids are begging for something sweet after dinner, and they’re ready in a flash. Plus, they’re surprisingly cost-effective. Oreos are generally budget-friendly, and cream cheese and chocolate are staples most people have on hand or can grab without breaking the bank. This makes them a lifesaver for unexpected potlucks or when you need a quick, impressive treat. And talk about versatile! You can dip them in dark chocolate, milk chocolate, White Chocolate, drizzle them with contrasting colors, or even roll them in sprinkles or chopped nuts. They’re perfect for holidays, birthdays, teacher gifts, or just because. Honestly, what I love most about these Oreo truffles is how they manage to be both incredibly easy and incredibly delicious. They’re a guaranteed crowd-pleaser, and they always get rave reviews without me having to stress about them.
How do you make Oreo Truffles?
Quick Overview
The process is brilliantly straightforward. You’ll crush Oreos, mix them with softened cream cheese until a dough forms, roll that dough into little balls, chill them briefly to firm up, and then dip them into melted chocolate. It sounds almost too simple, doesn’t it? But the magic happens in that perfect ratio of cookie to cream cheese, creating a truffle that’s rich, fudgy, and incredibly satisfying. It’s a no-bake wonder that comes together in under 30 minutes of active time, making it your new best friend for quick desserts.
Ingredients
For the Main Batter:
You’ll need about 28-30 regular Oreo cookies. It’s important to use the whole cookie – the crème filling is part of what makes them bind together so beautifully. If you can find a great deal on a family-size pack, go for it! You can also use the Double Stuf Oreos, but you might need a *tiny* bit more cream cheese to get the right consistency, so start with what the recipe says and adjust. Make sure your cream cheese is softened to room temperature; this is crucial for easy mixing and avoiding lumps. About 4 ounces (half a standard block) is usually perfect.
For the Filling:
This is where the magic really happens! The main “filling” for the truffles is made from the crushed Oreos and the cream cheese. You don’t need anything extra here for the base truffle mixture, but we’ll talk about add-ins and coatings later!
For the Glaze:
This is your luscious chocolate coating! I usually opt for about 10-12 ounces of good quality chocolate chips or a chopped chocolate bar. Semi-sweet chocolate chips are my go-to because they have a great balance of sweetness and bitterness. You can also use milk chocolate or White Chocolate chips, or even a mix! For melting, I often add about 1 tablespoon of coconut oil or vegetable shortening. This helps the chocolate melt smoothly and makes it easier to get a nice, thin coating on the truffles. If you don’t have it, a little bit of butter can work in a pinch, but coconut oil is my preferred choice for a smooth finish.
Step-by-Step Instructions
Step 1: Preheat & Prep Pan
Okay, this step is more about prep than baking! First, grab a baking sheet (or a few, depending on how many truffles you’re making). Line it with parchment paper or wax paper. This is super important because it stops the truffles from sticking to the pan once they’re formed and chilled. You don’t need to preheat an oven for this recipe, which is part of why I love it so much!
Step 2: Mix Dry Ingredients
This is where we get our Oreo goodness ready. Take your 28-30 Oreo cookies and crush them as finely as possible. You can do this in a food processor for the easiest, most uniform crumb. Just pulse until they’re fine crumbs with no large chunks. If you don’t have a food processor, you can put the cookies in a sturdy zip-top bag, seal it tightly, and then use a rolling pin or the bottom of a heavy pan to crush them. Aim for a consistency that’s like fine sand. You want to make sure you’re getting all those little bits, including the crème filling, into your crumb mixture.
Step 3: Mix Wet Ingredients
Now for the binder! In a medium bowl, add your softened cream cheese. Make sure it’s truly soft – not melted, but soft enough to mash easily with a fork or a spatula. If it’s too cold, you’ll end up with lumpy truffle dough, and nobody wants that! You don’t need to add anything else to the cream cheese at this stage.
Step 4: Combine
It’s time to bring our dry and wet ingredients together! Add the finely crushed Oreo crumbs to the softened cream cheese. Now, using a sturdy spoon or a spatula, mix everything together. It might seem like there isn’t enough cream cheese at first, but keep mixing! The cream cheese will gradually coat the crumbs and start to form a cohesive dough. You want it to be thick enough to roll into balls without being sticky or falling apart. If it feels too dry and crumbly, add another teaspoon or two of softened cream cheese. If it feels too wet and sticky, you can add a few more crushed Oreo crumbs (just a tablespoon at a time). The perfect consistency is like a firm play-doh that you can easily shape.
Step 5: Prepare Filling
The “filling” is already made in step 4! That’s the beauty of this recipe. The combination of Oreo crumbs and cream cheese *is* your filling. Once you have that perfect dough consistency, you’re ready to roll. For extra flair, you could stir in a tablespoon of your favorite extract (like vanilla or peppermint) into the dough, but it’s absolutely delicious just as it is.
Step 6: Layer & Swirl
This isn’t a layering step, but rather the rolling! Take about a tablespoon of the Oreo mixture at a time and roll it between your palms to form a smooth ball, about 1-inch in diameter. Don’t roll them too tightly, or they might become dense. Just a gentle shaping is all you need. Place the rolled balls onto your prepared baking sheet. Once all the dough is rolled into balls, pop the baking sheet into the freezer for about 10-15 minutes. This is a crucial step to firm them up, which makes dipping them in chocolate SO much easier and prevents them from falling apart.
Step 7: Bake
No baking required for these! You’ll be chilling them, not baking them. The chilling step in the freezer (Step 6) is really important. It helps the truffles hold their shape and makes the chocolate coating set up nicely and quickly.
Step 8: Cool & Glaze
While your truffle balls are chilling, it’s time to get your chocolate ready. Place your chocolate chips or chopped chocolate in a microwave-safe bowl, along with the coconut oil or shortening. Microwave in 30-second intervals, stirring well after each interval, until the chocolate is smooth and completely melted. Be careful not to overheat it, as chocolate can seize up! Alternatively, you can melt the chocolate in a double boiler over simmering water. Once the truffles are firm from their chill time, take them out of the freezer. Dip each truffle ball into the melted chocolate using a fork or a dipping tool. Let any excess chocolate drip back into the bowl. Place the dipped truffles back onto the parchment-lined baking sheet. If you want to get fancy, you can drizzle some extra melted chocolate over the tops once they’re set, or sprinkle them with colored sprinkles, chopped nuts, or even a little sea salt while the chocolate is still wet.
Step 9: Slice & Serve
Once all your truffles are dipped and decorated (if you choose!), let them sit at room temperature for a bit, or pop them back into the fridge for about 10-15 minutes to allow the chocolate coating to fully set. Then, they are ready to be enjoyed! They’re best served at room temperature or slightly chilled. You can pick them up and pop them right in your mouth – no slicing needed!
What to Serve It With
These Oreo truffles are so wonderfully versatile, they fit in everywhere! For breakfast, imagine a couple of these alongside your morning coffee. They’re not overly sweet for breakfast when paired with a good strong brew. They add a little moment of indulgence to start the day. For brunch, they are absolutely elegant. I like to arrange them on a pretty platter with some fresh berries – maybe some raspberries or strawberries. They look sophisticated and are always a hit when people are lingering over mimosas. As a dessert, well, they’re practically perfect on their own. But if you’re having a dessert buffet, they’re a fantastic addition, offering a rich, chocolatey bite that complements cakes, pies, or even Ice Cream. And for cozy snacks? This is probably my favorite time to enjoy them. After the kids are in bed, a cup of tea and one or two of these little beauties feels like a decadent treat. They’re also great for sharing with a friend who pops over unexpectedly; they feel special without any fuss. My kids always ask for these when we have friends over, and they disappear in minutes at birthday parties.
Top Tips for Perfecting Your Oreo Truffles
Over the years, I’ve picked up a few tricks that make making these Oreo truffles even better. For the Oreo prep, don’t be afraid to really get those crumbs fine in a food processor – it creates the smoothest texture. If you’re doing it by hand, a zip-top bag and a rolling pin work great, just be thorough! When it comes to mixing the dough, the key is the cream cheese. Make sure it’s properly softened. If it’s too cold, you’ll have a lumpy mess, and if it’s too warm, the dough might be too sticky to handle. The consistency you’re aiming for is moldable but not sticky. Think of it like a firm Cookie Dough. I’ve learned the hard way that if the dough is too sticky, it’s better to add a tiny bit more Oreo crumbs than more cream cheese. For the chilling step, don’t skip it! Freezing the balls for 10-15 minutes makes them firm enough to dip without falling apart. It’s a game-changer. When you’re melting your chocolate, go low and slow. Overheated chocolate gets weird and grainy. Adding that little bit of coconut oil or shortening is my secret for extra smooth, glossy chocolate that coats beautifully. For dipping, I find using a fork is easiest. You can gently twirl the truffle to coat it evenly, then tap the fork on the side of the bowl to let the excess chocolate drip off. For swirl customization, once you dip them, you can melt a contrasting color of chocolate (like white chocolate if you used dark) and drizzle it over the top with a spoon or a piping bag for a pretty effect. You can also roll them in sprinkles or finely chopped nuts before the chocolate sets. If you’re finding your chocolate isn’t setting fast enough, pop the tray back into the fridge for a few minutes. Trust me on this one – a good chill makes all the difference.
Storing and Reheating Tips
These Oreo truffles are quite forgiving when it comes to storage, which is another reason I love them. At room temperature, they’ll keep well for about 2-3 days, especially if your kitchen isn’t too warm. Just store them in an airtight container. If it’s warmer, or if you want them to last longer, the refrigerator is your best bet. Pop them in an airtight container or a resealable bag, and they’ll stay fresh and delicious for up to a week. They might get a little firmer in the fridge, but they’re still fantastic. For longer storage, these freeze beautifully! You can freeze them on a baking sheet until solid, then transfer them to a freezer-safe bag or container. They’ll last for 2-3 months in the freezer. When you want to enjoy them, you can either let them thaw at room temperature for about 30 minutes, or if you prefer them a little firmer, pop them in the fridge for a couple of hours. I usually add the glaze or any decorative toppings *after* they’ve been dipped and chilled, right before serving or storing at room temperature or in the fridge. If you’re freezing them, it’s best to just have them plain dipped in chocolate, and then you can add any drizzles or sprinkles once they’re thawed. They really maintain their quality well no matter how you store them, which is a huge win for busy bakers!
Frequently Asked Questions
Final Thoughts
I really hope you give these Oreo truffles a try. They’re one of those recipes that feel like a treat for both your tastebuds and your sanity – incredibly delicious with barely any effort. They’re the perfect example of how simple ingredients can come together to create something truly special. Whether you’re looking for a quick dessert for a party, a sweet treat for yourself, or a cute homemade gift, these little gems deliver every single time. They’re a testament to the joy of simple baking (or in this case, no-baking!). If you love Oreos, you are going to adore these. They’re a guaranteed hit, and the smiles they bring are just the icing on the cake (or the chocolate on the truffle!). If you make them, please, please let me know how they turn out in the comments below! I love hearing about your kitchen adventures, and I’m always curious to see what variations you come up with. Happy making!
Oreo truffles
Ingredients
Main Ingredients
- 24 pieces Oreo cookies finely crushed
- 8 ounces cream cheese softened
- 12 ounces chocolate chips milk or semi-sweet
- 1 tablespoon vegetable oil optional, for smoother melting
Instructions
Preparation Steps
- Crush the Oreo cookies into fine crumbs. A food processor works best for this.
- In a medium bowl, combine the finely crushed Oreos with the softened cream cheese. Mix until well combined and a dough-like consistency forms.
- Roll the mixture into small balls, about 1 inch in diameter. Place them on a baking sheet lined with parchment paper and freeze for at least 30 minutes.
- While the balls are freezing, melt the chocolate chips. You can do this in a microwave-safe bowl in 30-second intervals, stirring between each, or use a double boiler. Stir in the vegetable oil if using, for a smoother texture.
- Dip each frozen truffle into the melted chocolate, ensuring it's fully coated. Use a fork to lift the truffle and allow excess chocolate to drip off.
- Place the coated truffles back on the parchment-lined baking sheet. You can add sprinkles or drizzle with contrasting chocolate before the coating sets, if desired.
- Refrigerate for at least 15 minutes to allow the chocolate to set completely. Store in an airtight container in the refrigerator.