There are some recipes that just feel like a warm hug, and for me, this Orange Crush Cake is absolutely one of them. It’s that bright, zesty, comforting flavor that instantly transports me back to lazy summer afternoons at my Grandma Betty’s house. She’d always have some kind of treat baking, and the aroma of citrus always meant something special was happening. This cake is like her sunshine bottled up. It’s got that wonderful, almost nostalgic fizz of orange, balanced perfectly with a tender, moist crumb. If you’ve ever loved a classic orange Pound Cake but wanted something a little more… well, *fun* and a tad easier, this is your jam. Seriously, the way the orange flavor pops is just unparalleled. It’s not just orange; it’s that delightful, almost effervescent burst that makes you smile with every bite. It’s my go-to when I need a little pick-me-up, or when I want to impress without spending hours in the kitchen. This Orange Crush Cake is pure, unadulterated joy in cake form.
What is orange crush cake?
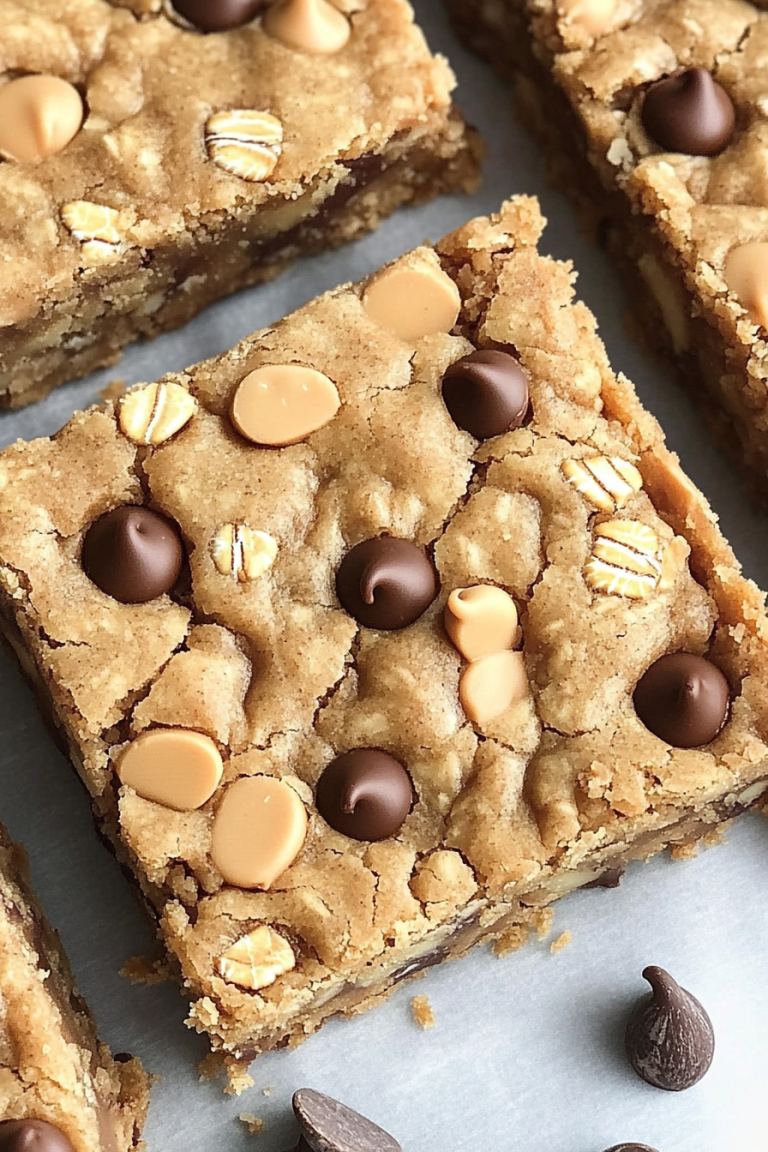
So, what exactly *is* Orange Crush Cake? At its heart, it’s a wonderfully moist and tender cake infused with a vibrant, unmistakable orange flavor. The “Crush” in the name isn’t just for show; it usually refers to using actual orange soda (like the classic Orange Crush soda, hence the name!) in the batter. This gives the cake a unique texture and an incredibly concentrated, fizzy orange taste that’s hard to get with just orange juice or zest alone. Think of it as a lighter, brighter cousin to a traditional pound cake or an orange loaf. It’s not overly dense, but it has a lovely, satisfying richness. The glaze is typically a simple, sweet orange affair that just amplifies that citrusy goodness. It’s essentially a celebration of all things orange, made incredibly accessible for even the most novice baker. It’s the kind of cake that makes people say, “Wow, what IS this?!”
Why you’ll love this recipe?
There are so many reasons why this Orange Crush Cake has become a staple in my baking rotation, and I’m betting it will for you too! First off, the **flavor** is just out of this world. It’s not a subtle hint of orange; it’s a full-on, sun-kissed citrus explosion that’s both refreshing and comforting. The sweet, slightly tangy orange notes are perfectly balanced, making it irresistible. Then there’s the **simplicity**. Seriously, this cake is a lifesaver on busy weeknights or when unexpected guests pop over. You can have it mixed up and in the oven in less time than it takes to decide what to watch on TV. The ingredients are mostly pantry staples, and the method is straightforward. No fancy techniques required! And speaking of ingredients, it’s wonderfully **cost-efficient**. You don’t need expensive extracts or exotic fruits; just a few common items will get you this incredible cake. What I also adore is its **versatility**. While it’s fantastic on its own, I’ve found it pairs beautifully with so many things. Serve it with a dollop of whipped cream and berries for a light dessert, or alongside a strong cup of coffee for a delightful breakfast treat. It’s also surprisingly adaptable – I’ve even tinkered with adding a bit of almond extract to complement the orange, and it was divine! This recipe stands out because it delivers such a big flavor punch with minimal fuss. It’s that perfect balance of impressive and easy, which is pretty much my baking sweet spot.
How do I make Orange Crush Cake?
Quick Overview
Making this Orange Crush Cake is a breeze! You’ll whisk together your dry ingredients, then mix your wet ingredients, combine them gently, pour into a prepared pan, and bake until golden and fragrant. The key is not to overmix, which ensures a tender crumb. Once cooled slightly, a simple orange glaze finishes it off. It’s truly as simple as that – a delightful cake with minimal effort and maximum payoff. I love how quickly it comes together; it’s perfect when you get a sudden craving for something sweet and citrusy.
Ingredients
For the Main Batter:
You’ll need all-purpose flour, granulated sugar for sweetness, baking powder and baking soda to give it a nice lift, and a pinch of salt to enhance all those flavors. Make sure your flour is fresh and your leavening agents haven’t expired; it makes a world of difference in how your cake rises. Using a good quality all-purpose flour is perfectly fine here; no need for anything fancy.
For the Filling:
The stars here are the eggs, which bind everything together and add richness, melted unsalted butter for that luxurious texture, and of course, the star of the show: Orange Crush soda! Make sure it’s nice and cold, or at least room temperature; I’ve found that very cold soda can sometimes make the batter a little too stiff. A bit of orange zest is also key for that extra zing and aromatic punch. If you can find it, the zest from a Navel orange works beautifully.
For the Glaze:
This is super simple and really brings it all together. You’ll need powdered sugar for that smooth, sweet finish, and more of that wonderful Orange Crush soda (or orange juice if you’re out of soda, though it won’t have quite the same fizzy punch!). A little extra orange zest can go in here too, if you’re feeling extra zesty!
Step-by-Step Instructions
Step 1: Preheat & Prep Pan
First things first, get your oven preheated to 350°F (175°C). This ensures the cake bakes evenly from the moment it goes in. I like to use a 9×13 inch baking pan for this cake. Grease it really well with butter or non-stick spray, and then flour it. This might seem old-school, but it’s my go-to for preventing any sticking disasters. You can also line the bottom with parchment paper for extra insurance – trust me, it’s a lifesaver when it’s time to lift the cake out!
Step 2: Mix Dry Ingredients
In a large mixing bowl, whisk together your all-purpose flour, granulated sugar, baking powder, baking soda, and salt. Whisking them together thoroughly is important; it ensures that your leavening agents are evenly distributed, which means a more consistent rise for your cake. You don’t want pockets of baking soda making your cake taste funny! Just give it a good whisk until everything looks uniform and no lumps remain.
Step 3: Mix Wet Ingredients
In a separate, medium-sized bowl, whisk together your eggs until they’re lightly beaten. Then, stir in the melted unsalted butter. Now comes the fun part: pour in your Orange Crush soda. Stir gently until just combined. You don’t need to whip this mixture; just a gentle stir is all it takes. This is where the magic starts to happen, and you’ll already get that lovely citrus aroma.
Step 4: Combine
Now, pour the wet ingredients into the bowl with your dry ingredients. Using a spatula or a whisk, gently fold everything together until *just* combined. I cannot stress this enough: do NOT overmix! Overmixing develops the gluten in the flour, which will make your cake tough. You should still see a few little streaks of flour; that’s perfectly okay. It’s better to have a few tiny lumps than a tough cake. The batter will be relatively pourable but not watery.
Step 5: Prepare Filling
Wait, there’s a filling? Not really a separate one, but the magic happens with the orange zest! Zest one or two fresh oranges directly into your batter before you combine wet and dry ingredients (or you can stir it into the wet ingredients if you prefer). This extra layer of fresh orange zest really elevates the flavor and aroma, giving it that true homemade taste. If you’re using store-bought zest, about 1-2 teaspoons should do the trick.
Step 6: Layer & Swirl
Okay, so for this specific recipe, it’s more of a “pour and swirl” situation, and the swirl isn’t like a traditional cinnamon swirl. What I love to do is pour about half of the batter into your prepared pan, then sprinkle about half of the orange zest over it. Pour the remaining batter on top, and then sprinkle the rest of the zest. Don’t worry about making it perfect; the zest will naturally distribute as it bakes. Some recipes might have a separate CREAM CHEESE filling to swirl in, but for this Orange Crush version, the zest is where the extra magic hides!
Step 7: Bake
Pop that pan into your preheated oven. Bake for about 30-40 minutes. The exact time can vary depending on your oven, so start checking around the 30-minute mark. You’ll know it’s done when a toothpick inserted into the center comes out clean, or with just a few moist crumbs attached. The cake should be golden brown around the edges and spring back lightly when you gently touch the top.
Step 8: Cool & Glaze
Once it’s baked, take the cake out of the oven and let it cool in the pan for about 10-15 minutes. This allows it to set up properly. Then, carefully invert it onto a wire rack to cool completely. It’s important to let it cool *completely* before glazing. If the cake is still warm, the glaze will just melt and slide right off, which is a sad sight! For the glaze, whisk together powdered sugar with a tablespoon or two of Orange Crush soda (or orange juice) until you reach a pourable, yet thick, consistency. Drizzle it generously over the cooled cake. If it’s too thick, add a tiny bit more soda; if it’s too thin, add a little more powdered sugar.
Step 9: Slice & Serve
Once the glaze has set up a bit, it’s time to slice and enjoy! I like to use a sharp knife to get clean cuts. The cake should be wonderfully moist and tender, with that vibrant orange flavor shining through. It’s perfect served at room temperature, but I’ve also enjoyed it slightly warm, especially on a chilly day. You can serve it as is, or with a dollop of whipped cream or a scoop of vanilla Ice Cream for a decadent treat.
What to Serve It With
This Orange Crush Cake is so wonderfully versatile, it fits into almost any meal or occasion! For **Breakfast**, it’s a dream. Imagine a slice with your morning coffee or a glass of fresh orange juice. It’s not overly sweet, so it feels perfectly acceptable as a breakfast treat. Presentation-wise, a simple dusting of powdered sugar or a light drizzle of the glaze is all it needs. When it comes to **Brunch**, it really shines. It adds a lovely burst of color and flavor to a spread. I like to serve it cut into smaller squares, maybe alongside some fresh Fruit Salad or yogurt parfaits. A sparkling cider or even a mimosa would be a perfect beverage pairing. As a **Dessert**, this cake can be dressed up or down. A simple glaze is lovely, but adding a dollop of lightly sweetened whipped cream, a few fresh raspberries, or a scoop of vanilla bean ice cream takes it to the next level for a perfect after-dinner treat. For **Cozy Snacks**, it’s just pure comfort. I love grabbing a slice in the afternoon with a cup of tea or when I’m settling in for a movie night. It’s that perfect, not-too-heavy sweet craving satisfier. My family loves it for weekend breakfasts, and the kids always ask for seconds when I make this Orange Crush Cake. It’s become our go-to “just because” treat.
Top Tips for Perfecting Your Orange Crush Cake
Over the years, I’ve learned a few tricks that make this Orange Crush Cake even better. For **Zucchini Prep**, if you decide to add some grated zucchini (a fantastic idea for extra moisture, though not strictly in this version!), make sure you squeeze out as much liquid as possible. Grate it on the larger side of your grater for better texture. Fresh zucchini is always best; avoid ones that look shriveled or old. When it comes to **Mixing Advice**, remember my mantra: DON’T OVERMIX! Seriously, this is the most crucial tip for a tender cake. Mix until you *just* combine the wet and dry ingredients. A few small lumps are better than a tough cake. For **Swirl Customization**, if you decide to add something to swirl in (like a simple orange jam or a cream cheese mixture), make sure it’s not too thin, or it’ll just disappear. For this particular Orange Crush cake, the zest is the “swirl” element and it works perfectly by just sprinkling it in.
**Ingredient Swaps**: While this recipe is written for Orange Crush soda, you can absolutely use another brand of orange soda or even a sparkling orange juice. If you don’t have soda, about 3/4 cup of orange juice plus 1/4 cup of club soda can work in a pinch, though the flavor won’t be as intense. For the butter, I’ve tested this with a good quality vegan butter, and it turned out surprisingly well – almost the same texture! As for the zest, if you can’t find fresh oranges, about 1 to 1.5 teaspoons of good quality orange extract can be used, but fresh zest really adds that bright, natural aroma that’s unbeatable. For the **Baking Tips**, always know your oven. If you find your oven tends to bake hotter or cooler, adjust the time accordingly. I usually bake on the middle rack to ensure even heating. For doneness testing, a toothpick is your best friend, but I also look for the edges of the cake to pull away slightly from the sides of the pan – that’s a great visual cue that it’s done. Finally, for **Glaze Variations**, play around with the consistency! If you want a thicker glaze that sits on top, use less liquid. For a thinner, more drizzly glaze that soaks in a bit, add a touch more liquid. You can also add a drop of orange food coloring for an even brighter hue, though I prefer the natural color.
Storing and Reheating Tips
Storing this Orange Crush Cake is pretty straightforward, and thankfully, it stays wonderfully moist. For **Room Temperature Storage**, if it’s not too humid, you can keep the cake, well-covered, at room temperature for up to 2-3 days. I usually use plastic wrap or a cake dome. Make sure the glaze is fully set before covering it. If you want to keep it longer or live in a warmer climate, **Refrigerator Storage** is your best bet. Wrap the cake tightly in plastic wrap, then place it in an airtight container. It should stay fresh in the fridge for up to a week, though the texture might change slightly after a few days. When you’re ready to serve it from the fridge, let it sit at room temperature for about 15-20 minutes to take the chill off and allow the flavors to meld. For **Freezer Instructions**, this cake freezes beautifully! Once completely cooled and glazed, wrap it very tightly in a double layer of plastic wrap, then a layer of aluminum foil. It can be frozen for up to 2-3 months. To thaw, unwrap it and let it thaw at room temperature overnight. The glaze might get a little sticky as it thaws, but it still tastes amazing. For **Glaze Timing Advice**, if you plan to freeze the cake, I highly recommend glazing it *after* thawing. Glazing before freezing can sometimes lead to condensation issues and a less-than-perfect finish when thawed. If you’re just storing it for a few days at room temp or in the fridge, glazing it beforehand is perfectly fine!
Frequently Asked Questions
Final Thoughts
Honestly, this Orange Crush Cake is one of those recipes that just makes me happy. It’s simple, bright, and bursting with that comforting citrus flavor that reminds me of so many cherished memories. It’s proof that you don’t need complicated steps or fancy ingredients to create something truly delicious and crowd-pleasing. Whether you’re looking for a breakfast treat, a brunch centerpiece, or a simple dessert to brighten your day, this cake delivers every single time. The way it bakes up so tender and moist, with that incredible orange aroma filling your kitchen, is pure magic. I really hope you give this Orange Crush Cake a try. It’s become a treasured recipe in my family, and I have a feeling it will become one in yours too. I can’t wait to hear what you think! Let me know in the comments if you try it and how it turns out, or if you have your own little twists. Happy baking!

Orange Crush Cake
Ingredients
Main Ingredients
- 2.5 cups all-purpose flour
- 1.5 cups granulated sugar
- 2 teaspoons baking powder
- 0.5 teaspoon salt
- 0.5 cup unsalted butter softened
- 2 large eggs
- 1 cup orange juice freshly squeezed
- 0.5 cup orange zest
- 0.5 cup sour cream
Instructions
Preparation Steps
- Preheat oven to 350°F (175°C). Grease and flour a 9x13 inch baking pan.
- In a large bowl, whisk together flour, sugar, baking powder, and salt.
- Add softened butter and mix until the mixture resembles coarse crumbs.
- In a separate bowl, whisk together eggs, orange juice, orange zest, and sour cream.
- Gradually add the wet ingredients to the dry ingredients, mixing until just combined. Do not overmix.
- Pour the batter into the prepared baking pan and spread evenly.
- Bake for 30-35 minutes, or until a toothpick inserted into the center comes out clean.
- Let the cake cool in the pan for 10 minutes before inverting it onto a wire rack to cool completely.
Notes
Nutrition

Ava Brooks is the home cook behind RecipeSharingHub, sharing dependable, step‑by‑step recipes for busy weeknights and easy weekend bakes. When not testing dishes, Ava snaps kitchen photos and answers reader questions in the comments. Discover the latest recipes or join the newsletter for new ideas each week.