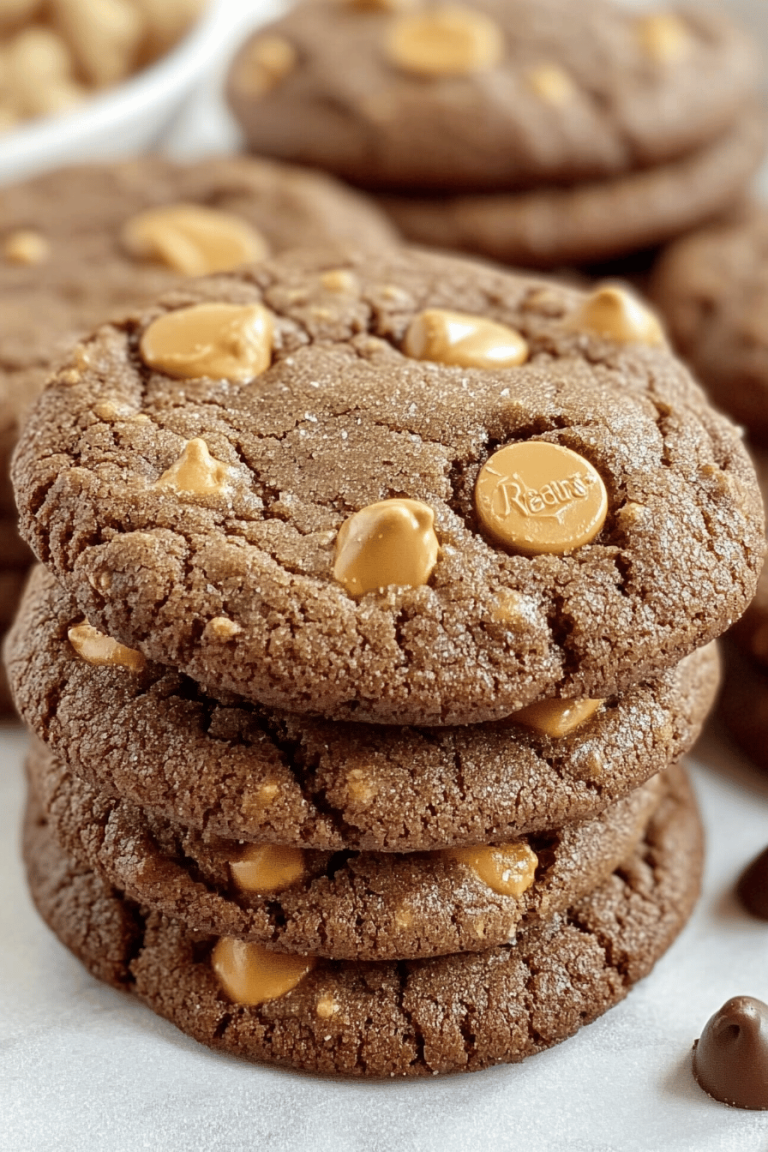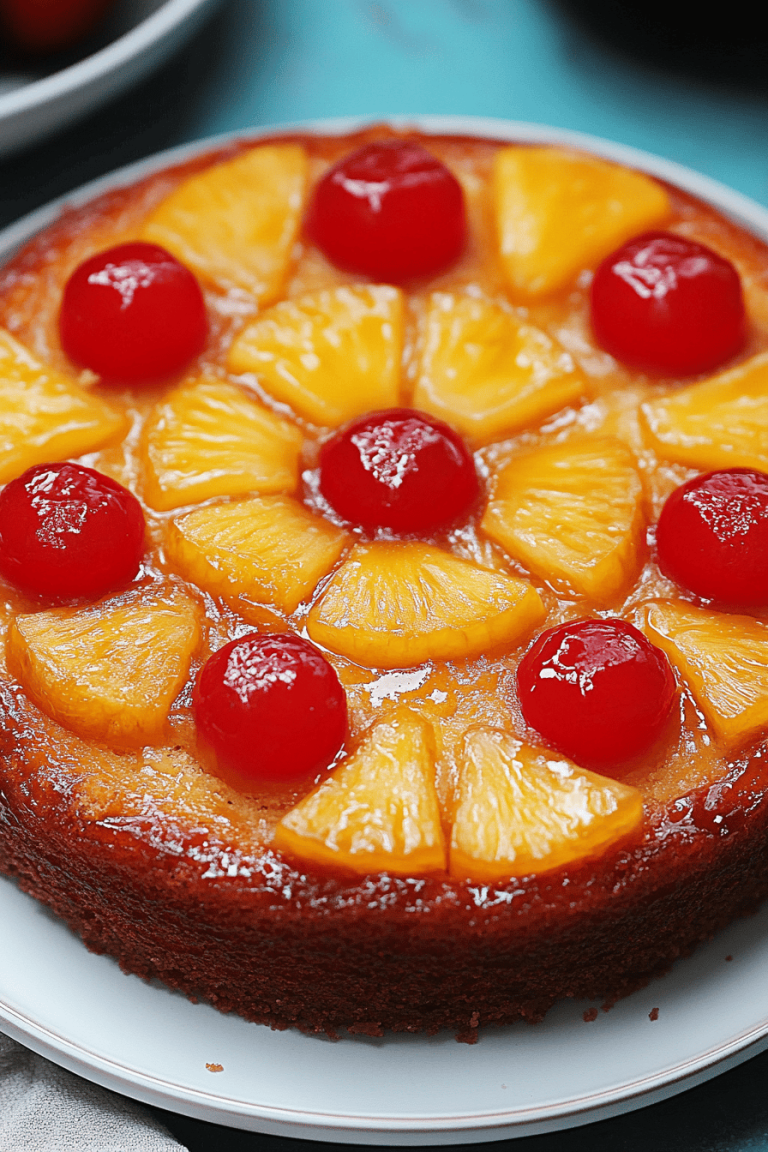
You know those days? The ones where you just need a little something sweet, something that feels like a hug in cookie form? That’s exactly when I reach for my monster cookies recipe. Seriously, these aren’t just cookies; they’re pure joy baked into a chewy, chocolatey, peanut buttery delight. I remember the first time I made these for a neighborhood bake sale, and they were gone in what felt like five minutes! My own kids, who can be the pickiest eaters on the planet, practically inhale them. They’re so much more than just your average Chocolate Chip cookie – they’ve got this wonderful, almost unruly personality, packed with goodness that makes you want to sneak another one (or three!) when no one’s looking. If you’re a fan of a really substantial, satisfying cookie that isn’t too fussy, then you’ve come to the right place. These monster cookies are a game-changer, and honestly, they’re my go-to when I want to impress without spending hours in the kitchen.
What are monster cookies?
So, what exactly *are* monster cookies, you ask? Well, think of them as the ultimate “kitchen sink” cookie, but in the best possible way! The name “monster” comes from the fact that they’re loaded with all sorts of goodies – typically Peanut Butter, oats, chocolate chips, and often M&M’s or other candies for that extra pop of fun and color. They’re not neat and tidy like a classic chocolate chip cookie; they’re a bit more free-spirited, a glorious mash-up of textures and flavors. It’s like all your favorite cookie cravings decided to have a party in one amazing bite. There’s no strict rulebook for what has to go in them, which is part of their charm. You can easily customize them based on what you have in your pantry, making them super adaptable. They’re essentially a celebration of deliciousness, all rolled into one satisfyingly chewy cookie.
Why you’ll love this recipe?
Okay, let’s talk about why this monster cookie recipe is going to become your new best friend in the kitchen. First off, the flavor is just out of this world. You get that rich, comforting creaminess from the Peanut Butter, a delightful chewiness from the oats, and then those bursts of melty chocolate and colorful candy. It’s a symphony of textures and tastes that will make your taste buds sing! But it’s not just about the amazing flavor; these cookies are surprisingly simple to whip up. Honestly, the hardest part is waiting for them to bake! You don’t need any fancy equipment or complicated techniques. And if you’re budget-conscious, you’ll be happy to know that most of the ingredients are pantry staples, making these a cost-effective treat. What I love most about these monster cookies, though, is their sheer versatility. They’re perfect for packed lunches, after-school snacks, or even a sweet treat with your morning coffee if you’re feeling a bit rebellious. They hold up really well, so they’re fantastic for taking to potlucks or picnics. Compared to other elaborate dessert recipes, this one truly shines because it delivers maximum flavor and fun with minimal fuss. It’s the kind of cookie that brings smiles to faces, and really, what could be better than that?
How do you make a monster cookie?
Quick Overview
Making these monster cookies is as easy as can be! We’ll start by creaming our butter and sugars, then adding in the wet ingredients, followed by the dry. The magic happens when we stir in all the chunky add-ins like Peanut Butter, oats, chocolate chips, and candies. We’ll then drop spoonfuls onto a baking sheet and bake them until they’re golden brown and delightfully chewy. The whole process takes less than 30 minutes of active time, making it a lifesaver on busy weeknights when a cookie craving hits hard. This method ensures all those yummy mix-ins get evenly distributed for the perfect bite every single time.
Ingredients
For the Main Batter:
2 cups (4 sticks) unsalted butter, softened: Make sure your butter is truly softened, not melted. It makes a world of difference in how the cookies cream together. I usually pull it out of the fridge about an hour before I plan to bake.
1 ½ cups granulated sugar: This adds sweetness and helps create that lovely crisp edge.
1 ½ cups packed light brown sugar: Brown sugar is key for that signature chewy texture and a hint of caramel flavor. Don’t skip this!
4 large eggs: These bind everything together and add richness. Room temperature eggs incorporate better.
1 teaspoon vanilla extract: Pure vanilla extract adds a depth of flavor that you just can’t get from imitation.
2 teaspoons baking soda: This is our leavening agent, helping the cookies spread and get that perfect chewiness.
1 teaspoon salt: Salt balances the sweetness and enhances all the other flavors.
4 cups all-purpose flour: The structure of our cookie! Sift it if you want an extra tender cookie, though it’s not strictly necessary for this recipe.
For the Filling:
1 cup creamy Peanut Butter: Your favorite brand works great here! If you’re not a peanut butter fan, you can try almond butter or sunflower seed butter for a different flavor profile, though the texture might vary slightly. Some people even use a few tablespoons of Nutella!
2 cups old-fashioned rolled oats: These give the cookies their wonderful chewiness and a nice rustic texture. Quick oats will work but can make the cookies a bit too soft.
2 cups chocolate chips: I love a mix of semi-sweet and milk chocolate chips for ultimate indulgence. Mini chips work well too for more even distribution.
1 cup chopped candy-coated chocolates (like M&M’s): This is where the “monster” really comes out! Use whatever colors or flavors you love. You can also use chopped candy bars or other favorite mix-ins.
Step-by-Step Instructions
Step 1: Preheat & Prep Pan
First things first, let’s get our oven preheated to 350 degrees F (175 degrees C). While the oven is warming up, line your baking sheets with parchment paper. This is a step I never skip because it prevents sticking and makes cleanup a breeze. If you don’t have parchment paper, you can lightly grease your baking sheets, but parchment is truly the way to go.
Step 2: Mix Dry Ingredients
In a medium bowl, whisk together the flour, baking soda, and salt. Whisking them well at this stage helps to distribute the leavening agent evenly, ensuring your cookies bake up consistently. You want to make sure there are no clumps of baking soda hiding in there, or you might end up with oddly flavored spots. Set this bowl aside for now.
Step 3: Mix Wet Ingredients
In a large mixing bowl, or the bowl of your stand mixer fitted with the paddle attachment, cream together the softened butter, granulated sugar, and light brown sugar. Beat this on medium-high speed for about 2-3 minutes until it’s light and fluffy. This creaming process is crucial for incorporating air, which will give your cookies a tender crumb and nice lift. Next, add the eggs one at a time, beating well after each addition. Then, stir in the vanilla extract. Make sure you scrape down the sides of the bowl a couple of times to ensure everything is thoroughly combined.
Step 4: Combine
Now it’s time to bring the wet and dry ingredients together. With the mixer on low speed, gradually add the flour mixture to the wet ingredients. Mix just until the flour is incorporated and you no longer see streaks of dry flour. Be careful not to overmix at this stage! Overmixing can develop the gluten too much, resulting in tougher cookies. Stop mixing as soon as it comes together. We want tender, chewy monster cookies!
Step 5: Prepare Filling
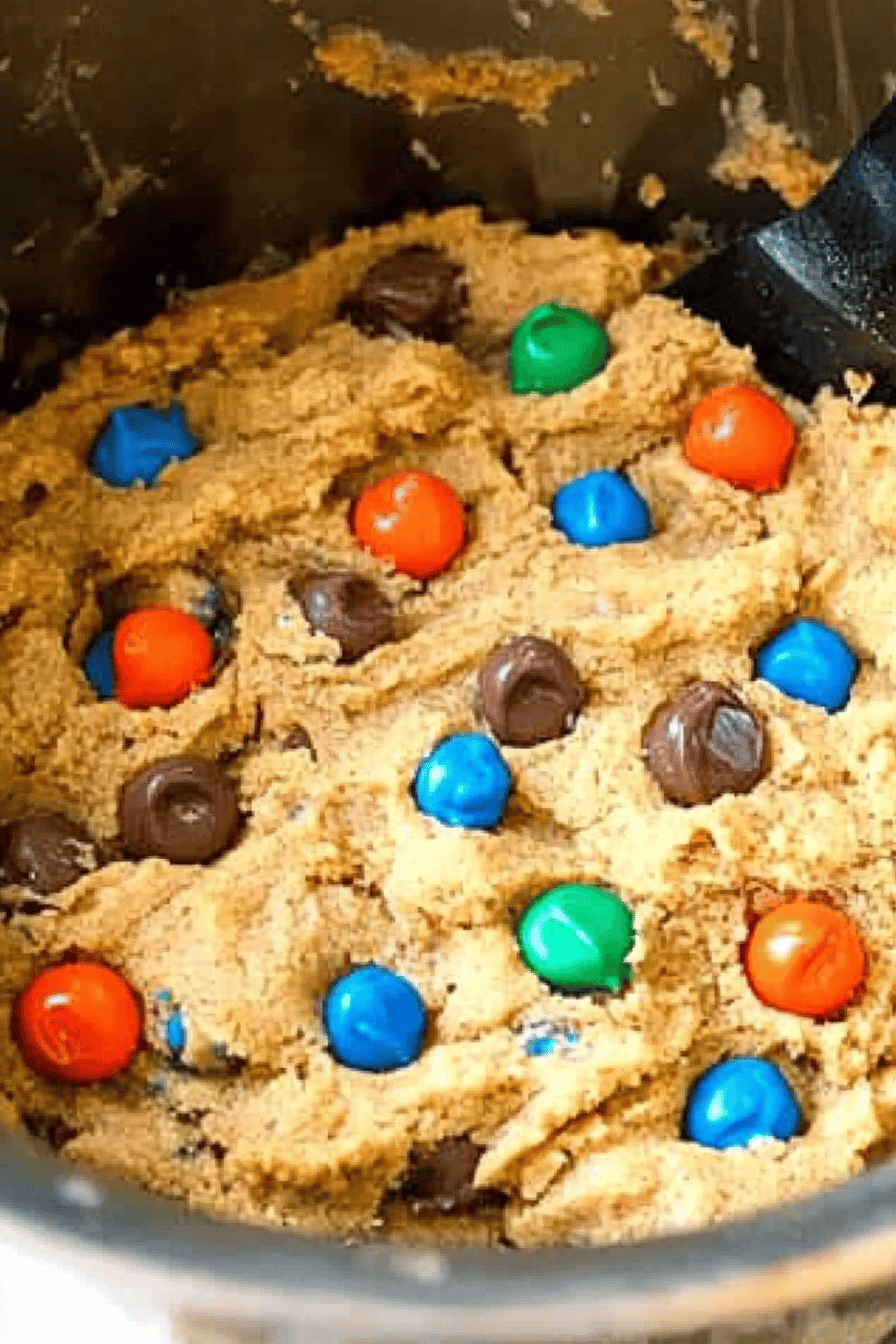
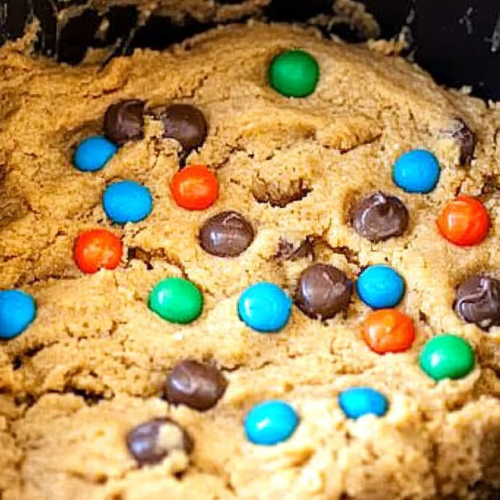
This is the fun part! In a separate large bowl, add the old-fashioned rolled oats, chocolate chips, and chopped candy-coated chocolates. If you’re using peanut butter and it’s not already incorporated into the batter, you would add it here. Some recipes incorporate peanut butter into the main batter, but I prefer adding it in with the mix-ins to ensure those lovely pockets of peanut butter goodness. Stir these dry ingredients and mix-ins together just to combine them roughly.
Step 6: Layer & Swirl
Gently fold the oat and candy mixture into the cookie dough. Use a sturdy spatula or wooden spoon for this. Again, don’t overmix! You want to distribute the add-ins evenly, but you don’t want to break up the chocolate chips too much or create a dense dough. The dough will be quite thick and packed with goodies – that’s exactly what we want for perfect monster cookies!
Step 7: Bake
Drop rounded tablespoons of dough onto your prepared baking sheets, leaving about 2 inches between cookies as they will spread. I like to use a cookie scoop for uniform size, but you can also just use two spoons. For slightly flatter, chewier cookies, press down on the tops of the dough balls a little before baking. Bake for 10-12 minutes, or until the edges are lightly golden brown and the centers look just slightly underbaked. They will continue to cook a bit on the baking sheet as they cool.
Step 8: Cool & Glaze
Let the cookies cool on the baking sheets for about 5-10 minutes before carefully transferring them to a wire rack to cool completely. This is where the magic of cooling on the sheet happens – they firm up just enough to be moved without falling apart. If you want to add a simple glaze, you can whisk together powdered sugar with a tablespoon or two of milk or water until you reach your desired drizzling consistency. Drizzle it over the cooled cookies once they’ve set up a bit. It adds an extra touch of sweetness and visual appeal!
Step 9: Slice & Serve
Once the cookies are completely cooled, they are ready to be devoured! For the best flavor and texture, serve them at room temperature. You can enjoy them as is, or if you’re feeling extra decadent, serve them with a cold glass of milk – it’s a classic pairing for a reason! These cookies are sturdy enough to be stacked and transported, making them perfect for sharing. They look beautiful on a plate, with all the colorful candies peeking out. Enjoy every delicious, chewy bite!
What to Serve It With
These monster cookies are pretty much a treat all on their own, but I love thinking about different ways to pair them up! For a cozy breakfast, imagine these alongside a steaming mug of coffee or a creamy latte. They’re wonderfully satisfying and give you that little boost you need to start the day, especially on a weekend morning when you have a bit more time to linger. For a more festive brunch spread, I often arrange them on a tiered stand with some fresh fruit and other pastries. They add a playful touch that everyone, kids and adults alike, will adore. They’re also fantastic as a dessert! Serve them warm with a scoop of vanilla bean ice cream for an extra special treat, or simply arrange them on a platter after dinner. And for those moments when you just need a comforting snack, a monster cookie paired with a glass of cold milk is pure bliss. My family has a tradition of making a big batch whenever we have a movie night, and everyone grabs their favorite kind of monster cookie to munch on during the film.
Top Tips for Perfecting Your Monster Cookies
I’ve made these monster cookies more times than I can count, and over the years, I’ve picked up a few tricks that I think really make them shine. For the best texture, make sure your butter is truly softened, not melted. Melted butter can make cookies spread too much and become greasy. When it comes to mixing, always err on the side of caution with the flour. Overmixing can lead to tough cookies, and nobody wants that! I’ve learned that stopping just as the flour disappears is the golden rule. For the mix-ins, don’t be afraid to get creative! I love using a mix of different chocolate chips, but you could also add chopped nuts (if no allergies!), dried cranberries, or even toffee bits. The key is to ensure they’re evenly distributed throughout the dough. If your dough seems a bit too sticky to handle, pop it in the fridge for about 15-20 minutes before scooping. This makes it much easier to work with. And remember, ovens can be fickle! I always recommend doing the toothpick test – insert a toothpick into the center of a cookie; if it comes out with moist crumbs attached, they’re done. If it comes out clean, they might be slightly overbaked. If you’re not a fan of the candy-coated chocolates, you can easily substitute them with more chocolate chips or a mix of chopped nuts and raisins for a more “grown-up” version. I once accidentally used quick oats instead of rolled oats and found the cookies were a bit softer and flatter, so stick to rolled oats if you can for that signature chew!
Storing and Reheating Tips
The best part about these monster cookies is that they stay wonderfully chewy and delicious for days! At room temperature, I usually store them in an airtight container for up to 4-5 days. Just make sure they’ve cooled completely before sealing them up, otherwise, you risk getting condensation and soggy cookies. If you find they’ve become a little too firm after a couple of days, you can pop them in the microwave for about 10-15 seconds with a small, damp paper towel. It works like a charm to bring back that fresh-baked chewiness! For longer storage, these cookies freeze beautifully. I like to freeze them in a single layer on a baking sheet until they’re solid, then transfer them to a freezer-safe bag or container. They’ll keep well in the freezer for up to 2-3 months. When you’re ready to enjoy them, you can either thaw them at room temperature for a few hours or reheat them gently in the microwave. If you plan to glaze your cookies, I highly recommend waiting until they are completely cool and you’re ready to serve them, or just before storing them at room temperature. Glazing frozen cookies can make them a bit too moist.
Frequently Asked Questions
Final Thoughts
Honestly, these monster cookies are more than just a recipe to me; they’re a little piece of happiness. They’re the kind of cookies that bring people together, sparking smiles and happy memories with every bite. The combination of chewy oats, rich peanut butter, melty chocolate, and fun candies is just unbeatable. They’re proof that sometimes, the best things in life are a delightful mix of everything good! If you’re looking for a simple yet incredibly satisfying treat that’s perfect for any occasion, you absolutely have to give these monster cookies a try. They’re a labor of love that truly pays off in deliciousness. I hope you love making them as much as I do! If you try this recipe, I’d be absolutely thrilled to hear all about it! Drop a comment below and let me know how your monster cookies turned out, and what amazing mix-ins you chose. Happy baking, and enjoy every single one!
Monster Cookies
Ingredients
Main Ingredients
- 1 cup butter, softened
- 1 cup packed brown sugar
- 0.75 cup granulated sugar
- 2 large eggs
- 1 teaspoon vanilla extract
- 1 teaspoon baking soda
- 0.5 teaspoon salt
- 3 cups all-purpose flour
- 1 cup creamy peanut butter
- 1 cup chocolate chips
- 1 cup M&Ms
Instructions
Preparation Steps
- Preheat oven to 350°F (175°C). Line baking sheets with parchment paper.
- In a large bowl, cream together the softened butter, brown sugar, and granulated sugar until light and fluffy.
- Beat in the eggs one at a time, then stir in the vanilla extract and peanut butter.
- In a separate medium bowl, whisk together the flour, baking soda, and salt.
- Gradually add the dry ingredients to the wet ingredients, mixing until just combined. Do not overmix.
- Stir in the chocolate chips and M&Ms.
- Drop rounded tablespoons of dough onto the prepared baking sheets, about 2 inches apart.
- Bake for 10-12 minutes, or until the edges are lightly golden brown and the centers are still slightly soft.
- Let the cookies cool on the baking sheets for a few minutes before transferring them to a wire rack to cool completely.