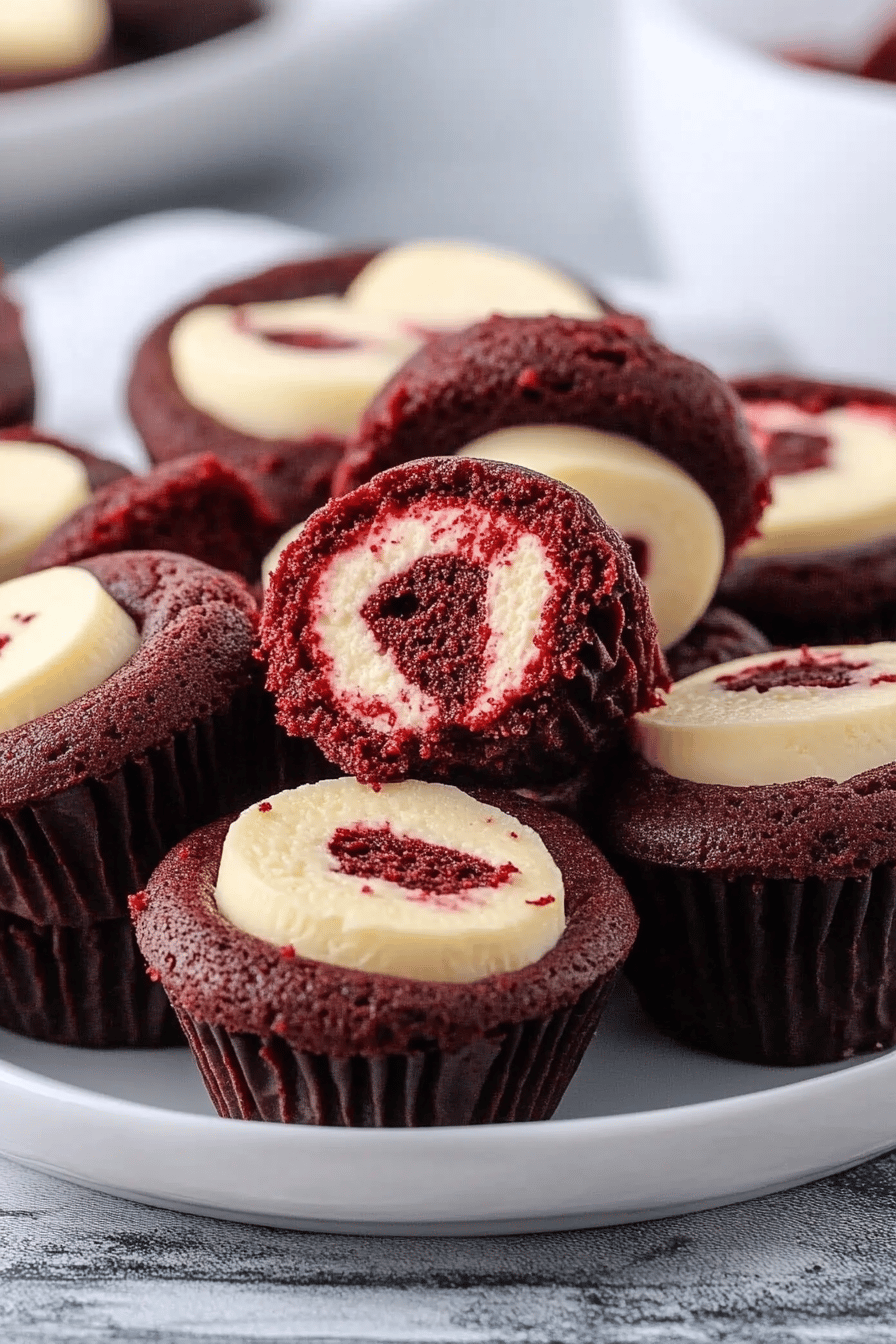
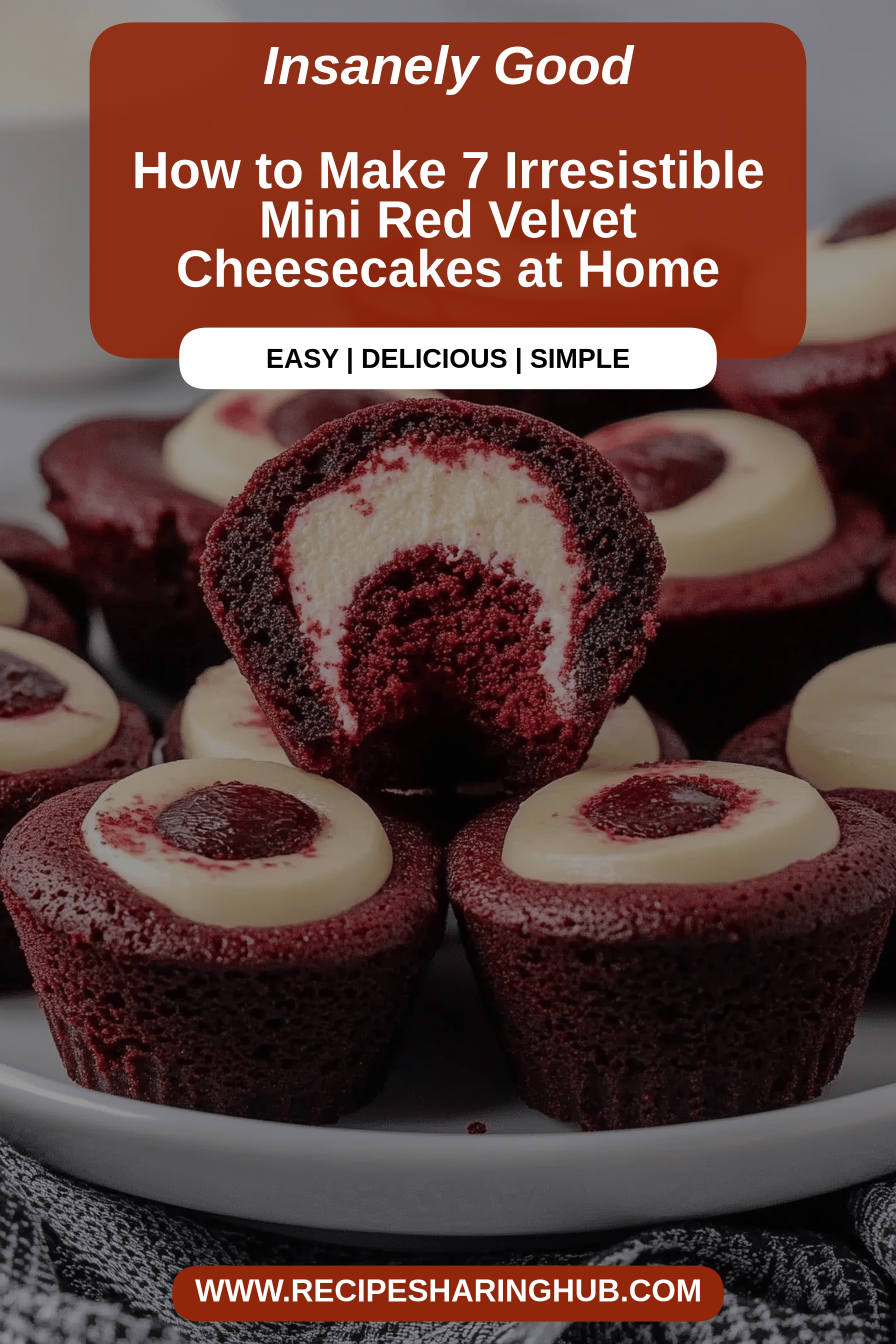
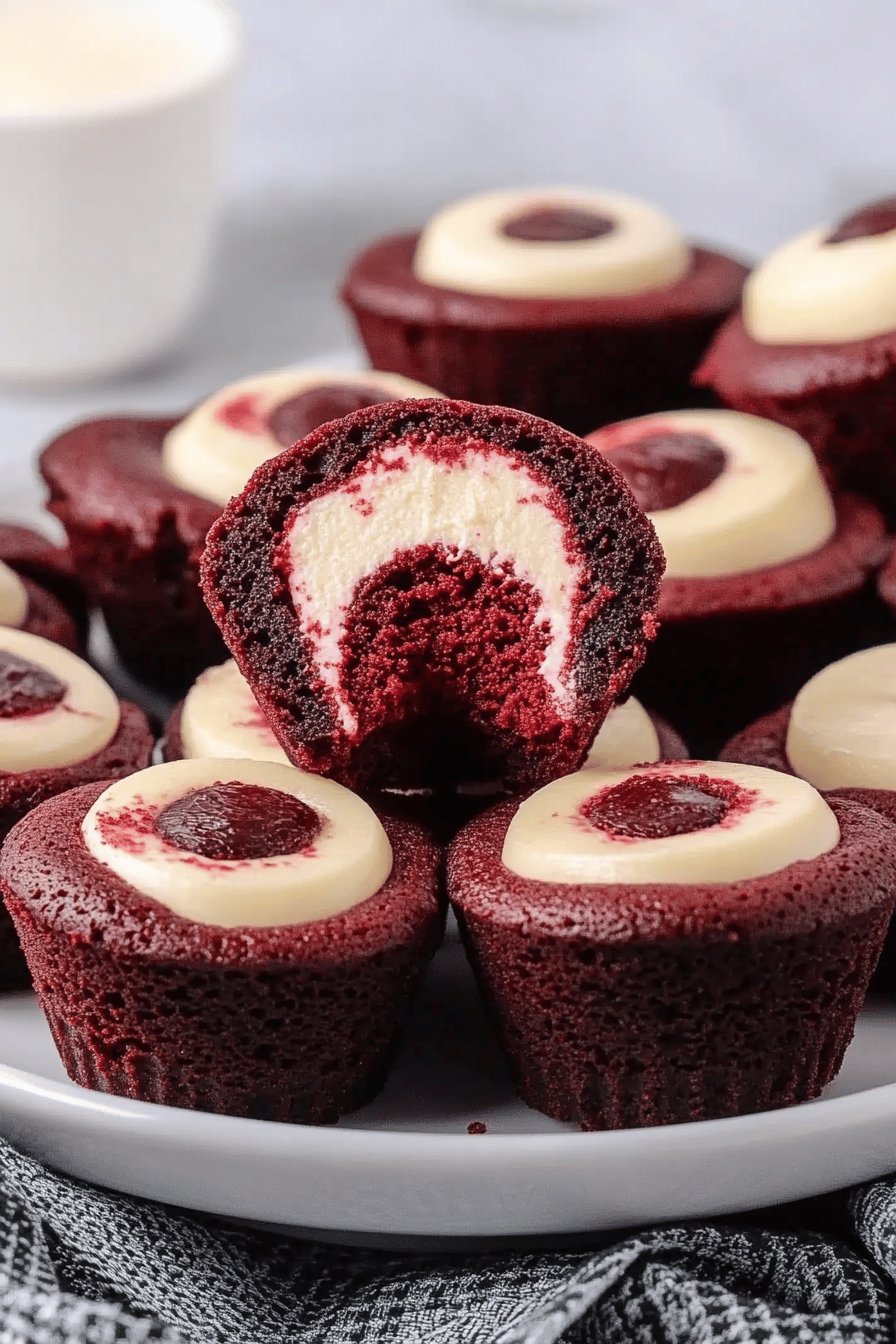
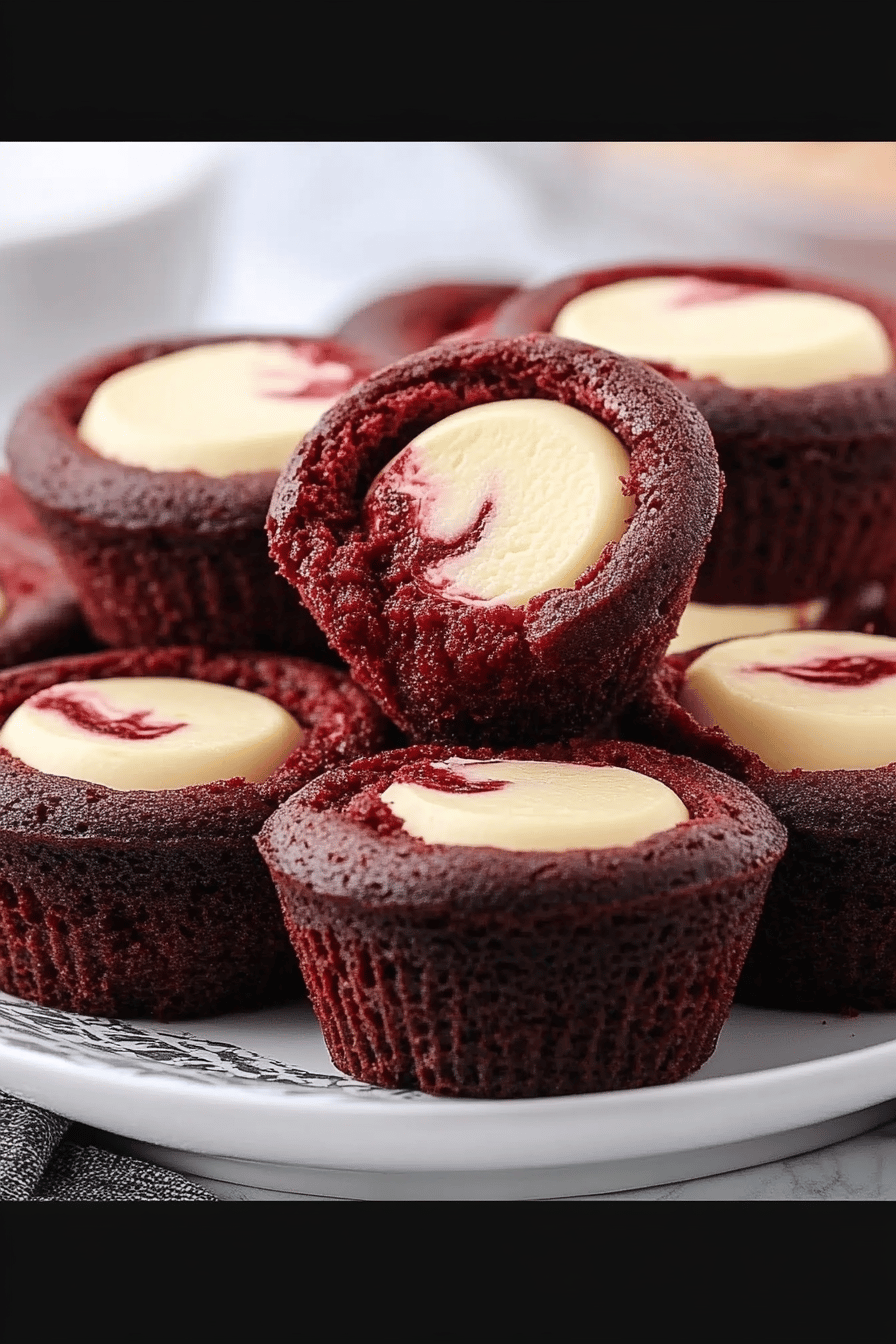
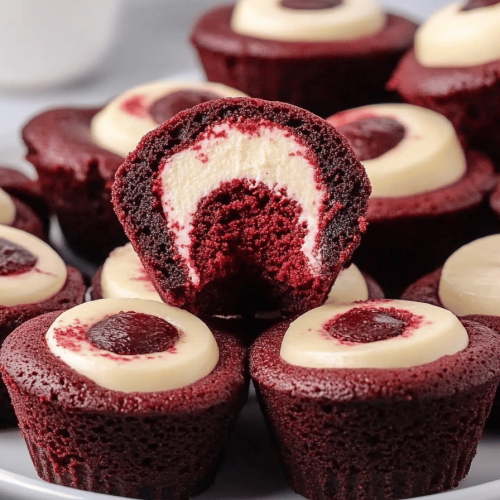
Oh, these little delights! If there’s one treat that instantly brings a smile to my face, it’s a batch of perfectly formed mini Red Velvet cheesecakes. There’s something so charming about their vibrant color and that irresistible swirl of creamy cheesecake peeking through. They’re like tiny edible jewels, aren’t they? I remember the first time I made these; it was for a friend’s baby shower, and they were an absolute hit! People kept asking for the recipe, thinking I’d spent hours painstakingly crafting them, but the truth is, they’re surprisingly straightforward. They’re not as fussy as a full-sized cheesecake, and they bake up so beautifully in individual portions, making them perfect for parties or even just a special weekend treat. Honestly, when I’m craving something decadent but don’t want to commit to a whole cake, these mini red velvet cheesecakes are my go-to. They have all the rich, creamy goodness of classic red velvet, but in a perfectly portioned, utterly delightful package.
What is the secret behind this Red Velvet Cheesecake?
So, what exactly are these little wonders? Think of them as the cute, pint-sized cousins of the grand, show-stopping red velvet cheesecake. We’re talking about a rich, moist red velvet Cake Batter that’s infused with that distinct cocoa flavor and a gorgeous crimson hue, all swirled together with a tangy, creamy cheesecake filling. Then, they’re baked up in delightful mini portions, usually in muffin tins, so you get that perfect bite-sized treat every single time. It’s essentially the best of both worlds: the classic, comforting taste of red velvet cake and the luxurious, smooth texture of cheesecake, all rolled into one irresistible package. The beauty of making them mini is that they bake faster and are so much easier to serve. Plus, let’s be honest, who can resist a mini dessert? They’re just inherently more fun!
Why you’ll love this recipe?
I know you’re going to love this recipe, but I’m not sure what to make it for. I’m just saying it’s flavor! It’s a harmonious dance between the slightly bitter cocoa and the sweet, tanginess of the CREAM CHEESE. The red velvet cake itself is wonderfully moist, and that creamy cheesecake swirl? Pure bliss. It’s not overly sweet, which is something I really appreciate, allowing the red velvet notes to truly shine.
What is the second category?simplicity. I know, I know, “cheesecake” can sound intimidating, but these mini versions are surprisingly forgiving and much quicker to whip up than a traditional large cheesecake. You don’t need a water bath, and they bake up beautifully without cracking. What I love most about this recipe is that it feels special without being overly complicated. It’s the kind of recipe that impresses your guests but doesn’t leave you stressed in the kitchen.
And let’s talk cost-efficiency. Compared to buying fancy individual desserts from a bakery, making these yourself is incredibly budget-friendly. The ingredients are all pretty standard pantry staples, and you probably have most of them already.
The versatility is another huge plus. These mini red velvet cheesecakes are perfect for practically any occasion. Birthdays, holidays, potlucks, or just a cozy night in – they fit right in. They’re fantastic alongside a cup of coffee, as a sweet ending to a meal, or even as a decadent breakfast if you’re feeling adventurous (I won’t tell!). They also hold up really well, making them great for making ahead. Honestly, they’re just a reliable winner. If you’re a fan of my classic red velvet cupcakes, you’ll adore these, as they share that same deep flavor profile but with the added bonus of that creamy cheesecake layer. It’s truly the best of both worlds!
How to Make Mini Red Velvet Cheesecakes
Quick Overview
The process is wonderfully straightforward! You’ll whip up a vibrant red velvet batter, create a simple, creamy cheesecake filling, and then artfully swirl them together before baking in muffin tins. The result is individual, perfectly portioned delights with that signature red velvet tang and the lusciousness of cheesecake. It’s a foolproof method that guarantees gorgeous results, even if you’re new to baking.
Ingredients
Here’s what you’ll need to bring these little beauties to life. I always try to use good quality ingredients, as it really does make a difference in the final taste!
For the Red Velvet Cake Batter:
All-purpose flour: 1 ½ cups, spooned and leveled. This is your base, so don’t pack it in the cup!
Granulated sugar: 1 cup. For sweetness and structure.
Unsweetened cocoa powder: 2 tablespoons. This gives it that subtle red velvet flavor. Not too much, or it can become bitter.
Baking soda: 1 teaspoon. Our leavening agent, crucial for that perfect rise.
Salt: ½ teaspoon. Balances the sweetness.
Buttermilk: 1 cup. This is key for that tender crumb and tangy flavor. If you don’t have buttermilk, you can make your own by adding 1 tablespoon of white vinegar or lemon juice to 1 cup of milk and letting it sit for 5-10 minutes.
Vegetable oil: ½ cup. Keeps the cake incredibly moist.
Large eggs: 2. At room temperature, they’ll incorporate much better.
Red food coloring: 1-2 tablespoons, or enough to achieve a vibrant color. Gel coloring is more potent than liquid.
White vinegar: 1 teaspoon. Reacts with the baking soda and buttermilk to give lift and tenderize.
Vanilla extract: 1 teaspoon. For that classic warmth.
For the Cream Cheese Filling:
Cream cheese: 8 ounces, softened to room temperature. Make sure it’s truly soft so you don’t get lumps!
Granulated sugar: ½ cup. Sweetens the filling.
Large egg: 1, at room temperature. Helps bind and enrich the filling.
Vanilla extract: ½ teaspoon. Adds a lovely aroma and flavor.
For the Optional Glaze:
Powdered sugar: 1 cup, sifted. For a smooth finish.
Milk or cream: 1-2 tablespoons. To reach desired drizzling consistency.
Vanilla extract: ½ teaspoon. A touch of flavor.
Step-by-Step Instructions
Step 1: Preheat & Prep Pan
First things first, get your oven preheating to 350°F (175°C). Now, grab a standard 12-cup muffin tin. I highly recommend using liners – either paper or silicone. For extra insurance against sticking and to make removal super easy, I like to lightly grease the inside of the muffin cups too, even with liners. This little step makes all the difference when you’re trying to get those perfectly intact Mini Cheesecakes out!
Step 2: Mix Dry Ingredients
In a medium bowl, whisk together the flour, granulated sugar, unsweetened cocoa powder, baking soda, and salt. Whisking them together well ensures everything is evenly distributed, so you won’t have pockets of baking soda or salt. This is a simple step, but it’s important for an even bake!
Step 3: Mix Wet Ingredients
In a separate, larger bowl, whisk together the buttermilk, vegetable oil, room temperature eggs, red food coloring (start with 1 tablespoon and add more if you want a deeper red), white vinegar, and vanilla extract until everything is well combined and the color is uniform. Make sure your eggs are at room temperature; it really helps them emulsify better with the other ingredients.
Step 4: Combine
Pour the dry ingredients into the wet ingredients. Now, this is where you need to be gentle! Mix just until combined. A few small lumps are totally okay; in fact, overmixing can lead to a tougher cake. I usually use a whisk or a rubber spatula for this, making sure to scrape the bottom and sides of the bowl. You want a smooth, vibrant red batter.
Step 5: Prepare Filling
In another bowl, beat the softened cream cheese until it’s smooth and creamy. This is crucial for a lump-free filling! Then, beat in the granulated sugar until well combined. Add the room temperature egg and vanilla extract, and beat just until everything is smooth and consistent. Don’t overbeat here either; we just want it combined and silky.
Step 6: Layer & Swirl
Now for the fun part! Spoon about 1-2 tablespoons of the red velvet batter into each prepared muffin cup, filling them about halfway. Then, drop about 1 teaspoon of the cream cheese filling onto the center of each dollop of batter. Using a toothpick or a skewer, gently swirl the cream cheese into the batter. Don’t over-swirl; you want distinct ribbons of color and cream cheese, not one muddy mixture. A few twists is usually all you need!
Step 7: Bake
Pop the muffin tin into your preheated oven. Bake for about 18-22 minutes, or until the edges are set and a toothpick inserted into the cake portion (avoiding the cream cheese swirl) comes out clean. The centers should be just set and not jiggly. Remember that ovens can vary, so keep an eye on them!
Step 8: Cool & Glaze
Once baked, let the mini cheesecakes cool in the muffin tin for about 10-15 minutes. This allows them to firm up before you remove them. Then, carefully transfer them to a wire rack to cool completely. Once they’re fully cooled, you can drizzle them with a simple glaze made from powdered sugar, a splash of milk, and vanilla. Let the glaze set before serving.
Step 9: Slice & Serve
These are best served chilled or at room temperature. The colors are so beautiful, and they look absolutely stunning on a platter. You can garnish them with a little whipped cream or some fresh berries if you’re feeling fancy!
What to Serve It With
These mini red velvet cheesecakes are so versatile, they truly fit into any occasion. I love them for all sorts of gatherings!
For Breakfast: Honestly, I’m not afraid to have one with my morning coffee! They’re a fantastic treat to make ahead for a weekend brunch. Imagine a platter of these alongside some fresh fruit salad, maybe some bacon, and a good strong coffee. They add a touch of indulgence without being overly heavy for the morning.
For Brunch: This is where they really shine. They look so elegant on a brunch buffet. I love serving them with a glass of prosecco or a mimosa. They pair beautifully with other brunch classics like quiches, pancakes, and savory egg dishes. The pop of color they bring to the table is just fantastic!
As Dessert: Of course, they are a natural fit for dessert! They’re perfect after a nice dinner. I often serve them with a dollop of whipped cream or a small scoop of vanilla bean ice cream. They’re also wonderful on a dessert board with other mini treats for a party. The small size means guests can try a few different things without feeling too full.
For Cozy Snacks: Sometimes, you just need a little something sweet to perk up your afternoon. These are perfect for that. Grab a mini cheesecake, curl up with a good book and a cup of tea. It’s my little moment of self-care. My kids absolutely love these as an after-school treat too. They disappear in minutes!
Top Tips for Perfecting Your Mini Red Velvet Cheesecakes
I’ve made these so many times, and over the years, I’ve picked up a few tricks that I think make a real difference. I’m happy to share them with you!
Red Velvet Batter Consistency: The batter should be thick but pourable. If it seems too thick, you can add a tablespoon of buttermilk at a time until it reaches the right consistency. If it’s too thin, it might spread too much and lose its shape. The goal is a vibrant, smooth batter that’s easy to work with.
Cream Cheese Temperature: This is non-negotiable for a smooth filling! Make sure your cream cheese is truly softened to room temperature. I usually leave it out on the counter for at least an hour, sometimes two. If you’re in a rush, you can gently microwave it for 10-15 second intervals, stirring in between, but be careful not to melt it. Cold cream cheese will result in a lumpy filling, and nobody wants that!
Don’t Overmix: I can’t stress this enough for both the cake batter and the cream cheese filling. Overmixing develops the gluten in the flour, leading to a tougher cake, and it can also incorporate too much air into the cream cheese mixture, which can cause cracks or a less dense, creamy texture. Mix just until combined!
The Art of the Swirl: When swirling, aim for elegance, not aggression. You want distinct ribbons of red and white. Insert your toothpick or skewer to the bottom of the cup and give it just a couple of gentle twists. Too much swirling will blend the colors and you’ll lose that beautiful marbled effect.
Baking Time is Key: Ovens are funny things! My oven might run hotter or cooler than yours. Start checking for doneness around the 18-minute mark. A toothpick inserted into the cake part should come out clean. The centers should look set, not wet or jiggly. If they seem to be browning too quickly on top, you can always loosely tent the muffin tin with foil.
Cooling is Crucial: Patience, my friends! Letting them cool in the tin for a bit helps them set, and then cooling completely on a wire rack prevents a soggy bottom. Rushing this step can lead to delicate mini cheesecakes falling apart.
Glaze Consistency: For the glaze, start with 1 tablespoon of milk and add more, a teaspoon at a time, until you get a drizzling consistency. You want it thick enough to coat the back of a spoon but thin enough to easily drizzle over the cheesecakes.
Storing and Reheating Tips
These mini red velvet cheesecakes are quite forgiving when it comes to storage, which is another reason I love them so much. They’re great for making ahead!
Room Temperature: If they are unglazed and you plan to eat them within a day or two, you can store them covered at room temperature. However, because of the cream cheese filling, I generally prefer to refrigerate them for optimal freshness and safety. If you do keep them out, make sure your kitchen isn’t too warm.
Refrigerator Storage: This is my preferred method. Once completely cooled, store them in an airtight container in the refrigerator. They’ll stay delicious for up to 4-5 days. I like to place a piece of parchment paper between layers if I’m stacking them to prevent them from sticking.
Freezer Instructions: These actually freeze surprisingly well! If you want to freeze them, it’s best to do so *before* glazing. Make sure they are completely cooled. You can flash freeze them on a baking sheet until firm, then transfer them to a freezer-safe airtight container or a heavy-duty freezer bag. They should last in the freezer for up to 2-3 months. To thaw, simply transfer them to the refrigerator overnight.
Glaze Timing Advice: If you’re planning to freeze them, definitely wait to apply the glaze until after they’ve thawed. For refrigerator storage, you can glaze them before storing, but be aware that the glaze might soften slightly over time. If you want that fresh, crisp glaze, it’s best to apply it just before serving.
Frequently Asked Questions
Final Thoughts
I truly hope you give these mini red velvet cheesecakes a try. They’re more than just a dessert; they’re little bites of happiness that are perfect for sharing (or not!). The beautiful contrast of the deep red cake and creamy white filling is so striking, and the flavor combination is just divine. They’re surprisingly easy to make, which means you can whip them up for spontaneous celebrations or just because you’re craving something truly special. If you enjoyed making these, you might also love my classic red velvet cookies or my easy no-bake red velvet parfait for more ways to enjoy that beloved flavor!
I can’t wait to hear how yours turn out! Please leave a comment below and tell me what you think, or share your own tips and variations. And if you snap a photo, be sure to tag me – I love seeing your baking adventures! Happy baking, everyone!
Mini Red Velvet Cheesecakes
Ingredients
Cheesecake Filling
- 226.8 ounces cream cheese softened
- 0.75 cup granulated sugar
- 2 large eggs
- 0.5 teaspoon vanilla extract
- 0.125 cup sour cream
Red Velvet Swirl
- 1 tablespoon unsweetened cocoa powder
- 1 teaspoon red food coloring gel or liquid
- 0.5 teaspoon white vinegar
Crust
- 1.5 cup graham cracker crumbs
- 0.33 cup unsalted butter melted
- 1 tablespoon granulated sugar
Instructions
Preparation Steps
- Preheat oven to 325°F (160°C). Line a 12-cup muffin tin with paper liners.
- In a medium bowl, combine graham cracker crumbs, melted butter, and sugar. Mix until well combined. Press about 1 tablespoon of the mixture into the bottom of each muffin liner.
- In a large bowl, beat cream cheese until smooth. Gradually beat in sugar until combined.
- Beat in eggs one at a time, mixing well after each addition. Stir in vanilla extract and sour cream.
- In a small bowl, whisk together cocoa powder, red food coloring, and white vinegar until smooth. Add this mixture to the cheesecake batter and swirl gently with a toothpick for a marbled effect. Do not overmix.
- Spoon the cheesecake batter evenly into the prepared muffin cups over the crust. Fill about two-thirds full.
- Bake for 20-25 minutes, or until the edges are set and the centers are slightly jiggly.
- Let the cheesecakes cool in the muffin tin for 10 minutes before transferring them to a wire rack to cool completely. Chill in the refrigerator for at least 2 hours before serving.