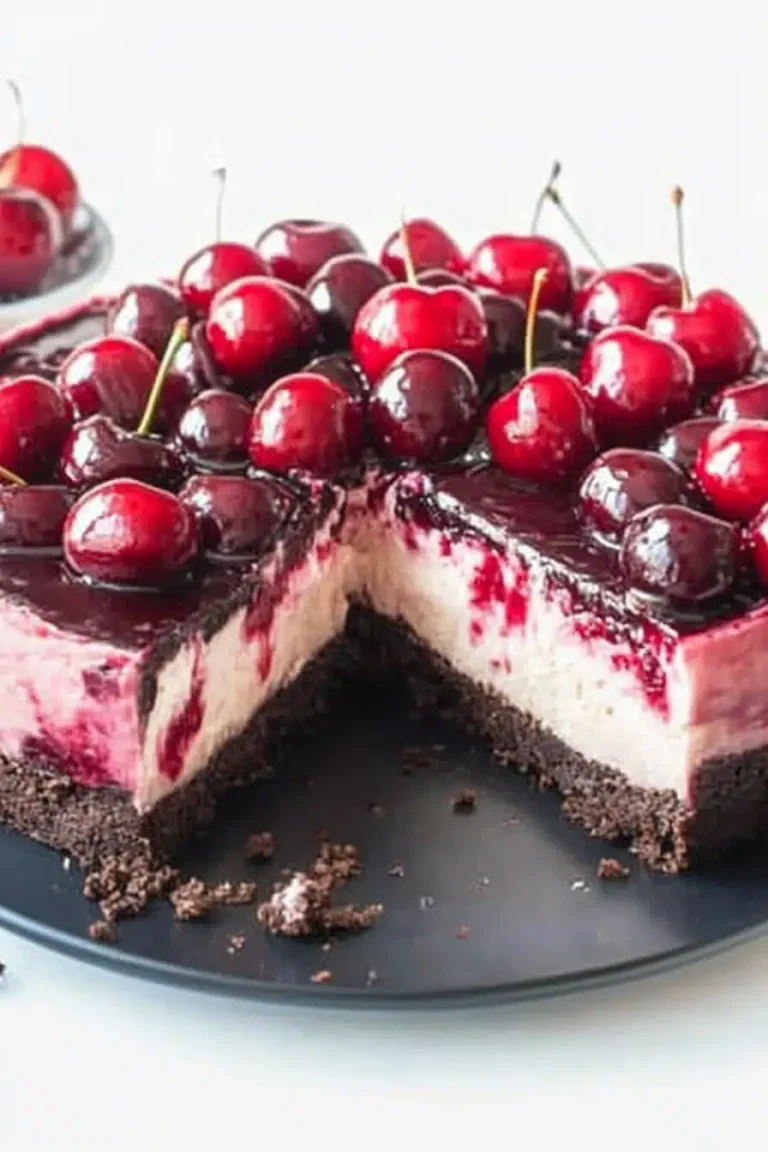
Oh, you guys. I have to tell you about these brownies. They’re not just any brownies; they’re the kind that instantly transport me back to sticky summer afternoons, the smell of baking filling our little kitchen, and my mom letting me lick the spoon (a treat I still savor today!). These Marshmallow Fluff Brownies are pure magic in dessert form. Imagine a rich, fudgy brownie base swirled with ribbons of gooey, sweet marshmallow fluff, all topped with a delicate, crackly glaze. It’s like a s’more met a brownie and they fell madly in love. Honestly, if you’re looking for that perfect treat that hits all the right nostalgic notes while being surprisingly simple to whip up, you’ve found it. Forget those boxed mixes; this is the real deal, and it’s far easier than you might think. It’s the kind of dessert that disappears in minutes at any gathering, and I always get asked for the recipe. It’s a lifesaver when you need a crowd-pleaser or just a comforting sweet fix after a long day.
What is Marshmallow Fluff Brownies?
So, what exactly are Marshmallow Fluff Brownies? Think of them as your classic fudgy brownie, but with an incredible, dreamy layer of marshmallow fluff swirled throughout. It’s not just marshmallow *on* top; it’s actually incorporated into the batter, creating these beautiful, gooey pockets of sweetness. The name itself, Marshmallow Fluff Recipes, always brings a smile to my face because it just sounds so delightfully decadent. This recipe takes a beloved, comforting dessert – the brownie – and elevates it with that signature fluffy, slightly chewy texture and sweet, airy flavor of marshmallow creme (or Fluff, as many of us know it!). It’s essentially a way to capture the essence of those childhood marshmallow treats and bake them into a rich, chocolatey dream. It’s a wonderfully simple concept, but the result is anything but ordinary. It’s a dessert that truly brings out the kid in all of us.
Why you’ll love this recipe?
Honestly, there are so many reasons why this recipe has earned a permanent spot in my baking rotation. First and foremost, the flavor is just out of this world. You get that deep, rich chocolate from the brownie, which is perfectly balanced by the sweet, airy marshmallow fluff. It’s not cloyingly sweet, but it’s definitely decadent enough to satisfy any craving. And the texture! Oh my goodness, the texture. You have the dense, fudgy brownie base, then those pockets of soft, melted marshmallow, and if you let the glaze set just right, you get a little crackle on top. It’s a symphony of deliciousness. What I love most about this recipe, though, is its sheer simplicity. I’ve found that many “fancy” desserts end up being a huge production, but these brownies are remarkably easy to make, even on a busy weeknight. You don’t need any special equipment, and the steps are straightforward. I’ve even had my kids help with stirring, and they absolutely love it. Plus, they’re so cost-effective! The ingredients are pretty standard pantry staples, making it an affordable way to create a truly impressive treat. And talk about versatile! You can serve these for any occasion – they’re perfect for potlucks, birthday parties, or just a cozy night in. They even hold up well, making them great for making ahead. Compared to other brownie recipes, this one stands out because of that unique marshmallow swirl. It’s that little something extra that makes everyone go, “Wow, what is this?” It’s a recipe that I’ve tinkered with over the years, and I’m so thrilled with how it always turns out. It’s a guaranteed hit, and that’s what really matters to me.
How do I make Marshmallow Fluff Brownies?
Quick Overview
This recipe is all about combining a rich, fudgy brownie batter with creamy marshmallow fluff, swirling them together for a beautiful marbled effect, and then baking until just set. The beauty of this method is that it’s incredibly forgiving. You get that classic brownie goodness with an added layer of dreamy marshmallow goodness that’s almost like a baked s’more experience. It’s a one-bowl wonder for the brownie batter, then a simple swirl, and into the oven it goes. Honestly, it’s hard to mess this one up, which is exactly why I love it for those times when I need a delicious dessert without a lot of fuss. The end result is a chewy, fudgy brownie with delightful pockets of melted marshmallow, all topped with a light glaze.
Ingredients
For the Brownie Batter:
1 cup (2 sticks) unsalted butter, melted
2 cups granulated sugar
4 large eggs, at room temperature
1 teaspoon vanilla extract
1 cup all-purpose flour
3/4 cup unsweetened cocoa powder (Dutch-process gives a richer flavor, but natural works too!)
1/2 teaspoon baking powder
1/4 teaspoon salt
For the Marshmallow Swirl:
1 cup marshmallow fluff (or marshmallow creme) – make sure it’s the creamy kind!
For the Optional Glaze:
1 cup powdered sugar, sifted
2-3 tablespoons milk (or water for a thinner glaze)
1/4 teaspoon vanilla extract (optional)
Step-by-Step Instructions
Step 1: Preheat & Prep Pan
First things first, get that oven preheating to 350°F (175°C). You’ll want to grab a 9×13 inch baking pan and grease it really well with butter or non-stick spray. Then, I like to line it with parchment paper, leaving a little overhang on the sides. This makes lifting the brownies out so much easier once they’re done, and cleanup is a breeze. Just make sure the parchment doesn’t go all the way up the sides, or it might burn a bit.
Step 2: Mix Dry Ingredients
In a medium bowl, whisk together your all-purpose flour, unsweetened cocoa powder, baking powder, and salt. Give it a good whisk to make sure everything is evenly distributed. This step might seem small, but it’s important for ensuring your brownies have the right texture and that the leavening agent and salt are spread throughout, so you don’t get any weird pockets of taste.
Step 3: Mix Wet Ingredients
In a large bowl, combine the melted butter and granulated sugar. Whisk them together until they’re well combined. Then, crack in your eggs, one at a time, whisking well after each addition. Stir in the vanilla extract. You want this mixture to be smooth and glossy. The eggs at room temperature really help emulsify everything nicely, making for a richer, more tender brownie.
Step 4: Combine
Now, gradually add the dry ingredients to the wet ingredients. Fold them together gently with a spatula until just combined. Be careful not to overmix! Seriously, this is key to fudgy brownies. A few streaks of flour are okay; they’ll disappear as it bakes. Overmixing develops the gluten too much, which can make your brownies tough instead of delightfully chewy.
Step 5: Prepare Filling
This is where the magic happens! Grab your cup of marshmallow fluff. You don’t need to do anything to it, really. Just have it ready to dollop into the brownie batter.
Step 6: Layer & Swirl
Pour about two-thirds of the brownie batter into your prepared pan and spread it out evenly. Now, dollop spoonfuls of the marshmallow fluff all over the top of the batter. Don’t worry about making them perfect. Then, dollop the remaining brownie batter over the marshmallow fluff. Take a butter knife or a skewer and gently swirl the marshmallow and brownie batter together. Make figure-eights or simple back-and-forth motions. You want to create ribbons, not completely mix them. This is what gives you those beautiful, gooey pockets.
Step 7: Bake
Pop the pan into your preheated oven. Bake for about 25-35 minutes. You’ll know they’re done when the edges look set and a toothpick inserted into the brownie part (avoiding a marshmallow pocket!) comes out with moist crumbs attached, not wet batter. The marshmallow will be bubbly and golden in spots.
Step 8: Cool & Glaze
This is probably the hardest part: letting them cool! Let the brownies cool completely in the pan on a wire rack. Once they’re cooled, you can prepare the glaze. In a small bowl, whisk together the sifted powdered sugar, milk (start with 2 tablespoons and add more if needed to reach desired consistency), and vanilla. Drizzle this glaze over the cooled brownies and let it set before slicing. For an extra pretty look, you can use a piping bag or a Ziploc bag with the corner snipped off for drizzling.
Step 9: Slice & Serve
Once the glaze has set, use the parchment paper overhang to lift the entire slab of brownies out of the pan. Place it on a cutting board and slice into squares. For the cleanest cuts, use a sharp knife, and wipe it clean between cuts. Serve them at room temperature for the best texture. They’re delicious on their own, or you can serve them with a scoop of vanilla Ice Cream for an extra treat!
What to Serve It With
These Marshmallow Fluff Brownies are so versatile, they’re practically ready for any occasion. For a leisurely breakfast or brunch, I love serving them alongside a steaming mug of good coffee. The richness of the brownie cuts through the bitterness of the coffee beautifully, and they make any morning feel a little bit special. For a more elegant brunch spread, I’ll cut them into smaller, neater squares and arrange them on a tiered stand with fresh berries and perhaps a dollop of whipped cream. For dessert, well, they’re already a dessert, but they’re absolutely phenomenal served warm with a scoop of good quality vanilla bean ice cream. The contrast of the warm brownie and cold ice cream is divine. Sometimes, if we’ve had a big dinner, I’ll even serve them as a lighter dessert option, just a small square with a tiny bit of whipped cream. And for those cozy nights in, when you just need something comforting? These are perfect. I’ll often serve them with a glass of cold milk or even a hot chocolate. My kids’ favorite way to have them is just straight from the pan, no frills needed! It’s funny, my sister likes to put them in a little bowl with some fresh raspberries and a sprinkle of chocolate shavings – it looks so fancy, but it’s so simple. They’re truly a crowd-pleaser no matter how you present them.
Top Tips for Perfecting Your Marshmallow Fluff Brownies
Over the years, I’ve picked up a few tricks that really help make these Marshmallow Fluff Brownies absolutely perfect every single time. So, listen up! For the brownie batter, the biggest thing is not to overmix. Once you add the flour, just fold it in until you don’t see any dry streaks. Seriously, a few little flour bits are fine! Overmixing is the enemy of fudgy brownies. I learned that the hard way many moons ago. Also, make sure your eggs are at room temperature; it helps them incorporate better and gives you a richer, more tender brownie. When it comes to the marshmallow swirl, don’t go crazy with trying to make it perfectly even. The beauty of this recipe is the rustic, marbled look. Just dollop it on and give it a few gentle swirls with a knife. If you swirl too much, you’ll just end up with marshmallow-flavored brownies, and while that’s still good, you lose that distinct contrast. I once tried using mini marshmallows instead of fluff, and it was a disaster – they melted too much and just became one sticky mess. Stick to the marshmallow fluff or creme! For the glaze, the consistency is key. You want it thick enough to drizzle but thin enough to spread easily. Start with 2 tablespoons of milk and add more a teaspoon at a time until you get that perfect drizzly texture. If you accidentally make it too thin, just whisk in a bit more sifted powdered sugar. And if you’re impatient like me and want to cut them sooner, try chilling them in the fridge for about 30 minutes before slicing. It makes for much cleaner cuts. I’ve also found that Dutch-process cocoa powder really gives you a deeper, richer chocolate flavor, but regular unsweetened cocoa works just fine if that’s what you have on hand. Just remember to sift your cocoa powder to avoid lumps.
Storing and Reheating Tips
Okay, so you’ve made these incredible Marshmallow Fluff Brownies and maybe, just maybe, you have some leftovers (a rare but glorious occasion!). Let’s talk about keeping them tasting amazing. At room temperature, these brownies will stay delicious for about 2-3 days. Just make sure they’re covered tightly with plastic wrap or stored in an airtight container. This helps keep them from drying out. If you know you won’t finish them within a couple of days, or if your kitchen is particularly warm, I highly recommend storing them in the refrigerator. In the fridge, they can last for up to a week, though I find the texture is best within the first 4-5 days. Keep them in an airtight container to prevent them from absorbing any odors. For longer storage, freezing is your best friend! You can freeze the whole pan of brownies (once completely cooled and glazed) or individual squares. Wrap each square tightly in plastic wrap, then place them in a freezer-safe bag or container. They’ll keep well in the freezer for about 2-3 months. When you’re ready to enjoy them, you can thaw them at room temperature for a few hours, or even gently reheat them in the oven or microwave for a warm, gooey treat. If you’ve glazed them, I’d recommend waiting to glaze them until after you’ve thawed them if you plan to freeze them, or just be aware that the glaze might soften a bit with thawing. Honestly, though, they’re so good, they rarely last long enough to worry about long-term storage!
Frequently Asked Questions
Final Thoughts
So there you have it – my absolute favorite Marshmallow Fluff Brownies! I truly believe that this recipe is special because it’s more than just a dessert; it’s a little bit of happiness, a hug in brownie form. It takes those classic, comforting flavors we all love and elevates them with that irresistible marshmallow swirl. They’re incredibly rich, perfectly fudgy, and wonderfully chewy, with those delightful pockets of gooey marshmallow that make every bite an adventure. I hope you’ll give this recipe a try. It’s one of those recipes that I’ve made countless times, and it never, ever fails to bring smiles to faces. If you’re a fan of rich chocolate and sweet, airy marshmallows, you are going to adore these. For those of you who loved this recipe, you might also want to check out my No-Bake Chocolate Peanut Butter Bars or my Classic Fudgy Brownies for more indulgent treats. They’re in a similar vein of simple, delicious comfort. I can’t wait to hear what you think, so please leave a comment below and let me know how your Marshmallow Fluff Brownies turn out! And if you make them, don’t forget to share your photos – I love seeing your creations!
Marshmallow Fluff Recipes
Ingredients
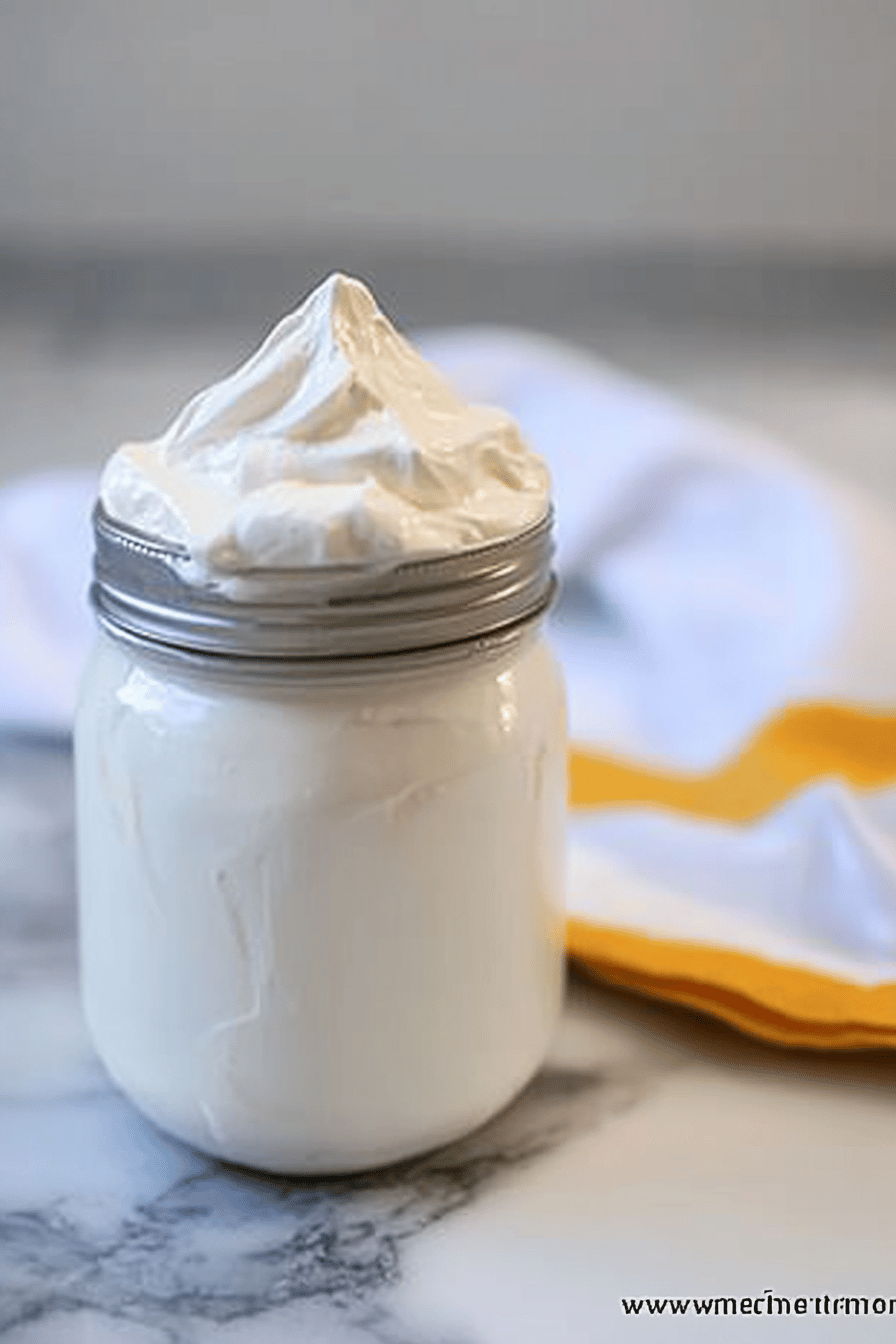
Marshmallow Fluff Frosting
- 7 ounces Marshmallow Fluff
- 4 ounces Cream Cheese softened
- 0.5 cup Unsalted Butter softened
- 1 teaspoon Vanilla Extract
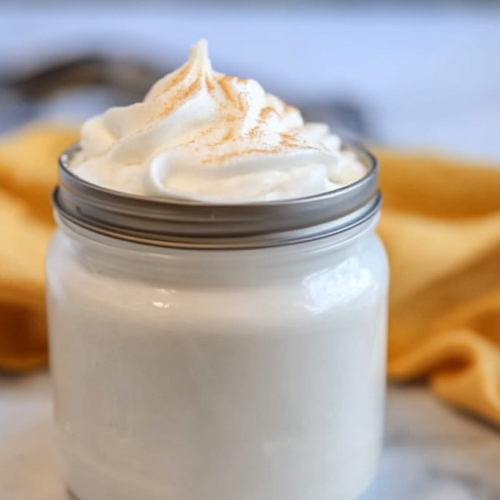
Basic Marshmallow Fluff Pie
- 1 pre-made Graham Cracker Crust 9-inch
- 7 ounces Marshmallow Fluff
- 3 each Egg Yolks
- 1 cup Milk
- 0.5 cup Granulated Sugar
- 2 tablespoons Cornstarch
- 1 teaspoon Vanilla Extract
Instructions
Marshmallow Fluff Frosting Instructions
- In a large bowl, beat the softened cream cheese and softened butter until smooth and creamy.
- Add the Marshmallow Fluff and vanilla extract. Beat on low speed until just combined, then increase speed to medium-high and beat until light and fluffy.
- Use immediately as a frosting or filling.
Basic Marshmallow Fluff Pie Instructions
- Prepare the filling: In a saucepan, whisk together milk, sugar, and cornstarch until smooth.
- Cook over medium heat, stirring constantly, until the mixture thickens and boils. Boil for 1 minute, then remove from heat.
- In a separate bowl, whisk the egg yolks. Gradually temper the hot milk mixture into the egg yolks, whisking constantly.
- Pour the tempered mixture back into the saucepan and cook over low heat, stirring constantly, for 2 minutes, or until thickened. Do not boil.
- Remove from heat and stir in the vanilla extract.
- Gently fold in the Marshmallow Fluff until it is mostly melted and incorporated.
- Pour the filling into the prepared graham cracker crust.
- Chill for at least 4 hours, or until firm.
- Top with whipped cream and a drizzle of chocolate syrup if desired before serving.