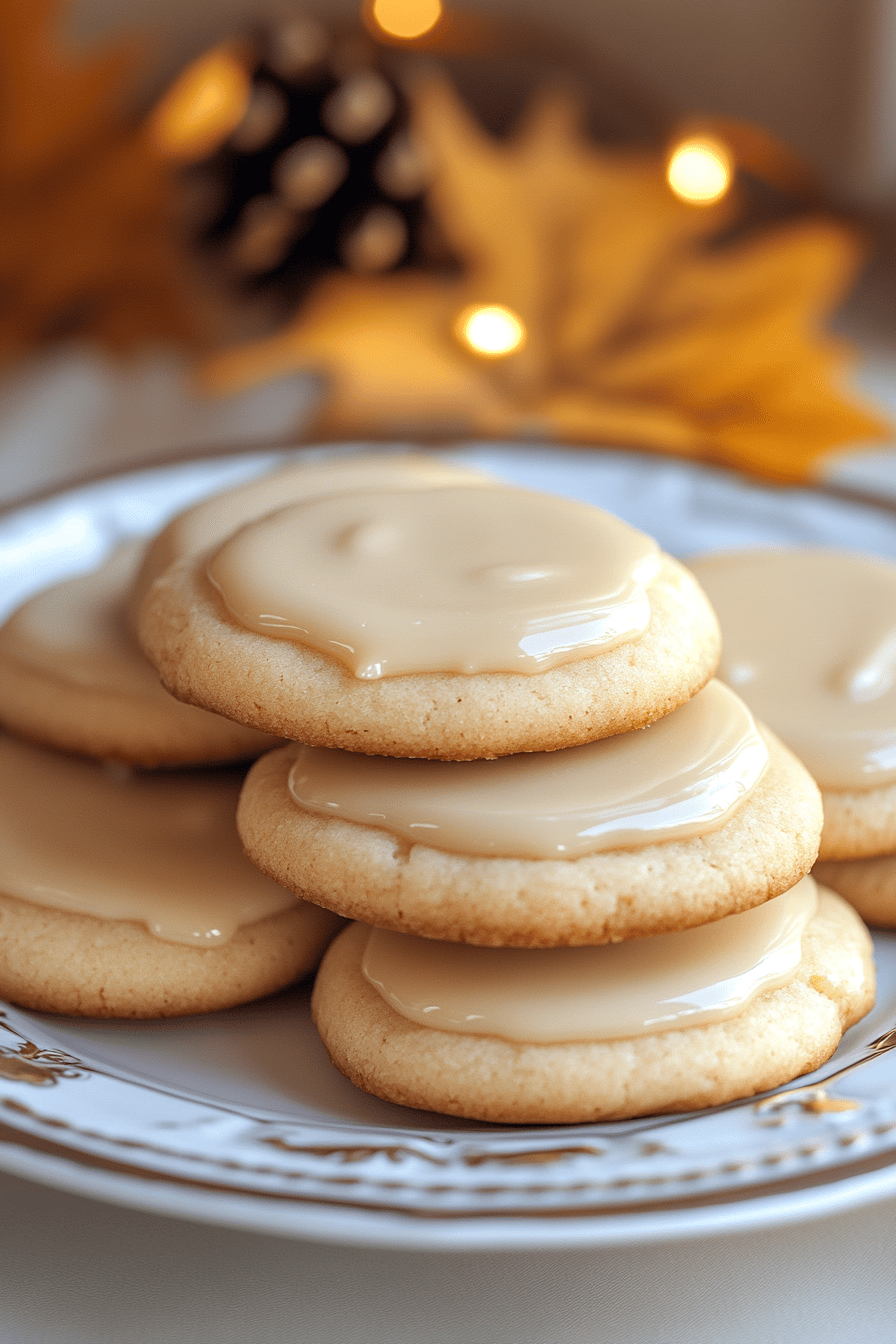
Oh my goodness, you HAVE to try these maple cookies! They’re one of those recipes that just… feels like home. I remember my Grandma Betty making them every fall when the air started to get crisp and the leaves turned those brilliant shades of red and gold. The whole house would smell like pure autumn magic. These aren’t your super-crispy, thin maple cookies, oh no. These are soft, chewy, and have this incredible, deep maple flavor that just melts in your mouth. They’re the perfect companion to a steaming mug of coffee or tea, or even just a glass of cold milk. Honestly, they remind me a bit of those fancy diner cookies, but somehow even better because they’re made with love right in my own kitchen. If you’ve ever found yourself craving something sweet and comforting, but don’t want to go through the fuss of a whole cake, this maple cookies recipe is your new best friend. I’ve tried other maple cookie recipes, and while some are good, none quite capture that nostalgic, comforting essence like this one.
What are maple cookies?
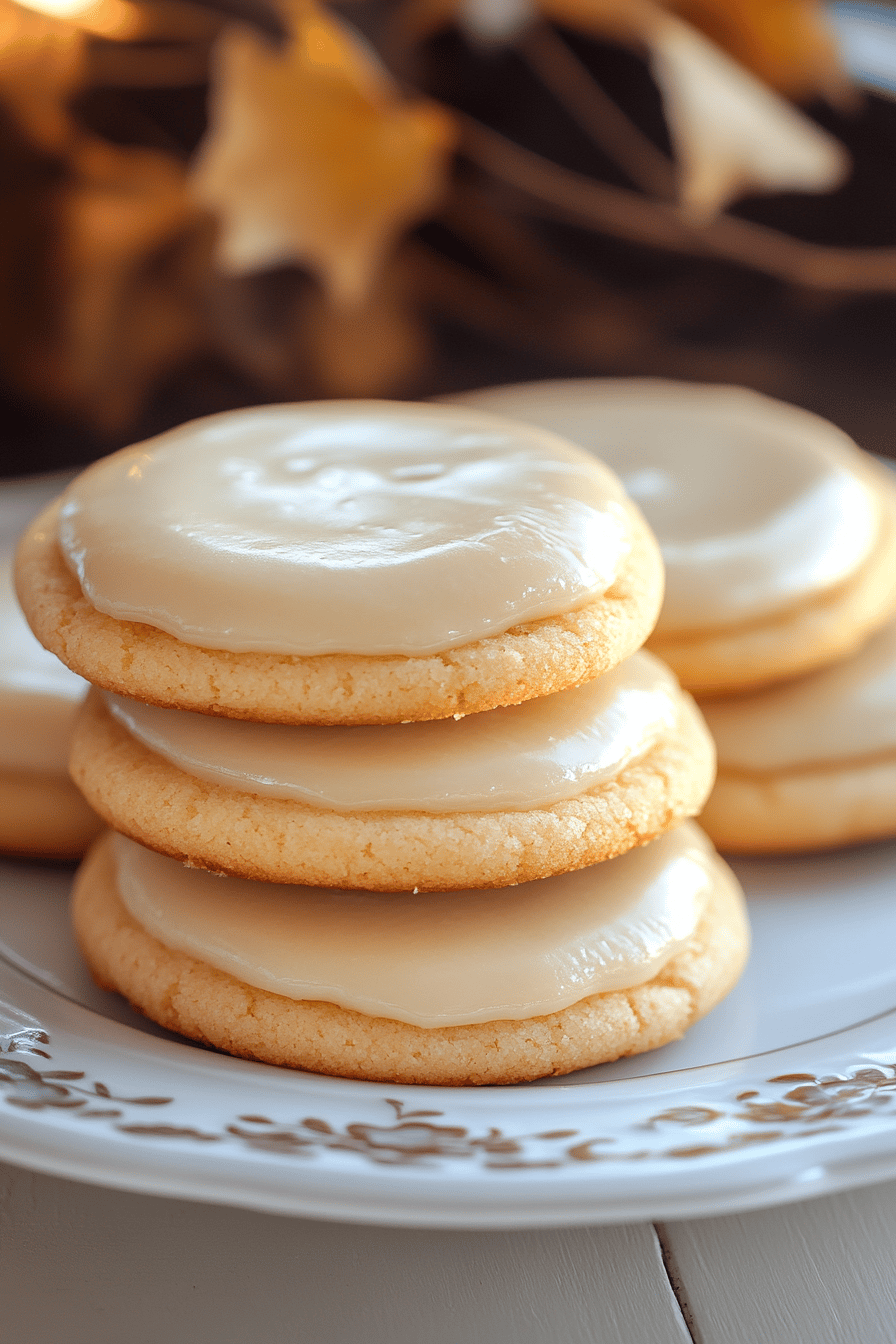
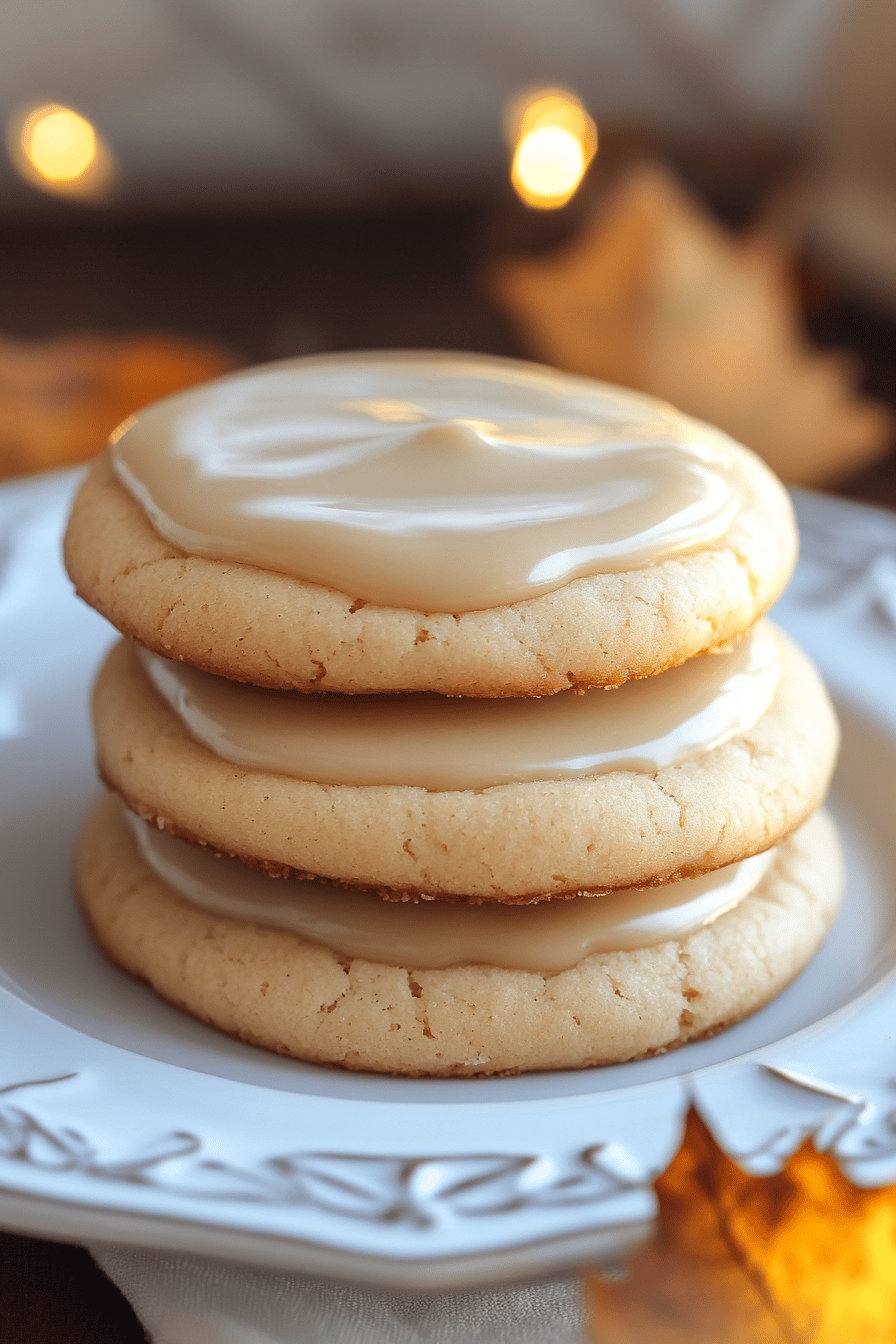
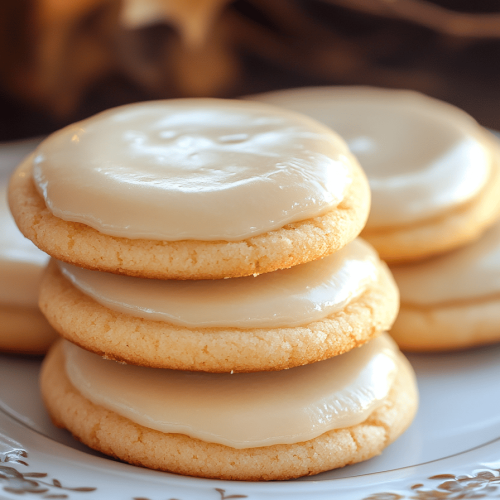
So, what exactly are these delightful maple cookies? Think of them as little pillows of pure comfort. They’re essentially a soft, slightly cakey cookie infused with the rich, unmistakable flavor of maple syrup. Unlike some cookies that rely heavily on granulated sugar for sweetness and structure, these get a huge flavor boost and a wonderfully tender crumb from real maple syrup. The magic happens when the butter and maple syrup come together, creating this beautiful caramel-like sweetness that’s just out of this world. They’re not overly complicated, which is part of their charm. You’re not looking for a super-flat, crisp cookie here; you’re aiming for something soft, a little chewy in the center, and with edges that are just slightly set. It’s that perfect balance that makes them so utterly addictive. They’re the kind of cookie that makes you pause, close your eyes, and just savor the moment.
Why you’ll love this recipe?
There are so many reasons why this particular maple cookies recipe has become a staple in my kitchen, and I just know you’re going to fall in love with it too! First off, let’s talk about the flavor. It’s out of this world! You get that pure, unadulterated taste of maple syrup that’s both sweet and slightly caramelly, with just a hint of warmth from the spices. It’s not just sweet; it’s complex and comforting. Then there’s the texture. These cookies are wonderfully soft and chewy. They’re not crumbly, and they don’t turn hard and stale after a day. They stay wonderfully tender, almost like a little cake bite, which is exactly what I love in a cookie. And the best part? They are surprisingly simple to make! Even if you’re not an experienced baker, you can whip these up without any stress. The ingredients are all pantry staples, and the steps are straightforward. I’ve made these on busy weeknights when I needed a little pick-me-up, and they’ve never failed me. They are also incredibly budget-friendly, especially if you already have maple syrup on hand. You don’t need fancy extracts or expensive ingredients to achieve this incredible flavor. What I love most about this recipe is its versatility. They are fantastic on their own, but they also make a lovely base for a simple maple frosting or even sandwiched together with a maple cream filling. They’re perfect for bake sales, potlucks, or just to have on hand when unexpected guests pop by. They truly are a crowd-pleaser, and the smell that fills your kitchen while they’re baking? Pure bliss!
How do you make maple cookies?
Quick Overview
Making these incredible maple cookies is a breeze, honestly! You’ll start by creaming together some softened butter with sugar and then beating in the star of the show: maple syrup. Then, you’ll mix in your dry ingredients, just until everything is combined – no overmixing here, that’s key! We’ll then form them into little balls, give them a gentle press, and bake them until they’re just set. The result is a soft, chewy, and unbelievably flavorful cookie that tastes like pure autumn bliss. It’s a simple, foolproof process that guarantees delicious results every time.
Ingredients
For the Main Batter:
Here’s what you’ll need for the cookies themselves. I always try to use good quality, pure maple syrup – the amber or dark color ones have the most robust flavor, which is what we’re after here! Don’t skimp on this; it’s where all that amazing maple goodness comes from. Make sure your butter is nice and soft, but not melted. It makes a world of difference when you’re creaming it. And for the flour, all-purpose is perfect. I’ve tested this with a few different brands, and they all seem to work beautifully. You’ll need:
- 1 cup (2 sticks) unsalted butter, softened
- 1 ½ cups packed light brown sugar
- ⅓ cup pure maple syrup (amber or dark color recommended)
- 2 large eggs
- 1 teaspoon vanilla extract
- 2 ¾ cups all-purpose flour
- 1 teaspoon baking soda
- ½ teaspoon salt
- ½ teaspoon ground cinnamon (optional, but I love it!)
- ¼ teaspoon ground nutmeg (optional, but adds warmth)
For the Filling:
This part is totally optional, but if you want to take your maple cookies to the next level, a simple CREAM CHEESE filling is *chef’s kiss*. It adds this wonderful tangy creaminess that complements the sweet maple so perfectly. Make sure your cream cheese is softened so it mixes smoothly. If you don’t want to do cream cheese, a simple dusting of powdered sugar or a drizzle of extra maple glaze works wonderfully too! For the cream cheese filling, you’ll need:
- 4 ounces cream cheese, softened
- ¼ cup powdered sugar
- ½ teaspoon vanilla extract
For the Glaze:
A simple maple glaze is the perfect finishing touch. It adds an extra layer of that glorious maple flavor and a beautiful sheen. You want a consistency that’s thick enough to coat but thin enough to drizzle. If it’s too thick, add a tiny splash of milk or water; if it’s too thin, add a bit more powdered sugar. This is where you can really customize the sweetness!
- 1 ½ cups powdered sugar
- ¼ cup pure maple syrup
- 2-3 tablespoons milk or water
Step-by-Step Instructions
Step 1: Preheat & Prep Pan
First things first, let’s get your oven ready to work its magic. Preheat your oven to 375°F (190°C). While the oven is heating up, line a couple of baking sheets with parchment paper. This is a lifesaver for easy cleanup and ensures your cookies don’t stick, giving you perfectly shaped treats every time. If you don’t have parchment paper, you can lightly grease your baking sheets, but parchment is really my preferred method.
Step 2: Mix Dry Ingredients
In a medium-sized bowl, whisk together your flour, baking soda, salt, and any optional spices like cinnamon and nutmeg you’re using. Whisking them together well ensures that the leavening agents (baking soda) and salt are evenly distributed throughout the flour. This step might seem small, but it’s super important for getting consistent texture and rise in your cookies. Make sure there are no clumps of baking soda! Set this bowl aside for now.
Step 3: Mix Wet Ingredients
In a large bowl, using an electric mixer (handheld or stand mixer), beat the softened butter and light brown sugar together until light and fluffy. This usually takes about 2-3 minutes. You want it to look pale and airy. Then, beat in the maple syrup and vanilla extract until well combined. It might look a little separated at first, but keep mixing, and it will come together. Scrape down the sides of the bowl as needed to make sure everything is incorporated.
Step 4: Combine
Now it’s time to bring it all together! Gradually add the dry ingredients (from Step 2) to the wet ingredients (from Step 3), mixing on low speed until just combined. Be careful not to overmix here! Overmixing develops the gluten in the flour, which can lead to tough cookies. You want to stop mixing as soon as you don’t see any more streaks of dry flour. A few little streaks are fine; they’ll disappear when you start shaping the dough.
Step 5: Prepare Filling
If you’re making the cream cheese filling (and I really recommend it!), grab another small bowl. Beat the softened cream cheese, powdered sugar, and vanilla extract together until smooth and creamy. It should be spreadable. If you’re not using a filling, you can skip this step entirely. Easy peasy!
Step 6: Layer & Swirl (Optional)
This step is for the optional filling. Take about two tablespoons of Cookie Dough and flatten it into a small disc in your hand. Place about a teaspoon of the cream cheese filling in the center. Then, carefully bring the edges of the cookie dough up and around the filling, sealing it completely. Roll it gently between your palms to form a smooth ball. Repeat with the remaining dough and filling. If you’re not filling them, simply roll the dough into 1.5-inch balls.
Step 7: Bake
Place the cookie dough balls (filled or not) onto your prepared baking sheets, leaving about 2 inches between them. Gently flatten the tops of the cookies with the palm of your hand or the bottom of a glass. Now, bake for 10-12 minutes, or until the edges are lightly golden and set, but the centers still look a little soft. They’ll continue to firm up as they cool. Don’t overbake them – that’s the secret to chewy cookies!
Step 8: Cool & Glaze
Let the cookies cool on the baking sheets for about 5 minutes before carefully transferring them to a wire rack to cool completely. While the cookies are cooling, whisk together the powdered sugar and maple syrup for the glaze. Add milk or water, a tablespoon at a time, until you reach your desired drizzling consistency. Once the cookies are completely cool, drizzle the glaze generously over the tops. Let the glaze set for about 15-20 minutes before serving or storing.
Step 9: Slice & Serve
And there you have it! Perfectly baked, delightfully chewy maple cookies. You can slice them in half if you’ve made filled cookies, or just enjoy them whole. They are absolutely divine served warm or at room temperature. The aroma alone is enough to make your day better!
What to Serve It With
These maple cookies are fantastic all on their own, but they also pair beautifully with so many things! Here are some of my favorite ways to enjoy them:
For Breakfast: Honestly, who says cookies are just for dessert? A couple of these alongside a hot cup of black coffee or a creamy latte is pure bliss. They’re also amazing with a glass of cold whole milk – a classic combination that never disappoints. I love to sneak one in my bag for a mid-morning treat at work!
For Brunch: Elevate your brunch spread by arranging these on a nice platter. They look sophisticated with their pretty glaze and pair wonderfully with fresh fruit salads, yogurt parfaits, or even alongside a fluffy stack of pancakes or waffles. For beverages, consider a mimosa, a fresh-squeezed orange juice, or a spiced apple cider.
As Dessert: Serve them after dinner with a scoop of vanilla bean ice cream or a dollop of whipped cream. They also make a lovely accompaniment to a warm fruit crumble or pie, adding a different texture and flavor dimension. For a more decadent experience, try sandwiching two cookies together with a generous smear of maple buttercream frosting.
For Cozy Snacks: This is probably my favorite time to enjoy them! Curl up on the couch with a good book and a few of these cookies and a warm cup of tea, especially on a chilly evening. They’re comforting, satisfying, and just perfect for those moments when you need a little sweet treat to brighten your day. They’re the ultimate comfort food, and the smell alone brings everyone to the kitchen!
Top Tips for Perfecting Your Maple Cookies
I’ve been making these maple cookies for years, and I’ve picked up a few tricks along the way that I think will help you achieve cookie perfection. Don’t be afraid to experiment a little – that’s part of the fun of baking!
Zucchini Prep (if you were looking for that, but this is for cookies!): Wait, zucchini? Oh, I think my mind wandered for a second there! For *these* maple cookies, there’s no zucchini involved, thankfully. We’re keeping it purely delicious with maple goodness. But if you’re ever making zucchini bread, you’ll want to make sure you squeeze out all that excess moisture – it’s key to a good texture!
Mixing Advice: The biggest tip I can give you is *do not overmix* the dough once you add the flour. Seriously. Mix until just combined. If you keep mixing, you’ll end up with tough cookies, and nobody wants that. A slightly shaggy dough is what you’re aiming for. It should still hold together, but you don’t want it perfectly smooth and uniform. Trust me on this one!
Swirl Customization: If you’re making the filled cookies, don’t worry about making them look perfectly sealed. A little bit of filling peeking out is actually charming! For the dough balls, a gentle press is all you need. You want them to spread a bit in the oven, but still retain a nice cookie shape. I sometimes use the bottom of a glass dipped in a little sugar to flatten them, which gives them a nice texture.
Ingredient Swaps: While I truly believe this recipe is perfect as is, I have experimented a little. If you can’t find pure maple syrup, don’t substitute with pancake syrup; the flavor just isn’t the same. For a dairy-free option, I’ve had success using a good quality plant-based butter substitute and a splash of almond milk for the glaze. The flavor is slightly different, but still delicious! For the spices, if you’re not a fan of cinnamon or nutmeg, feel free to leave them out. The maple flavor will still shine through beautifully.
Baking Tips: Ovens can be so finicky! Mine tends to run a little hot, so I often bake these for exactly 10 minutes. Keep an eye on them, especially during the last few minutes. You’re looking for the edges to be lightly golden and set, but the center should still look a bit soft and slightly underdone. They will continue to bake on the hot baking sheet for a few minutes after you pull them out of the oven. This is the secret to that chewy texture!
Glaze Variations: The glaze consistency is really up to you! For a thinner drizzle, use a bit more liquid. For a thicker, more candy-like coating, reduce the liquid. You can also add a tiny pinch of salt to the glaze to balance the sweetness, or even a drop of maple extract for an extra maple punch. If you’re not a fan of glaze, a simple dusting of powdered sugar or even some chopped pecans sprinkled on top while the glaze is still wet works wonderfully!
Storing and Reheating Tips
I’m often asked about how to keep these maple cookies fresh, and thankfully, they’re pretty forgiving! My family devours them so quickly that I rarely have leftovers, but when I do, here’s what I’ve learned.
Room Temperature: These cookies are wonderful at room temperature for up to 3-4 days. The best way to store them is in an airtight container. If they have glaze, make sure the glaze is completely set before stacking them. I usually place a piece of parchment paper between layers just to be safe, especially if it’s warm out. They’ll stay soft and chewy this way.
Refrigerator Storage: If you live in a very humid climate or have a lot of cookies to store for longer than a few days, the refrigerator is your friend. Store them in an airtight container in the fridge. They’ll last for about a week. They might firm up a bit more in the fridge, but they’ll still be delicious. Just let them sit out at room temperature for about 15-20 minutes before enjoying to soften them up.
Freezer Instructions: These cookies freeze beautifully, which is fantastic if you want to bake a big batch ahead of time. Wrap them tightly in plastic wrap, then place them in a freezer-safe bag or container. They should stay good in the freezer for up to 3 months. To thaw, simply remove them from the freezer and let them thaw at room temperature, or gently reheat them in a low oven (around 300°F/150°C) for a few minutes until warmed through.
Glaze Timing Advice: It’s crucial to let the cookies cool completely before glazing. If you glaze them while they’re warm, the glaze will melt and become a sticky mess. Once glazed, let the glaze set fully before storing. If you plan on freezing them, I often prefer to glaze them *after* thawing them. This way, the glaze stays fresh and vibrant. However, if you glaze before freezing, just make sure it’s completely hardened.
Frequently Asked Questions
Final Thoughts
Honestly, this maple cookies recipe is more than just a recipe for me; it’s a little taste of nostalgia, a reminder of cozy autumn days and my Grandma’s warm kitchen. I truly believe that everyone needs a go-to cookie recipe that brings them comfort and joy, and this is mine. The way the maple syrup infuses into the soft, chewy cookie is just heavenly. They’re simple enough for a beginner baker but special enough for any occasion. If you love these cookies, you might also enjoy my recipe for Old-Fashioned Oatmeal Raisin Cookies or my Easy Chocolate Chip Scones – they have that same comforting vibe! Give this maple cookies recipe a try, and I’m pretty sure it will become a favorite in your home too. I can’t wait to hear how yours turn out, so please leave a comment below and let me know what you think, or share any fun variations you come up with!
Maple Cookies Recipe
Ingredients
Main Ingredients
- 0.5 cup unsalted butter, softened
- 0.75 cup granulated sugar
- 0.5 cup maple syrup
- 1 large egg
- 1 teaspoon vanilla extract
- 2 cups all-purpose flour
- 1 teaspoon baking soda
- 0.5 teaspoon salt
- 0.25 teaspoon ground cinnamon
Instructions
Preparation Steps
- Preheat oven to 350°F (175°C). Line baking sheets with parchment paper.
- In a large bowl, cream together the softened butter and granulated sugar until light and fluffy.
- Beat in the maple syrup, egg, and vanilla extract until well combined.
- In a separate medium bowl, whisk together the flour, baking soda, salt, and cinnamon.
- Gradually add the dry ingredients to the wet ingredients, mixing until just combined. Do not overmix.
- Drop rounded tablespoons of dough onto the prepared baking sheets, about 2 inches apart.
- Bake for 10-12 minutes, or until the edges are golden brown and the centers are set.
- Let the cookies cool on the baking sheets for a few minutes before transferring them to a wire rack to cool completely.