Oh, you are going to LOVE these lemon blueberry bars. I swear, every time I pull them out of the oven, my kitchen just fills with this incredible aroma, and it’s like a beacon for everyone in the house. They’re sunshine in bar form, honestly. If you’ve ever made a lemon bar, think of these as their even more delightful, fruit-packed cousin. They have that perfect tangy lemon kick, but then these bursts of sweet, juicy blueberries just pop in every bite. They’re not fussy, they’re not complicated, and they always, always disappear within minutes. This recipe has been a lifesaver on busy weeknights when I need a sweet treat without a lot of fuss, and it’s become a staple for picnics and potlucks. They are, quite simply, happiness in a pan.
What are lemon blueberry bars?
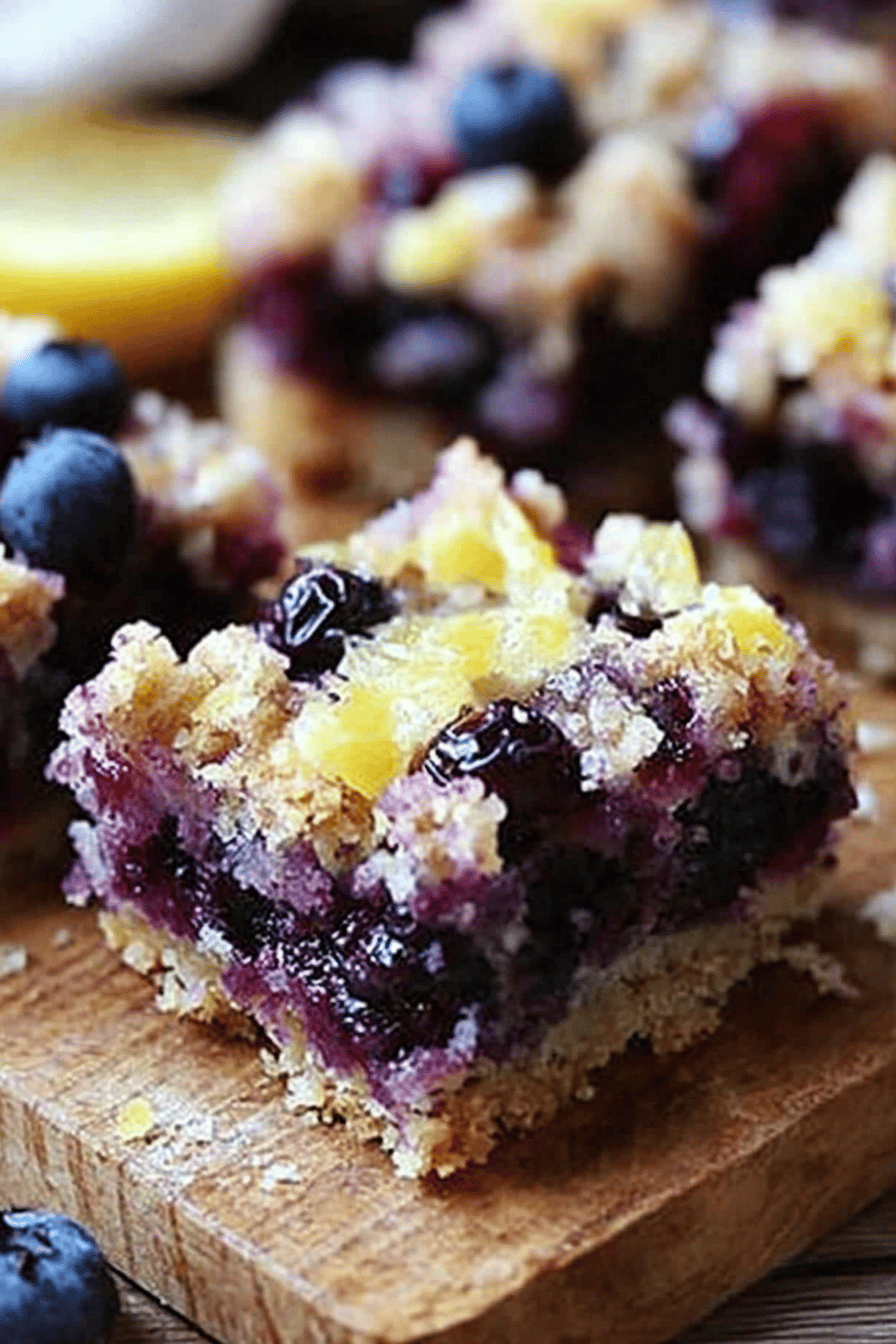
So, what exactly are these magical little squares? Think of them as a classic lemon bar, but with a serious upgrade. Instead of just a plain shortbread crust, we’re making a slightly richer, more tender base that holds up beautifully. Then, the filling is where the real party starts: a bright, zesty lemon curd that’s just the right amount of tart, studded generously with fresh blueberries. When they bake, the blueberries soften and release their lovely juice, creating these gorgeous streaks of purple throughout the golden lemon filling. They’re not quite a cake, not quite a cookie, but something wonderfully in between – a perfectly balanced treat that’s both comforting and refreshing. It’s essentially sunshine, happiness, and a whole lot of flavor all baked into one easy-to-share bar.
Why you’ll love this recipe?
There are so many reasons why this lemon blueberry bar recipe has earned a permanent spot in my recipe box, and I just know you’re going to feel the same way. First off, the flavor is just out of this world. You get that initial bright, tangy zing from the fresh lemon juice and zest, which is so wonderfully refreshing, and then BAM! You hit a pocket of warm, sweet blueberry. It’s a flavor combination that just sings. It’s like summer decided to throw a party in your mouth. But it’s not just about the taste; these bars are surprisingly simple to make. Even if you’re not a seasoned baker, you’ll find yourself breezing through the steps. The ingredients are pretty common too, so you likely won’t need a special trip to the store. And the versatility! Oh my goodness. These are fantastic on their own, of course, but they’re also amazing served with a dollop of whipped cream or a scoop of vanilla Ice Cream. What I love most, though, is how they make you feel. They’re cheerful, they’re bright, and they just bring a smile to everyone who tries them. They’re definitely a step up from your average cookie, but without any of the stress of a fancy cake. They’re the perfect “wow” dessert that’s secretly super easy.
How do I make lemon blueberry bars?
Quick Overview
This recipe is all about creating layers of deliciousness. We start with a simple, buttery shortbread-style crust that bakes up golden and tender. Then, we pour over a luscious lemon filling, made rich with eggs and sweetened just right, before scattering a generous amount of fresh blueberries on top. Everything bakes together until it’s set and wonderfully fragrant. Finally, a simple lemon glaze is drizzled over the top to add an extra touch of sweetness and shine. It sounds like a lot, but trust me, it comes together so smoothly and the results are absolutely worth it. It’s a straightforward process that yields truly spectacular results.
Ingredients
For the main battery (crust):
You’ll need all-purpose flour, unsalted butter that’s softened but not melted (this is key for a good texture!), granulated sugar for sweetness, and a pinch of salt to balance everything out. I always use good quality butter; it really makes a difference in the richness of the crust. If your butter is too soft, the crust can get greasy, so make sure it’s just nicely pliable.
For the Filling:
This is where the magic happens! We need more granulated sugar, fresh lemon juice (seriously, use fresh – the bottled stuff just doesn’t compare for brightness!), lemon zest for that intense citrus perfume, eggs to bind it all together and give it that classic curd texture, and a little bit of all-purpose flour to help thicken it up perfectly. And, of course, fresh blueberries! You can use frozen in a pinch, but fresh ones hold their shape better and have a more vibrant flavor. I like to use about 1.5 to 2 cups, depending on how many berry bursts you like.
For the Glaze:
This is super simple and just adds a lovely finishing touch. You’ll need powdered sugar (also called confectioners’ sugar), a little bit of fresh lemon juice, and maybe a tiny splash of milk or water to get the consistency just right. You want it pourable but not too thin.
Step-by-Step Instructions
Step 1: Preheat & Prep Pan
First things first, get your oven preheating to 350 degrees Fahrenheit (175 degrees Celsius). This is a pretty standard baking temperature, but it’s crucial for ensuring even cooking. You’ll also want to grab an 8×8 inch baking pan. I like to line mine with parchment paper, leaving an overhang on two sides. This makes it ridiculously easy to lift the bars right out of the pan once they’re cooled, which is a lifesaver for cutting clean slices. Just grease the pan lightly, then lay the parchment in, pressing it into the corners. Make sure you grease the parchment too, just a little!
Step 2: Mix Dry Ingredients
In a medium bowl, whisk together your all-purpose flour and granulated sugar for the crust. Add the salt. Whisking them together before adding the butter helps distribute everything evenly and ensures there are no little clumps of sugar. It might seem like a small step, but it really helps create a more uniform crust. Don’t overthink it, just a good whisk until it looks combined.
Step 3: Mix Wet Ingredients
Now, for the crust, add your softened butter to the dry ingredients. You can do this with a pastry blender, a fork, or even just your fingertips. You want to work it in until the mixture resembles coarse crumbs. Imagine tiny little pebbles of butter coated in flour. That’s the texture you’re aiming for. If it looks too wet or sticky, add a tiny bit more flour. If it seems too dry and crumbly, that’s usually okay, as the butter will melt and bind it when it bakes.
Step 4: Combine
Press the crumb mixture evenly into the bottom of your prepared baking pan. Really get it into the corners and press it down firmly. This is going to be your crust, so you want it to be a nice, solid base. I usually use the bottom of a measuring cup or a flat-bottomed glass to get it really compact and even. Pop this into your preheated oven and bake it for about 15-20 minutes, until it’s lightly golden brown around the edges. You’re just par-baking it, so it doesn’t need to be fully cooked yet.
Step 5: Prepare Filling
While the crust is doing its thing, let’s whip up that glorious lemon filling. In a separate bowl, whisk together the granulated sugar, flour, and salt for the filling. Then, add your eggs and whisk until everything is well combined and smooth. Now, stir in your fresh lemon juice and lemon zest. You should immediately start to smell that amazing lemon aroma! Keep whisking until the mixture is nice and smooth. Don’t worry if it looks a little thin at this stage; it will thicken up as it bakes. Taste it at this point, and if you want it even tangier, you can add a little more lemon juice, but be careful not to make it too watery.
Step 6: Layer & Swirl
Once the crust is out of the oven and lightly golden, let it cool for just a few minutes – you don’t want it piping hot when you add the filling. Carefully pour the lemon filling over the warm crust, spreading it evenly with a spatula. Now, sprinkle your fresh blueberries all over the top of the lemon filling. For a pretty effect, you can gently swirl some of the blueberries into the filling with a toothpick or the tip of a knife, but honestly, just scattering them works beautifully too. They’ll sink in a bit as it bakes, creating those gorgeous pockets of berry goodness.
Step 7: Bake
Pop the pan back into the oven and bake for another 25-30 minutes. You’ll know they’re ready when the edges are set and the center is mostly set, with just a slight wobble. It shouldn’t look liquidy anymore. The filling will continue to set as it cools. If the top starts to look like it’s browning too quickly, you can always loosely tent it with foil. I usually check mine around the 25-minute mark. Ovens can be so different, so keep an eye on it!
Step 8: Cool & Glaze
This is probably the hardest part: letting them cool! You absolutely MUST let the bars cool completely in the pan, preferably on a wire rack, before you even think about glazing or cutting them. This usually takes at least 2-3 hours. If you try to cut them too soon, they’ll be gooey and fall apart. Once they’re completely cool, you can make the glaze. In a small bowl, whisk together the powdered sugar and lemon juice until you have a smooth, drizzly consistency. Add more lemon juice a tiny bit at a time if it’s too thick, or more powdered sugar if it’s too thin. Drizzle this glaze over the cooled bars. It sets up quickly, so work relatively fast.
Step 9: Slice & Serve
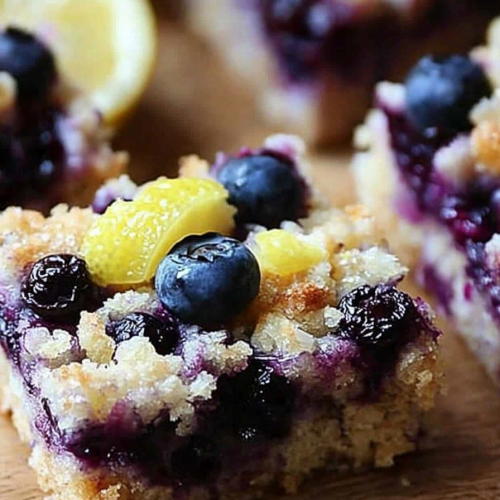
Once the glaze has set, you can lift the bars out of the pan using the parchment paper overhang. Place them on a cutting board. For the cleanest slices, use a sharp knife and wipe it clean between cuts. I find cutting them into 16 squares (4×4) works perfectly. Serve them at room temperature for the best texture and flavor. They are absolutely delicious on their own, but if you want to get fancy, a little dollop of whipped cream or a dusting of powdered sugar can be lovely additions.
What to Serve It With
These lemon blueberry bars are wonderfully versatile, fitting into almost any meal or occasion! For breakfast, they’re a delightful treat alongside a strong cup of coffee. Imagine cutting a smaller square and having it with your morning brew – it’s a little bit of sunshine to start your day. For a more leisurely brunch, these bars are an absolute showstopper. Arrange them artfully on a platter with fresh berries and maybe some melon slices. They pair beautifully with mimosas or a sparkling lemonade. As a dessert, they’re perfect after a light meal. Serve them slightly chilled or at room temperature, perhaps with a raspberry coulis or a small scoop of vanilla bean ice cream. For those cozy snack moments, when you just need something sweet to hit the spot, these bars are ideal. They’re satisfying without being heavy, and the bright flavors are always welcome. I’ve even taken them to potlucks where they’ve been requested time and time again. My family loves them for dessert after a barbecue, and they’re always a hit at holiday gatherings, adding a lovely burst of color and flavor. Seriously, there’s rarely a wrong time for these bars!
Top Tips for Perfecting Your Lemon Blueberry Bars
I’ve made these lemon blueberry bars more times than I can count, and through the years, I’ve picked up a few tricks that really elevate them from good to absolutely spectacular. For the crust, make sure your butter is properly softened. If it’s too cold, it won’t integrate well, and if it’s melted, your crust can end up greasy and crumbly. You’re looking for that “coarse crumb” texture. When you press it into the pan, really pack it down firmly; a compact crust prevents the filling from seeping through and gives you a sturdy base. When it comes to the filling, using fresh lemon juice and zest is non-negotiable for that vibrant, authentic lemon flavor. Bottled juice just doesn’t have the same punch. Also, resist the urge to over-whisk the filling once the eggs are in; just combine until smooth. For the blueberries, if you’re using frozen, don’t thaw them completely. Toss them with a tablespoon of the flour you’re using for the filling before adding them to the batter. This helps prevent them from bleeding too much color into the filling and keeps them from sinking entirely. My favorite swirling technique is to gently drag a toothpick through the blueberries and filling a few times, creating lovely patterns without overmixing. When it comes to baking, every oven is a little different. Start checking for doneness around the 25-minute mark for the filling. You want the edges to be set and the center to have just a slight jiggle, not be completely liquid. Remember, they’ll continue to set up as they cool. And for the glaze, the consistency is key. Too thick and it’s hard to drizzle, too thin and it just runs off. Aim for a texture similar to heavy cream – pourable but with some body. I’ve found that adding the lemon juice a teaspoon at a time is the safest way to get it just right. And please, for the love of all things delicious, let them cool completely before slicing! Patience is truly rewarded here. These little tips have saved me from countless kitchen mishaps and have turned good batches into truly exceptional ones.
Storing and Reheating Tips
Once these delightful lemon blueberry bars are baked and cooled (and believe me, the cooling part is crucial!), you’ll want to know the best way to keep them fresh. For storing at room temperature, they’re usually good for about 2-3 days. Just make sure they are completely cooled and covered tightly with plastic wrap or stored in an airtight container. This prevents them from drying out. If you’re not going to eat them all within a couple of days, or if your kitchen is particularly warm, popping them into the refrigerator is a great option. In the fridge, they’ll stay delicious for up to a week. Again, an airtight container is your best friend here to keep them from absorbing other smells. When you want to serve them from the fridge, I find they are best enjoyed at room temperature, so just let them sit out for about 20-30 minutes before serving. If you find yourself with an abundance of these bars (which, let’s be honest, is a good problem to have!) or want to make them ahead for a future event, freezing is a fantastic option. I like to cut them into individual bars first, then wrap each one tightly in plastic wrap, followed by a layer of aluminum foil or a freezer-safe bag. They’ll keep well in the freezer for up to 2-3 months. To thaw them, simply unwrap them and let them come to room temperature on a wire rack for a few hours. For the glaze, I generally recommend adding it *after* the bars have cooled completely and *before* storing them if you’re keeping them at room temperature or in the fridge. If you plan to freeze them, you have two options: either glaze them after thawing, or freeze them plain and add a simple dusting of powdered sugar or a fresh glaze right before serving. Glazing them before freezing can sometimes make the glaze a little sticky or prone to cracking when frozen, but it’s not a deal-breaker if you’re careful!
Frequently Asked Questions
Final Thoughts
Honestly, these lemon blueberry bars are just one of those recipes that brings pure joy. They’re a perfect balance of bright, zesty lemon and sweet, juicy blueberries, all wrapped up in a tender, buttery crust. They’re incredibly forgiving, surprisingly easy to whip up, and the aroma that fills your kitchen while they bake is just the best. Whether you’re looking for a treat to brighten your morning, a showstopper for brunch, a delightful dessert, or just a perfect cozy snack, these bars deliver every single time. They’ve become a go-to in my house, and I truly hope they become a favorite in yours too. If you love this recipe, you might also enjoy my Lemon Raspberry Scones or my Blueberry Muffins for more fruity goodness. I can’t wait to hear what you think of these lemon blueberry bars! Please leave a comment below with your thoughts, or share a photo of your creations. Happy baking!
Lemon Blueberry Bars
Ingredients
For the Crust
- 2.5 cups all-purpose flour
- 1 cup granulated sugar
- 1 cup unsalted butter, softened
For the Lemon Filling
- 4 large eggs
- 2 cups granulated sugar
- 0.5 cup all-purpose flour
- 0.5 cup lemon juice (freshly squeezed)
- 2 teaspoons lemon zest
For the Blueberry Topping
- 1 cup fresh blueberries
Instructions
Preparation Steps
- Preheat your oven to 350°F (175°C). Grease and flour a 9x13 inch baking pan.
- In a medium bowl, combine the flour and sugar for the crust. Cut in the softened butter until the mixture resembles coarse crumbs.
- Press the crust mixture evenly into the bottom of the prepared baking pan.
- Bake the crust for 15-20 minutes, or until lightly golden brown. Remove from oven and let cool slightly.
- While the crust is baking, prepare the lemon filling. In a large bowl, whisk together the eggs and sugar until well combined.
- Whisk in the flour until smooth. Stir in the lemon juice and lemon zest.
- Pour the lemon filling evenly over the warm crust.
- Scatter the fresh blueberries evenly over the lemon filling.
- Bake for another 25-30 minutes, or until the filling is set and the edges are lightly golden. The center should be firm but slightly jiggly.
- Let the bars cool completely on a wire rack before cutting into squares. This may take a few hours.
- For best results, chill the bars in the refrigerator for at least 1 hour before serving.