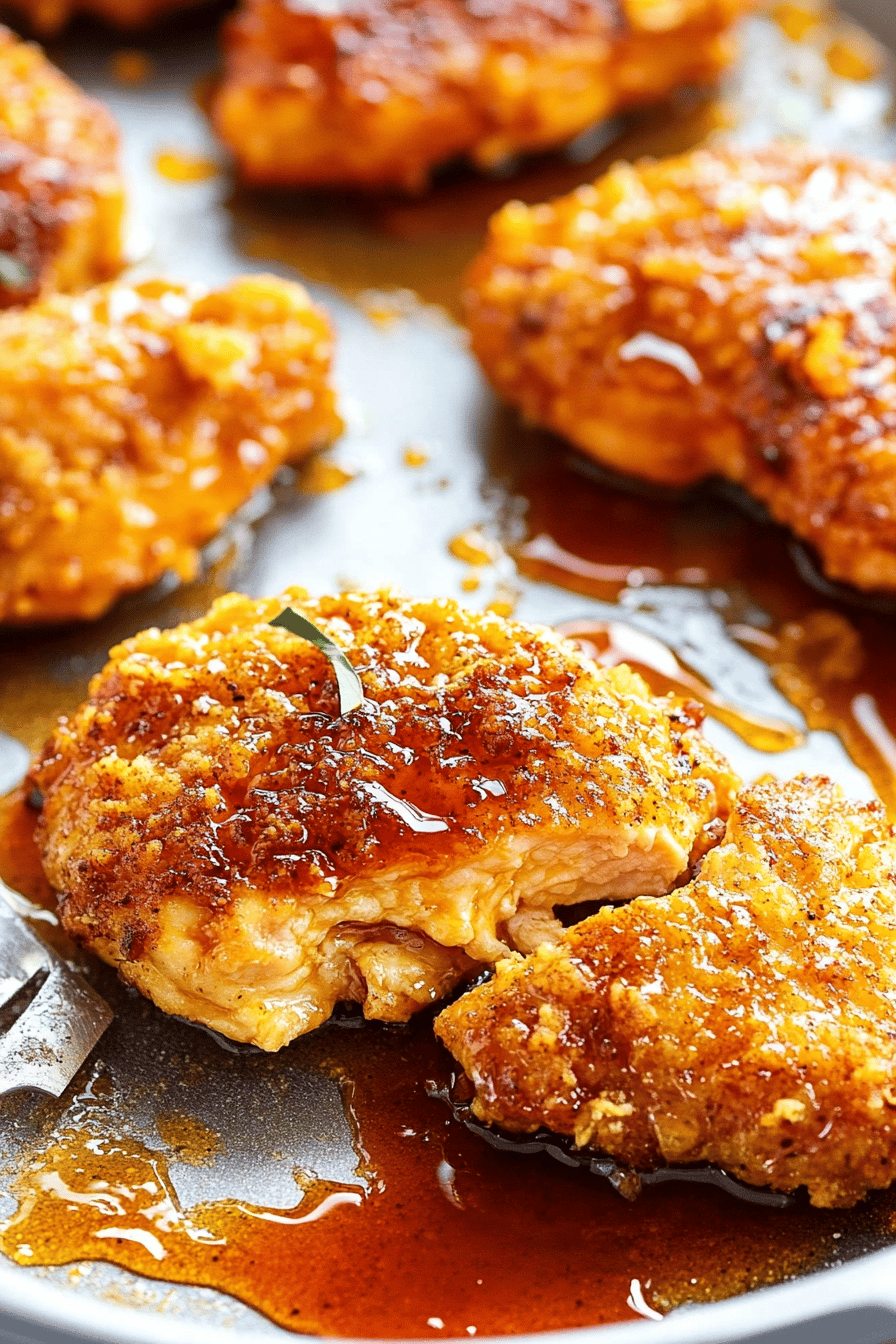
Okay, so you know how sometimes you stumble upon a recipe that just *clicks*? It becomes your absolute go-to, the one you make when you need a little comfort, a little excitement, or just want to impress yourself (and anyone lucky enough to be around)? Well, this Hot Honey Chicken Recipe is that for me. It’s a little bit sweet, a whole lot of savory with a kick of spice, and it’s surprisingly simple to pull off, even on a weeknight. I’m talking crispy, juicy chicken coated in this incredible glaze that has just the right amount of heat. Honestly, it’s a game-changer, and it’s quickly becoming a family favorite. If you love chicken, and you love that perfect balance of sweet and heat, then you are going to adore this.

What is hot honey chicken?
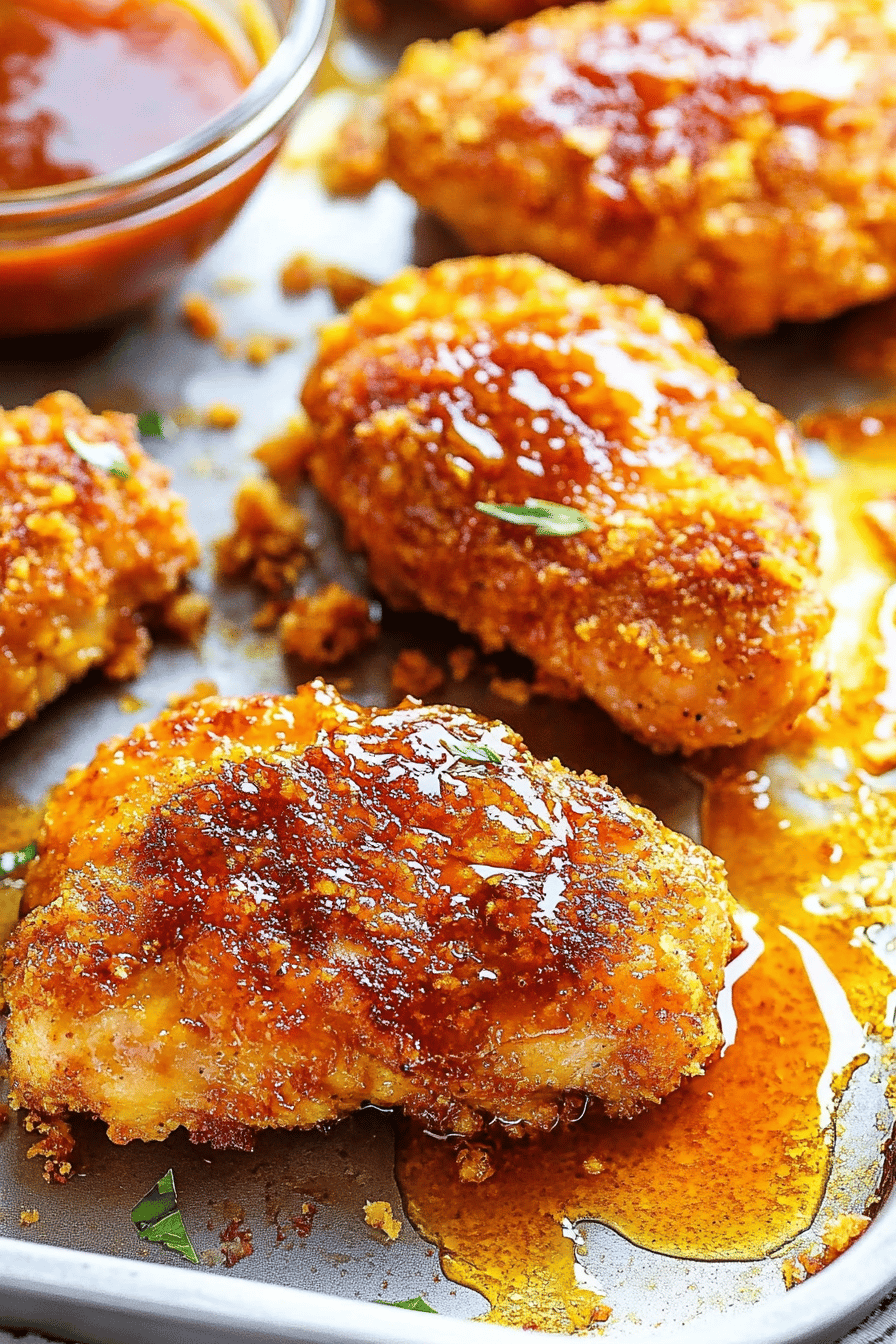
So, what exactly is this magical dish we’re talking about? At its heart, it’s about taking perfectly cooked chicken – usually pan-fried or baked until golden and crispy – and then drenching it in a luscious, glossy glaze. This glaze is where all the magic happens. It’s a beautiful marriage of sweet honey and fiery chili peppers. Think of it as the grown-up, more sophisticated cousin to your average sweet and sour chicken, but with way more personality. It’s not just about the spice; it’s about how the honey rounds out the heat, creating a flavor profile that’s incredibly addictive. It’s essentially comfort food with a delightful little zing that wakes up your taste buds. It’s the kind of dish that makes you close your eyes with the first bite and just savor it.
Why you’ll love this recipe?
There are so many reasons why this HOT HONEY Chicken Recipe has earned a permanent spot in my recipe rotation, and I just know you’re going to feel the same way. First off, the flavor. Oh. My. Goodness. It’s this incredible dance between the sweetness of the honey, the savory depth of the chicken, and that perfect, lingering warmth from the chili. It’s not overwhelmingly spicy, but it’s definitely got a kick that keeps you coming back for more. And the texture! When you get that crispy chicken coated in that sticky glaze, it’s just pure heaven. Plus, it’s ridiculously simple to make. Seriously, I’ve pulled this off on evenings when I’m exhausted, and it still feels like a special meal. It uses pretty basic pantry staples, which is always a win in my book, and it’s so versatile – I’ll explain more about that later!
What I love most about this recipe, beyond the taste and ease, is the sheer joy it brings. Every time I make it, the smell fills the kitchen, and you can practically hear my family’s anticipation growing. It’s one of those dishes that makes you feel like a rockstar chef without actually having to slave away for hours. It’s much more exciting than a plain roasted chicken, and honestly, it holds its own against even the fanciest take-out options, but with the comfort of knowing exactly what’s in it. If you’ve ever enjoyed crispy honey chicken or a good spicy glaze, this version takes it to a whole new level. It’s the perfect balance – not too sweet, not too spicy, just… right.
How do I make hot chicken?
Quick Overview
This recipe is all about building layers of flavor and texture. We’ll start by getting our chicken perfectly crispy, then whip up a quick, irresistible hot honey glaze. The beauty of this method is how quickly it comes together. You’ll be amazed at how a few simple steps can lead to such an impressive and delicious result. It’s truly designed for busy home cooks who want maximum flavor with minimum fuss. Trust me, the payoff is huge for the effort involved.
Ingredients
For the Main Batter:
You’ll need about 1.5 pounds of boneless, skinless chicken thighs or breasts, cut into bite-sized pieces. Thighs tend to stay more moist and flavorful, but breasts work great too if that’s your preference. For the coating, I like to use about 1 cup of all-purpose flour, but I often add a little cornstarch (about 2 tablespoons) to help make it extra crispy. A teaspoon each of salt and Black Pepper is essential, and I sometimes throw in a pinch of garlic powder or onion powder for an extra flavor boost. Make sure your chicken is patted really dry before you start; it helps the coating stick better!
For the Filling:
This is where we add some depth. You’ll need a couple of tablespoons of neutral oil for pan-frying, like vegetable or canola. For the glaze, the star ingredients are honey (about half a cup) and your favorite hot sauce. I usually use a good quality cayenne-based hot sauce, but a sriracha or even a smoky chipotle sauce can be amazing. You’ll also need a tablespoon of apple cider vinegar or white vinegar to give the glaze a nice tang, and a clove or two of minced garlic for that aromatic punch. A tiny pinch of red pepper flakes can boost the heat if you’re feeling brave!
For the Glaze:
This is the showstopper! We’re talking about combining about 1/2 cup of good quality honey (local is always best if you can find it!) with about 2-4 tablespoons of your favorite hot sauce. The amount of hot sauce is really up to your spice tolerance – I usually start with 2 tablespoons and taste, then add more if I’m feeling adventurous. A tablespoon of apple cider vinegar adds a lovely tang that cuts through the sweetness, and a teaspoon of soy sauce or tamari adds a subtle umami depth. A clove of minced garlic and a pinch of red pepper flakes will really make this glaze sing.
Step-by-Step Instructions
Step 1: Preheat & Prep Pan
First things first, get a large skillet or frying pan over medium-high heat. Add your cooking oil – you want enough to generously coat the bottom. While the pan heats up, make sure your chicken pieces are completely dry. This is super important for getting that lovely crispiness we’re after. I like to line a plate with paper towels for when the chicken is done.
Step 2: Mix Dry Ingredients
In a medium bowl, whisk together the flour, cornstarch (if using), salt, pepper, and any other dry seasonings you like (garlic powder, onion powder). Give it a good mix so everything is evenly distributed. You want to ensure every piece of chicken gets a nice, even coating.
Step 3: Mix Wet Ingredients
In a separate, shallow bowl or dish, whisk together the honey, hot sauce, vinegar, minced garlic, and red pepper flakes for the glaze. Set this aside for now. For the chicken itself, in another bowl, I like to whisk together an egg with a tablespoon of water or milk. This acts as a binder for the flour.
Step 4: Combine
Dip each piece of chicken into the egg mixture, letting any excess drip off, and then toss it in the seasoned flour mixture, making sure each piece is thoroughly coated. You can also do this by putting the flour in a zip-top bag and shaking the chicken in it. Don’t overcrowd the pan when you start frying; you might need to do this in batches. Overcrowding will steam the chicken instead of frying it, and nobody wants soggy chicken!
Step 5: Prepare Filling
This step is actually the glaze. While the chicken is cooking or resting, you’ll combine all the glaze ingredients in a small saucepan. Heat it gently over low heat, stirring constantly, until it’s warm and well combined. You don’t want it to boil vigorously, just to meld the flavors.
Step 6: Layer & Swirl
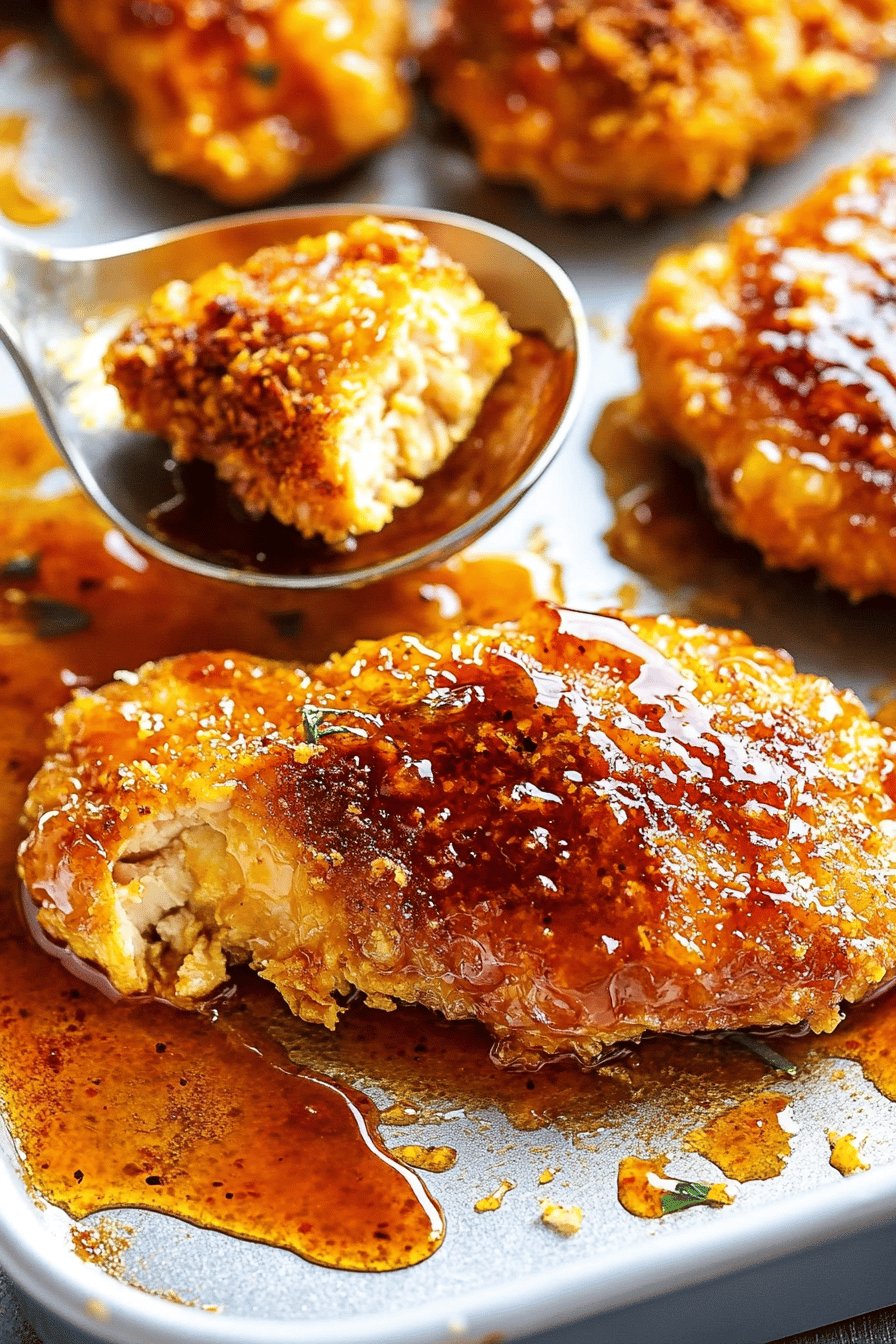
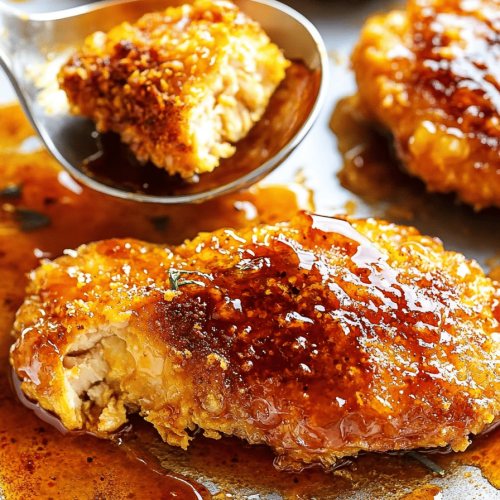
This step refers to how you’ll coat the chicken. Once your chicken is fried and golden, you’ll add it to a clean pan or bowl. Then, you’ll pour that gorgeous hot honey glaze over the chicken and toss gently until every piece is beautifully coated and sticky. It’s like magic happening right in your pan!
Step 7: Bake
Actually, this recipe is more about pan-frying or air-frying than baking, but if you prefer baking, preheat your oven to 400°F (200°C). Arrange the coated chicken pieces on a baking sheet lined with parchment paper. Bake for 20-25 minutes, flipping halfway through, until cooked through and golden brown. The key is that internal temperature of 165°F (74°C).
Step 8: Cool & Glaze
Once the chicken is cooked and crispy, transfer it to a large bowl. Gently pour the warm hot honey glaze over the chicken. Toss carefully to coat each piece evenly. The glaze should cling beautifully to the chicken. Let it sit for just a minute or two to allow the glaze to thicken slightly and adhere to the chicken.
Step 9: Slice & Serve
Serve your Hot Honey Chicken immediately. It’s fantastic on its own, but also works wonders over rice, in tacos, or alongside your favorite veggies. Garnish with some sesame seeds or sliced green onions if you like for an extra touch of elegance and flavor.
What to Serve It With
This Hot Honey Chicken is so versatile, it’s almost ridiculous! For a really satisfying meal, I love serving it over a bed of fluffy white or brown rice. The rice soaks up all that delicious glaze, which is a treat in itself. Steamed broccoli or green beans are perfect partners, adding a nice crunch and a fresh, healthy element to balance out the richness. If you’re feeling a bit more adventurous, it’s amazing tucked into soft tortillas for a spicy, sweet chicken taco, or even piled onto a brioche bun for a killer sandwich. My kids also go wild for it served with some crispy sweet potato fries. It’s just one of those dishes that elevates anything you pair it with.
On a more casual note, I’ve also made a big batch and served it as an appetizer at parties, with toothpicks for easy grabbing. It’s always a huge hit! For a more complete meal, I’ll often pair it with a simple coleslaw to give it a cool, creamy contrast to the warm, spicy chicken. Or, for a lighter option, a fresh, vibrant salad with a citrusy dressing works beautifully. Honestly, you can’t go wrong. The balance of sweet and spicy means it pairs well with so many different flavors and textures. It’s a true crowd-pleaser, no matter how you serve it.
Top Tips for Perfecting Your Hot Honey Chicken
Alright, let’s talk about how to make this the absolute best it can be. First off, the chicken. Make sure you pat it *really* dry before coating it. Moisture is the enemy of crispiness! I learned this the hard way after a batch that was just… not quite right. Also, don’t be afraid to season that flour mixture well. Salt and pepper are your friends here, and a little garlic powder or paprika can really make a difference. When you’re frying, remember not to overcrowd the pan. Give the chicken pieces some breathing room so they can get nice and golden, not pale and sad.
For the glaze, the quality of your honey matters. A really good, flavorful honey will make the glaze shine. And don’t be shy with the hot sauce – taste as you go and adjust to your liking. If you want it spicier, add more hot sauce or a pinch of cayenne. If you want it sweeter, add a little more honey. The vinegar is key for balance; it prevents the glaze from being cloyingly sweet. I also like to add a tiny bit of soy sauce to the glaze for an extra layer of savory depth, even though it’s not traditionally in *every* hot honey recipe. It just adds that something extra.
When you toss the chicken with the glaze, do it just before serving for maximum crispiness. If it sits too long, the glaze will soften the coating. However, if you’re taking leftovers to work, the glaze actually holds up pretty well. For an extra touch, a sprinkle of sesame seeds or some finely chopped fresh chives or cilantro right at the end adds a beautiful pop of color and fresh flavor. And if you’re a fan of spice, a drizzle of extra hot honey over the top just before serving is pure bliss. I’ve experimented with different types of hot sauce, and while most work, I find that a good quality cayenne-based sauce gives that clean heat without too much vinegar flavor.
Storing and Reheating Tips
This Hot Honey Chicken is definitely best enjoyed fresh, right after it’s been glazed and is still perfectly crispy. However, life happens, and sometimes we have leftovers! If you’ve got some deliciousness remaining, the best way to store it is in an airtight container in the refrigerator. It should keep well for about 2-3 days. The coating will soften a bit as it sits in the glaze, but the flavor is still absolutely there.
When it comes to reheating, I’ve found the best method is a quick zap in the oven or an air fryer. Pop it on a baking sheet at around 350°F (175°C) for about 8-10 minutes, or until heated through and slightly crisped up again. Microwaving works in a pinch, but it will definitely make the chicken softer. You can also try reheating it in a skillet over medium heat, which can help revive some of the crispiness. Just be gentle! If you know you’ll be reheating, try to slightly under-glaze when you first make it, so you can add a little extra glaze or a drizzle of honey when you reheat to freshen it up.
If you’re planning to freeze it, I’d recommend freezing the *cooked and unglazed* chicken first, then making the glaze fresh when you’re ready to eat. Freezing the glazed chicken can sometimes lead to a mushy coating when thawed. But if you do freeze the glazed chicken, wrap it very well in plastic wrap and then foil, and it should last for about 1-2 months. Thaw it overnight in the refrigerator and then reheat as per the oven or air fryer method. The glaze timing advice is crucial: for immediate eating, glaze right after cooking. For leftovers, glaze before storing but be prepared for a softer coating. If you’re going to freeze it unfrosted, then glaze it after reheating.
Frequently Asked Questions
Final Thoughts
So there you have it – my absolute favorite Hot Honey Chicken Recipe! I really hope you give this one a try. It’s one of those dishes that consistently wows everyone, and it’s become such a staple in my kitchen for good reason. It’s the perfect blend of comforting and exciting, familiar yet somehow new. The way the sweet honey and the gentle heat come together with that perfectly cooked chicken is just *chef’s kiss*. It’s proof that you don’t need a ton of complicated ingredients or hours in the kitchen to make something truly spectacular.
If you love this recipe, you might also enjoy some of my other chicken dishes that have that little something extra, like my sticky Teriyaki Chicken or my spicy Korean-fried chicken. They all share that same philosophy of big flavor, manageable effort. I can’t wait to hear what you think of this Hot Honey Chicken, so please leave a comment below and let me know how yours turned out! And if you snap a picture, tag me – I love seeing your creations. Happy cooking, everyone!
Hot Honey Chicken Recipe
Ingredients
Main Ingredients
- 1.5 pounds boneless, skinless chicken thighs cut into 1-inch pieces
- 0.5 cup all-purpose flour
- 0.5 teaspoon salt
- 0.25 teaspoon black pepper
- 2 tablespoons olive oil
Hot Honey Glaze
- 0.5 cup honey
- 2 tablespoons hot sauce e.g., Sriracha or Frank's RedHot
- 1 tablespoon apple cider vinegar
- 1 clove garlic minced
- 0.5 teaspoon red pepper flakes optional, for extra heat
Garnish
- 1 tablespoon sesame seeds
- 1 tablespoon fresh chives chopped
Instructions
Preparation Steps
- In a bowl, toss chicken pieces with flour, salt, and pepper until evenly coated.
- In a medium saucepan, whisk together honey, hot sauce, apple cider vinegar, minced garlic, and red pepper flakes (if using).
- Heat olive oil in a large skillet over medium-high heat. Add chicken and cook for 6-8 minutes, or until browned and cooked through.
- Pour the hot honey glaze over the cooked chicken in the skillet. Stir to coat the chicken evenly. Simmer for 2-3 minutes until the glaze thickens.
- Serve hot, garnished with sesame seeds and chopped chives.