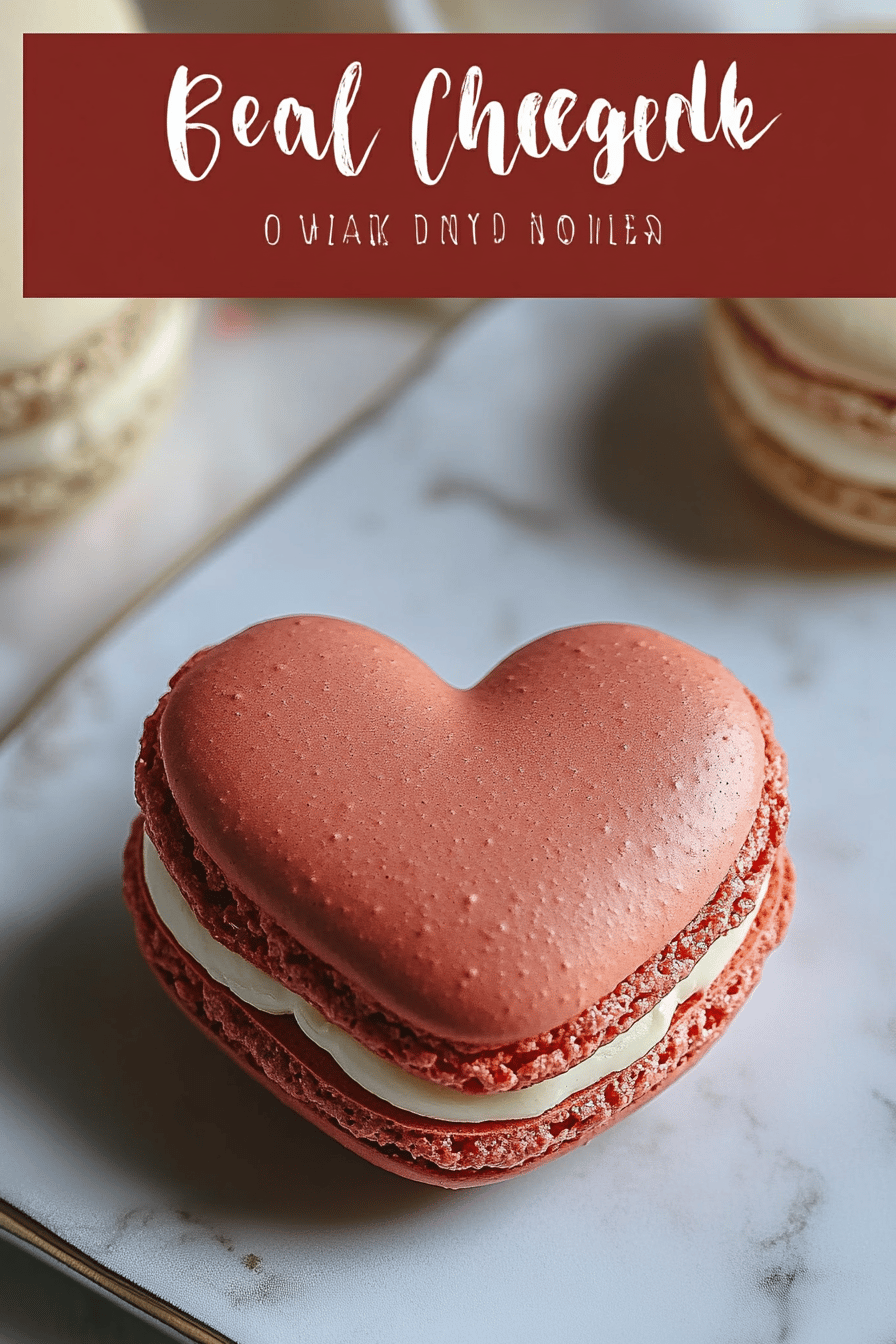
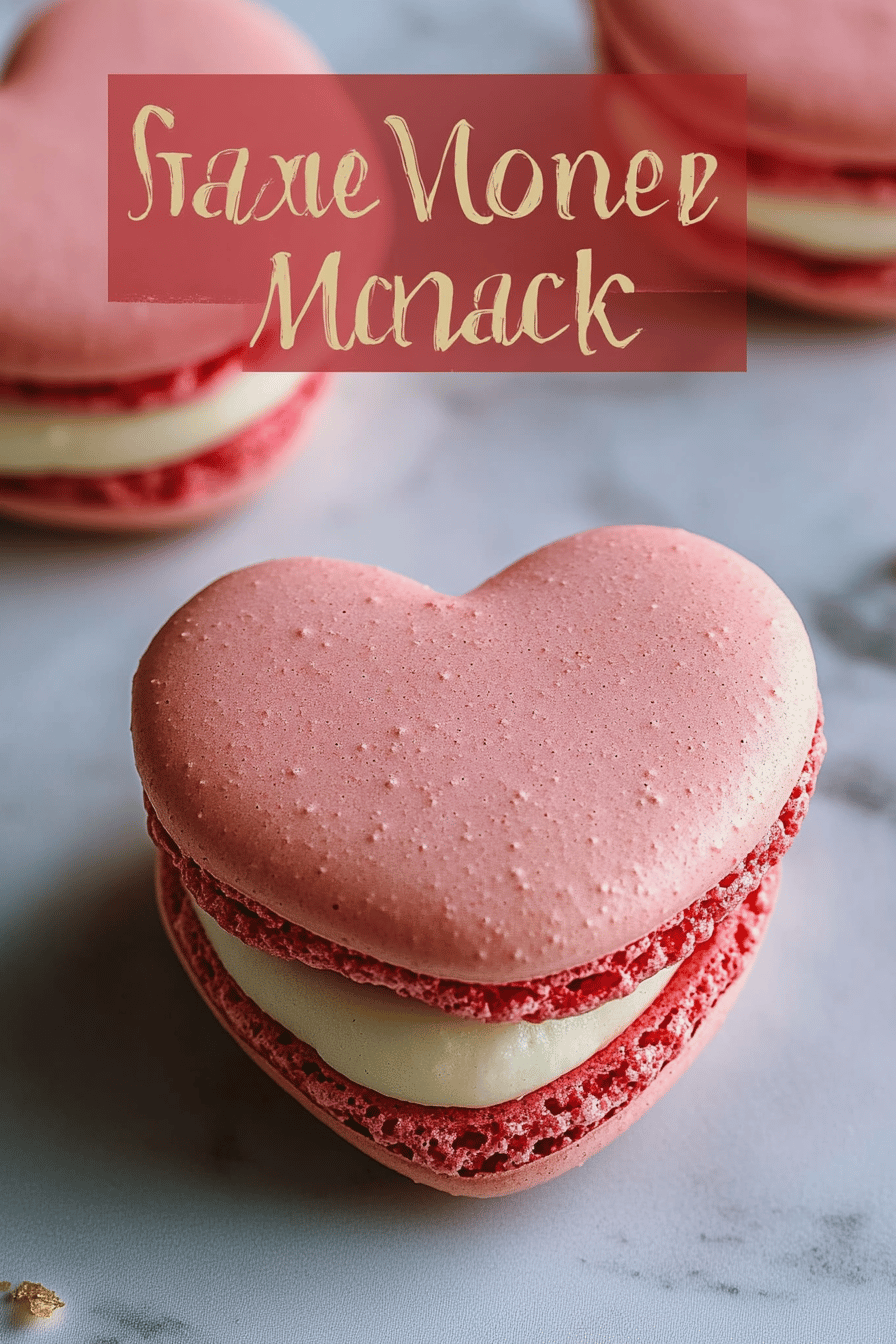
Oh, these little beauties! My heart just does a little flip every time I see them. You know, there are some recipes that just feel like a warm hug from the inside out. For me, these heart-shaped macarons are absolutely one of them. I remember the first time I ever attempted macarons – it was a disaster, a sugary, almond-flour mess that looked more like sad little cookie pebbles than anything elegant. But over the years, through a lot of trial and error (and yes, a few kitchen meltdowns!), I’ve finally cracked the code. These aren’t just any macarons; they’re little love notes you can eat. They’re perfect for Valentine’s Day, of course, but honestly, why wait for a holiday? They bring a touch of magic to any afternoon tea or a sweet surprise tucked into a lunchbox. They’re just as intricate as a French pastry you’d find in a Parisian patisserie, but with my little tweaks, you can totally nail them at home. If you’ve ever swooned over a perfectly crafted macaron, get ready, because we’re going to make some magic happen together.

What are heart-shaped macarons?
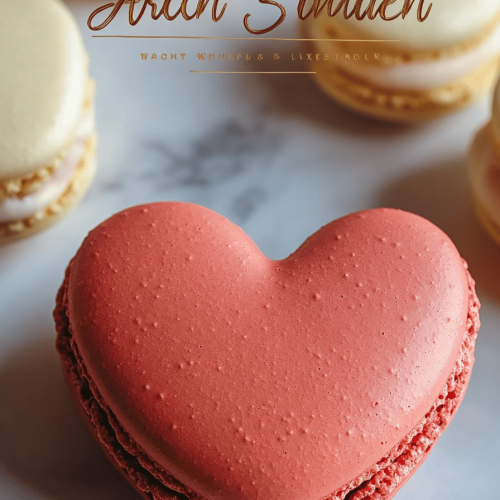
So, what exactly are these whimsical little treats? Think of them as tiny, delicate sandwich cookies, but with a flavor and texture that’s leagues beyond your average cookie. They’re made from a simple batter of egg whites, finely ground almond flour, powdered sugar, and granulated sugar, piped into perfect little circles (or in our case, hearts!) and then filled with a luscious cream or ganache. The magic happens in the baking: a slightly crisp shell that gives way to a chewy, melt-in-your-mouth interior. The “heart-shaped” part? That’s just our fun little twist, achieved by piping them carefully or using a heart-shaped template. It’s essentially a classic French macaron, but with a romantic shape that adds an extra layer of charm. They look incredibly sophisticated, but honestly, the process is more about precision than anything overly complicated. They’re the kind of sweet that feels special, like a little burst of joy with every bite.
Why you’ll love this recipe?
I know, I know, macarons have a bit of a reputation for being finicky. But I promise you, this recipe and my tips will have you making gorgeous heart-shaped macarons like a pro! What I adore about these is the incredible contrast in textures: that delicate, almost brittle shell that shatters just so, followed by that wonderfully soft, chewy interior. And the flavor? Oh, it’s divine. You get that subtle, nutty sweetness from the almond flour, balanced perfectly by the creamy filling. It’s not overly sweet, which I appreciate – it’s just right. Plus, they are surprisingly budget-friendly when you make them yourself. Almond flour and powdered sugar might sound fancy, but when you consider the cost of buying these pre-made from a good bakery, you’re saving a bundle. And the versatility! You can fill them with literally anything your heart desires – classic chocolate ganache, tangy raspberry buttercream, zesty lemon curd, or even a creamy coffee filling. They’re also incredibly impressive for special occasions; a plate of these always wows guests. Honestly, the biggest reason I keep coming back to this recipe is the pure joy they bring. They’re little edible works of art, and the satisfaction of making them yourself is just immense. They remind me of the beautiful pastries I’d see in shop windows on trips to Europe, but now I can recreate that magic right in my own kitchen!
How do I make heart-shaped macarons?
Quick Overview
Making these heart-shaped macarons involves a few key stages: carefully preparing the batter, piping them into shape, letting them ‘dry’ or form a skin, baking them to perfection, and then filling them with your favorite deliciousness. It might sound like a lot, but each step is manageable and crucial for that signature macaron texture. The trick is patience and attention to detail, but don’t let that intimidate you! I’ve streamlined the process to be as straightforward as possible, focusing on the absolute must-dos to ensure success. You’ll end up with delicate, flavorful cookies that look like they came straight from a high-end pâtisserie, but with the comforting pride of having made them yourself.
Ingredients
For the Main Batter:
1. Almond Flour: 100 grams (about 1 cup). Make sure it’s super fine! If yours has larger chunks, give it a quick pulse in a food processor (don’t overdo it though, you don’t want almond butter!) and then sift it. This is non-negotiable for smooth shells.
2. Powdered Sugar: 100 grams (about 1 cup). Also needs to be sifted to get rid of any lumps. I always sift my powdered sugar twice, just to be extra sure.
3. Egg Whites: 75 grams (about 2 large egg whites). These should be at room temperature, and crucially, free of *any* yolk. Even a tiny speck can ruin your meringue. I often weigh my egg whites to ensure accuracy, as egg sizes can vary so much.
4. Granulated Sugar: 30 grams (about 2 tablespoons). This is for stabilizing the meringue. Fine granulated sugar works best here.
5. Cream of Tartar: A tiny pinch (about 1/8 teaspoon). This is an optional stabilizer for the egg whites, but I find it really helps give the meringue that extra oomph.
6. Gel Food Coloring: A few drops, if you want colored macarons. Gel is best because it doesn’t add extra moisture like liquid colors can.
For the Filling:
My absolute go-to is a classic dark chocolate ganache. It’s so simple and pairs beautifully with the almond. You’ll need:
1. Good Quality Dark Chocolate: 100 grams, finely chopped. The better the chocolate, the better the ganache!
2. Heavy Cream: 100 ml (about ½ cup). Warm it gently until just simmering.
Just pour the warm cream over the chocolate, let it sit for a minute, then whisk until smooth and glossy. Let it cool and thicken to a spreadable consistency.
For the Glaze:
For that extra touch of elegance, a simple glaze is perfect. You can use melted white chocolate, or a simple powdered sugar glaze:
1. Powdered Sugar: 1 cup, sifted.
2. Milk or Water: 1-2 tablespoons, added slowly until you reach a thick but pourable consistency.
3. Vanilla Extract: ½ teaspoon (optional, but lovely!).

Step-by-Step Instructions
Step 1: Preheat & Prep Pan
First things first, let’s get your oven ready. Preheat it to 300°F (150°C). Line two baking sheets with parchment paper. If you’re feeling fancy, you can draw little heart shapes on the underside of the parchment paper as a guide for piping. Just make sure the ink doesn’t bleed through! I usually draw them about 1.5 inches wide. If you don’t have a template, don’t worry, freehand is perfectly fine too, and each macaron will have its own unique charm.
Step 2: Mix Dry Ingredients
In a medium bowl, whisk together your sifted almond flour and sifted powdered sugar. I like to give them a good whisk to ensure they are really well combined and to break up any tiny lumps that might have survived sifting. Then, sift this mixture through a fine-mesh sieve. This step is super important for smooth macaron shells. I usually do this twice, just to be safe. Discard any large almond bits that are left behind in the sieve. Set this bowl aside.
Step 3: Mix Wet Ingredients (Make the Meringue)
In a clean, dry bowl (seriously, absolutely no grease!), whip your room temperature egg whites with the cream of tartar using an electric mixer on medium speed until they become foamy. Gradually add the granulated sugar, a tablespoon at a time, while continuing to beat. Once all the sugar is added, increase the speed to high and beat until you have stiff, glossy peaks. This means when you lift the whisk, the meringue stands up straight without drooping. If you’re adding gel food coloring, this is when you do it – just a few drops to get your desired shade. Beat until the color is fully incorporated.
Step 4: Combine
Now comes the stage often called “macaronage.” Gently fold about one-third of the dry ingredients into the meringue using a rubber spatula. Once mostly combined, add the remaining dry ingredients and continue folding. You want to fold by cutting down through the middle of the mixture, scraping around the bottom of the bowl, and bringing the batter up and over the top. Keep folding until the batter is smooth, glossy, and flows like thick lava. When you lift the spatula, the batter should fall off in a thick, ribbon-like stream, and it should slowly melt back into itself within about 20-30 seconds. Be careful not to overmix – this is where many people go wrong! It’s better to slightly undermix than to overmix.
Step 5: Prepare Filling
While your batter is resting for a moment, let’s get the filling ready. If you’re making the chocolate ganache, gently warm your heavy cream until it’s just simmering. Pour it over your finely chopped dark chocolate in a heatproof bowl. Let it sit undisturbed for about 5 minutes to allow the chocolate to melt. Then, grab a whisk and stir slowly from the center outwards until the ganache is completely smooth, glossy, and emulsified. Let it sit at room temperature to cool and thicken to a pipeable consistency – it should be like thick pudding. If it’s too thin, it will ooze out; too thick, and it’ll be hard to pipe.
Step 6: Layer & Swirl
Spoon your macaron batter into a piping bag fitted with a round tip (about ½ inch). Now, pipe your hearts onto the prepared baking sheets. Hold the piping bag directly above the parchment paper and pipe a steady stream of batter, stopping before you reach your drawn outline, then flicking your wrist to create the point of the heart. Try to keep them all roughly the same size. Once piped, firmly tap the baking sheets on the counter a few times. This helps to release any air bubbles trapped in the batter. You can use a toothpick to pop any remaining stubborn bubbles. Now, this is a crucial step for a smooth shell: let the piped macarons sit at room temperature for about 30-60 minutes, or until they form a dry skin. You should be able to gently touch one without any batter sticking to your finger. This skin allows the macaron to rise upwards in the oven, creating those little ‘feet’!
Step 7: Bake
Once your macarons have developed their skin, carefully slide one baking sheet into the preheated oven. Bake for 12-15 minutes. The baking time can vary a lot depending on your oven, so keep an eye on them. You’re looking for them to be firm to the touch and to have developed those signature “feet” at the base. They shouldn’t wobble when you gently nudge one. If they look like they’re browning too quickly, you can loosely tent them with foil. Once baked, remove the baking sheets from the oven and let the macarons cool completely on the sheets before attempting to peel them off. Trying to move them when they’re warm will result in heartbreak (and broken macarons!).
Step 8: Cool & Glaze
After the macarons have cooled completely on the baking sheets, carefully peel them off the parchment paper. If they’re sticking, they might need a few more minutes. Once they’re all free, you can get ready to assemble. If you’re using the simple powdered sugar glaze, whisk together the sifted powdered sugar with 1 tablespoon of milk or water. Add more liquid, a teaspoon at a time, until you have a consistency that’s thick enough to coat the back of a spoon but still flows. Add the vanilla extract if using. You can then drizzle this glaze over the cooled macaron shells using a spoon or a piping bag with a very thin tip. Let the glaze set completely before filling. If using melted white chocolate, just melt it gently and drizzle. This can take about 30 minutes to an hour to fully set.
Step 9: Slice & Serve
Once the shells are cooled and any glaze has set, it’s time for the best part: assembly! Pair up your macaron shells so they are roughly the same size. Spoon your cooled chocolate ganache (or your chosen filling) into a piping bag and pipe a generous dollop onto the flat side of one shell. Gently place the matching shell on top and lightly press down to spread the filling evenly to the edges. Don’t overfill, or it will squeeze out! For the best flavor and texture, I highly recommend letting your filled macarons rest in an airtight container in the refrigerator for at least 24 hours. This “maturation” period allows the filling’s moisture to soften the shells just a bit, creating that perfect chewy texture. Before serving, let them come to room temperature for about 15-20 minutes.
What to Serve It With
These heart-shaped macarons are so versatile, they can elevate almost any occasion! For a lovely breakfast treat, I love serving them alongside a steaming cup of coffee or a delicate herbal tea. They add a touch of elegance to a simple morning. For brunch, imagine a platter of these alongside fresh berries, mini croissants, and perhaps a glass of bubbly – pure indulgence! They look absolutely stunning presented on a tiered stand. As a dessert, they are the perfect elegant finish to any meal. They pair wonderfully with a rich chocolate mousse, a light fruit tart, or simply on their own with a scoop of vanilla bean ice cream. And for those cozy snack moments, when you just need a little something sweet to brighten your day? They’re perfect. I often enjoy one (or two!) with a glass of cold milk late at night when I’m craving something sweet but don’t want to bake a whole cake. My kids especially love them tucked into their lunchboxes, and seeing their little notes about how yummy they were always makes my day.
Top Tips for Perfecting Your Heart-Shaped Macarons
Alright, let’s talk about getting those picture-perfect macarons every single time. I’ve learned a few things the hard way, and I’m happy to share them with you!
Almond Flour Prep: I can’t stress enough how important fine almond flour is. If yours isn’t super fine, pulse it in a food processor *briefly* until it’s powder-like. Then, sift it – ideally twice – with your powdered sugar. Any large almond bits can lead to bumpy tops, and we want those smooth, sleek surfaces for our little hearts!
Egg White Wisdom: Room temperature egg whites are key for a stable meringue. And I mean *room temperature*, not just slightly cool. I often separate my eggs a day or two in advance and let them sit out in a covered bowl. Also, ensure absolutely NO yolk gets into your egg whites. It’s a macaron killer!
The Macaronage Stage: This is the delicate dance of folding. You want to achieve that “lava-like” consistency where the batter flows smoothly. If it’s too stiff, your macarons will be crumbly. If it’s too runny, they’ll spread too much and might collapse. The “ribbon stage” is your goal – where the batter falls from the spatula in a continuous ribbon and slowly melds back into itself. Don’t be afraid to fold a little more if needed, but err on the side of slightly undermixed rather than overmixed. Overmixing is irreversible!
Piping Precision: For the heart shape, consistency is vital. Try to pipe with steady pressure and avoid over-swirling. Tapping the baking sheets firmly on the counter is your best friend for releasing air bubbles and helping the batter settle smoothly. A toothpick is also great for popping any stragglers.
The Skinny on Drying: This step is non-negotiable! Letting the piped macarons dry until they form a skin allows them to puff up correctly in the oven, creating those signature “feet” and preventing cracking. You should be able to touch them lightly without any batter sticking to your finger. Humidity is the enemy here, so if it’s a very humid day, you might need to let them dry for longer, or even use a fan to help speed things up.
Baking Smarts: Every oven is different! Get to know yours. Start with the recommended temperature, but be prepared to adjust. If your macarons are browning too fast, you might need to lower the temperature slightly or bake on a lower rack. If they’re not developing feet, they might need a bit more time or a slightly higher temp. The best test is when they feel firm and don’t wobble when you gently nudge them.
Filling Fun: Don’t overfill! A nice, even layer of filling that reaches close to the edge is perfect. Too much filling will squish out and make them messy. And seriously, let them mature in the fridge for at least 24 hours. It makes a world of difference to the texture – turning those crisp shells into a delightful chew.
Storing and Reheating Tips
Ah, the dilemma of what to do with all these delicious heart-shaped macarons! Thankfully, they store pretty well, which is great if you like to do some prep work ahead of time.
Room Temperature Storage: Once fully assembled and the filling has set (meaning they’ve had their fridge maturation time!), you can store them in an airtight container at room temperature for 1-2 days. Keep them out of direct sunlight and away from heat. This is perfect if you’re serving them at a party and don’t want them to take up fridge space.
Refrigerator Storage: For longer storage, and to maintain that ideal chewy texture, keep them in an airtight container in the refrigerator for up to 5-7 days. As I mentioned, I honestly think they taste best after about 24-48 hours in the fridge. Just make sure the container is sealed TIGHTLY. You don’t want them absorbing any fridge smells!
Freezer Instructions: Yes, you can freeze these little wonders! It’s a fantastic way to have them ready for unexpected guests or just to have on hand. Either freeze the baked, unfilled shells, or the fully assembled macarons. If freezing shells, place them in an airtight container with parchment paper between layers. If freezing assembled macarons, make sure they’ve had their initial fridge maturation. Wrap the container tightly in plastic wrap or place it inside a freezer bag. They’ll last in the freezer for up to 1-2 months. To thaw, simply transfer them to the refrigerator overnight. If you froze them unfllled, then fill them after thawing and let them mature in the fridge for 24 hours.
Glaze Timing Advice: If you’ve glazed your macarons, I would recommend glazing them closer to when you plan to serve them if they’re going to be at room temperature for an extended period. If they’re going straight into the fridge or freezer, the glaze will hold up well. For very long freezer storage, you might consider glazing after thawing for the freshest look.
Frequently Asked Questions
Final Thoughts
There you have it – my beloved recipe for heart-shaped macarons! I really hope you give these a try. They might seem a little intimidating at first, but I truly believe that with a bit of patience and my tips, you can create these delicate little wonders right in your own kitchen. The feeling of biting into a perfectly made macaron, with that crisp shell and chewy center, is just incomparable. They’re more than just a treat; they’re a little piece of edible art and a whole lot of love. If you adore these, you might also enjoy my recipe for classic French Madeleines or my simple Chocolate Lava Cakes – they’re also big hits in my house! Please, please let me know in the comments below how your heart-shaped macarons turn out. I’d love to hear about your flavor combinations or any fun decorations you come up with. Sharing your photos would make my day! Happy baking, friends!
Heart-Shaped Macarons
Ingredients
Macaron Shells
- 100 grams almond flour
- 100 grams powdered sugar
- 75 grams egg whites aged at room temperature
- 75 grams granulated sugar
- 0.25 teaspoon cream of tartar
- 0.5 teaspoon pink food coloring gel or powder
Buttercream Filling
- 113 grams unsalted butter softened
- 200 grams powdered sugar
- 30 ml heavy cream
- 1 teaspoon vanilla extract
Instructions
Macaron Shell Preparation
- Sift almond flour and powdered sugar together into a bowl. Set aside.
- In a clean, dry bowl, whip the egg whites with cream of tartar until foamy. Gradually add the granulated sugar while whipping until stiff, glossy peaks form. Add the pink food coloring and mix until evenly distributed.
- Fold the almond flour and powdered sugar mixture into the meringue in two additions, until a smooth, lava-like batter forms (macaronage).
- Fit a piping bag with a round tip and fill with the macaron batter. Pipe small heart shapes onto baking sheets lined with parchment paper.
- Tap the baking sheets firmly on the counter to release air bubbles. Let the macarons rest at room temperature for 30-60 minutes, or until a skin forms.
- Preheat oven to 300°F (150°C). Bake for 15 minutes, or until the shells are firm and have developed 'feet'. Let cool completely on the baking sheets.
Buttercream Filling Preparation
- In a bowl, beat the softened butter until creamy. Gradually add the powdered sugar, alternating with the heavy cream, beating until smooth and fluffy. Stir in the vanilla extract.
Assembly
- Pair up similar-sized macaron shells. Pipe or spread a small amount of buttercream onto one shell and sandwich with another.
- Refrigerate the macarons for at least 30 minutes before serving to allow the flavors to meld.
Notes
Nutrition

Ava Brooks is the home cook behind RecipeSharingHub, sharing dependable, step‑by‑step recipes for busy weeknights and easy weekend bakes. When not testing dishes, Ava snaps kitchen photos and answers reader questions in the comments. Discover the latest recipes or join the newsletter for new ideas each week.