Oh, pizza. Just the word itself brings a smile to my face, doesn’t it? For years, I felt like I was missing out on Friday night pizza traditions because of my gluten sensitivity. I tried store-bought crusts, those pre-made mixes that promised miracles but delivered cardboard, and even dabbled in some truly bizarre flour combinations that ended up tasting like… well, let’s just say they weren’t edible. But then, through a lot of trial and error (and more than a few kitchen fails I’d rather forget!), I finally landed on this absolute gem of a gluten-free Pizza Dough recipe. It’s the one that has everyone in my house, gluten-eaters included, asking for seconds. Seriously, it’s that good. It’s chewy, it’s got that perfect slight crisp on the bottom, and it holds up to all your favorite toppings without getting soggy. This isn’t just another gluten-free recipe; it’s the recipe that reignited my love for homemade pizza and made it a regular, cherished part of our family meals again. It’s my go-to when that pizza craving hits hard, and trust me, it hits often!
What is gluten free pizza dough?
So, what exactly is this magical concoction? Think of it as your new best friend in the kitchen when it comes to pizza night. It’s a gluten-free Pizza Dough that doesn’t taste like a compromise. It’s essentially a carefully balanced blend of gluten-free flours, a touch of yeast for that lovely rise and subtle chew, and a few other pantry staples that work together to create a dough with incredible texture and flavor. Unlike some gluten-free doughs that can be gummy or crumbly, this one has a beautiful elasticity, making it surprisingly easy to work with, even for beginners. The name? Well, it’s just my honest, enthusiastic description of what it is: the best gluten-free pizza dough I’ve ever made, and one that I think you’ll love just as much as I do.
Why you’ll love this recipe?
What is gluten free pizza dough?flavorWhat are some of the best toppings to make with this yeasty base?simplicity. I know “gluten-free dough” can sound intimidating, but this recipe is incredibly straightforward. I’ve walked my sister through it over the phone on a busy weeknight, and she nailed it. It’s honestly easier than some traditional recipes I’ve tried in the past. And the cost-efficiency? Compared to the price of pre-made gluten-free crusts, making this from scratch is a huge money-saver. You likely already have most of the ingredients in your pantry. But what I truly adore is its versatility. This dough is a blank canvas! You can make classic Margherita, loaded supreme, or even a sweet dessert pizza. I’ve used this exact dough for homemade calzones, and they were incredible. It’s a lifesaver on nights when the family is craving pizza but we’re short on time. This recipe is what made me fall back in love with making pizza at home, and I’m so excited for you to experience that too!
How to Make This Incredible Gluten-Free Pizza Dough
Quick Overview
This is your shortcut to amazing homemade gluten-free pizza. We’ll be mixing a few key gluten-free flours with some active yeast, then combining them with wet ingredients to form a manageable dough. After a short rest, it’s ready to be shaped, topped, and baked to golden perfection. It’s a surprisingly quick process that yields a pizza crust far superior to anything you’ll find in the freezer aisle.
Ingredients
For the Dough:
1 ½ cups warm water (around 105-115°F) – not too hot, or it’ll kill the yeast!
2 ¼ teaspoons active dry yeast (that’s one standard packet)
1 teaspoon sugar or honey – this feeds the yeast, makes them happy and bubbly.
2 ½ cups gluten-free all-purpose flour blend (one that contains xanthan gum is best; if yours doesn’t, you’ll need to add about ½ teaspoon separately)
1 teaspoon salt – essential for flavor!
2 tablespoons olive oil – adds richness and helps with texture. Plus, a little extra for greasing.
For Toppings (Use your favorites!):
Pizza sauce (homemade or store-bought)
Shredded mozzarella cheese (or your preferred cheese blend)
Your favorite pizza toppings: pepperoni, mushrooms, onions, peppers, olives, basil, etc.
Step-by-Step Instructions
Step 1: Activate the Yeast
In a large mixing bowl, combine the warm water, sugar (or honey), and yeast. Give it a gentle stir. Let it sit for about 5-10 minutes. You’re looking for it to get foamy and bubbly on top. This means your yeast is alive and ready to work its magic! If it doesn’t foam, your yeast might be old, or the water was too hot or too cold – don’t be afraid to start over with fresh yeast and properly tempered water.
Step 2: Mix the Dry Ingredients
While the yeast is doing its thing, in a separate medium bowl, whisk together the gluten-free flour blend and salt. Make sure they’re thoroughly combined. This ensures the salt is evenly distributed and prevents pockets of saltiness in your dough.
Step 3: Combine Wet and Dry
Once your yeast is foamy, add the olive oil to the yeast mixture. Then, gradually add the dry ingredients to the wet ingredients, mixing with a wooden spoon or a sturdy spatula. Keep mixing until a shaggy, sticky dough forms. It will be much wetter than traditional wheat dough – that’s exactly what we want!
Step 4: Knead (Gently!)
This is where it gets a little different from wheat dough. Since there’s no gluten, we don’t need to knead it extensively. Just keep mixing until it’s mostly combined. Then, lightly oil your hands and gently fold the dough over itself in the bowl a few times. The goal here isn’t to develop gluten, but to ensure everything is incorporated and to start building some structure. The dough will be sticky, and that’s okay. Resist the urge to add too much extra flour – that’s a common mistake that leads to dry, crumbly crusts.
Step 5: First Rise
Cover the bowl with a clean kitchen towel or plastic wrap. Place it in a warm spot in your kitchen (like a slightly warm oven that’s been turned off) for about 45-60 minutes. The dough should puff up and roughly double in size. It might not rise as dramatically as wheat dough, but you’ll see a noticeable difference.
Step 6: Shape Your Pizza
Preheat your oven to 425°F (220°C). If you have a pizza stone or steel, place it in the oven while it preheats. Lightly dust a piece of parchment paper with some gluten-free flour or cornmeal. Gently turn the dough out onto the parchment paper. It will still be a bit sticky. Using oiled hands or a lightly floured spatula, gently press and stretch the dough outwards into your desired pizza shape. Don’t overwork it; just coax it into a circle or rectangle. Aim for about a ¼-inch thickness.
Step 7: Add Your Toppings
Spread your pizza sauce evenly over the dough, leaving a small border for the crust. Sprinkle generously with cheese, then add all your favorite toppings. Don’t overload it, or the crust might not cook through properly.
Step 8: Bake to Perfection
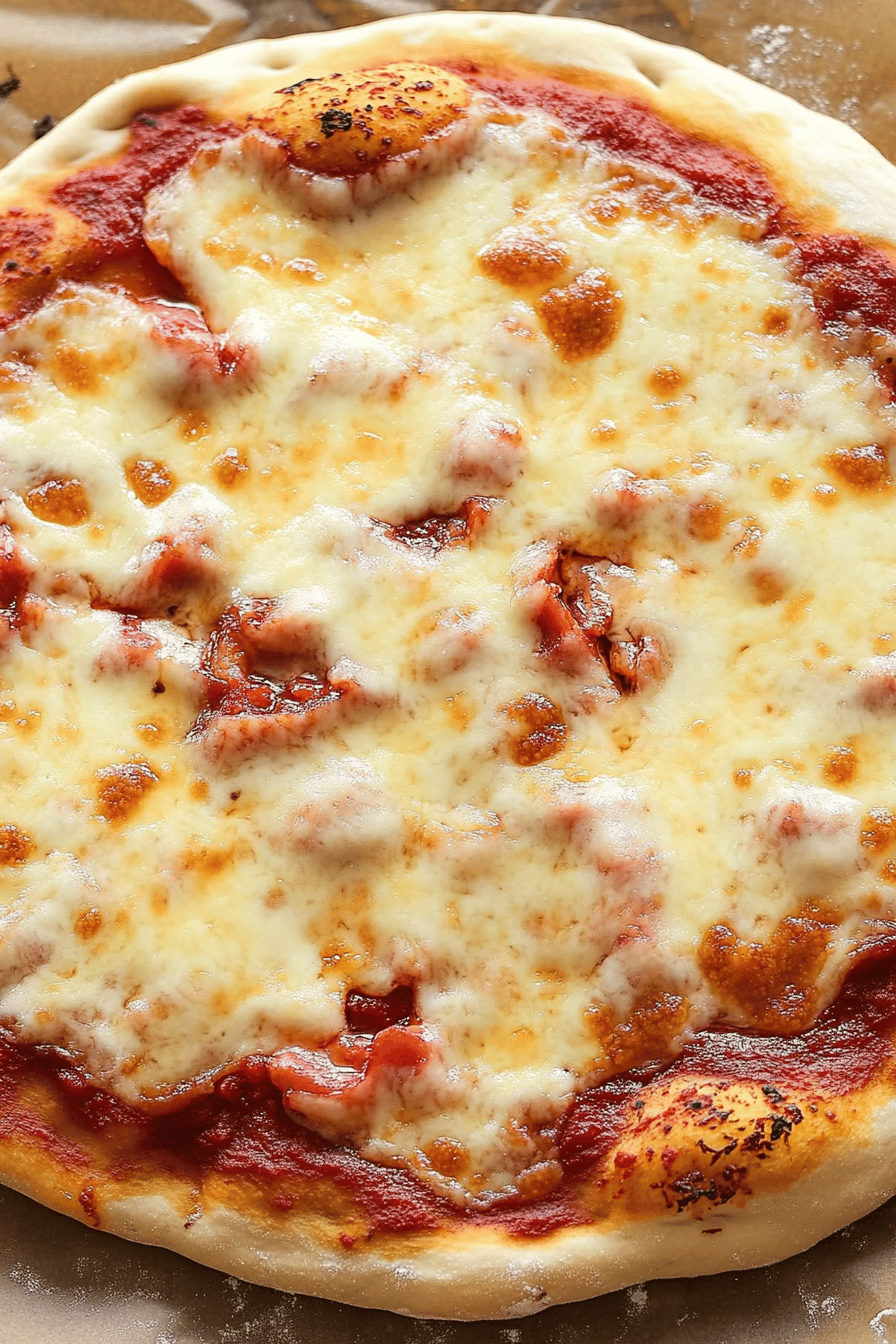
Carefully slide the parchment paper with your pizza onto the preheated pizza stone/steel or a baking sheet. Bake for 15-20 minutes, or until the crust is golden brown and the cheese is melted and bubbly. The exact time will depend on your oven and how thick you made your crust.
Step 9: Cool Slightly and Serve
Let the pizza cool on a wire rack for a few minutes before slicing. This helps the crust set up and prevents toppings from sliding off. Slice with a sharp knife or pizza cutter and enjoy your delicious homemade gluten-free pizza!
What to Serve It With
This gluten-free pizza dough is incredibly versatile, making it perfect for any meal or occasion. For Breakfast, I love making mini pizzas with a thin layer of scrambled eggs, some sautéed spinach, and a sprinkle of feta cheese. A side of fresh fruit and a warm cup of coffee are absolute perfection. For a more elegant Brunch, consider a white pizza base with ricotta, asparagus, and prosciutto, drizzled with a balsamic glaze. It looks so sophisticated on a platter! As a decadent Dessert, swap the sauce for a thin layer of Nutella or fruit compote, top with berries and a dusting of powdered sugar. It’s a showstopper! And for those classic Cozy Snacks, you can’t beat a traditional pepperoni pizza with a side of garlic knots (made with gluten-free flour, of course!). My kids also love making “pizza roll-ups” by spreading toppings on one half and folding it over, then baking. It’s always a hit and a fun activity for them.
Top Tips for Perfecting Your Gluten-Free Pizza Dough
Over the years of making this gluten-free pizza dough countless times, I’ve picked up a few tricks that really make a difference. First, when it comes to the flour blend, I find that blends containing a mix of rice flour, potato starch, and tapioca starch work best. If your blend doesn’t have xanthan gum, definitely add it – it’s the binder that mimics gluten’s elasticity. For mixing, remember it’s okay if it looks wet and sticky! Don’t be tempted to add a ton of extra flour, as this is the most common mistake and leads to a dry, crumbly crust. Gently folding and pressing is all the “kneading” you need. When it comes to shaping, using oiled hands or a spatula on parchment paper makes it so much easier. If the dough springs back, let it rest for a few minutes before continuing to shape. For baking, a hot oven is key! Using a pizza stone or steel will give you that wonderfully crispy bottom crust that’s so satisfying. If you don’t have one, a heavy-duty baking sheet works well too. If you want to get creative with topping combinations, think about flavor profiles. A spicy sausage with sweet peppers, or a pesto base with cherry tomatoes and mozzarella – the possibilities are endless!
Storing and Reheating Tips
One of the best things about this gluten-free pizza dough is how well it stores. Leftover baked pizza can be kept at room temperature for a couple of hours, but for longer storage, I always pop it in the fridge. In the refrigerator, sealed in an airtight container or wrapped tightly in plastic wrap, it stays delicious for about 3-4 days. The crust might soften slightly, but it’s still wonderful. If you want to keep it even longer, freezing is your best bet. Wrap individual slices tightly in plastic wrap, then place them in a freezer bag. It will keep its quality for up to 2-3 months. To reheat, I find that a few minutes in a preheated oven or toaster oven (around 350°F) works wonders to bring back that delightful crispness. Microwaving can make it a bit chewy, so I tend to avoid that if I can. If you’re making the dough ahead of time before baking, you can store the unbaked dough (after its first rise) in the refrigerator for up to 24 hours. Just let it come to room temperature for about 30 minutes before shaping.
Frequently Asked Questions
Final Thoughts
Honestly, this gluten-free pizza dough recipe is more than just a recipe for me; it’s a little piece of kitchen magic that has brought so much joy to our family dinners. It’s proof that you don’t have to sacrifice incredible taste and texture just because you’re avoiding gluten. I truly believe this recipe is a game-changer for anyone who loves pizza but needs or prefers to go gluten-free. Give it a try, and I have a feeling it will become a staple in your kitchen too! If you loved this, you might also enjoy my recipe for gluten-free garlic knots or my easy gluten-free focaccia. They use similar flour blends and techniques! I can’t wait to hear what you think, and please, share your favorite toppings in the comments below! Happy baking!
Gluten-Free Pizza Dough
Ingredients
Main Ingredients
- 2.5 cups all-purpose gluten-free flour blend
- 1 teaspoon xanthan gum
- 1 teaspoon instant dry yeast
- 0.5 teaspoon sugar
- 1 teaspoon salt
- 1 cup warm water about 105-115°F (40-46°C)
- 2 tablespoons olive oil
Instructions
Preparation Steps
- In a large bowl, whisk together the gluten-free flour blend, xanthan gum, yeast, sugar, and salt. Ensure they are well combined.
- In a separate bowl or liquid measuring cup, combine the warm water and olive oil.
- Pour the wet ingredients into the dry ingredients. Mix with a wooden spoon or a stand mixer with a dough hook attachment until a sticky dough forms. It will be wetter than traditional wheat dough.
- Cover the bowl with plastic wrap or a damp kitchen towel and let the dough rise in a warm place for about 1 hour, or until doubled in size.
- Preheat your oven to 425°F (220°C). If using a pizza stone, place it in the oven while it preheats.
- Turn the risen dough out onto a lightly floured surface (use gluten-free flour or parchment paper). Gently shape the dough into your desired pizza crust. It's best to press and spread rather than knead.
- Transfer the crust to a pizza peel dusted with cornmeal or onto parchment paper. Add your favorite pizza sauce and toppings.
- Bake for 12-18 minutes, or until the crust is golden brown and the cheese is bubbly and melted. Cooking time may vary depending on your oven and toppings.