You know those recipes that just feel like a warm hug? This French Onion Tart recipe is exactly that for me. It’s the kind of dish I whip up when I want something truly comforting, something that smells absolutely incredible wafting through the house, and something that, without fail, makes everyone around the table smile. Honestly, it’s my go-to when I’m feeling a bit nostalgic or just need a little culinary magic to brighten my day. If you’re a fan of the classic French Onion Soup, you are going to fall head over heels for this tart. It captures all those deep, savory, cheesy, caramelized onion flavors you adore, but in a wonderfully elegant, yet surprisingly simple, tart form. Forget fussing with soup bowls and bread that gets soggy; this is French onion goodness in every single bite, perfectly contained in a flaky, buttery crust.
What is a French onion tart?
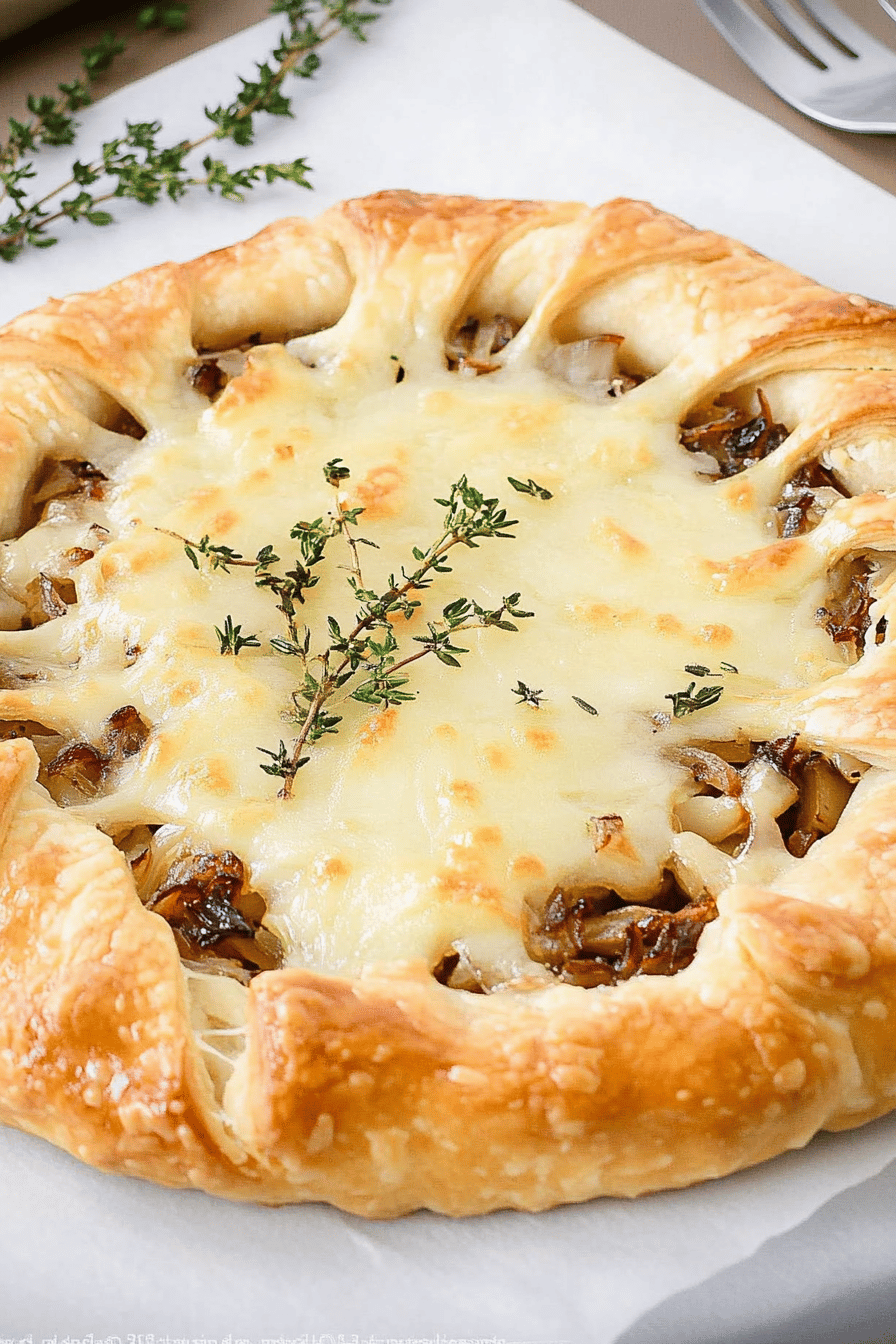
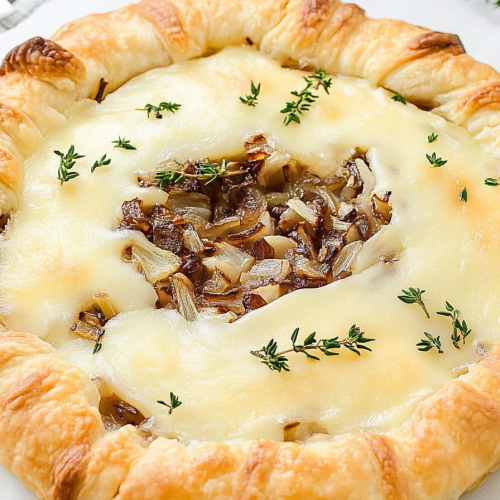
So, what exactly *is* a French Onion Tart? At its heart, it’s a savory tart that takes all the best bits of that beloved French Onion Soup and transforms them into a delightful pastry. Think deeply caramelized, sweet onions forming the luscious base, nestled within a crisp, golden crust. Then, it’s topped with a generous, gooey layer of melted cheese – usually a mix of Gruyère and sometimes a touch of Parmesan for extra zing. The name itself, “French Onion Tart,” hints at its inspiration, but the execution is all about bringing that iconic flavor profile into a more versatile format. It’s not quite a quiche, and it’s not a casserole; it’s its own special thing, a sophisticated yet utterly approachable dish that sings with flavor.
Why you’ll love this recipe?
Where do I even begin with why this French Onion Tart recipe is a keeper? First off, the flavor is absolutely out of this world. Those onions, slow-cooked until they’re meltingly tender and sweet, are the star of the show. They develop this incredible depth that’s rich, savory, and just a touch sweet, like nature’s candy. Then you have the cheese – oh, that cheese! Melted and bubbly, with those delightful golden-brown bits, it creates this irresistible gooey layer that ties everything together. It’s pure comfort food bliss.
What’s more, it’s surprisingly simple to make, especially if you use store-bought puff pastry. I’ve tested this recipe countless times, and even on a busy weeknight, I can have it ready to go. The simplicity is a lifesaver. And let’s talk about budget-friendliness! Onions are incredibly inexpensive, and the other ingredients are pantry staples. It feels so fancy, but it won’t break the bank. Plus, its versatility is fantastic. You can serve this as a sophisticated appetizer for a dinner party, a light lunch with a side salad, or even a hearty brunch item. It’s the kind of dish that impresses without demanding all your time and energy. It truly stands out because it delivers all the nostalgic, comforting flavors I crave in a way that’s elegant and easy. What I love most about this French onion tart is that it feels like a special occasion dish, but it’s honestly achievable any day of the week.
How do I make French onion tart?
Quick Overview
Making this French Onion Tart is a three-act play of deliciousness: caramelizing the onions, assembling the tart, and baking it to golden perfection. You’ll gently sauté onions until they’re unbelievably sweet and tender, then layer them into a pre-baked or par-baked tart shell. Top generously with cheese, bake until bubbly and golden, and voilà! It’s a straightforward process that yields incredibly rewarding results, proving that simple ingredients can create something truly spectacular.
Ingredients
For the Caramelized Onions: For the Caramelized Onions: For the Caramelized Onions: For the Cara
4 tablespoons unsalted butter
2 tablespoons olive oil
3 pounds yellow onions, thinly sliced (about 5-6 large onions)
1 teaspoon granulated sugar
1/2 teaspoon salt, plus more to taste
1/4 teaspoon Black Pepper, plus more to taste
1/4 cup dry sherry or white wine (optional, but adds amazing depth)
1 tablespoon balsamic vinegar
1 sprig fresh thyme (optional, for fragrance)
For the Tart Assembly:
1 (9-inch) pre-baked or par-baked Pie Crust (homemade or good quality store-bought)
1 cup shredded Gruyère cheese
1/2 cup shredded Parmesan cheese
1 tablespoon all-purpose flour (for the crust if par-baking)
For the Optional Topping:
A drizzle of crème fraîche or sour cream
Fresh chives, finely chopped
Step-by-Step Instructions
Step 1: Preheat & Prep Pan
If you’re using a homemade pie crust and need to par-bake it, preheat your oven to 375°F (190°C). Line your unbaked pie shell with parchment paper and fill with pie weights or dried beans. Bake for about 15 minutes, then remove the parchment and weights and bake for another 5-7 minutes until lightly golden. If using a pre-baked shell, you’ll just be warming it slightly later, so no pre-baking is strictly necessary unless your crust instructions say otherwise. For the onions, grab a large, heavy-bottomed skillet or Dutch oven – something that can handle a lot of onions and cook them evenly. This is where the magic happens, so don’t rush it!
Step 2: Mix Dry Ingredients
This step isn’t really about mixing dry ingredients in the traditional sense for the tart itself, but we’ll add the salt and pepper to the onions as they cook. For the crust, if you are par-baking it, you might lightly prick the bottom with a fork to prevent puffing. If you’re working with puff pastry, you’ll want to ensure it’s thawed according to package directions, as this is crucial for achieving those flaky layers.
Step 3: Mix Wet Ingredients
For the onions, the “wet” components come in the form of butter and olive oil, which will help them soften and caramelize beautifully. The optional sherry or white wine, and the balsamic vinegar, will be added later to deglaze the pan and add incredible layers of flavor. Ensure your butter is at room temperature for easier melting.
Step 4: Combine
The main “combining” happens in the skillet. Add the butter and olive oil to your large, heavy-bottomed pan over medium heat. Once the butter is melted and shimmering, add all your thinly sliced onions. It might seem like a mountain, but they’ll cook down significantly. Stir them around to coat them in the fat. This is the beginning of the caramelization process. I always do this low and slow, otherwise, they’ll just steam instead of truly caramelizing and developing that sweet flavor.
Step 5: Prepare Filling
Now, let’s talk about the real filling magic. This is where those beautifully caramelized onions meet their cheesy destiny. Once your onions have reached that perfect deep golden-brown, spoon them generously into your pre-baked or par-baked tart shell. Don’t be shy; pack them in there! Then, sprinkle the shredded Gruyère and Parmesan cheese evenly over the top of the onions. You want good coverage so you get that lovely, melted cheese blanket. If you chose to par-bake your crust, you might dust it with a tablespoon of flour before adding the onions to help absorb any excess moisture.
Step 6: Layer & Swirl
Layering here is simple: it’s all about getting that beautiful bed of caramelized onions into the crust, followed by the blanket of glorious cheese. There’s no real swirling needed for this particular recipe, but you want to ensure an even distribution of both the onions and the cheese. This helps guarantee that every bite is packed with that signature French onion flavor and cheesy goodness. Aim for a lovely, slightly mounded topping of cheese that will melt and bubble beautifully in the oven.
Step 7: Bake
Now for the baking! Place your assembled tart onto a baking sheet (this catches any drips and makes it easier to handle). Bake in the preheated 375°F (190°C) oven for about 20-25 minutes, or until the crust is deeply golden brown and the cheese is melted, bubbly, and has lovely browned bits. Keep an eye on it in the last 5-10 minutes; ovens can be tricky, and you want that perfect golden hue without burning.
Step 8: Cool & Glaze
Once out of the oven, let the French Onion Tart cool on a wire rack for at least 10-15 minutes. This is crucial! It allows the filling to set up a bit, making it easier to slice. Rushing this step can lead to a messy, melty situation. If you’re using the optional topping, this is when you’d add a delicate swirl of crème fraîche or a dollop of sour cream and sprinkle with fresh chives. This adds a lovely creamy contrast and a pop of freshness to the rich, savory tart.
Step 9: Slice & Serve
After it’s had its well-deserved rest, slice the tart into wedges using a sharp knife. The goal is clean cuts that show off those beautiful layers of crust, onion, and cheese. Serve it warm. The aroma alone will have people gathering in the kitchen, eager to get a slice. It’s truly a showstopper, even with its humble beginnings as just onions and pastry.
What to Serve It With
This French Onion Tart is wonderfully versatile, making it a fantastic addition to any meal. For breakfast, imagine a slice alongside a perfectly brewed cup of coffee or a refreshing glass of orange juice. It’s a savory start that feels indulgent without being heavy. For a delightful brunch spread, serve it as part of a larger buffet with dishes like fresh Fruit Salad, a light quiche, or some fluffy scrambled eggs. Its elegance makes it feel special for a weekend gathering.
As a light lunch or dinner, this tart is brilliant paired with a crisp green salad. A simple vinaigrette is all you need to cut through the richness of the onions and cheese. Think mixed greens, perhaps with some toasted walnuts or dried cranberries for added texture and flavor. It’s my favorite way to enjoy it when I want something satisfying but not overly heavy. For a more substantial meal, you could serve it alongside some roasted chicken or pan-seared Pork Tenderloin. The flavors complement each other beautifully. And for cozy snacks? A warm slice, perhaps with a tiny dollop of sour cream, is pure comfort. It’s perfect when you’re craving something savory and deeply satisfying on a chilly afternoon.
Top Tips for Perfecting Your French Onion Tart
I’ve made this French Onion Tart more times than I can count, and over the years, I’ve picked up a few tricks that I think make a world of difference. For the onions, the absolute key is patience. Slow and low is the name of the game. Don’t be tempted to crank up the heat to speed things up. You want them to soften and sweeten gradually, developing that deep, rich caramelization. If they start to brown too quickly, reduce the heat and add a tablespoon or two of water. I always use a combination of butter and olive oil; the butter adds flavor, and the olive oil gives it a slightly higher smoke point, preventing the butter from burning.
When it comes to mixing, the less you handle the pastry, the better, especially if you’re using puff pastry. Just gently fold the ingredients together until just combined. Overmixing can lead to a tough crust. For the cheese, I highly recommend shredding your own from a block. Pre-shredded cheese often has anti-caking agents that can make it melt less smoothly. Gruyère is traditional and fantastic, but don’t be afraid to experiment! A good quality sharp cheddar or even a mix with some fontina can be delicious too. When it comes to baking, always use a baking sheet underneath your tart pan. This catches any rogue cheese or onion that might bubble over and makes for easy cleanup. Also, remember that ovens vary. Start checking for doneness a little earlier than the recipe states, and trust your eyes – you want that beautiful golden-brown color.
Regarding ingredient swaps, if you can’t find sherry or white wine, a bit of beef broth can add a similar savory depth to the onions. If you’re not a fan of balsamic vinegar, a tiny splash of red wine vinegar can add a nice tang. And for the crust, while puff pastry is wonderful for its flakiness, a good all-butter shortcrust pastry or even a sturdy pâte brisée works beautifully if you prefer something more traditional. I once accidentally used shallots instead of yellow onions when I was in a pinch, and while the flavor was a bit more delicate, it was still absolutely delicious. Just be prepared to use more of them as shallots are smaller.
Storing and Reheating Tips
Storing this French Onion Tart is pretty straightforward, but how you store it can impact its texture, so I’ve learned to be a bit strategic. If you have any leftovers (which is rare in my house!), the best way to keep it is to let it cool completely at room temperature first. Once fully cooled, you can store it at room temperature for up to 2 hours. After that, it’s best to refrigerate it.
For refrigerator storage, place the cooled tart in an airtight container. It should keep well for about 3-4 days. I usually just place the whole tart (if it fits) or cover it tightly with plastic wrap and then foil. When you’re ready to reheat, you’ve got a couple of good options. The absolute best way to reheat a slice is in a moderate oven, around 300-325°F (150-160°C), for about 10-15 minutes. This will help crisp up the crust again and melt the cheese beautifully, making it taste almost as good as freshly baked. You can also reheat it in a toaster oven. Microwaving is an option if you’re in a super hurry, but it can make the crust a bit soggy. If you do microwave, aim for short bursts of 30-60 seconds until heated through.
Freezing is also an option for this tart, though I rarely have leftovers to freeze! You’ll want to bake the tart fully, let it cool completely, and then wrap it tightly in plastic wrap, followed by a layer of aluminum foil. You can freeze individual slices or the whole tart. It should keep well in the freezer for about 1-2 months. Thaw it overnight in the refrigerator before reheating in the oven as described above. For the glaze, I always recommend adding it *after* reheating, right before serving, to maintain its fresh appearance and texture. If you add it before storing, it might make things a bit soggy.
Frequently Asked Questions
Final Thoughts
I truly hope you give this French Onion Tart recipe a try. It’s one of those dishes that feels special enough for company but is also perfectly at home as a comforting meal for yourself or your family. The depth of flavor you get from those slowly caramelized onions is just unparalleled, and when it’s paired with that gooey, melted cheese and a flaky crust… well, it’s pure culinary magic. It’s a recipe that has brought so much joy to my kitchen, and I can’t wait for it to do the same for yours. If you end up making it, please, please let me know how it turned out! I’d love to hear about your experience, any tweaks you made, or what you served it with. Your feedback genuinely makes my day. Happy baking, and enjoy every delicious bite!
French Onion Tart Recipe
Ingredients
For the Pastry:
- 2.5 cups all-purpose flour
- 1 teaspoon salt
- 0.75 cup cold unsalted butter, cut into cubes
- 0.5 cup ice water
For the Filling:
- 2 pounds yellow onions, thinly sliced
- 2 tablespoons olive oil
- 1 tablespoon unsalted butter
- 0.5 teaspoon salt
- 0.25 teaspoon black pepper
- 0.5 cup beef broth
- 2 large eggs
- 1 cup shredded Gruyère cheese
- 0.5 cup shredded Swiss cheese
- 1 tablespoon fresh thyme leaves
Instructions
Preparation Steps
- For the pastry, whisk together flour and salt in a large bowl. Cut in the cold butter using a pastry blender or your fingertips until the mixture resembles coarse crumbs. Gradually add ice water, 1 tablespoon at a time, mixing until the dough just comes together. Form into a disc, wrap in plastic wrap, and refrigerate for at least 30 minutes.
- For the filling, heat olive oil and butter in a large skillet over medium heat. Add the sliced onions, salt, and pepper. Cook, stirring occasionally, for 40-50 minutes, or until the onions are deeply caramelized and golden brown. Stir in the beef broth and cook for another 5 minutes until slightly reduced.
- Preheat oven to 375°F (190°C). On a lightly floured surface, roll out the chilled dough into a 12-inch circle. Carefully transfer the dough to a 9-inch tart pan with a removable bottom, pressing it into the bottom and up the sides. Trim any excess dough.
- Spread the caramelized onions evenly over the bottom of the tart crust.
- In a medium bowl, whisk together the eggs, Gruyère cheese, Swiss cheese, and thyme. Pour this mixture evenly over the onions.
- Bake for 30-40 minutes, or until the filling is set and the top is golden brown. Let cool slightly before slicing and serving.