Oh, hey there! Come on in, have a seat. I was just thinking about these incredible chocolate mint cookies, and I knew I had to share them with you. Honestly, they’re not just cookies to me; they’re little bites of happy memories. Every time I pull a batch of these out of the oven, the whole house just fills with this amazing scent – that deep chocolate mingled with a whisper of cool mint. It’s like a hug in cookie form. My kids always seem to know when they’re coming, appearing like little shadows in the kitchen, noses twitching. They’re surprisingly easy, too, which is a lifesaver on those busy weeknights when you just need a little something sweet to make everything feel a bit brighter. They remind me a little bit of those fancy thin mints you can buy, but, dare I say it, even better because I made them myself. These are the kind of chocolate mint cookies that really make you feel like you’ve accomplished something special, even if you only have an hour to spare.
What is chocolate mint cookie?
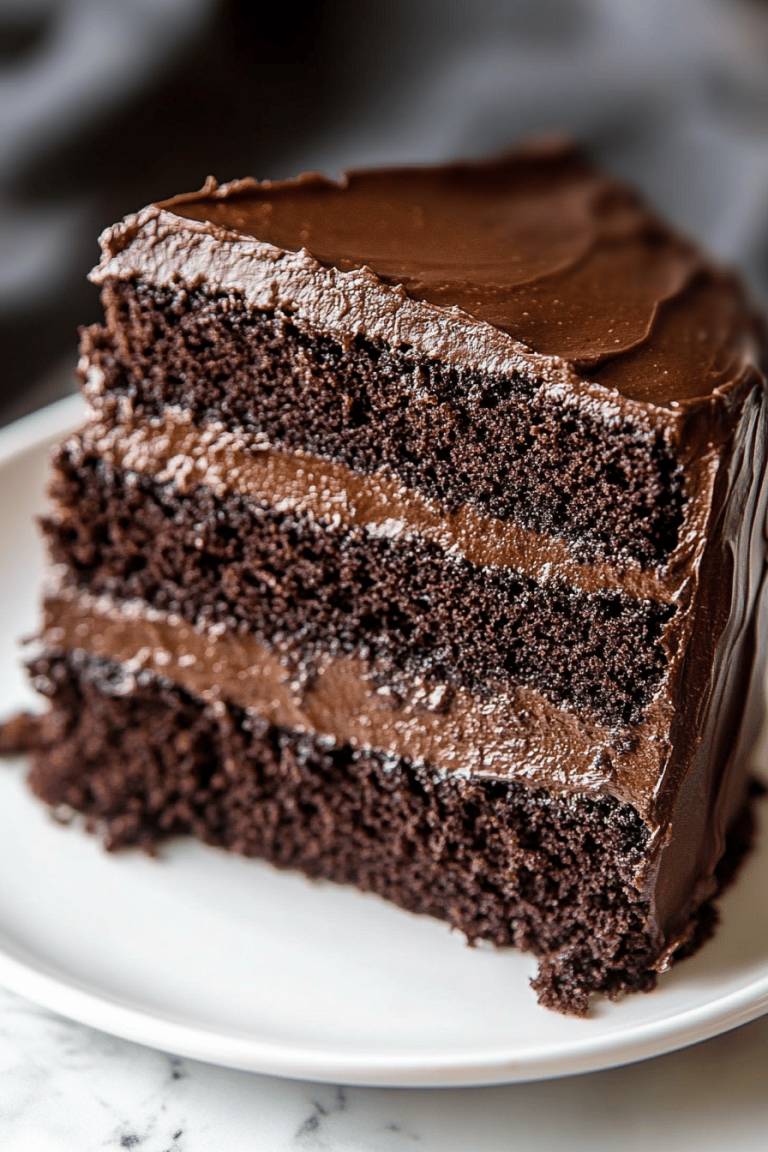
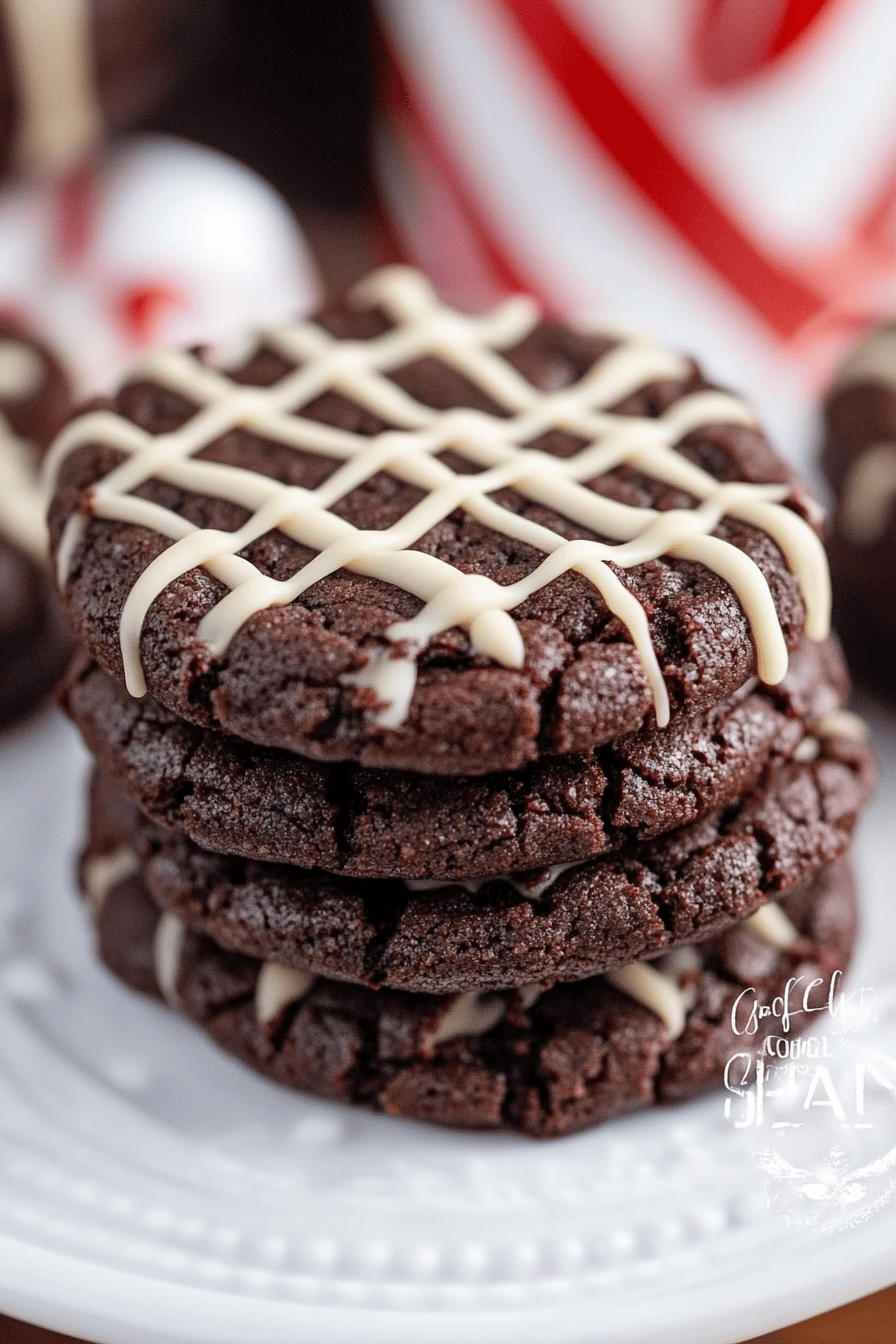
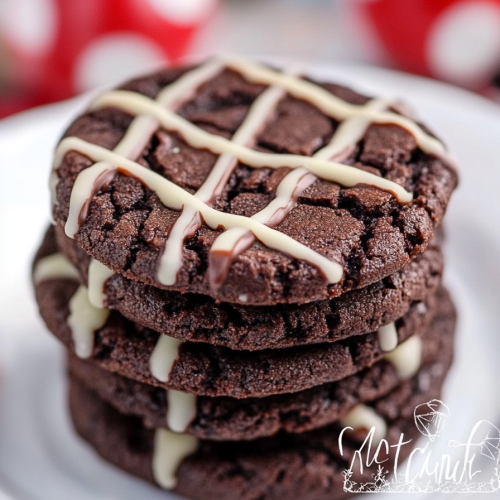
So, what exactly are these delightful little things? Think of them as the perfect marriage of rich, decadent chocolate and that refreshing, bright kiss of mint. It’s not an overpowering mint, mind you – it’s more of a subtle, invigorating note that cuts through the sweetness of the chocolate beautifully. They have this wonderful chewy texture in the center with just the slightest crisp around the edges, making every bite a little adventure. I’ve seen so many variations out there – some are super thin and crispy, others are more like brownies in cookie form. Mine? They’re the happy medium. They’re substantial enough to feel like a real treat, but not so dense that you feel weighed down. It’s essentially a classic chocolate cookie base, but with that special zing of peppermint that just elevates it to another level. It’s a flavor combination that’s both comforting and surprisingly sophisticated, all rolled into one irresistible package.
Why you’ll love
There are so many reasons why this recipe has become a staple in my kitchen, and I just know you’re going to fall in love with it too. First off, the flavor. Oh, the flavor! It’s that perfect balance – you get that deep, satisfying chocolate goodness, and then, just as you think you’ve tasted it all, that cool, refreshing mint comes in. It’s like a little wake-up call for your taste buds. I’ve tried other chocolate mint cookies, but they either end up too minty and taste like toothpaste, or the chocolate flavor gets lost. This recipe just nails it every single time.
Then there’s the simplicity. Seriously, you don’t need to be a master baker to whip these up. The ingredients are pretty standard pantry items, and the process is straightforward. It’s one of those recipes I can confidently make even when I’m feeling a bit rushed. I’ve even made them with my nieces and nephews, and they had a blast helping out (mostly with the decorating part, of course!).
And let’s talk cost-effectiveness. With the price of groceries these days, finding a recipe that delivers big on flavor without breaking the bank is a win-win. These cookies use simple, budget-friendly ingredients that give you maximum deliciousness for your dollar.
What I love most, though, is their versatility. They’re perfect with a glass of cold milk, amazing with a hot cup of coffee, and they even hold up beautifully when I make them for bake sales or potlucks. They’re just… always a hit. It’s that reliable, go-to recipe that never disappoints and always brings smiles. If you enjoy my chewy chocolate chip cookies or my What are some of the, I guarantee these chocolate mint cookies are going to be right up your alley.
How to Make Chocolate Mint Cookies
Quick Overview
This recipe is all about creating a wonderfully moist and intensely chocolatey cookie base, then infusing it with a delicate mint flavor, often enhanced with a swirl or a drizzle. We’ll mix our dry and wet ingredients separately, then combine them gently. The mint comes in through extracts or sometimes even crushed candies. The baking time is usually pretty quick, and the magic happens during cooling when the flavors really meld together. It’s designed to be straightforward, ensuring you get that perfect chewy texture and vibrant minty chocolate taste without a fuss.
Ingredients
For the Main Batter:
I always start with good quality unsalted butter, softened. It makes a huge difference in texture! You’ll need about 1 cup (2 sticks). Then, for sweetness and structure, 3/4 cup of granulated sugar and another 3/4 cup of packed light brown sugar. The brown sugar is key for that chewy texture. For the eggs, two large ones are perfect, at room temperature if you can remember – it helps them incorporate better. And for that deep chocolate flavor, a full cup of unsweetened cocoa powder. I swear by Dutch-processed cocoa for its richer, darker color and smoother taste. Don’t skip the all-purpose flour; 2 cups should do it. For leavening, 1 teaspoon of baking soda and 1/2 teaspoon of baking powder. And a good pinch of salt, about 1/2 teaspoon, to balance out all that sweetness.
For the Minty Flavor:
This is where the magic happens! You’ll need 1 to 2 teaspoons of pure peppermint extract. Start with 1 teaspoon and taste your batter – you can always add more! A little goes a long way, and you don’t want it to be overwhelmingly minty. If you’re feeling extra festive, a handful of crushed peppermint candies or mini chocolate mint chips can be stirred in too. I sometimes add these right at the end, just before scooping.
For the Optional Glaze:
If you like a little extra something-something, a simple glaze is wonderful. You’ll need about 1 cup of powdered sugar, 2-3 tablespoons of milk (or even a little cream for richness!), and another 1/2 teaspoon of peppermint extract. A drop of green food coloring is fun for visual appeal, especially around holidays, but it’s totally optional.
Step-by-Step Instructions
Step 1: Preheat & Prep Pan
First things first, get that oven preheating to 350 degrees Fahrenheit (175 degrees Celsius). While it’s heating up, grab your baking sheets. I like to line mine with parchment paper or silicone baking mats. This is a lifesaver for cleanup, trust me! It also helps prevent the cookies from sticking and ensures they bake evenly. Make sure your baking sheets are completely cool before you start placing Cookie Dough on them, otherwise, the cookies will start to spread too much right away.
Step 2: Mix Dry Ingredients
In a medium bowl, whisk together your flour, cocoa powder, baking soda, baking powder, and salt. Giving these a good whisk ensures that all the leavening agents and cocoa are evenly distributed. You don’t want pockets of unincorporated baking soda or uneven chocolate flavor! This step is super important for getting a consistent texture throughout your cookies.
Step 3: Mix Wet Ingredients
In a large bowl, cream together your softened butter and both sugars until the mixture is light and fluffy. This usually takes about 2-3 minutes with an electric mixer. Then, beat in the eggs, one at a time, making sure each is fully incorporated before adding the next. Stir in the vanilla extract and the peppermint extract. This is where you really get to smell that lovely minty aroma starting to develop!
Step 4: Combine
Now, gradually add the dry ingredients to the wet ingredients, mixing on low speed until just combined. Be careful not to overmix here! Overmixing can develop the gluten in the flour, leading to tough cookies. We want tender, chewy cookies, so stop mixing as soon as you no longer see streaks of dry flour. If you’re adding any mix-ins like chocolate chips or crushed candies, gently fold them in now with a spatula.
Step 5: Prepare Filling (Optional for Swirl Cookies)
If you’re making swirl cookies, this is the stage where you’d prepare a slightly different batter or a chocolate ganache to swirl in. For a simple swirl, you might take about half of the main batter, stir in a bit more cocoa powder and a touch more peppermint extract into it, maybe a tablespoon of milk to loosen it. Or, you could make a quick ganache by melting some chocolate chips with a little heavy cream.
Step 6: Layer & Swirl
Drop rounded spoonfuls of the main cookie dough onto your prepared baking sheets, leaving about 2 inches between them. If you’re swirling, then alternate dollops of your main dough and your swirl dough. Then, use a toothpick or a knife to gently swirl the two batters together. Don’t over-swirl; you want distinct ribbons of chocolate and mint, not a muddy mess. I learned that the hard way after my first attempt looked like a chocolate mud puddle!
Step 7: Bake
Bake for 10-12 minutes, or until the edges are set and the centers look slightly underbaked. They’ll continue to cook on the baking sheet as they cool. For chewy cookies, it’s better to err on the side of slightly underbaked than overbaked. Keep an eye on them, as oven temperatures can vary!
Step 8: Cool & Glaze
Let the cookies cool on the baking sheets for about 5 minutes before carefully transferring them to a wire rack to cool completely. If you’re glazing them, make sure they are fully cooled before you start. Whisk together the powdered sugar, milk, and peppermint extract until smooth. If it’s too thick, add a tiny bit more milk; if it’s too thin, add a little more powdered sugar. Drizzle or spread the glaze over the cooled cookies. Let the glaze set before storing.
Step 9: Slice & Serve
Once the glaze has set, these chocolate mint cookies are ready to be enjoyed! You can slice them with a sharp knife if they’re slightly larger, or just pick them up and savor them. They’re absolutely divine when they’re still a little warm from cooling, but they’re also fantastic at room temperature. I love arranging them on a pretty platter for guests, or just grabbing one (or two!) straight from the cooling rack when that late-night craving hits.
What to Serve It With
These chocolate mint cookies are so versatile, they fit in perfectly no matter the occasion. For breakfast, I love pairing them with a strong cup of coffee – the bitter notes of the coffee really complement the sweet chocolate and mint. They make a surprisingly delightful addition to a morning pastry spread if you’re feeling fancy.
For brunch, especially around the holidays, I’ll often arrange them on a tiered stand with other treats. They look beautiful next to lighter fruit tarts or scones. A glass of sparkling water with a hint of lime or a light prosecco also pairs wonderfully, offering a refreshing contrast.
As a dessert, they’re pure indulgence. They’re fantastic on their own, but if you want to go all out, serve them with a scoop of good quality vanilla bean Ice Cream or even a dark chocolate gelato. A small glass of port wine or a rich crème de menthe can be a decadent after-dinner pairing for the adults.
And for those cozy snack times? They’re absolute perfection. Just a simple glass of cold milk is my family’s favorite. Sometimes, if I’ve made them with the glaze, we’ll have them alongside some fresh berries – the tartness of the berries cuts through the richness of the cookie beautifully. They’re the ultimate comfort food when you need a little pick-me-up on a chilly afternoon. My grandma used to say they were like a little piece of heaven, and I have to agree!
Top Tips for Perfecting Your Chocolate Mint Cookies
I’ve been making these chocolate mint cookies for years, and through trial and error (and a few hilarious baking mishaps!), I’ve picked up a few tricks that I think make all the difference. So, listen up, because these are the secrets that’ll take your cookies from good to absolutely spectacular!
Cocoa Powder Choice: Don’t skimp on the cocoa powder quality. I always reach for Dutch-processed cocoa. It gives a deeper, richer chocolate flavor and a less bitter profile than natural cocoa. If you can only find natural, it’ll still work, but it might be slightly less intense. Make sure it’s sifted to avoid any lumps in your batter.
Extract Strength: Peppermint extract can be potent! I always recommend starting with 1 teaspoon and tasting the batter (before adding eggs, of course!). You can always add a tiny bit more if you want a stronger mint flavor. It’s much easier to add than to take away. Also, make sure you’re using *peppermint* extract, not spearmint, as they have different flavor profiles. Pure extract is always best.
The Art of Not Overmixing: This is probably the biggest tip I can give. Once you add the dry ingredients to the wet, mix *just* until combined. Seriously, a few streaks of flour are okay – they’ll disappear when you form the cookies. Overmixing develops the gluten, which results in tough, cakey cookies, and nobody wants that. We’re aiming for chewy perfection!
Chilling the Dough (Optional but Recommended): If you have the time, chilling the dough for at least 30 minutes (or even overnight!) before baking can really help. It allows the flavors to meld together, and it makes the dough easier to handle. Plus, it helps prevent the cookies from spreading too much in the oven, ensuring that nice thick, chewy center.
Baking Doneness: I always say that the sign of a perfectly baked chewy cookie is one that looks slightly underbaked in the center when you take it out of the oven. The residual heat on the baking sheet will continue to cook them. If they look completely done in the oven, they’ll likely be dry and crispy once cooled. So, trust the process and pull them out a minute or two early!
Glaze Consistency: For the glaze, think of it like pancake batter. It should be thick enough to coat the back of a spoon but thin enough to drizzle. If it’s too thick, add milk a *tiny* drop at a time. If it’s too thin, add powdered sugar a teaspoon at a time. A good drizzle looks beautiful, but a light spread works just as well and is less messy if you’re packing them to go.
Storing and Reheating Tips
One of the best things about these chocolate mint cookies is how well they store. They’re quite forgiving, which is a blessing!
Room Temperature Storage: If you’ve glazed them, let the glaze set completely (this usually takes about an hour). Then, store the cookies in an airtight container at room temperature. They’ll stay wonderfully fresh and chewy for about 3-4 days. I always make sure to place a piece of parchment paper between layers if I’m stacking them, especially if they’re glazed, to prevent sticking.
Refrigerator Storage: For longer storage, you can pop them in the refrigerator. Again, make sure they’re in an airtight container. They should keep well for up to a week. The texture might become a bit firmer when chilled, but they’ll soften up again at room temperature. This is also a great way to keep them from getting eaten too quickly!
Freezer Instructions: These cookies freeze beautifully, which is my secret weapon for always having a treat on hand. Once they’re completely cooled and the glaze (if used) is set, you can freeze them in a single layer on a baking sheet until solid, then transfer them to a freezer-safe bag or container. They’ll keep their quality for up to 2-3 months. For the best results, thaw them overnight in the refrigerator or on the counter.
Glaze Timing Advice: If you plan to freeze them *with* the glaze, I’d recommend glazing them *after* thawing. The glaze can sometimes get a little sticky or develop condensation in the freezer. If you don’t mind a slightly less pristine look, you can freeze them with the glaze, but letting them thaw completely before re-freezing is best. For cookies stored at room temp or in the fridge, glazing them after they’ve cooled completely is ideal.
Frequently Asked Questions
Final Thoughts
So there you have it – my absolute favorite chocolate mint cookies! I really hope you give them a try. They’re more than just a recipe to me; they represent those little moments of joy, shared laughter in the kitchen, and the pure comfort of a homemade treat. They’re the perfect balance of rich chocolate and refreshing mint, with a texture that’s just divine – chewy, soft, and utterly irresistible. They’re proof that you don’t need complicated steps or fancy ingredients to create something truly special.
If you find yourself loving the combination of chocolate and mint as much as I do, you might also enjoy my chocolate mint brownies or perhaps my double chocolate cookies for a pure chocolate indulgence.
I can’t wait to hear how yours turn out! Seriously, if you make these, please leave a comment below and let me know what you think. Did you add anything extra? Did your family devour them as quickly as mine does? Sharing your experiences makes my day! Happy baking, and enjoy every single bite!
Chocolate Mint Cookies
Ingredients
Main Ingredients
- 0.75 cup unsalted butter, softened
- 0.75 cup granulated sugar
- 0.75 cup packed brown sugar
- 2 large eggs
- 1 teaspoon vanilla extract
- 0.5 teaspoon peppermint extract
- 2.5 cups all-purpose flour
- 0.75 cup unsweetened cocoa powder
- 1 teaspoon baking soda
- 0.5 teaspoon salt
- 1 cup chocolate chips
- 0.5 cup peppermint candies, crushed
Instructions
Preparation Steps
- Preheat oven to 375°F (190°C). Line baking sheets with parchment paper.
- In a large bowl, cream together the softened butter, granulated sugar, and brown sugar until light and fluffy.
- Beat in the eggs one at a time, then stir in the vanilla extract and peppermint extract.
- In a separate bowl, whisk together the flour, cocoa powder, baking soda, and salt.
- Gradually add the dry ingredients to the wet ingredients, mixing until just combined.
- Stir in the chocolate chips and crushed peppermint candies.
- Drop rounded tablespoons of dough onto the prepared baking sheets.
- Bake for 10-12 minutes, or until the edges are set and the centers are still slightly soft.
- Let the cookies cool on the baking sheets for a few minutes before transferring them to a wire rack to cool completely.