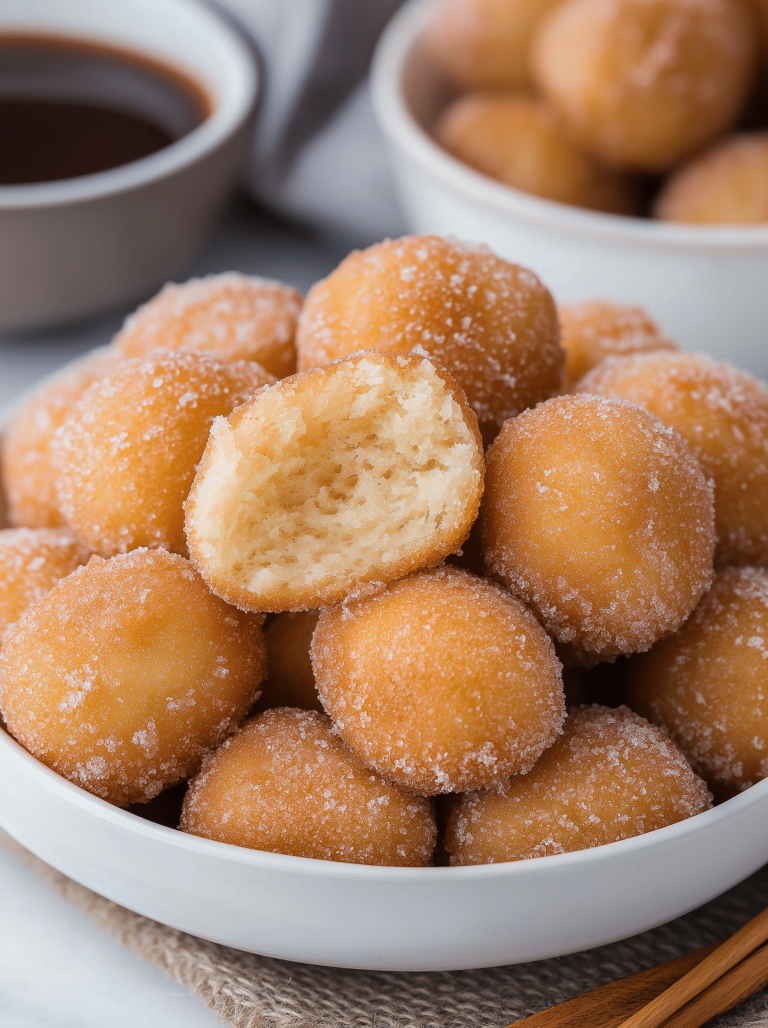
Oh, this chocolate lasagna. Just saying the name makes my heart do a little happy dance! It’s one of those recipes that feels like a secret weapon in my kitchen. You know those days when you’re absolutely craving something sweet, something decadent, something that just screams “comfort food,” but the thought of preheating the oven and all the fuss feels like too much? This is your lifesaver. Honestly, it’s probably one of the first recipes I ever truly mastered and it’s been a family favorite ever since. My kids, bless their little hearts, will ask for this chocolate lasagna specifically when they have friends over, or when they’ve had a good week at school. It’s that impressive, yet surprisingly simple. It reminds me a bit of my mom’s famous chocolate pudding, but with an extra layer of deliciousness that makes it feel truly special. If you love rich, creamy chocolate flavors without all the baking drama, you are going to adore this.
What is chocolate lasagna?
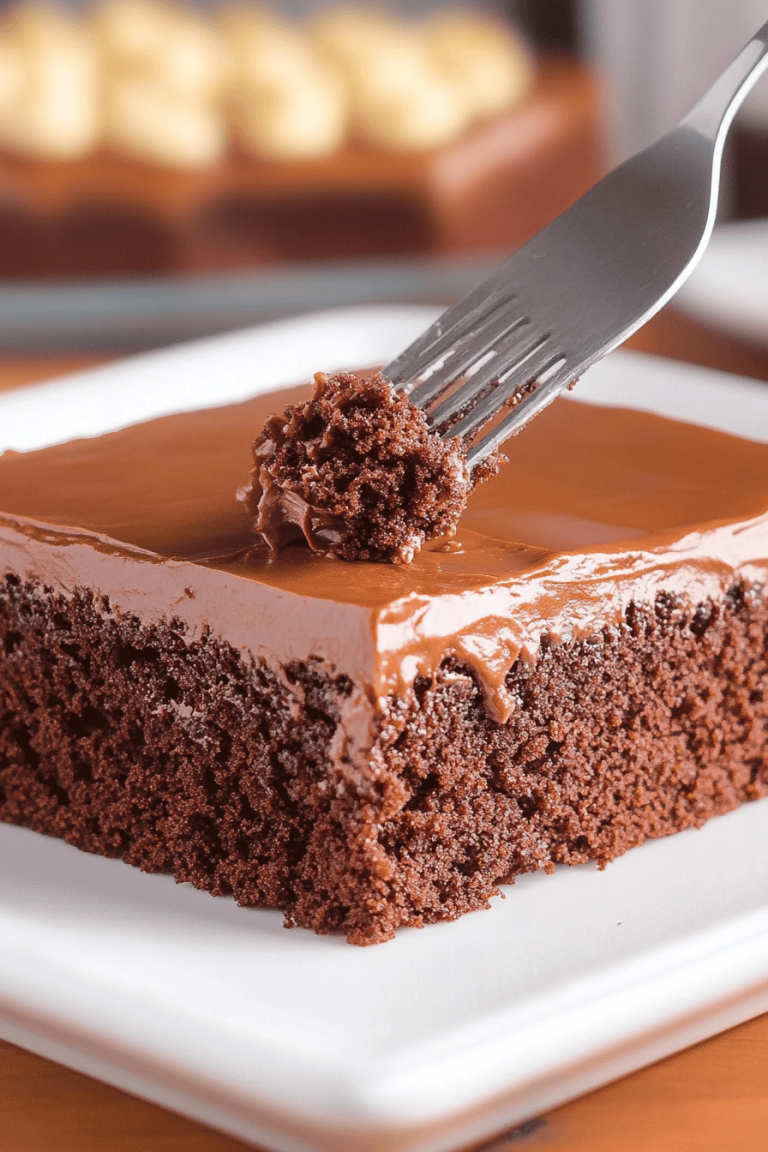
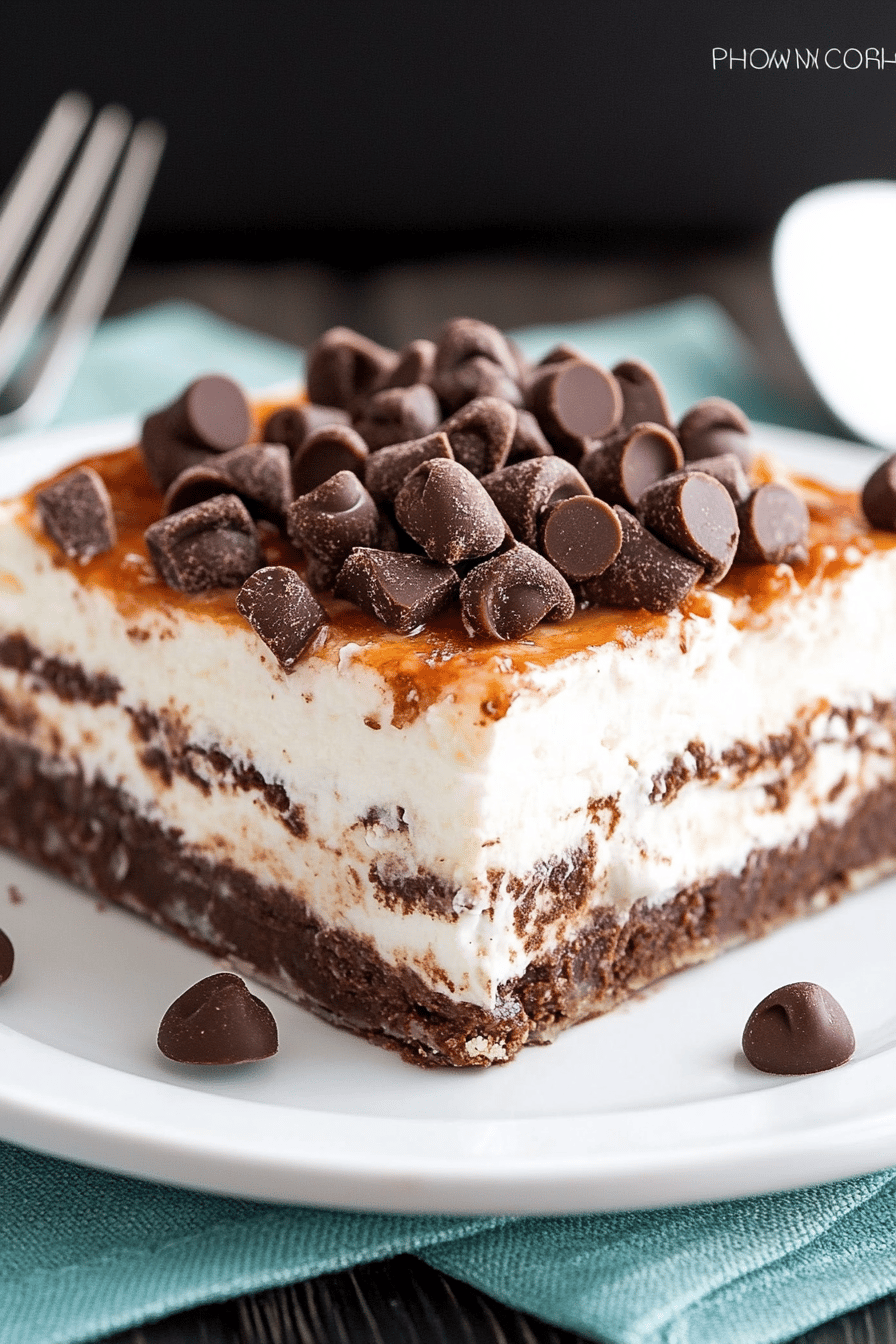
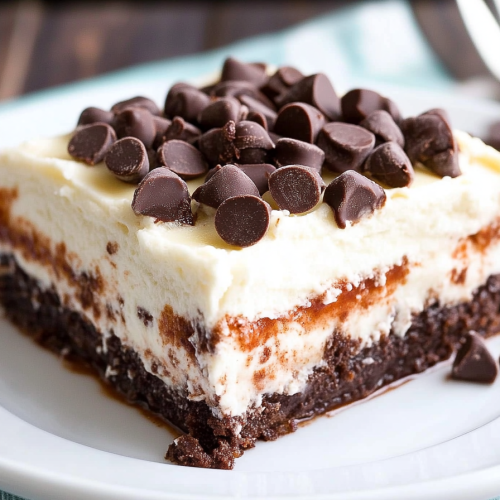
So, what exactly *is* chocolate lasagna? It sounds a bit unusual, right? Lasagna usually brings to mind savory layers of pasta, cheese, and sauce. But in this case, we’re taking that concept of layered deliciousness and giving it a glorious chocolate makeover. Think of it as a no-bake dessert that stacks up incredible chocolate flavors and textures. It’s essentially a symphony of creamy, rich, and slightly crunchy components, all piled high in a dish, much like you would layer ingredients for traditional lasagna. The “noodles” are often a cookie or graham cracker crust, the “ricotta” layer is a smooth, creamy cheesecake-like filling, and the “sauce” is a luscious chocolate pudding or ganache. It’s playful with the name, but the taste is anything but a joke – it’s pure, unadulterated chocolate bliss. It’s the kind of dessert that makes people’s eyes widen when they take their first bite.
Why you’ll love this recipe?
There are so many reasons why this chocolate lasagna has earned a permanent spot in my recipe binder, and I have a feeling it’ll do the same for you. First and foremost, the flavor. Oh my goodness, the flavor! It’s an intense, yet perfectly balanced chocolate experience. You get the deep, rich cocoa from the crust and pudding layers, a subtle tang from the creamy cheese filling, and sometimes a hint of vanilla that just ties it all together. It’s not overly sweet, which is something I really appreciate in a dessert. And then there’s the texture. You have that slightly crumbly, buttery cookie base, followed by the impossibly smooth, silky pudding, and then that wonderfully light and airy CREAM CHEESE layer. Each spoonful is a delightful contrast! What I love most, though, is the sheer simplicity of it. Seriously, no oven required! This is a total game-changer, especially during the warmer months when you don’t want to heat up the kitchen. I’ve found it to be incredibly budget-friendly too. The ingredients are all pantry staples or easy to find, so you can whip this up without breaking the bank. And talk about versatile! While it’s fantastic on its own, it’s also a blank canvas for your creativity. You can add different extracts to the cream cheese layer, swap out the cookie crust for something else entirely, or go wild with toppings. It’s the perfect dessert when you’re craving something special but don’t have hours to spend in the kitchen. It’s reliable, crowd-pleasing, and frankly, just plain delicious. This recipe stands out because it delivers that “wow” factor without any of the baking stress. It’s a win-win-win!
How do I make chocolate lasagna?
Quick Overview
This chocolate lasagna comes together in just a few simple steps, making it perfect for even the busiest of cooks. You’ll start by creating a delicious cookie crust, then whip up a creamy no-bake cheesecake layer, followed by a rich chocolate pudding, and finally, a decadent whipped topping. The beauty of this recipe is that it’s entirely no-bake, meaning you can assemble it ahead of time and let it chill in the fridge while you get on with your day. The only “cooking” involved is making the pudding, which is quick and easy. It’s so straightforward, you’ll be amazed at how professional it looks and tastes!
Ingredients
For the Chocolate Cookie Crust:
This is the foundation of our delicious chocolate lasagna, and you want it to be sturdy enough to hold all those lovely layers. I always use chocolate sandwich cookies – the kind with the creme filling – because they have the perfect balance of chocolatey crunch and a hint of sweetness from the filling. You’ll need about 36 cookies, which usually comes down to one standard package. For binding, unsalted butter is my go-to. Melted, of course! About 1/2 cup should do the trick to get that perfect crumbly yet firm consistency. Some people like to add a tablespoon of granulated sugar for extra crispness, but I find the cookie filling is sweet enough on its own.
For the Creamy Cheesecake Layer:
This is where that lovely tang and velvety smoothness comes in. You’ll need two blocks of cream cheese, softened to room temperature. This is crucial – if it’s cold, you’ll end up with lumps, and nobody wants lumpy cheesecake filling, right? I also like to add about 1/4 cup of powdered sugar just to sweeten it up a touch and ensure it’s silky smooth. A splash of vanilla extract (about 1 teaspoon) is a must for enhancing all those flavors. For that airy, lighter texture, I whip in about 1/2 cup of heavy whipping cream until it holds soft peaks. This makes the layer so delightful and not too dense.
For the Rich Chocolate Pudding Layer:
This is the heart of our chocolate lasagna! While you can certainly use a good quality store-bought chocolate pudding mix (the kind you just whisk with milk), I personally love making my own from scratch when I have a few extra minutes. It’s surprisingly easy and the flavor is so much deeper and richer. You’ll need cocoa powder (use a good Dutch-process one for that really dark color and smooth flavor), granulated sugar, cornstarch (for thickening), a pinch of salt to enhance the chocolate, and milk. About 3 cups of milk should give you the right amount. Some recipes add an egg yolk for extra richness, but I find it’s wonderfully decadent without it. A tablespoon of butter stirred in at the end makes it extra glossy and smooth.
For the Whipped Topping:
This final layer adds a light, fluffy contrast to the richness below. It’s as simple as whipping up some heavy cream with a touch of powdered sugar and a hint of vanilla until you get lovely, soft peaks. This is what you’ll spread on top just before serving. Some people like to add a few chocolate shavings or a dusting of cocoa powder over the top, which is always a lovely touch!
Step-by-Step Instructions
Step 1: Preheat & Prep Pan
Even though this is a no-bake dessert, we still need to prep our pan! I love using a 9×13 inch baking dish for this chocolate lasagna. It gives you plenty of room to spread out those gorgeous layers and makes for beautiful slices. Make sure it’s clean and dry. We don’t need to grease it since the crust will provide a barrier, but having it ready to go is key!
Step 2: Mix Dry Ingredients
For the crust, take your chocolate sandwich cookies and pulse them in a food processor until they are fine crumbs. If you don’t have a food processor, you can pop them into a sturdy zip-top bag and crush them with a rolling pin – it’s a bit more work but totally doable and quite therapeutic! You want them to be almost like coarse sand. If you’re adding that tablespoon of sugar, now’s the time to whisk it in with the cookie crumbs.
Step 3: Mix Wet Ingredients
Melt your unsalted butter in a small saucepan or in the microwave. You want it just melted, not boiling hot. Pour the melted butter over the cookie crumbs and stir with a fork until all the crumbs are moistened. It should look like wet sand, and when you squeeze a bit in your hand, it should hold its shape.
Step 4: Combine
Pour the buttered cookie crumbs into your prepared 9×13 inch baking dish. Use the bottom of a measuring cup or a flat-bottomed glass to firmly press the crumbs evenly across the bottom of the dish. Make sure to press down really well, especially along the edges, to create a compact crust. This step is important for preventing a crumbly base!
Step 5: Prepare Filling
Now for that luscious cheesecake layer! In a large bowl, beat the softened cream cheese with an electric mixer until it’s completely smooth and creamy. Add the powdered sugar and vanilla extract and beat again until well combined and smooth. In a separate bowl, whip the heavy cream until it forms soft peaks. Gently fold the whipped cream into the cream cheese mixture until just combined. You don’t want to overmix here. Spoon this creamy mixture evenly over the prepared cookie crust, spreading it out gently with an offset spatula or the back of a spoon.
Step 6: Layer & Swirl
Next up, the chocolate pudding! If you’re using a pudding mix, prepare it according to the package directions, using milk. If you’re making it from scratch, whisk together the cocoa powder, sugar, cornstarch, and salt in a medium saucepan. Gradually whisk in the milk until smooth. Cook over medium heat, stirring constantly, until the pudding thickens and comes to a boil. Let it boil for about a minute, stirring. Remove from heat and stir in the butter until melted and incorporated. Let the pudding cool slightly for about 5-10 minutes – you don’t want it piping hot, but not completely cold either, as it will be harder to spread. Pour the slightly cooled chocolate pudding evenly over the cream cheese layer. You can gently spread it with a spatula, but don’t worry about making it perfectly smooth; a few swirls are actually quite pretty!
Step 7: Bake
Since this is a no-Bake Recipe, there’s no baking involved! That’s the magic! All you need to do now is cover the dish tightly with plastic wrap or a lid.
Step 8: Cool & Glaze
Now for the hardest part: waiting! Place the covered chocolate lasagna in the refrigerator and let it chill for at least 4 hours, or preferably overnight. This allows all the layers to set up beautifully. Just before you’re ready to serve, prepare your whipped topping by whipping the heavy cream with powdered sugar and vanilla until soft peaks form. Spread this whipped topping evenly over the chilled chocolate pudding layer. You can add some chocolate shavings, cocoa powder, or even some fresh berries for decoration at this stage.
Step 9: Slice & Serve
Once the whipped topping is on, it’s time to slice and serve this magnificent chocolate lasagna! I find using a sharp knife dipped in hot water and wiped dry between cuts gives you the cleanest slices. Cut it into squares and serve immediately. It’s best enjoyed cold and chilled.
What to Serve It With
This chocolate lasagna is such a showstopper on its own, but I love playing around with what to pair it with, depending on the occasion. For a simple breakfast treat (yes, I’m one of those people!), a small sliver with a strong, hot cup of coffee is pure indulgence. The richness of the chocolate is balanced beautifully by the bitterness of the coffee. It’s a decadent way to start the day, and honestly, a little bit feels like a treat without being over the top. On a more festive brunch table, I like to elevate its presentation. I’ll often serve it with a few fresh raspberries or strawberries arranged artfully on top of the whipped cream. A light dusting of cocoa powder or some chocolate shavings also adds that extra touch of elegance. For a formal dessert setting, it’s lovely served with a dollop of crème fraîche or a drizzle of raspberry coulis on the side. The tartness of the fruit sauce cuts through the sweetness of the chocolate beautifully. And for those cozy nights in, when you just want something comforting and delicious? It’s perfect all by itself, maybe with a tall glass of cold milk. My family also loves when I add a sprinkle of sea salt on top of the whipped cream; it brings out the chocolate flavor even more and adds a lovely sweet-and-salty contrast. It’s a dessert that truly fits any mood or gathering!
Top Tips for Perfecting Your Chocolate Lasagna
Over the years, I’ve made this chocolate lasagna more times than I can count, and I’ve picked up a few tricks that I think really make a difference. When it comes to the cookie crust, make sure those crumbs are fine! If they’re too coarse, the crust can be a bit loose and crumbly. Pulsing them in a food processor is definitely the easiest way to get them uniform. Pressing it down firmly is also key – give it a good, solid pat-down so it holds together well. For the cheesecake layer, I cannot stress enough how important it is to use softened cream cheese. Cold cream cheese is the enemy of smooth fillings! Let it sit out on the counter for at least an hour, or even pop it in the microwave for 15-20 seconds on low power. When folding in the whipped cream, be gentle! You want to keep all that air you whipped into it. Overmixing will deflate it, making the layer denser than you want. For the pudding, whether you’re using a mix or making it from scratch, make sure it’s thick enough. If it’s too runny, it will seep into the other layers and make things messy. Cooking it a minute longer or adding a tiny bit more cornstarch (but be careful not to overdo it!) can help. Letting it cool slightly before spreading is important so it doesn’t melt the cream cheese layer. My absolute favorite tip for the swirling effect (if you choose to do it) is to dollop the pudding over the cream cheese layer in spoonfuls, and then use a toothpick or a knife to gently swirl them together. Don’t over-swirl, or you’ll lose the distinct layers! For ingredient swaps, if you can’t find chocolate sandwich cookies, Oreos are the classic choice, but chocolate graham crackers or even chocolate wafer cookies can work for the crust – you might need a bit more butter to bind them. If you’re out of heavy whipping cream for the cheesecake layer, full-fat sour cream can offer a similar tang, but the texture will be a bit denser. And for the whipped topping, if you’re looking for something stable that can sit out longer, Cool Whip is a common substitute, though I personally prefer the fresh cream taste. Always taste as you go – especially the pudding and whipped topping – to adjust sweetness to your preference. This recipe is so forgiving, but these little tweaks can really elevate it from good to absolutely phenomenal!
Storing and Reheating Tips
This chocolate lasagna is honestly at its best when it’s well-chilled, so storing it properly is key to maintaining that wonderful texture and flavor. If you have any leftovers (which is rare in my house!), the best place for them is the refrigerator. Cover the dish tightly with plastic wrap or a lid to prevent it from absorbing any odors from other foods in the fridge. It will stay delicious in the refrigerator for about 3 to 4 days. The layers tend to firm up even more as it chills, which is a good thing! I’ve tried freezing portions, and it actually holds up surprisingly well, though the texture of the whipped topping might change slightly after thawing. If you want to freeze it, make sure the entire lasagna is well-wrapped in plastic wrap and then in aluminum foil, or placed in an airtight freezer-safe container. It can be frozen for up to 2 months. To thaw, transfer it from the freezer to the refrigerator and let it chill overnight. Since it’s a no-bake dessert, there’s no “reheating” in the traditional sense. You just want to ensure it’s properly chilled before serving. The key is making sure the pudding layer is fully set. If for some reason your pudding layer seems a little soft after chilling, you can try gently spreading a bit more whipped cream or even a simple chocolate ganache over the top to help it firm up before slicing.
Frequently Asked Questions
Final Thoughts
There you have it – my absolute favorite chocolate lasagna! I truly believe this recipe is a treasure. It’s the perfect blend of rich chocolate flavor, creamy textures, and that satisfying crunch from the cookie crust, all without turning on your oven. It’s the kind of dessert that makes people feel special, whether you’re serving it at a big family gathering or just enjoying a quiet moment with a loved one. It’s so forgiving and adaptable, making it perfect for bakers of all levels. If you enjoyed this recipe and are looking for more easy, decadent treats, you might also love my No-Bake Chocolate Mousse or my Easiest Ever Brownies. I can’t wait to hear how your chocolate lasagna turns out! Please leave a comment below and let me know your thoughts, or share any fun variations you tried. Happy baking (or in this case, happy no-baking!)!
chocolate lasagna
Ingredients
Chocolate Pastry
- 1.5 cups all-purpose flour
- 0.5 cup unsweetened cocoa powder
- 0.25 cup granulated sugar
- 0.5 teaspoon salt
- 0.5 cup unsalted butter, cold and cubed
- 0.25 cup ice water
Cream Cheese Filling
- 16 oz cream cheese, softened
- 0.75 cup powdered sugar
- 1 teaspoon vanilla extract
- 2 large eggs
Chocolate Pudding Layer
- 3.4 oz instant chocolate pudding mix
- 2 cups milk
Toppings
- 1 cup whipped cream for serving
- 0.5 cup chocolate shavings for garnish
Instructions
Preparation Steps
- Preheat oven to 350°F (175°C). Grease and flour a 9x13 inch baking dish.
- In a large bowl, whisk together flour, cocoa powder, sugar, and salt. Cut in cold butter with a pastry blender or your fingertips until the mixture resembles coarse crumbs.
- Gradually add ice water, 1 tablespoon at a time, mixing until the dough just comes together. Do not overmix.
- Press the dough evenly into the bottom of the prepared baking dish to form the crust.
- Bake the crust for 15 minutes. Remove from oven and let cool slightly.
- In a medium bowl, beat cream cheese, powdered sugar, and vanilla extract until smooth.
- Beat in the eggs one at a time until just combined.
- Pour the cream cheese mixture evenly over the baked crust.
- In a separate bowl, whisk together the instant chocolate pudding mix and milk until thickened. Let it sit for a few minutes.
- Carefully spoon the chocolate pudding mixture over the cream cheese layer.
- Bake for 25-30 minutes, or until the edges are set and the center is slightly jiggly.
- Let the lasagna cool completely on a wire rack, then refrigerate for at least 2 hours before serving.
- Serve chilled, topped with whipped cream and chocolate shavings.