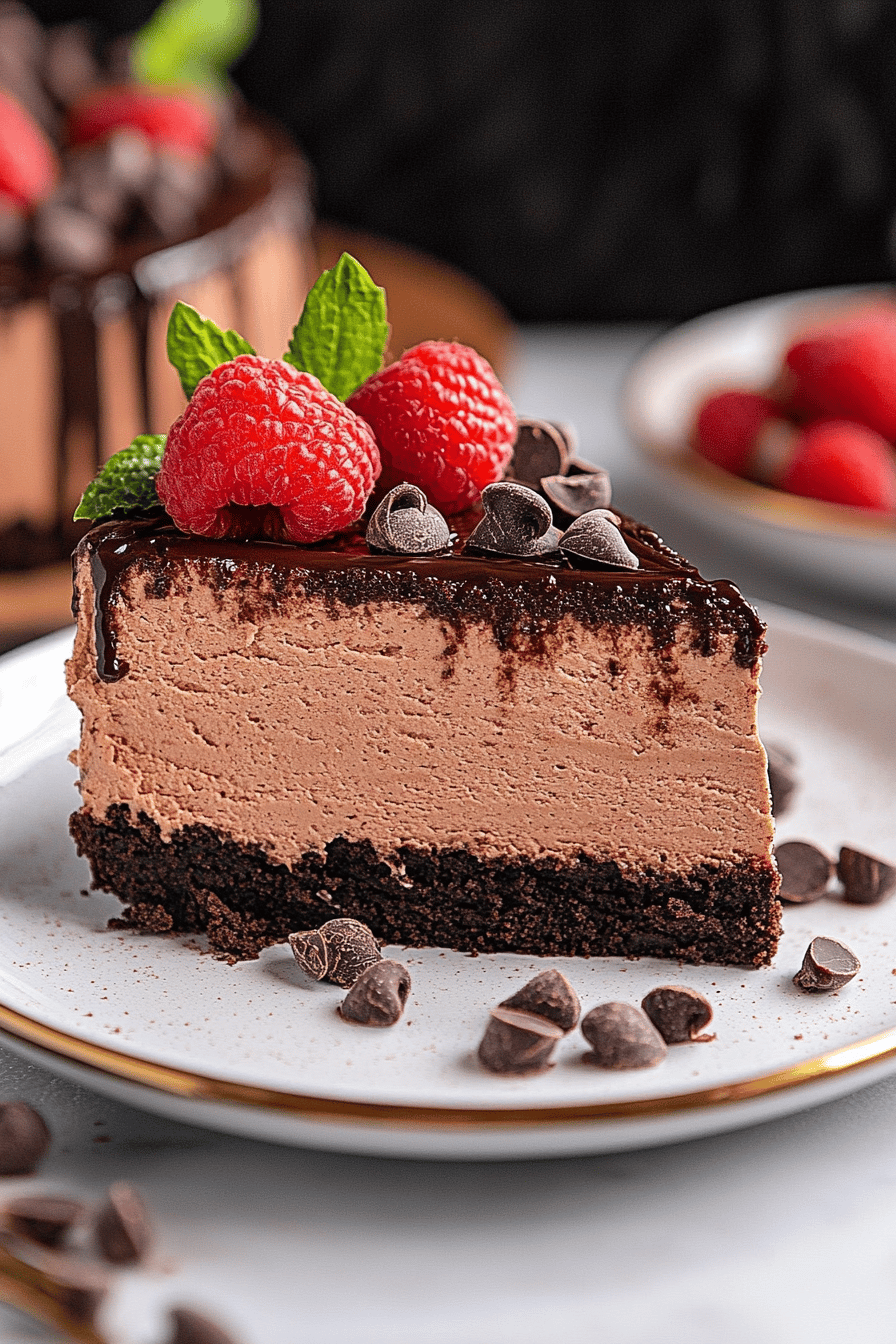
There are some recipes that just feel like home, aren’t there? The ones that, when you smell them baking, transport you back to your childhood kitchen, or instantly make a regular Tuesday feel like a special occasion. For me, that recipe, hands down, is this chocolate cheesecake. It’s not just a dessert; it’s a memory maker. Every time I pull this beauty out of the oven, I’m reminded of my grandma, her flour-dusted apron, and the sheer joy on everyone’s faces when she’d slice into one. It’s rich, it’s decadent, and honestly, it’s ridiculously easy once you get the hang of it. If you’ve ever thought cheesecake was too fussy or too complicated, let me tell you, this chocolate cheesecake is going to change your mind faster than you can say “second slice, please!” It’s every bit as good, if not better, than those fancy restaurant versions, but with that special handmade touch. You know, the kind that makes your taste buds sing and your heart feel full.
What is chocolate cheesecake?
So, what exactly makes this chocolate cheesecake so special? Well, think of it as the ultimate marriage between a classic creamy cheesecake and your deepest, darkest chocolate cravings. It’s got that luscious, melt-in-your-mouth texture that you expect from a really good cheesecake, but it’s infused with a deep, satisfying chocolate flavor that isn’t too sweet. The base is a simple, buttery graham cracker crust (though sometimes I mix in some crushed Oreos if I’m feeling extra decadent!), and the filling is where the magic really happens. It’s a smooth, rich custard, packed with good quality cocoa powder and melted chocolate. It’s not a light and airy mousse; it’s got substance, that satisfying density that tells you you’re about to enjoy something truly indulgent. It’s essentially the comfort food of the dessert world, elevated. The name itself, “Chocolate Cheesecake,” perfectly captures its essence – it’s direct, it promises pure chocolatey bliss, and it delivers every single time.
Why you’ll love this recipe?
Honestly, there are so many reasons why I’ve come to adore this chocolate cheesecake and why I’m so excited to share it with you! Firstly, the flavor is just out of this world. It’s got this deep, complex chocolate taste that’s not overpowering, thanks to using both cocoa powder and melted dark chocolate. It’s the perfect balance of rich, creamy, and just a *hint* of tang from the CREAM CHEESE that cuts through the richness beautifully. You get that satisfyingly smooth texture that coats your tongue, and the subtle chocolate aroma filling your kitchen is just divine. Secondly, and this is a big one for me, it’s surprisingly simple to make. I know, I know, cheesecake can sound intimidating, but this recipe has been streamlined over years of making it. I’ve found the easiest way to get that perfect creamy texture without any fuss. Most of the ingredients are pantry staples, too, which makes it super cost-efficient. You don’t need fancy, hard-to-find items to make something this spectacular. Plus, it’s incredibly versatile! I’ll get to that more later, but you can dress it up or down depending on the occasion. What I love most about this particular chocolate cheesecake recipe is that it feels incredibly special without requiring a whole day in the kitchen. It’s my go-to for birthdays, holidays, or even just when a serious chocolate craving hits after dinner.
How do I make chocolate cheesecake?
Quick Overview
In a nutshell, making this divine chocolate cheesecake involves whipping up a simple crust, mixing a luscious chocolate filling, baking it gently, and then letting it work its magic as it cools. The key is patience during the cooling process – that’s where the true cheesecake magic happens! We’ll combine our ingredients carefully to ensure that super smooth texture and then bake it in a water bath (don’t worry, it’s easier than it sounds!) to achieve that perfect, creamy consistency. It’s a straightforward process that yields jaw-dropping results, proving that gourmet desserts can absolutely be made at home.
Ingredients
For the Crust:
2 cups graham cracker crumbs (about 14-16 full graham crackers, crushed fine)
1/4 cup granulated sugar
1/2 cup (1 stick) unsalted butter, melted
For the Filling:
3 (8-ounce) packages cream cheese, softened to room temperature
1 1/4 cups granulated sugar
1/4 cup unsweetened cocoa powder, good quality!
1 teaspoon vanilla extract
1/2 teaspoon salt
3 large eggs, at room temperature
4 ounces semi-sweet or bittersweet chocolate, melted and slightly cooled
For the Glaze:
1/2 cup semi-sweet or bittersweet chocolate chips
2 tablespoons heavy cream
Step-by-Step Instructions
Step 1: Preheat & Prep Pan
First things first, get that oven preheating to 325°F (160°C). You’ll need a 9-inch springform pan for this. I always like to lightly grease the sides of mine, even though it’s a springform. Then, wrap the *outside* of the springform pan tightly with a couple of layers of heavy-duty aluminum foil. This is super important if you’re planning on using a water bath, which I highly recommend for the smoothest, creamiest cheesecake. It prevents any water from seeping into your crust. Place the foil-wrapped pan inside a larger baking pan, like a roasting pan.
Step 2: Mix Dry Ingredients
In a medium bowl, combine your graham cracker crumbs and the 1/4 cup of granulated sugar. Give it a good stir with a fork or whisk until everything is nicely incorporated. This is where you can also add in about 1/4 cup of finely crushed chocolate cookies if you want an extra chocolatey crust, but it’s totally optional! The sugar helps to bind the crumbs and adds a little sweetness to the base.
Step 3: Mix Wet Ingredients
In a large bowl, using an electric mixer (a stand mixer with the paddle attachment works best, but a hand mixer is perfectly fine), beat the softened cream cheese on medium speed until it’s completely smooth and creamy. This usually takes about 2-3 minutes. Scrape down the sides and bottom of the bowl to make sure there are no lumps. Gradually add the 1 1/4 cups of granulated sugar and the cocoa powder. Beat again until everything is well combined and smooth. Then, stir in the vanilla extract and salt. Make sure you use unsweetened cocoa powder – it gives you more control over the sweetness and a deeper chocolate flavor!
Step 4: Combine
Now, it’s time for the eggs. Add them one at a time, beating on low speed just until each egg is incorporated. It’s really important not to overmix at this stage! Overmixing can incorporate too much air, which can lead to cracks. After the eggs are mixed in, gently fold in the melted and slightly cooled chocolate using a spatula until just combined. You want it to be smooth and uniform, but don’t keep beating it.
Step 5: Prepare Filling
The filling is already prepared in Step 4! The key here is to ensure your cream cheese and eggs are at room temperature. This helps everything emulsify beautifully and creates that super smooth, dense texture we’re after. If your cream cheese is cold, your filling might end up lumpy, and nobody wants that!
Step 6: Layer & Swirl
Pour about half of the chocolate filling into your prepared crust. Then, gently spoon the remaining half of the filling over the top. At this point, you can create a beautiful marbled effect by running a knife or skewer through the filling in a swirling motion. Don’t overdo it – just a few gentle swirls will create a lovely pattern. If you’re not into the marbling, you can just smooth the top of the filling evenly. The goal is a beautiful, smooth surface that will bake up perfectly.
Step 7: Bake
Carefully place the larger pan (with the springform pan inside) onto the oven rack. Then, slowly and carefully pour about 2 cups of hot water into the larger pan, creating a water bath around the cheesecake. Make sure the water doesn’t splash into the cheesecake! Bake for 55-70 minutes. The edges should look set, but the center will still be slightly wobbly. This is exactly what you want! It will continue to set as it cools. You can test for doneness by gently shaking the pan; the center 2-3 inches should jiggle like Jell-O, not slosh.
Step 8: Cool & Glaze
Once baked, turn off the oven, crack the oven door open slightly (prop it with a wooden spoon), and let the cheesecake cool in the oven for 1 hour. This slow cooling process is crucial for preventing cracks. After an hour, remove the cheesecake from the oven and let it cool completely on a wire rack. Once it’s at room temperature, cover it loosely with plastic wrap and refrigerate for at least 6 hours, or preferably overnight. For the glaze, gently heat the chocolate chips and heavy cream in a microwave-safe bowl in 30-second intervals, stirring in between, until smooth. Or, you can melt them in a small saucepan over low heat. Let the glaze cool slightly, then drizzle it over the chilled cheesecake. The glaze adds a beautiful sheen and an extra layer of chocolatey goodness.
Step 9: Slice & Serve
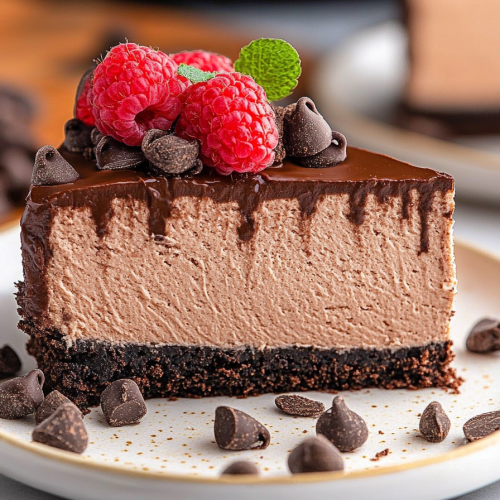
To slice, dip a sharp knife into hot water, wipe it dry, and then cut. Repeat this between each slice for the cleanest cuts. Serve chilled. This chocolate cheesecake is pure decadence on its own, but a dollop of whipped cream or a few fresh berries can be lovely accompaniments!
What to Serve It With
This chocolate cheesecake is so versatile, it’s practically a chameleon! For a truly decadent breakfast, imagine a small slice alongside a strong, hot cup of coffee. The richness of the cheesecake paired with the bitterness of the coffee is a match made in heaven. I love serving it with a dusting of cocoa powder or even a sprinkle of flaky sea salt on top for that sweet-and-salty magic. For a more elegant brunch, consider serving it with a side of fresh berries like raspberries or strawberries; their tartness cuts through the richness beautifully. A little swirl of crème fraîche or a light dusting of powdered sugar can also elevate its presentation. As a dessert, it’s a showstopper on its own. But if you want to go all out, a warm raspberry coulis or a scoop of vanilla bean Ice Cream makes it truly unforgettable. My kids, bless their hearts, often just want a simple, generous slice as is for dessert, and I can’t blame them! It’s perfect for those cozy evenings when you just want something warm and comforting. A glass of milk, a good book, and a thick slice of this chocolate cheesecake? Pure bliss.
Top Tips for Perfecting Your Chocolate Cheesecake
Over the years, I’ve learned a few little tricks that I think make all the difference when it comes to getting that perfect chocolate cheesecake every time. First, and I can’t stress this enough, make sure your cream cheese is genuinely at room temperature. I mean, *really* soft. If it’s even a little bit cool, you’ll struggle to get it perfectly smooth, and lumps are the enemy of a great cheesecake. I’ve learned to leave mine out for at least 2-3 hours. When you’re mixing the filling, resist the urge to beat it on high speed once the eggs are in. Just gentle mixing is key to a crack-free, smooth cheesecake. I’ve definitely had my share of cracked cheesecakes in the past, and it usually came down to overmixing or too drastic a temperature change during baking or cooling. The water bath is your best friend here! Don’t skip it. Even though it seems a bit fussy, it creates a moist, even cooking environment that’s absolutely crucial. I used to try to get away without it, and let’s just say the results were… educational. For the glaze, if you find it’s too thick, just stir in another tiny splash of cream. If it’s too thin, let it sit for a few minutes longer, or add a few more chocolate chips. It’s all about getting that perfect drizzly consistency. And don’t be afraid to experiment with the chocolate! I’ve used dark chocolate, semi-sweet, and even a mix of both. The darker the chocolate, the richer the flavor. Just make sure it’s good quality – it really does make a difference.
Storing and Reheating Tips
This chocolate cheesecake is fantastic for making ahead of time, which is a lifesaver! Once it’s completely cooled and glazed, you can store it at room temperature for a few hours if you plan to serve it soon. However, for longer storage, it’s best to keep it in the refrigerator. Cover it tightly with plastic wrap or transfer it to an airtight container. It will stay delicious in the fridge for up to 4-5 days. The flavors actually meld and deepen as it sits, so it’s often even better on the second day! If you need to store it for longer, freezing is a great option. I usually freeze slices rather than the whole cheesecake, as it’s easier to thaw just what you need. Wrap each slice very well in plastic wrap, then in aluminum foil, and pop them into a freezer-safe bag or container. It can stay frozen for up to 2-3 months. To thaw, unwrap the slices and let them thaw in the refrigerator overnight. If you’ve glazed your cheesecake, the glaze usually holds up well to refrigeration and thawing. If you’re freezing before glazing, just glaze it once it’s thawed. I usually don’t reheat cheesecake; it’s best served chilled or at room temperature. The texture is just perfect that way!
Frequently Asked Questions
Final Thoughts
So there you have it – my go-to recipe for the most divine chocolate cheesecake. It’s a recipe that brings so much joy to my table, and I truly hope it brings the same to yours. It’s proof that you don’t need to be a pastry chef to create something truly spectacular. The combination of rich chocolate, creamy texture, and that familiar graham cracker crust is simply irresistible. This chocolate cheesecake is more than just a dessert; it’s an experience, a little slice of happiness that’s perfect for celebrating, comforting, or just because. If you enjoyed this, you might also love my decadent brownies or my classic New York Cheesecake Recipe – they’re favorites for similar reasons! I can’t wait to hear what you think and see your beautiful creations. Happy baking, and may your cheesecakes be ever so smooth!
Decadent Chocolate Cheesecake
Ingredients
Crust
- 2.5 cups chocolate cookie crumbs
- 6 tablespoons butter, melted
- 2 tablespoons granulated sugar
Cheesecake Filling
- 32 ounces cream cheese, softened
- 1.5 cups granulated sugar
- 4 large eggs
- 1 cup sour cream
- 0.5 cup unsweetened cocoa powder
- 1 teaspoon vanilla extract
- 0.25 cup heavy cream
Instructions
Preparation Steps
- Preheat oven to 350°F (175°C).
- In a medium bowl, combine chocolate cookie crumbs, melted butter, and sugar. Press mixture firmly into the bottom of a 9-inch springform pan.
- Bake for 10 minutes. Let cool while preparing the filling.
- In a large bowl, beat cream cheese and sugar until smooth. Beat in eggs one at a time, mixing well after each addition.
- Stir in sour cream, cocoa powder, vanilla extract, and heavy cream until just combined.
- Pour filling over the cooled crust. Smooth the top.
- Bake for 50-60 minutes, or until the center is set but still slightly jiggly.
- Turn off the oven and let the cheesecake cool in the oven with the door ajar for 1 hour. This helps prevent cracking.
- Remove from oven and let cool completely on a wire rack. Then, cover and refrigerate for at least 4 hours, or preferably overnight.
- Before serving, carefully run a knife around the edge of the pan and remove the springform ring.