There are certain recipes that just feel like home, aren’t there? For me, it’s this chocolate cake. Not just any chocolate cake, mind you, but the one that smells like pure happiness when it’s baking, the one that yields the most incredibly moist crumb, and the one that can be whipped up on a whim when a serious chocolate craving strikes. I’ve tried a gazillion chocolate cake recipes over the years, from fancy layered creations to quick mug cakes, but this particular chocolate Cake Recipe is my absolute, hands-down, keeper. It’s the one I bring to potlucks, the one my kids always ask for, and the one that seems to make even the most stressful days feel a little bit brighter. If you’ve ever found yourself staring longingly at a bakery display, wishing you could recreate that fudgy, decadent magic at home without a ton of fuss, then you’re in for a treat. This is that recipe. It’s basically a hug in cake form, and I’m so excited to share it with you.
What is the ultimate chocolate cake?
So, what makes this chocolate Cake Recipe so special, you ask? Well, it’s essentially my perfected, no-fail, incredibly delicious chocolate cake. I call it the “Ultimate Chocolate Cake Recipe” because it’s the culmination of all my baking adventures and misadventures. Think of it as your dependable, go-to cake for absolutely any occasion, or for no occasion at all! It’s not overly complicated, but it delivers a richness and depth of flavor that rivals anything you’d buy. It’s moist, it’s tender, and it’s unapologetically chocolatey. The beauty of this recipe is its simplicity and its incredible adaptability. It’s the kind of cake that makes you feel like a baking superstar, even if you’re a complete beginner. It’s a true classic, elevated just enough to be truly unforgettable, but still approachable enough for a Tuesday afternoon bake.
Why you’ll love this recipe?
Honestly, I could sing the praises of this chocolate cake recipe all day long, but let me break down the highlights for you. First and foremost, the flavor. Oh my goodness, the flavor! It’s intensely chocolatey without being bitter, thanks to a perfect balance of cocoa powder and a little secret ingredient I’ll share later. The texture is also a huge win. It’s so unbelievably moist and tender, like, melt-in-your-mouth tender. You know those cakes that can be a little dry? This one is the absolute opposite. It stays wonderfully moist for days, which is a huge bonus in my book. And speaking of bonuses, it’s surprisingly budget-friendly too! Most of the ingredients are pantry staples, so you don’t need to break the bank to make something truly spectacular. What I love most about this recipe, though, is its versatility. It’s fantastic on its own, but it’s also the perfect canvas for all sorts of frostings and toppings. It’s a lifesaver when you need a showstopper dessert without hours in the kitchen. Honestly, it’s the chocolate cake I always come back to because it just delivers, every single time. It’s far superior to your average box mix and so much easier than some of those super complicated French patisserie-style cakes. It’s that perfect sweet spot of deliciousness and ease.
How do I make a chocolate cake?
Quick Overview
Making this chocolate cake is a breeze, truly! You’ll basically mix your dry ingredients, whisk together your wet ingredients, combine them gently, and then bake. The result? A deeply flavorful, incredibly moist cake that will have everyone asking for the recipe. It’s designed to be straightforward, minimizing fuss and maximizing chocolatey goodness. Trust me, the hardest part will be waiting for it to cool!
Ingredients
For the Main Batter:
- 2 cups all-purpose flour
- 1 ¾ cups granulated sugar
- ¾ cup unsweetened cocoa powder (I prefer Dutch-processed for a richer flavor, but natural works too!)
- 1 ½ teaspoons baking soda
- 1 teaspoon baking powder
- 1 teaspoon salt
- 2 large eggs, at room temperature
- 1 cup buttermilk, at room temperature (if you don’t have buttermilk, just add 1 tablespoon of lemon juice or white vinegar to 1 cup of milk and let it sit for 5 minutes)
- ½ cup vegetable oil (or any neutral-flavored oil like canola or sunflower)
- 2 teaspoons vanilla extract
- 1 cup hot brewed coffee (this is the secret weapon for intensifying chocolate flavor!)
For the Filling (Optional, but highly recommended!):
- ½ cup (1 stick) unsalted butter, softened
- 1 ½ cups powdered sugar
- ⅓ cup unsweetened cocoa powder
- ¼ cup milk (or cream for extra richness)
- 1 teaspoon vanilla extract
For the Glaze (My absolute favorite part!):
- 4 ounces semi-sweet chocolate, finely chopped
- ½ cup heavy cream
- 1 tablespoon unsalted butter
- Pinch of salt
Step-by-Step Instructions
Step 1: Preheat & Prep Pan
First things first, get your oven preheating to 350°F (175°C). I usually line the bottom of my cake pans (two 8-inch or 9-inch rounds) with parchment paper and then grease and flour the sides. This is a crucial step to prevent any sticking and ensure your beautiful cakes come out in one piece. If you’re using a dark-colored pan, you might want to reduce the oven temperature by about 25 degrees Fahrenheit, as they tend to bake hotter.
Step 2: Mix Dry Ingredients
In a large mixing bowl, whisk together the flour, sugar, cocoa powder, baking soda, baking powder, and salt. Give it a good whisk to make sure everything is evenly distributed and there are no clumps of cocoa powder. This is important for an even bake and consistent flavor throughout your cake.
Step 3: Mix Wet Ingredients
In a separate medium bowl, whisk together the eggs, buttermilk, oil, and vanilla extract. Make sure your eggs and buttermilk are at room temperature; this helps everything emulsify beautifully and creates a smoother batter.
Step 4: Combine
Pour the wet ingredients into the bowl with the dry ingredients. Mix on low speed (or whisk gently by hand) until just combined. Don’t overmix here! Overmixing develops the gluten too much, which can lead to a tough cake. Once it’s *almost* combined, slowly pour in the hot brewed coffee. The batter will be quite thin, and that’s perfectly normal! It might seem unusual, but this is what gives the cake its incredible moisture and deep chocolate flavor.
Step 5: Prepare Filling
If you’re making the filling, beat the softened butter in a medium bowl until creamy. Gradually add the powdered sugar and cocoa powder, alternating with the milk, until you have a smooth, spreadable consistency. Stir in the vanilla extract. This is a simple buttercream-style filling that adds an extra layer of decadence.
Step 6: Layer & Swirl
Divide the batter evenly between your prepared cake pans. If you’re using the filling, dollop spoonfuls of it over the batter in each pan. Then, using a knife or skewer, gently swirl the filling into the batter. Don’t over-swirl; you want pockets of filling, not a completely blended mix. This step adds a delightful surprise of fudginess within the cake.
Step 7: Bake
Bake for 30-35 minutes, or until a wooden skewer inserted into the center comes out clean or with a few moist crumbs attached. Keep an eye on it, as oven temperatures can vary. The cake should spring back lightly when gently touched.
Step 8: Cool & Glaze
Let the cakes cool in their pans for about 10-15 minutes before inverting them onto a wire rack to cool completely. While the cakes are cooling, prepare the glaze. Heat the heavy cream in a small saucepan until just simmering. Pour it over the chopped chocolate in a heatproof bowl. Let it sit for a minute, then whisk until smooth. Stir in the butter and salt until fully incorporated. It should be a glossy, pourable consistency. Once the cakes are completely cool, pour the glaze over the top, letting it drip down the sides. This glaze is pure magic!
Step 9: Slice & Serve
Once the glaze has set slightly, slice the cake and serve. It’s best at room temperature, but honestly, it’s amazing anytime!
What to Serve It With
This chocolate cake recipe is so versatile, it fits into any meal or occasion! Here are some of my favorite ways to enjoy it:
For Breakfast: Don’t knock it till you try it! A thin slice of this chocolate cake with a good cup of coffee is surprisingly delightful for a weekend treat. It’s less heavy than a full dessert slice and feels like a special indulgence to start the day. I sometimes even toast a slice lightly, which gives it a wonderful chewy texture.
For Brunch: Serve a slightly larger slice with a dollop of fresh whipped cream and a scattering of fresh berries. It looks so elegant on a brunch table and pairs beautifully with mimosas or a strong coffee. It’s a sweet ending that’s not too overwhelming after a spread of savory dishes.
As Dessert: This is its natural habitat! Serve it warm with a scoop of vanilla bean Ice Cream or a drizzle of raspberry sauce. For a more decadent experience, a rich chocolate ganache frosting is divine, or simply dust with a little extra powdered sugar for a simpler, yet still sophisticated, finish.
For Cozy Snacks: Anytime I need a pick-me-up, a slice of this cake with a cold glass of milk is pure comfort. It’s perfect for those late-night cravings when you don’t want to bake something elaborate. My kids practically inhale it with milk after school – it’s a weekly ritual!
My family has a tradition of making this cake for “half-birthdays” – you know, those random days in the year that just call for cake. It’s become our little inside joke and a delicious reminder that any day is a good day for chocolate cake.
Top Tips for Perfecting Your Chocolate Cake
I’ve made this chocolate cake recipe more times than I can count, and over the years, I’ve picked up a few tricks that I think you’ll find really helpful. These are the little things that can take your cake from good to absolutely phenomenal.
Zucchini Prep: While this recipe doesn’t use zucchini (that’s a different amazing cake!), I’ve found that using room temperature ingredients for *any* Cake Batter is crucial. Eggs and dairy incorporate much better when they aren’t cold, leading to a smoother, more consistent batter and a lighter cake. So, remember to take your eggs and buttermilk out of the fridge a bit before you start.
Mixing Advice: The most important thing is not to overmix the batter once you add the flour. Mix just until the streaks of flour disappear. A few tiny lumps are okay! Overmixing develops gluten, which can make your cake tough and dense, and we absolutely don’t want that here. A gentle hand is key for that tender crumb.
Swirl Customization: If you’re adding the optional filling, don’t go overboard with swirling. You want distinct ribbons of that fudgy center, not a uniform texture. A few gentle drags with a knife are all you need. If you want to get fancy, you can even add a pinch of espresso powder to the batter for an even deeper chocolate flavor, or a few chocolate chips!
Ingredient Swaps: If you’re out of buttermilk, the milk-and-vinegar trick is a lifesaver and works just as well! For the oil, any neutral-flavored oil is fine, but I’ve even experimented with melted coconut oil (cooled slightly) and it added a lovely subtle flavor. For the coffee, if you’re not a coffee drinker, strong hot brewed tea or even just hot water will work, though coffee really does enhance the chocolate notes beautifully.
Baking Tips: Always use the correct size pans. If you use pans that are too small, the cake will overflow. If they’re too big, the cake might bake too quickly and become dry. And remember, oven temperatures can be quirky! If your oven tends to run hot, use an oven thermometer and adjust the temperature accordingly. A good test for doneness is to gently press the center of the cake; it should spring back. Also, if you notice the top browning too quickly before the inside is cooked, you can loosely tent it with foil.
Glaze Variations: The simple chocolate ganache glaze is my favorite, but feel free to get creative! You can add a touch of peppermint extract for a mint-chocolate flavor, or a tablespoon of orange zest for a chocolate-orange twist. If you prefer a lighter topping, a simple dusting of powdered sugar is lovely. For a richer frosting, you could make a classic chocolate buttercream and frost the entire cake.
Storing and Reheating Tips
One of the best things about this chocolate cake recipe is how well it keeps its moisture. This means leftovers (if you have any!) are just as delicious as when they’re fresh.
Room Temperature: Once fully cooled and glazed, you can store the cake at room temperature, well-covered, for up to 2 days. I like to use a cake dome or an airtight container. If it’s particularly warm in your kitchen, it’s probably best to err on the side of caution and refrigerate it.
Refrigerator Storage: For longer storage, up to 4-5 days, keep the cake in an airtight container in the refrigerator. The glaze can become a bit firmer in the fridge, but the cake itself will remain wonderfully moist. If you’ve frosted it with buttercream, that will also hold up well in the fridge.
Freezer Instructions: This cake freezes beautifully! Let it cool completely and add the glaze (or frosting). Wrap it tightly in a layer of plastic wrap, then a layer of aluminum foil. It can be stored in the freezer for up to 2-3 months. To thaw, unwrap it and let it come to room temperature on a wire rack. This usually takes a few hours, depending on the size of the cake.
Glaze Timing Advice: If you plan to freeze the cake, I actually recommend glazing it *after* it has thawed. This helps prevent any condensation issues and ensures the glaze stays nice and shiny. If you’re just storing it for a day or two, glazing it beforehand is perfectly fine.
Frequently Asked Questions
Final Thoughts
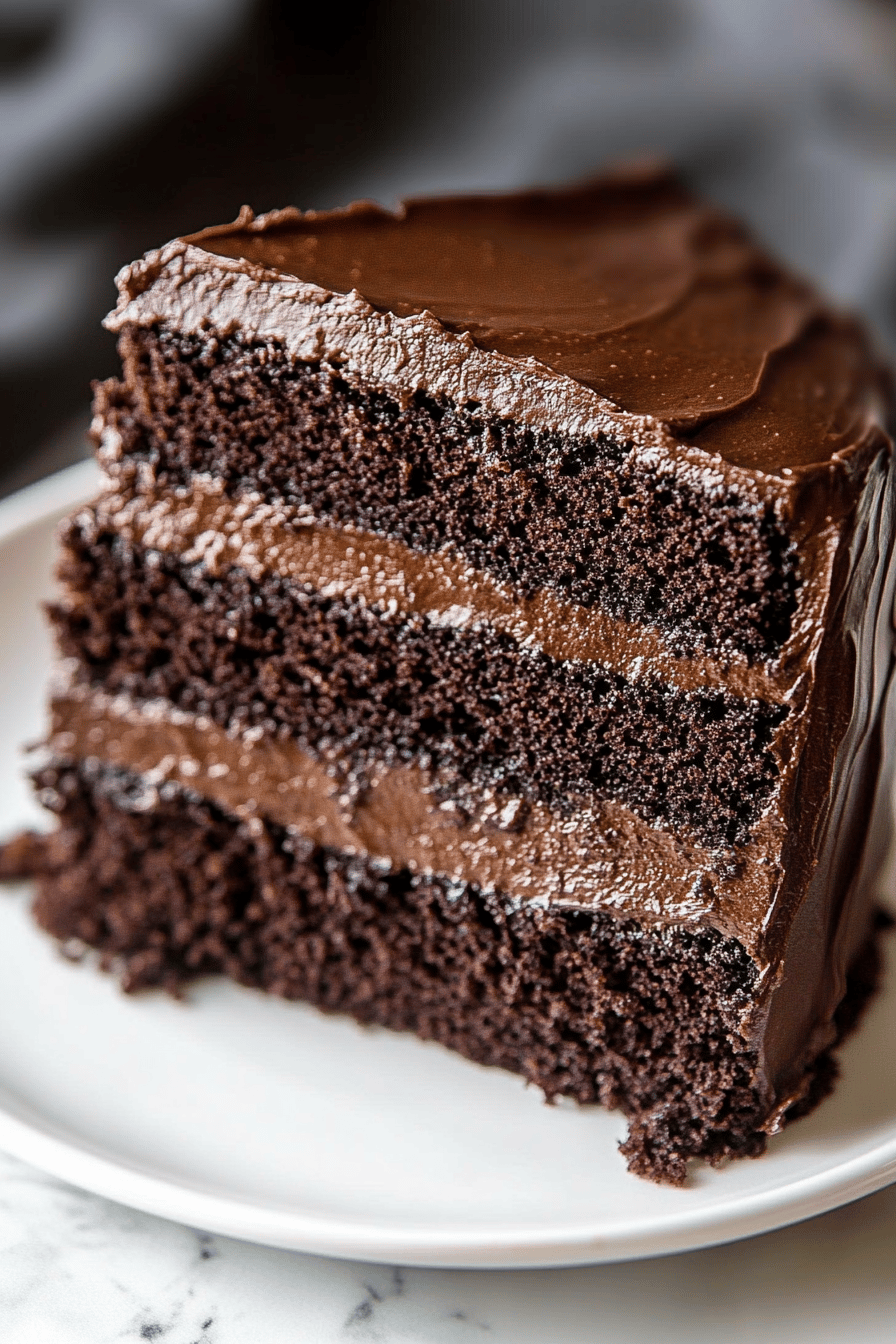
So there you have it – my ultimate chocolate cake recipe! This is more than just a recipe to me; it’s a source of comfort, joy, and countless happy memories. It’s proof that you don’t need to be a pastry chef to create something truly spectacular in your own kitchen. The moist crumb, the rich chocolate flavor, and that simple, glossy glaze all come together to create a cake that’s perfect for any occasion, or just because. I really hope you give this chocolate cake recipe a try. It’s a recipe that has been tested, loved, and perfected over time, and I’m confident it will become a favorite in your home too. If you make it, please let me know how it turns out in the comments below! I’d love to hear about your experiences and any creative twists you might add. Happy baking!
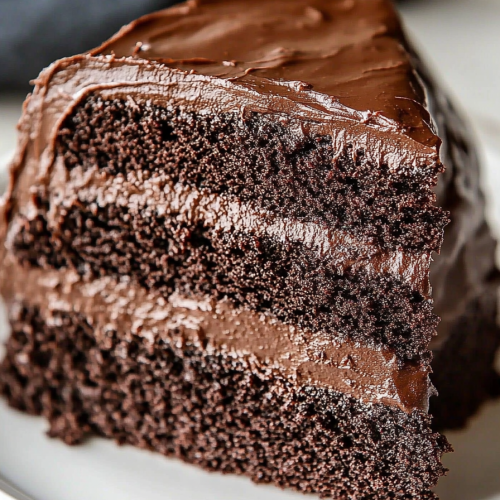
Decadent Chocolate Cake
Ingredients
Cake Batter
- 2 cups all-purpose flour
- 1.5 cups granulated sugar
- 0.75 cup unsweetened cocoa powder
- 2 teaspoons baking soda
- 1 teaspoon baking powder
- 1 teaspoon salt
- 2 large eggs
- 1 cup buttermilk
- 0.5 cup vegetable oil
- 2 teaspoons vanilla extract
- 1 cup hot brewed coffee
Chocolate Ganache Frosting
- 8 ounces semi-sweet chocolate chips
- 1 cup heavy cream
- 1 tablespoon unsalted butter
Instructions
Baking the Cake
- Preheat oven to 350°F (175°C). Grease and flour two 9-inch round cake pans.
- In a large bowl, whisk together flour, sugar, cocoa powder, baking soda, baking powder, and salt.
- In a separate bowl, beat together eggs, buttermilk, oil, and vanilla extract.
- Add the wet ingredients to the dry ingredients and mix until just combined. Be careful not to overmix.
- Gradually stir in the hot coffee until the batter is smooth. The batter will be thin.
- Pour the batter evenly into the prepared cake pans.
- Bake for 30-35 minutes, or until a wooden skewer inserted into the center comes out clean.
- Let the cakes cool in the pans for 10 minutes before inverting them onto a wire rack to cool completely.
Making the Ganache
- Place the chocolate chips in a heatproof bowl.
- Heat the heavy cream in a small saucepan over medium heat until it just begins to simmer. Do not boil.
- Pour the hot cream over the chocolate chips. Let it sit for 5 minutes without stirring.
- Gently whisk the mixture until smooth. Stir in the butter until melted and incorporated.
- Let the ganache cool at room temperature for about 30 minutes, or until it reaches a spreadable consistency.
Assembling the Cake
- Place one cake layer on a serving plate. Spread a generous amount of ganache over the top.
- Top with the second cake layer and frost the top and sides of the cake with the remaining ganache.
- Serve immediately or store at room temperature.