Oh, you guys, I’m so excited to share this one with you! You know those nights when you’re just craving something utterly delicious, something that feels like a special treat but you *really* don’t have hours to spend in the kitchen? Yeah, me too. More often than I’d like to admit, actually! This is when I reach for my trusty Cheesy Pizza Bombs recipe. It’s like magic in a pan. Imagine your favorite cheesy, saucy pizza, all rolled up into these perfectly portioned, bite-sized little treasures. They’re seriously addictive and have a way of making any day feel a little bit brighter. Honestly, I think they’re even better than a whole pizza sometimes because you get that perfect ratio of fluffy bread, gooey cheese, and tangy sauce in every single bite. My kids beg for these, and honestly, so do I! They’re just pure comfort and joy, all wrapped up and baked to golden perfection.
What are Cheesy Pizza Bombs?
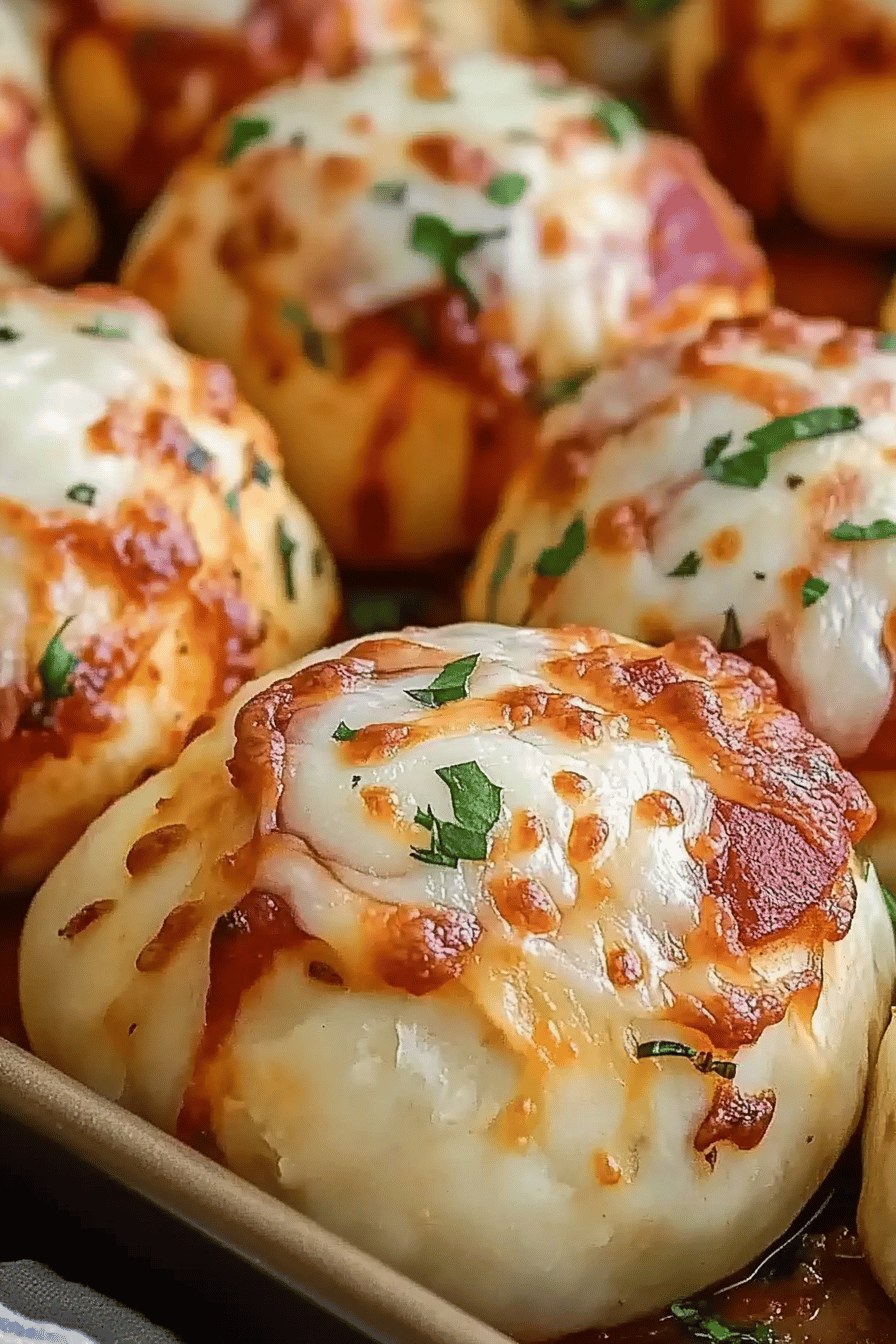
So, what exactly are these little flavor bombs? Think of them as a cross between a super fluffy dinner roll and a mini calzone, all baked together in a pan. The name “Cheesy Pizza Bombs” just felt right because, well, they explode with flavor and they’re absolutely loaded with cheese! It’s essentially a tender, slightly sweet dough that cradles a generous filling of classic pizza toppings – usually a rich marinara, plenty of mozzarella, and your favorite additions. We then bake them all together until the dough is golden brown and the cheese inside is perfectly melted and stretchy. They’re not complicated, not fussy, but they deliver on all the pizza-craving fronts. It’s the ultimate easy appetizer or even a fun main course when you want something a little different. It’s a recipe that’s surprisingly simple but tastes like you spent ages in the kitchen.
Why you’ll love this recipe?
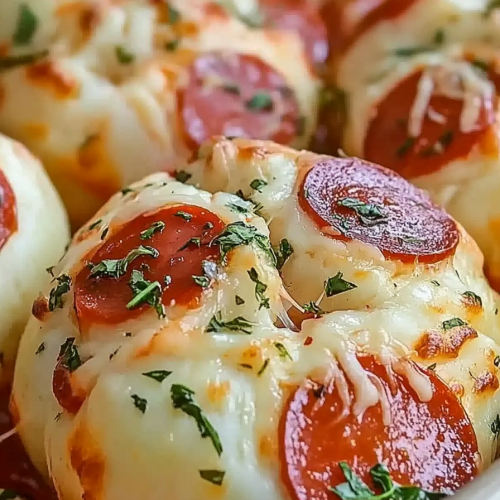
There are so many reasons why this Cheesy Pizza Bomb recipe has become a staple in my kitchen, and I have a feeling it’s going to be in yours too. First off, the flavor is just out of this world. You get that satisfying chew of the bread, the bright tang of the marinara sauce, and then that glorious, stretchy, melted mozzarella cheese that’s just… heaven. It’s everything you love about pizza, concentrated into these delightful little bites. But it’s not just about the taste; the simplicity is a HUGE win. Seriously, the dough comes together so easily, and the filling is a breeze to prepare. This is one of those lifesaver recipes for busy weeknights or when unexpected guests pop over. Plus, it’s incredibly budget-friendly! The ingredients are common pantry staples, so you don’t need to break the bank to make a batch. And don’t even get me started on the versatility. You can customize the fillings to your heart’s content. My personal favorite is the classic pepperoni, but my kids love a little ham and pineapple. I’ve also seen people make them with just veggies, or even a sweet version for dessert! What I love most is that they make everyone happy, from the pickiest eaters to the most discerning foodies. It’s just pure, unadulterated deliciousness that’s always a crowd-pleaser. I’ve tried similar recipes that use store-bought dough, and while those are okay in a pinch, there’s something truly special about this homemade version. It has a tenderness and a subtle sweetness that just can’t be replicated.
How do I make Cheesy Pizza Bombs?
Quick Overview
This recipe is all about creating a soft, slightly enriched dough, preparing a simple yet flavorful pizza filling, and then bringing it all together for a bake that’s pure magic. We’ll mix up a quick dough, let it rest for just a bit, prepare our cheesy, saucy filling, and then assemble these adorable bombs before baking them until they’re golden and irresistible. It’s a straightforward process, and I promise, even if you’re new to baking, you’ll nail this on the first try. The aroma that fills your kitchen while these bake is simply intoxicating, and they come out of the oven looking as good as they taste!
Ingredients
For the Main Batter:
2 ¼ teaspoons active dry yeast (one packet)
1 cup warm water (about 105-115°F) – not too hot, or it’ll kill the yeast!
1 tablespoon granulated sugar – this feeds the yeast and adds a hint of sweetness to the dough
3 ¼ cups all-purpose flour, plus more for dusting
1 teaspoon salt – essential for flavor!
¼ cup olive oil, plus more for greasing
For the Filling:
1 cup pizza sauce or marinara sauce – use a good quality one, it makes a difference!
2 cups shredded mozzarella cheese – and maybe a little extra for sprinkling on top!
½ cup finely chopped pepperoni, cooked crumbled sausage, or your favorite pizza toppings – dice them small so they’re easy to distribute.
1 teaspoon dried oregano (optional, but I love it for that extra Italian flair)
¼ teaspoon garlic powder (also optional, but adds a nice punch)
For the Glaze:
2 tablespoons melted butter
1 teaspoon garlic powder
½ teaspoon dried parsley (for color and freshness)
Step-by-Step Instructions
Step 1: Preheat & Prep Pan
First things first, grab a 9×13 inch baking pan. Give it a good greasing with a little olive oil or cooking spray. This is super important to prevent our precious bombs from sticking. Then, go ahead and preheat your oven to 375°F (190°C). Getting the oven nice and hot beforehand ensures even baking right from the start.
Step 2: Mix Dry Ingredients
In a large mixing bowl, whisk together the flour, salt, sugar, and yeast. Make sure everything is well combined. The sugar actually helps activate the yeast, so don’t skip it! It’s this simple combination that forms the base of our wonderfully soft dough. You want to see no lumps of yeast or salt.
Step 3: Mix Wet Ingredients
Pour the warm water into a separate bowl or measuring cup. Add the olive oil to the water. The water should feel comfortably warm to the touch, like a warm bath, not hot. This temperature is crucial for waking up the yeast and getting our dough to rise beautifully.
Step 4: Combine
Pour the wet ingredients into the bowl with the dry ingredients. Mix everything with a wooden spoon or a sturdy spatula until a shaggy dough forms. Then, turn the dough out onto a lightly floured surface. Knead for about 5-7 minutes, or until the dough is smooth and elastic. You’ll know it’s ready when it springs back slightly when you poke it. If it feels too sticky, add a tiny bit more flour, but be careful not to add too much, as that can make the bombs tough. I always get a little flour on my hands, it’s part of the fun!
Once kneaded, place the dough in a lightly oiled bowl, cover it with a clean kitchen towel or plastic wrap, and let it rise in a warm place for about 30-45 minutes, or until it’s doubled in size. This is where the magic starts to happen, giving us that lovely fluffy texture.
Step 5: Prepare Filling
While the dough is rising, let’s get our delicious filling ready. In a medium bowl, combine the pizza sauce, shredded mozzarella, your chopped pepperoni or other cooked toppings, dried oregano, and garlic powder (if using). Give it a good stir to make sure all those yummy ingredients are well distributed. This is where you can really customize! I like my filling pretty packed with cheese and a good amount of sauce, but you can adjust it to your preference. Just make sure the toppings are cut small enough so they don’t prevent the bombs from sealing.
Step 6: Layer & Swirl
Once the dough has risen, punch it down gently to release the air. Turn it out onto a lightly floured surface. Now, this is the fun part! You can either roll the dough out into a large rectangle (about 12×18 inches) and spread the filling evenly over the top, leaving a small border, then roll it up like a jelly roll. Or, my preferred method for individual bombs: divide the dough into about 12-16 equal portions. Flatten each portion into a small disc, place a generous spoonful of filling in the center, and then pinch the edges of the dough together to completely seal the filling inside, forming a ball. It’s important to pinch really well to prevent any filling from leaking out during baking. Once they’re all formed, arrange them snugly in your prepared baking pan, leaving a little space between them. They will puff up and touch as they bake.
Step 7: Bake
Pop the pan into your preheated oven. Bake for 20-25 minutes, or until the tops are golden brown and the cheese is bubbling around the edges. The exact time will depend on your oven, so keep an eye on them. You’re looking for that beautiful golden hue all over. I usually give them a gentle poke to ensure the dough is cooked through.
Step 8: Cool & Glaze
Once they’re out of the oven, let them sit in the pan for about 5 minutes. While they’re still warm, whisk together the melted butter, garlic powder, and parsley in a small bowl. Brush this glorious Garlic Butter mixture all over the tops of the Cheesy Pizza Bombs. This step is pure indulgence and adds so much flavor! The scent alone is incredible.
Step 9: Slice & Serve
You can serve these directly from the pan, but if you want to present them a bit more formally, you can carefully lift them out with a spatula once they’ve cooled slightly. They are best served warm, when the cheese is perfectly melty and gooey. They’re perfect for dipping in extra marinara sauce if you’re feeling adventurous!
What to Serve It With
These Cheesy Pizza Bombs are incredibly versatile and can fit into almost any meal or occasion! For a truly indulgent breakfast, I love serving them warm with a side of scrambled eggs and a fresh fruit salad. They’re substantial enough to be a satisfying start to the day, and the cheesy goodness is just a delight. On a weekend for brunch, they’re fantastic alongside a simple green salad with a light vinaigrette. You can also present them as a beautiful centerpiece with a selection of dips – ranch is always a winner, or a spicy aioli for those who like a kick. For dessert, and this might sound a little wild, but a sweet version with chocolate chips and a drizzle of raspberry sauce is absolutely divine! Think of it as a sweet calzone. And of course, for those cozy snack times when you just need something comforting, they’re perfect on their own, maybe with a glass of milk or a cold soda. My family tradition is to have them as an appetizer on pizza night, and they disappear so fast!
Top Tips for Perfecting Your Cheesy Pizza Bombs
I’ve made these Cheesy Pizza Bombs more times than I can count, and over the years, I’ve picked up a few little tricks that really elevate them. First, for the dough, don’t be afraid to knead! That gluten development is what gives you that perfect chewy texture. If your dough feels a bit sticky, resist the urge to dump in a ton of extra flour; just keep kneading and it will come together. The warmth of your hands helps. For the filling, I always recommend pre-cooking any raw meats like sausage, and dicing them really small. This ensures they cook through properly inside the bombs and don’t leave excess moisture. Also, don’t overload the bombs with too much filling, or they’ll be hard to seal, and you’ll end up with leaky bombs, which is a sad sight! When you’re sealing them, make sure to pinch those seams *really* tightly. I sometimes give them an extra little twist and pinch just to be sure. For baking, ovens can be so different, so my best advice is to watch them. They should be golden brown on top and the bottom should be cooked through. If the tops are browning too quickly, you can always loosely tent them with foil. And for that garlic butter glaze? Trust me, don’t skip it! It takes them from delicious to absolutely irresistible. I’ve experimented with different flours, and while all-purpose works perfectly, I’ve found that using a good quality bread flour can give an even chewier, more rustic texture if that’s what you’re going for. For ingredient swaps, if you don’t have active dry yeast, instant yeast can also work, but you’ll typically add it directly to the dry ingredients without proofing. If you’re out of mozzarella, a blend of cheddar and Monterey Jack can be a fun alternative, though it won’t have that classic pizza cheese pull!
Storing and Reheating Tips
So, what happens if you (miraculously!) have leftovers? Don’t worry, these Cheesy Pizza Bombs store beautifully and reheat like a dream. If you’re keeping them at room temperature, I’d say they’re best enjoyed within about 2-3 hours. After that, the dough can start to dry out. For longer storage, pop them into an airtight container in the refrigerator. They’ll keep well for about 3-4 days. When you’re ready to reheat, I highly recommend popping them back into a moderate oven (around 350°F or 175°C) for about 5-10 minutes, until they’re warmed through and that cheese is melty again. This is the best way to get that lovely crispness back. Microwaving works in a pinch, but they can become a bit softer. If you want to freeze them, it’s best to do so *before* baking. Form them, place them on a baking sheet in a single layer, freeze until solid, then transfer to a freezer-safe bag or container. They’ll last for up to 2-3 months. To bake from frozen, just add a few extra minutes to the baking time. If you’re reheating baked and cooled bombs, the oven method is still your best bet. I usually add the glaze *after* reheating to keep it fresh and vibrant, especially if they’ve been stored for a day or two.
Frequently Asked Questions
Final Thoughts
Honestly, Cheesy Pizza Bombs are more than just a recipe to me; they’re little pockets of joy. They represent those easy weeknight wins, those spontaneous gathering appetizers, and those moments when you just need something incredibly comforting and delicious. I hope you’ll give them a try and that they bring as much happiness to your kitchen as they do to mine. They’re proof that sometimes, the most wonderful things are also the simplest. If you love this recipe, you might also enjoy my CHEESY GARLIC BREAD Knots or my Quick & Easy Homemade Pizza Dough! Both have that same comforting, crowd-pleasing vibe. I can’t wait to hear how your Cheesy Pizza Bombs turn out! Please leave a comment below and tell me what you think, or share your favorite topping combinations. Happy baking, everyone!
Cheesy Pizza Bombs
Ingredients
Dough
- 1.5 cups all-purpose flour
- 1 teaspoon active dry yeast
- 0.75 teaspoon salt
- 0.5 cup warm water (105-115°F)
- 1 tablespoon olive oil
Filling
- 1 cup shredded mozzarella cheese
- 0.5 cup pizza sauce
- 0.25 cup grated Parmesan cheese
- 0.5 teaspoon dried oregano
- 0.25 teaspoon garlic powder
Optional Topping
- 1 tablespoon melted butter
- 0.5 teaspoon Italian seasoning
Instructions
Preparation Steps
- In a small bowl, combine warm water and yeast. Let stand for 5-10 minutes until foamy.
- In a large bowl, whisk together flour and salt. Add the yeast mixture and olive oil. Mix until a shaggy dough forms.
- Turn dough out onto a lightly floured surface and knead for 5-7 minutes until smooth and elastic. Place in a lightly oiled bowl, cover, and let rise in a warm place for about 1 hour, or until doubled in size.
- While the dough rises, prepare the filling. In a medium bowl, combine mozzarella cheese, pizza sauce, Parmesan cheese, oregano, and garlic powder.
- Once the dough has risen, punch it down and divide it into 12 equal pieces. Flatten each piece into a disc.
- Spoon about 1 tablespoon of the filling into the center of each dough disc. Pinch the edges of the dough together to seal, forming a ball.
- Place the pizza bombs seam-side down on a baking sheet lined with parchment paper.
- Preheat oven to 400°F (200°C).
- Bake for 12-15 minutes, or until golden brown and the cheese is melted and bubbly.
- For an optional topping, brush the baked pizza bombs with melted butter mixed with Italian seasoning immediately after removing them from the oven.
- Let cool slightly before serving.