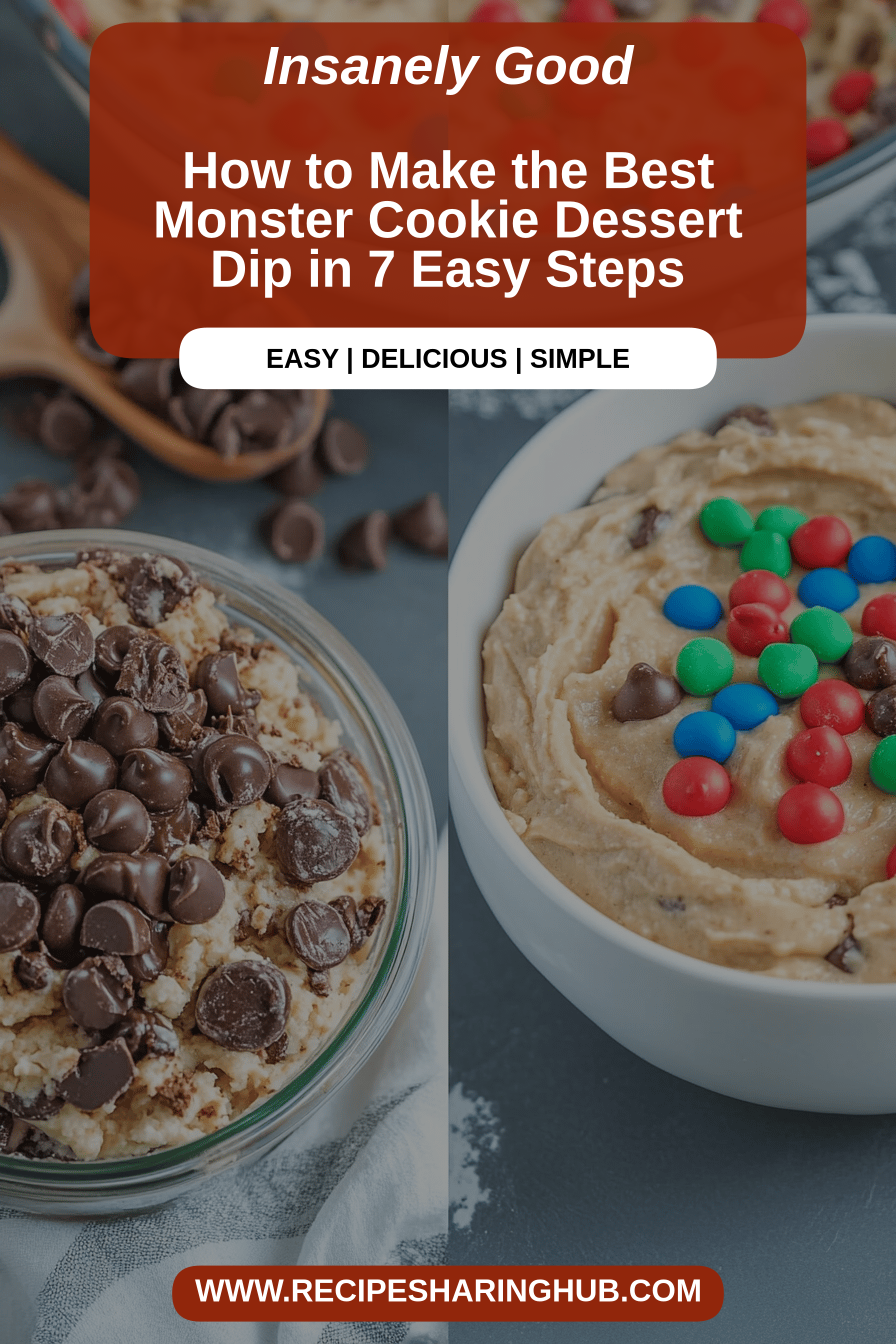
Monster Cookie Dessert Dip
You know those days? The ones where you’re staring into the pantry, a vague craving for something sweet hitting you hard, but the thought of preheating the oven, greasing pans, and waiting for cookies to bake feels like an Olympic sport? Yeah, I’ve been there, probably more times than I’d like to admit! That’s exactly why this Monster Cookie Dessert Dip recipe became my absolute hero. It’s like a magic trick for your sweet tooth – all the incredible flavors of a chewy, decadent monster cookie, but in a ridiculously easy dip form. Think of it as the fun, party-ready cousin of traditional cookies. It’s not quite a cake, not quite a cookie, but something wonderfully in-between that’s always a huge hit. Honestly, the first time I whipped this up, my family practically inhaled it. I knew right then and there it was a keeper, a recipe to stash away for those moments you need a serious flavor boost without a huge commitment. It’s the perfect answer to that 10 PM sugar craving when baking a whole batch of cookies just isn’t in the cards.
What is Monster Cookie Dessert Dip?
So, what exactly *is* this glorious concoction we’re talking about? At its heart, Monster Cookie Dessert Dip is a creamy, dreamy, no-bake dessert that captures all the iconic flavors and textures of a classic monster cookie. You know, the ones packed with oats, Peanut Butter, chocolate chips, and colorful candies? We’ve taken all those amazing components and transformed them into a spoonable, dippable delight. It’s essentially a thick, rich batter that tastes just like a freshly baked monster cookie, but instead of shaping and baking individual cookies, we’re whipping it up into a smooth, luscious dip. It’s designed to be scooped up with cookies, pretzels, fruit, or anything else your heart desires. The name itself just screams fun, right? It’s a playful nod to the messy, delightful chaos of a monster cookie, all rolled into one incredibly satisfying dessert. It’s approachable, it’s cheerful, and it’s guaranteed to make you smile with every bite.
Why you’ll love this recipe?
There are so many reasons why I’m utterly obsessed with this Monster Cookie Dessert Dip, and I’m pretty sure you’re going to feel the same way. First off, the flavor is just out-of-this-world delicious. It hits all the right notes: the nutty depth of peanut butter, the comforting chewiness of oats, the sweet pops of chocolate chips, and those fun, colorful candies that add a little burst of joy. It’s a symphony of classic cookie flavors in every single spoonful. But the flavor is only part of the story. The sheer simplicity of this recipe is a game-changer. You don’t need to be a master baker to whip this up. It’s mostly just mixing ingredients together, and honestly, the biggest challenge is probably resisting the urge to eat it straight from the bowl before it’s even properly chilled! Plus, it’s incredibly cost-effective. The ingredients are pantry staples for most of us, which means you can whip this up without a major grocery run. And talk about versatile! This dip is perfect for almost any occasion. We’ve had it at casual backyard BBQs, fancy-ish potlucks, and even just as a special treat on a Tuesday night. It’s the kind of recipe that earns you major points without a lot of fuss. While I love a good chewy cookie, and I’ve shared plenty of those recipes here, this dip offers that same satisfaction in a totally different, incredibly convenient way. It’s a crowd-pleaser that’s hard to mess up, making it a lifesaver when you’re short on time or just want something truly delightful to share (or not share!).
How do I make a Monster Cookie Dip?
Quick Overview
Making this Monster Cookie Dessert Dip is an absolute breeze, I promise! The whole process involves just a few simple steps: we’ll cream together some base ingredients until they’re light and fluffy, then we’ll gently mix in our dry components and all those yummy add-ins like chocolate chips and candies. That’s pretty much it! The magic happens as it chills, allowing the flavors to meld and the dip to thicken to that perfect, scoopable consistency. It’s the ultimate low-stress, high-reward recipe that even beginner cooks can master. You’ll be amazed at how quickly you can go from craving to enjoying this delicious treat.
Ingredients
For the Main Batter:
Butter: About 1 cup (2 sticks), softened. Make sure it’s not melted; you want it soft enough to cream easily. Unsalted is my preference so I can control the saltiness, but salted works too, just adjust accordingly.
CREAM CHEESE: One 8-ounce block, softened. This is key for that tangy richness and creamy texture that makes it so decadent.
Peanut Butter: 1 cup, creamy. I usually go for a standard creamy peanut butter, but if you love a bit of crunch, you can definitely use crunchy too! Just be aware it will change the texture slightly.
Granulated Sugar: 1/2 cup. For that initial sweetness.
Brown Sugar: 1/2 cup, packed. The brown sugar is crucial for that classic chewy cookie flavor and helps with moisture.
Vanilla Extract: 1 teaspoon. A little splash of vanilla always enhances sweetness.
Milk: 1/4 cup. Whole milk works best for creaminess, but I’ve tested this with almond milk and it actually made it even creamier! Just use what you have.
For the Filling:
Rolled Oats: 1 1/2 cups. Not instant oats, please! Rolled oats give you that satisfying chewy texture. Make sure they’re plain rolled oats.
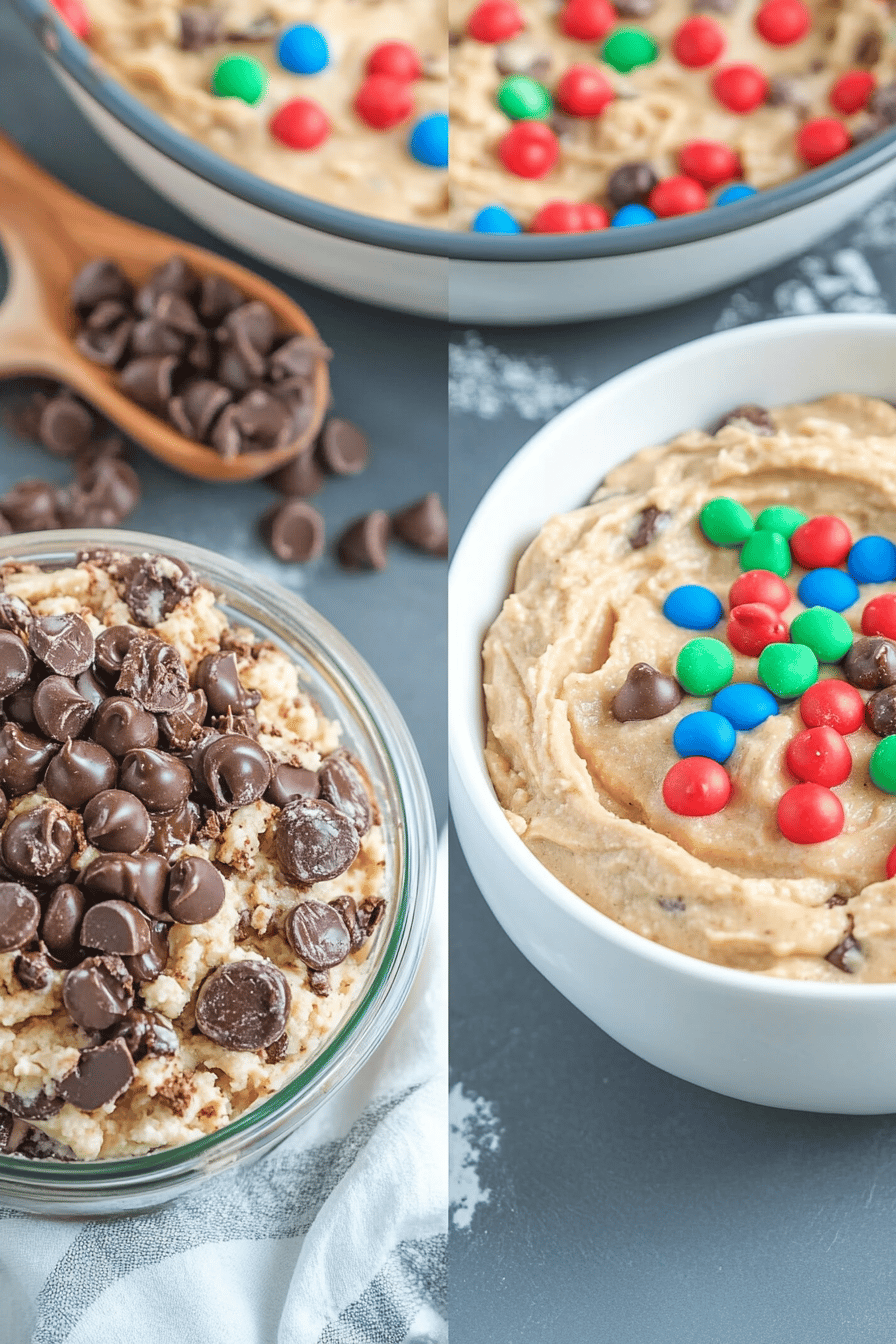
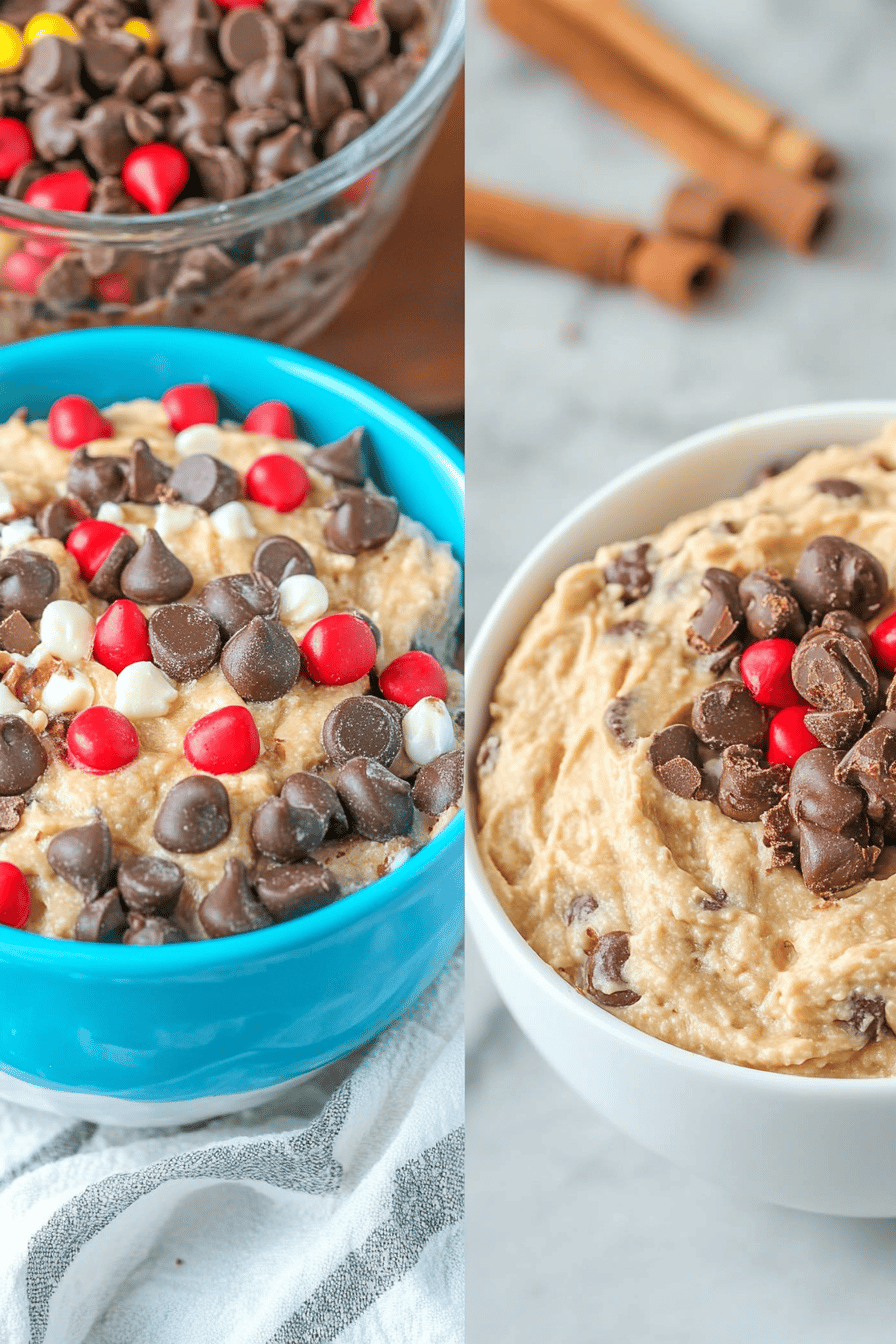
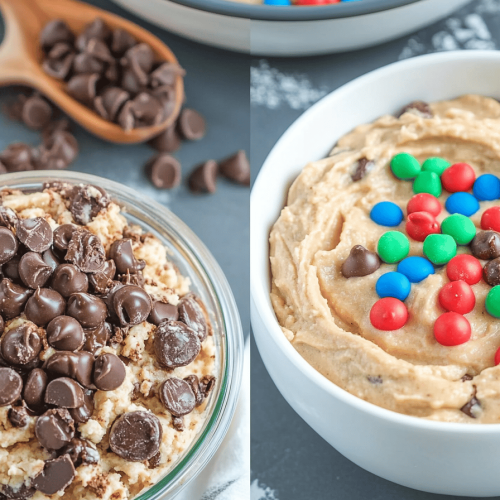
Mini Chocolate Chips: 1 cup. Mini chips distribute better in the dip, but regular ones are fine too. I often use a mix of semi-sweet and milk chocolate for extra flavor.
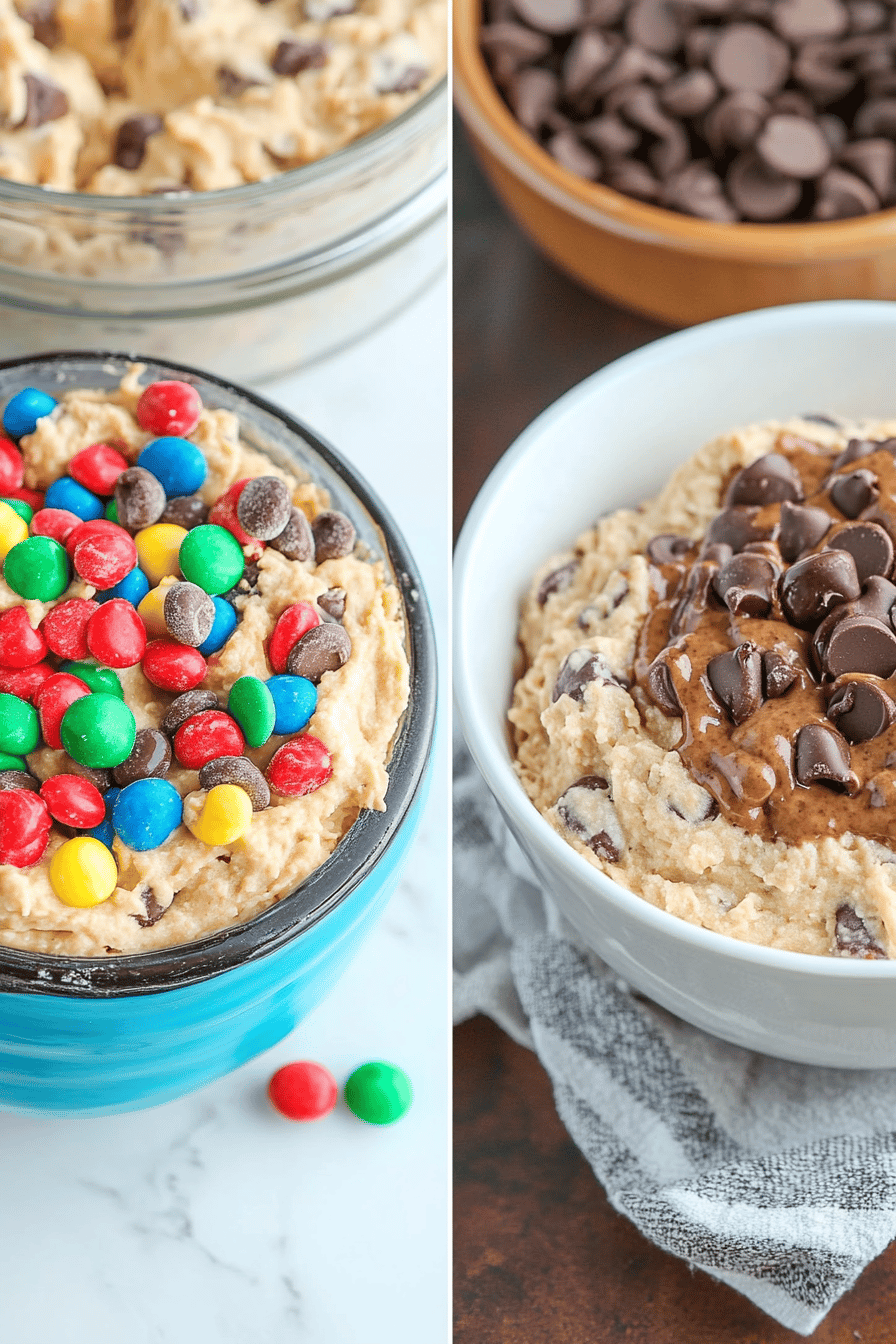
M&M’s or Similar Candies: 1/2 cup. These are non-negotiable for that “monster” look and fun pop of color and crunch!
For the Glaze:
Powdered Sugar: 1 cup. Sifted, if you want a super smooth glaze.
Milk: 1-2 tablespoons. Start with 1 tablespoon and add more as needed until you reach your desired drizzling consistency.
Vanilla Extract: 1/2 teaspoon. Just for a hint of flavor.
Step-by-Step Instructions
Step 1: Preheat & Prep Pan
Actually, for this recipe, we don’t need to preheat an oven or prep a pan because it’s a no-bake wonder! We will need a large mixing bowl and an electric mixer (or a sturdy whisk and some elbow grease!). Ensure your butter and cream cheese are nicely softened; this is really important for getting a smooth, lump-free base. Leaving them out on the counter for about an hour usually does the trick.
Step 2: Mix Dry Ingredients
In a separate medium bowl, whisk together the rolled oats. If you’re feeling fancy, you can lightly toast your oats in a dry skillet over medium heat for a few minutes until fragrant – it adds another layer of nutty flavor! This step isn’t strictly necessary, but it’s a little trick I learned that really elevates the dip. Just make sure they cool down completely before adding them to the wet ingredients.
Step 3: Mix Wet Ingredients
In your large mixing bowl, beat together the softened butter, softened cream cheese, and peanut butter until they are light, fluffy, and well combined. It should look smooth and creamy. Then, gradually beat in the granulated sugar and packed brown sugar until fully incorporated. Stir in the vanilla extract. This is where you start smelling that wonderful Cookie Dough aroma!
Step 4: Combine
Pour the milk into the creamed mixture and mix until just combined. Then, add the prepared dry oats from Step 2 to the wet ingredients. Mix on low speed (or fold in by hand) until everything is just combined. Be careful not to overmix at this stage! Overmixing can make the oats a bit too tough. You want a mixture that’s thick and holds its shape, but is still smooth.
Step 5: Prepare Filling
Gently fold in the mini chocolate chips and the M&M’s (or your candy of choice). Fold them in just until they are evenly distributed throughout the batter. This is the fun part where you really see that “monster” coming to life! Take a peek – doesn’t it look amazing already?
Step 6: Layer & Swirl
This step is optional but adds a lovely touch! If you want a more refined look, you can reserve about 1/4 cup of the batter and then gently swirl in a few extra chocolate chips and candies into the remaining batter. For this dip, we’re not really layering in the traditional sense, but rather ensuring all those delicious bits are mixed throughout. The ‘swirl’ comes more from the topping if you choose to do that. For this recipe, just getting everything mixed well is the goal.
Step 7: Bake
As I mentioned, this is a no-Bake Recipe! So, no baking is required. The dip will set and thicken as it chills in the refrigerator.
Step 8: Cool & Glaze
Cover the bowl with plastic wrap, pressing it gently onto the surface of the dip to prevent a skin from forming, or transfer it to an airtight container. Refrigerate for at least 2 hours, or until it’s firm and chilled. The chilling time is crucial for the flavors to meld and for the dip to reach the perfect consistency. Once chilled, prepare the glaze. In a small bowl, whisk together the powdered sugar, 1 tablespoon of milk, and vanilla extract. Add more milk, a teaspoon at a time, until you achieve a drizzly consistency. Drizzle this over the chilled dip just before serving.
Step 9: Slice & Serve
This is the moment we’ve all been waiting for! Serve the Monster Cookie Dessert Dip chilled, directly from the bowl or a pretty serving dish. It’s best served with a variety of dippers. I love it with graham crackers, vanilla wafers, pretzels, or even slices of apple or banana. The mix of sweet, salty, and crunchy textures is divine!
What to Serve It With
The beauty of this Monster Cookie Dessert Dip is its incredible versatility. It’s not just for dessert, although it excels there! Here are some of my favorite ways to serve it, depending on the occasion:
For Breakfast: Yes, you read that right! A small dollop of this on some whole-wheat toast or alongside some Greek yogurt makes for a surprisingly delightful breakfast treat. The oats and peanut butter add some substance, and a little sweetness to start the day feels like a special occasion. Pair it with a strong cup of coffee, and you’re set.
For Brunch: Elevate your brunch spread by serving this dip in a pretty bowl with an assortment of dippers like mini muffins, fresh berries, and possibly some mini shortbread cookies. It adds a fun, unexpected element that guests will rave about. A mimosa or a lovely iced tea would be perfect alongside.
As Dessert: This is its most obvious and arguably most popular role. Serve it up at parties, holidays, or just a family movie night. It’s fantastic with classic cookies (especially ones that complement the flavors, like peanut butter cookies or plain sugar cookies), pretzels for that sweet and salty contrast, or even fresh fruit like strawberries and banana slices for a slightly healthier option. A scoop of vanilla bean ice cream alongside is pure indulgence!
For Cozy Snacks: On those lazy afternoons or evenings when you just need a little pick-me-up, this dip is your answer. I often find myself just grabbing a spoon and enjoying it straight from the container while curled up on the couch. It’s the ultimate comfort food that requires zero effort. My kids always ask for this all the time when they’re doing homework or after school. It’s a guaranteed way to bring smiles to faces.
Top Tips for Perfecting Your Monster Cookie Dessert Dip
I’ve made this Monster Cookie Dessert Dip more times than I can count, and over the years, I’ve picked up a few tricks that I think make all the difference. These aren’t complicated secrets, just little bits of wisdom from my kitchen to yours.
Cream Cheese Prep: This is non-negotiable for a smooth dip. Make sure your cream cheese is truly softened. If you’re in a rush, you can cut it into cubes and let it sit on the counter for about 30-45 minutes, or even pop it in the microwave for 10-15 second intervals, stirring in between, until it’s just softened but not melted. You’re looking for that texture where you can easily indent it with your finger.
Mixing Advice: When you’re combining the wet and dry ingredients (especially the oats), mix just until combined. Overmixing can toughen up those oats and create a less pleasant texture. I often switch from the electric mixer to a spatula or large spoon for the final folding in of the oats and add-ins to ensure I don’t go too far. You want that delightful chew, not something overly dense.
Swirl Customization: While not strictly necessary for this recipe, if you want to add a bit more visual appeal, you can divide the batter into two bowls before adding the mix-ins. In one bowl, add the chocolate chips; in the other, add the candies. Then, layer these two portions into your serving dish and gently swirl them together with a knife or skewer. This creates beautiful ribbons of flavor and texture.
Ingredient Swaps: Feel free to get creative! If you’re not a peanut butter fan, almond butter or even sunflower seed butter works beautifully. For the candies, any small, colorful candy-coated chocolate will do. You could also add in chopped nuts like peanuts or pecans if you like a bit more crunch. And for the chocolate chips, consider using white chocolate chips or butterscotch chips for a different flavor profile. Just remember that different nut butters might change the sweetness and saltiness, so do a quick taste test before chilling.
Baking Tips: There are no baking tips needed here as it’s a no-bake recipe! But for chilling, make sure you cover it well. Pressing plastic wrap directly onto the surface prevents that dreaded skin from forming, which is essential for that smooth, creamy texture. Give it at least 2 hours, but a bit longer is even better for the flavors to fully develop and the dip to set perfectly.
Glaze Variations: The glaze is entirely optional, but I love it! If you want to skip it, dusting with a little extra powdered sugar is a nice touch. For the glaze itself, start with less milk than you think you need; it’s much easier to thin out a glaze than to thicken it. If you accidentally add too much milk, whisk in a little more powdered sugar until it’s right. You can also add a pinch of salt to the glaze to balance the sweetness.
Storing and Reheating Tips
One of the best things about this Monster Cookie Dessert Dip is how well it stores, making it perfect for making ahead. I’ve got a few tested methods that keep it tasting as fresh and delicious as the day you made it.
Room Temperature: If you plan on serving the dip within a few hours, you can leave it covered on the counter. However, because it contains cream cheese and butter, I wouldn’t leave it out for more than 2-3 hours, especially in warmer environments. For best quality and safety, it’s always better to refrigerate it if you’re not serving it immediately.
Refrigerator Storage: This is my preferred method for storage. Once the dip has set, transfer it to an airtight container or cover the bowl tightly with plastic wrap, pressing it down onto the surface of the dip to prevent a skin from forming. It should stay fresh and delicious in the refrigerator for up to 3-4 days. The flavors actually tend to deepen and improve over the first day or two!
Freezer Instructions: Yes, you can freeze this! It’s a great make-ahead strategy. Transfer the dip to a freezer-safe container or wrap it very well in plastic wrap and then foil. It will keep in the freezer for up to 1-2 months. To thaw, remove it from the freezer and let it defrost in the refrigerator overnight. You might need to give it a good stir to bring it back to its original creamy consistency. Sometimes, a little extra splash of milk may be needed if it seems a bit too stiff after thawing.
Glaze Timing Advice: The glaze is best added just before serving. If you’re storing the dip, keep the glaze separate and drizzle it on right before you plan to eat it. This prevents the glaze from getting soggy or melting into the dip, especially if you’re serving it from the refrigerator. If you’ve frozen the dip, make a fresh batch of glaze after it has thawed and is ready to be served.
Frequently Asked Questions
Final Thoughts
So there you have it, my friends! This Monster Cookie Dessert Dip is more than just a recipe; it’s a little slice of joy in a bowl. It’s the perfect blend of nostalgia, convenience, and pure, unadulterated deliciousness. Whether you’re hosting a party, need a quick sweet fix, or just want to impress your family with something special made with minimal effort, this dip is your answer. It’s the kind of recipe that makes you feel like a culinary superstar without breaking a sweat. I truly hope you give this one a try and that it becomes a beloved staple in your kitchen, just like it has in mine. If you love this, you might also enjoy my recipes for [link to similar recipe 1, e.g., “No-Bake Chocolate Peanut Butter Bars”] or my [link to similar recipe 2, e.g., “Gourmet Chocolate Chip Cookies”]. I can’t wait to hear what you think and see how your Monster Cookie Dessert Dip turns out! Don’t forget to share your creations and any fun variations you come up with in the comments below. Happy dipping!
Monster Cookie Dessert Dip
Ingredients
Main Ingredients
- 0.5 cup unsalted butter, softened
- 0.5 cup light brown sugar, packed
- 0.25 cup granulated sugar
- 1 large egg yolk
- 1 teaspoon vanilla extract
- 1 cup all-purpose flour
- 0.5 teaspoon baking soda
- 0.25 teaspoon salt
- 1 cup chocolate chips
- 0.5 cup M&Ms
Instructions
Preparation Steps
- In a large bowl, cream together the softened butter, brown sugar, and granulated sugar until light and fluffy.
- Beat in the egg yolk and vanilla extract until well combined.
- In a separate small bowl, whisk together the flour, baking soda, and salt.
- Gradually add the dry ingredients to the wet ingredients, mixing until just combined. Do not overmix.
- Stir in the chocolate chips and M&Ms.
- Serve immediately with your favorite dippers like graham crackers, pretzels, or fruit.