Oh, friends, I’m so excited to share this one with you! You know how sometimes you just need something sweet, something bright and cheerful to lift your spirits? That’s exactly what these Gluten-Free Lemon Brownies are for me. They’re like a little ray of sunshine baked right into a fudgy, decadent treat. I remember the first time I made them; it was one of those dreary, rainy afternoons, and I was craving something comforting but also a bit… zesty. I wanted that deep, satisfying chocolate hit of a classic brownie, but with a playful twist. So, I started experimenting, and after a few tries (because, let’s be real, baking is a journey!), I landed on this recipe. It’s become my go-to when I want to impress guests, or frankly, just when I need a little pick-me-up. They’re surprisingly easy, and the aroma that fills the kitchen is just divine. Honestly, they’re even better than some of the flour-laden versions I’ve tried!
What are gluten-free lemon brownies?
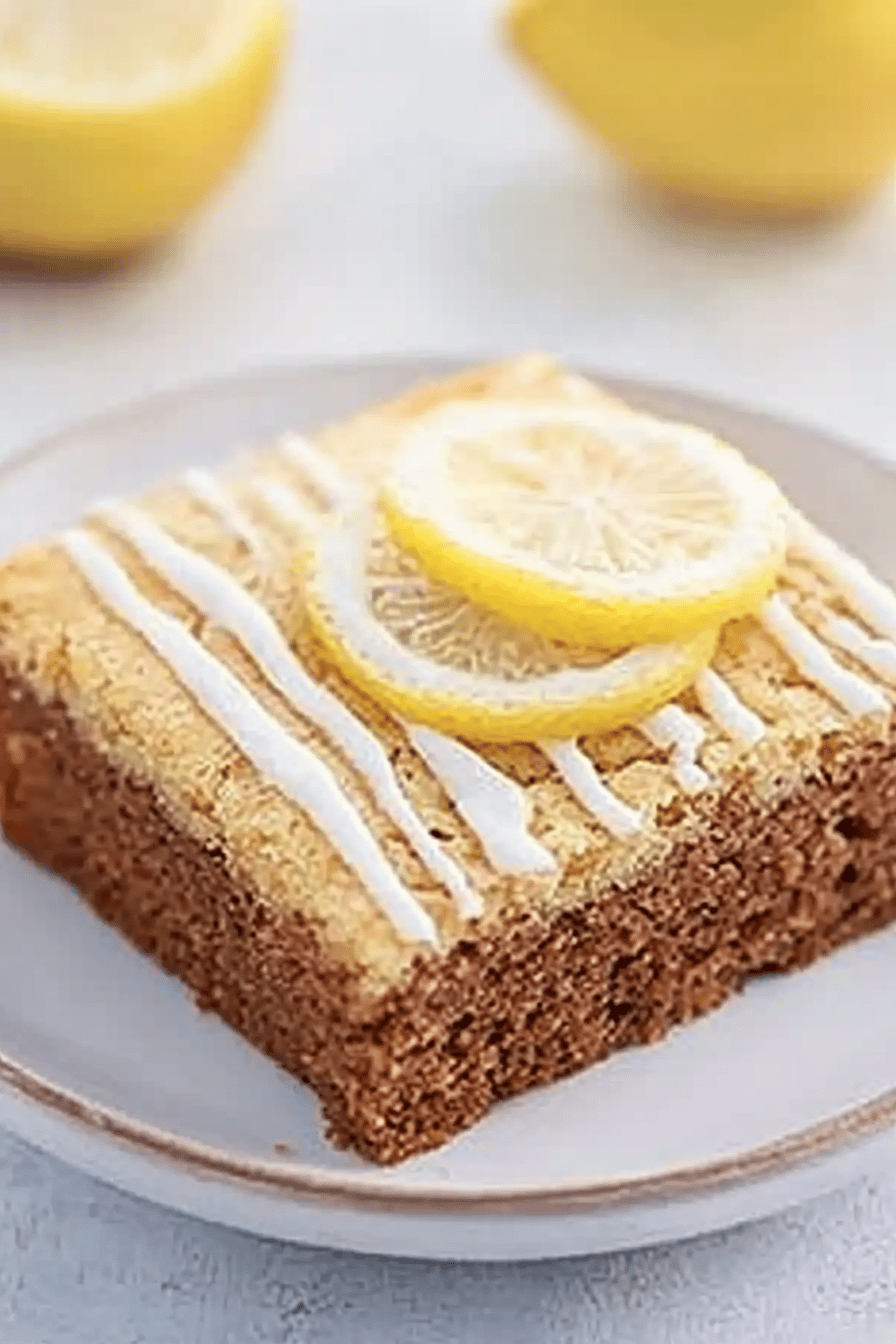
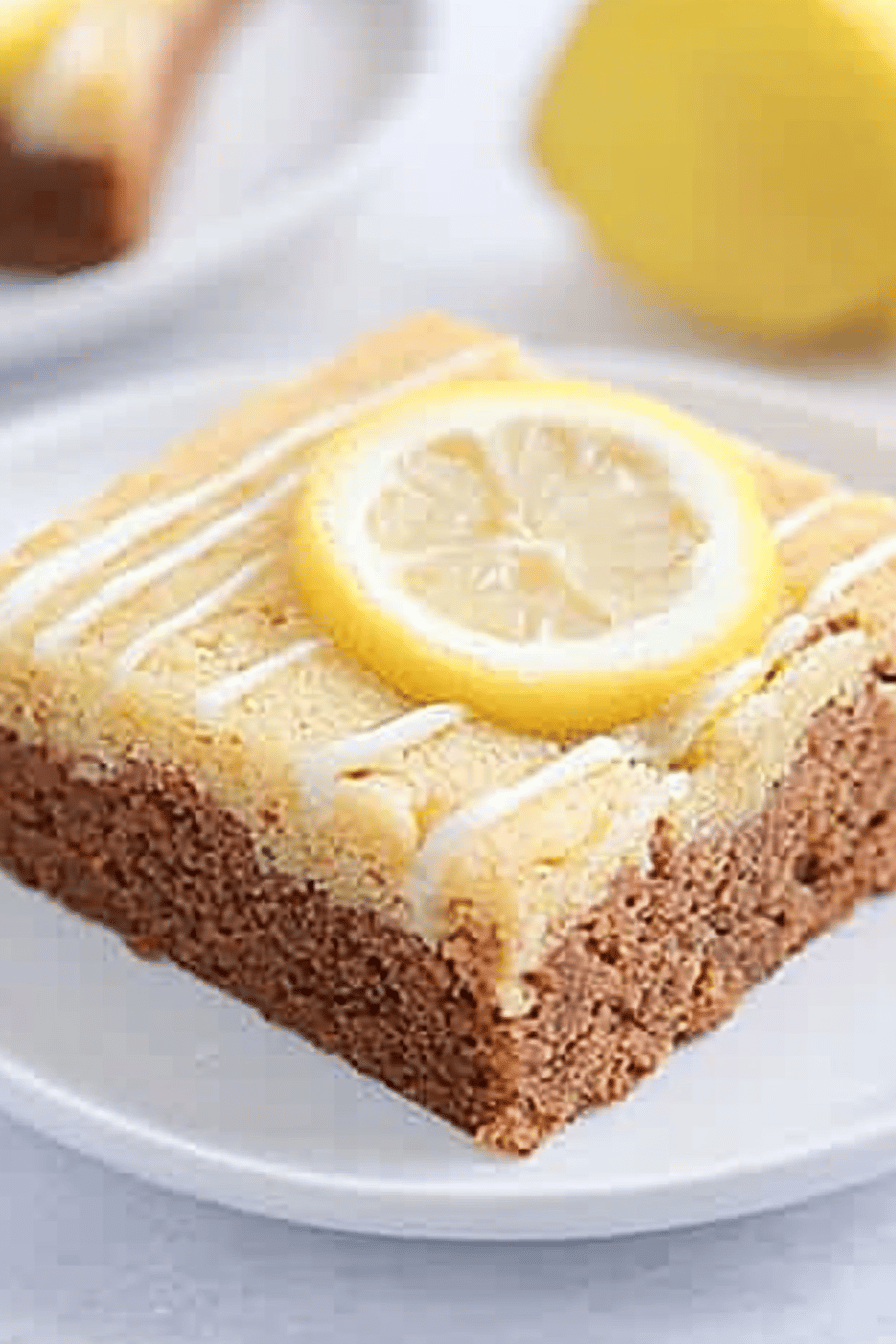
So, what exactly are these little gems? Think of your favorite rich, fudgy brownie – you know, the kind that’s dense, chocolatey, and utterly irresistible. Now, imagine infusing that incredible flavor with the bright, zippy taste of fresh lemon. That’s the magic of these Gluten-Free Lemon Brownies! They’re essentially a classic fudgy brownie recipe that has been cleverly adapted to be completely gluten-free, with the addition of lemon zest and juice that cuts through the richness and adds a delightful tang. It’s not a sharp, in-your-face lemon flavor, but rather a subtle, sophisticated note that makes the chocolate sing. It’s like a perfectly balanced conversation between two delicious flavors, and the fact that they’re gluten-free just makes them even more accessible for everyone to enjoy.
Why you’ll love this recipe?
Honestly, the list is pretty long! First and foremost, the FLAVOR. Oh my goodness, the flavor! You get that deep, dark chocolate goodness that you crave from a brownie, but then that subtle, bright lemon zest just dances on your tongue, creating this incredibly complex and satisfying taste. It’s unexpected, but oh-so-right. Then there’s the SIMPLICITY. I know baking can sometimes feel intimidating, but I promise you, this recipe is surprisingly straightforward. Most of the ingredients are pantry staples, and you can whip them up in no time. I’ve even made them on a weeknight when a dessert craving hit HARD! They’re incredibly COST-EFFECTIVE, too. You don’t need any fancy, hard-to-find ingredients to make these spectacular. And the VERSATILITY! These are just as happy at a fancy tea party as they are at a casual backyard barbecue. My kids love them, my husband devours them, and they’re always the first thing to go when I bring them to a potluck. What I love most, though, is how they feel so indulgent and special, yet they’re completely gluten-free. It’s a total win-win. They remind me a bit of my classic fudgy brownie recipe, but with this wonderful citrusy zing that just elevates them. If you’re looking for a dessert that’s a little bit classic and a little bit unexpected, this is it!
How do I make gluten-free lemon brownies?
Quick Overview
Making these Gluten-Free Lemon Brownies is a breeze! You’ll melt some butter and chocolate together, whisk in sugar and eggs, then gently fold in your gluten-free flour blend, cocoa powder, and that all-important lemon zest. A quick swirl of lemon filling goes in, and then you bake them until they’re perfectly fudgy. The whole process from start to finish, including cooling time, is pretty manageable, and the end result is always worth it. It’s all about gentle mixing and not overbaking, which are secrets to any great brownie, gluten-free or not!
Ingredients
For the Main Batter:
1 cup (2 sticks) unsalted butter, melted – I always use good quality butter here, it really makes a difference in the richness.
8 ounces semi-sweet or bittersweet chocolate, chopped – Using a mix of both gives a great depth of flavor. If you can find a good quality Gluten-Free Chocolate, even better!
1 ½ cups granulated sugar – This gives us that classic sweet brownie base.
3 large eggs, room temperature – Room temperature eggs incorporate much better and create a smoother batter.
1 teaspoon pure vanilla extract – Essential for that comforting flavor.
1 tablespoon fresh lemon zest – This is where the magic happens! Make sure you get mostly zest and not the white pith, as that can be bitter.
1 cup gluten-free all-purpose flour blend (with xanthan gum) – I’ve tested this with a few different blends, and most work wonderfully. Just ensure it’s a 1:1 substitute blend.
½ cup unsweetened cocoa powder – For that deep, chocolatey base. Dutch-processed cocoa gives a darker color and smoother flavor.
½ teaspoon baking powder – Just a touch to give them a little lift.
¼ teaspoon salt – Balances the sweetness and enhances the chocolate flavor.
For the Filling:
½ cup granulated sugar
¼ cup unsalted butter, softened
1 large egg yolk – This helps to create a rich, creamy filling.
2 tablespoons fresh lemon juice – For that bright, tangy kick.
1 teaspoon fresh lemon zest – More lemon goodness!
For the Glaze:
1 cup powdered sugar, sifted – Sifting is key for a smooth glaze.
2-3 tablespoons fresh lemon juice – Adjust this to get your desired consistency and tang.
Optional: A tiny drop of yellow food coloring for an extra sunny hue, but I usually skip this!
Step-by-Step Instructions
Step 1: Preheat & Prep Pan
First things first, preheat your oven to 350°F (175°C). Grab an 8×8 or 9×9 inch baking pan and line it with parchment paper, leaving some overhang on the sides. This makes lifting the brownies out so much easier later on. You can lightly grease the pan before lining it for extra insurance, but the parchment is usually enough.
Step 2: Mix Dry Ingredients
In a medium bowl, whisk together your gluten-free flour blend, cocoa powder, baking powder, and salt. Give it a good whisk to make sure everything is evenly distributed and there are no lumps. This step is important for ensuring consistent texture throughout your brownies.
Step 3: Mix Wet Ingredients
In a separate, larger bowl, combine the melted butter and chopped chocolate. Stir until the chocolate is completely melted and smooth. If you’re using an oven-safe bowl, you can do this over a double boiler, but I find the microwave in short bursts works just fine too – just be sure to stir between each burst. Once smooth, whisk in the granulated sugar until well combined. Then, add the eggs one at a time, whisking well after each addition until the mixture is glossy. Stir in the vanilla extract and that wonderful fresh lemon zest. It should smell amazing already!
Step 4: Combine
Now, gradually add the dry ingredients to the wet ingredients. Use a spatula or wooden spoon to gently fold them together until just combined. Be careful not to overmix! Overmixing gluten-free flour can sometimes lead to a tougher texture, so mix until you no longer see streaks of dry flour. It’s better to have a few tiny streaks than to overwork the batter.
Step 5: Prepare Filling
While the main batter is resting for a moment, let’s whip up the lemon filling. In a small bowl, cream together the softened butter and sugar until light and fluffy. Beat in the egg yolk, then stir in the lemon juice and lemon zest. It should be a thick, spreadable consistency.
Step 6: Layer & Swirl
Pour about two-thirds of the brownie batter into your prepared baking pan and spread it evenly. Dollop spoonfuls of the lemon filling over the batter. Then, pour the remaining one-third of the brownie batter over the filling. Now for the fun part! Use a knife or a skewer to gently swirl the layers together. Don’t go crazy – you want distinct ribbons of lemon and chocolate, not one muddy mess. A few gentle swoops will do the trick!
Step 7: Bake
Bake in your preheated oven for 25-30 minutes. The edges should look set, and a toothpick inserted into the center should come out with moist crumbs attached, not wet batter. Remember, gluten-free baked goods can sometimes bake a little differently, so start checking around the 25-minute mark. You want them fudgy, not dry!
Step 8: Cool & Glaze
This is probably the hardest part – waiting for them to cool! Let the brownies cool in the pan on a wire rack for at least 30 minutes. While they’re cooling, whisk together the sifted powdered sugar and 2 tablespoons of lemon juice for the glaze. Add more lemon juice, a teaspoon at a time, until you reach your desired drizzling consistency. Once the brownies have cooled considerably (they don’t need to be completely cold), drizzle the glaze over the top. Let the glaze set for a bit before cutting.
Step 9: Slice & Serve
Once the glaze has set, use the parchment paper overhang to lift the brownies out of the pan onto a cutting board. For the cleanest slices, use a sharp knife that you’ve dipped in hot water and wiped dry between cuts. Slice into squares and enjoy your delicious Gluten-Free Lemon Brownies!
What to Serve It With
These Gluten-Free Lemon Brownies are so wonderfully versatile, they fit right in with almost any meal or occasion. For a simple and cheerful BREAKFAST, I love cutting them into smaller squares and serving them alongside a hot cup of coffee or a tall glass of cold milk. They’re a sweet treat that feels a bit more grown-up than a typical pastry. For BRUNCH, they really shine! Present them on a lovely platter, perhaps with some fresh berries scattered around. They pair beautifully with a mimosa or a sparkling lemonade. As a decadent DESSERT, they’re a showstopper on their own, but you could also serve them with a scoop of vanilla bean ice cream or a dollop of whipped cream for an extra touch of indulgence. And for those COZY SNACKS, when you just need a little something sweet to curl up with? These are perfect. I often pair them with a nice cup of herbal tea. My family has a tradition of having one after a family game night, and it always feels so special. I’ve also found that they go surprisingly well with a mild cheese, like a mild cheddar, if you’re looking for something a little different. Trust me, they’re a crowd-pleaser no matter how you serve them!
Top Tips for Perfecting Your Gluten-Free Lemon Brownies
After making these more times than I can count, I’ve picked up a few tricks that I think are worth sharing. First, for the Zucchini Prep (oops, I mean lemon zest prep!), make sure you’re using a microplane or the finest side of your grater. This is key to getting that fragrant zest without any of the bitter white pith. If you do accidentally get a bit of pith, just scrape it off before adding the zest to your batter. For MIXING ADVICE, remember the golden rule of brownies: do NOT overmix. Once you add the gluten-free flour, fold it in *just* until it disappears. Overmixing develops the starches in the flour too much, which can result in a gummy or tough brownie, and nobody wants that! You want tender, fudgy goodness. When it comes to SWIRL CUSTOMIZATION, have fun with it! You don’t need to be an artist. Just gently drag a knife or skewer through the layers a few times. Creating those beautiful marble patterns adds visual appeal and ensures you get a bit of both chocolate and lemon in every bite. For INGREDIENT SWAPS, I’ve found that most good quality gluten-free all-purpose flour blends that contain xanthan gum work beautifully. If your blend doesn’t have xanthan gum, you’ll want to add about ½ teaspoon. For the chocolate, feel free to play around with dark, milk, or even a good quality white chocolate chips, though semi-sweet or bittersweet is my preference for that classic brownie balance. When it comes to BAKING TIPS, always err on the side of underbaking slightly, especially with gluten-free recipes. A toothpick with moist crumbs is exactly what you want for that perfect fudgy texture. They’ll continue to set as they cool. Lastly, for GLAZE VARIATIONS, if you want a thinner glaze, just add a little more lemon juice. If you want it thicker, add a bit more powdered sugar. You can also add a tiny bit of lemon extract for an even more intense lemon flavor, but I usually stick to fresh lemon for the best taste!
Storing and Reheating Tips
These Gluten-Free Lemon Brownies are wonderfully forgiving when it comes to storing. At ROOM TEMPERATURE, they’ll keep beautifully in an airtight container for about 2-3 days. Just make sure they’re completely cooled before sealing them up. I usually cover them with plastic wrap directly in the pan before putting the lid on. For REFRIGERATOR STORAGE, they can last even longer, up to a week. The texture might firm up a bit in the fridge, but that’s easily fixed. Just let them sit at room temperature for about 20-30 minutes before serving, or you can give them a quick zap in the microwave (about 10-15 seconds) to bring back that fudgy softness. If you want to FREEZER INSTRUCTIONS, these are fantastic for making ahead. Wrap individual brownies or the whole pan tightly in plastic wrap, then a layer of aluminum foil, or place them in a freezer-safe container. They’ll stay good for up to 2-3 months. To thaw, simply transfer them to the refrigerator overnight, then let them come to room temperature. For GLAZE TIMING ADVICE, I always recommend letting the glaze set completely before storing or freezing. If you’re storing them at room temperature or in the fridge, the glaze is usually fine. If you’re freezing them, I sometimes prefer to glaze them *after* thawing them. That way, the glaze is super fresh and bright. But either way works!
Frequently Asked Questions
You can slightly reduce the sugar in the brownie batter, perhaps by ¼ cup, if you prefer them less sweet. However, the sugar plays a role in the texture, so don’t reduce it too much. For the glaze, you can adjust the sweetness by adding more or less lemon juice. Using a less sweet chocolate in the batter can also help.
Final Thoughts
So there you have it – my beloved Gluten-Free Lemon Brownies! I truly believe this recipe captures that perfect balance of rich chocolate and bright citrus, all while being wonderfully accessible. They’re the kind of treat that makes you feel like you’ve accomplished something special in the kitchen, even on a busy day. They are perfect for when you need a little something to brighten your mood, or to share with loved ones. If you’ve enjoyed this recipe, I think you might also love my Classic Fudgy Brownies or my Lemon Blueberry Scones for more bright, delicious flavors. Please, please try these out and let me know what you think in the comments below! I absolutely love seeing your creations and hearing about your own kitchen adventures with this recipe. Happy baking, everyone!
Gluten-Free Lemon Brownies
Ingredients
Brownie Base
- 0.5 cup unsalted butter melted
- 2 large eggs
- 1.5 cup granulated sugar
- 1 teaspoon vanilla extract
- 0.5 cup gluten-free all-purpose flour blend with xanthan gum
- 0.25 cup unsweetened cocoa powder
- 0.5 teaspoon baking powder
- 0.25 teaspoon salt
Lemon Swirl
- 0.5 cup granulated sugar
- 0.5 cup fresh lemon juice
- 2 tablespoons lemon zest from 2 lemons
- 0.5 cup gluten-free all-purpose flour blend with xanthan gum
Instructions
Brownie Preparation
- Preheat your oven to 350°F (175°C). Grease and flour an 8x8 inch baking pan with gluten-free flour or line it with parchment paper.
- In a medium bowl, whisk together the melted butter and 1.5 cups of granulated sugar until well combined.
- Beat in the eggs one at a time, then stir in the vanilla extract.
- In a separate bowl, whisk together the 0.5 cup gluten-free flour blend, cocoa powder, baking powder, and salt.
- Gradually add the dry ingredients to the wet ingredients, mixing until just combined. Do not overmix.
Lemon Swirl Preparation
- In a small bowl, whisk together the 0.5 cup granulated sugar, lemon juice, and lemon zest until dissolved.
- Gradually whisk in the 0.5 cup gluten-free flour blend until the mixture is smooth and slightly thickened.
Assembly and Baking
- Pour half of the brownie batter into the prepared baking pan and spread evenly.
- Drizzle the lemon swirl mixture over the brownie batter. Use a knife or toothpick to gently swirl the lemon mixture into the brownie batter, creating a marbled effect.
- Pour the remaining brownie batter over the swirled mixture and spread evenly.
- Bake for 25-30 minutes, or until a toothpick inserted into the center comes out with moist crumbs (not wet batter).
- Let the brownies cool completely in the pan before cutting into squares.