You know those nights when a craving hits, a serious, deep-down craving for something sweet and utterly comforting, but the thought of turning on the oven feels like climbing Mount Everest? Yeah, I have those nights *all* the time. And that’s precisely when this Peanut Butter Mousse recipe becomes my absolute hero. Forget complicated baking steps or waiting hours for things to chill. This is pure, unadulterated peanut butter bliss, ready in a fraction of the time you’d spend baking a batch of cookies, and honestly? It often satisfies that sweet tooth even better. It’s the kind of dessert that makes you close your eyes with the first bite, a little moment of pure joy. It reminds me so much of those little chocolate pudding cups we used to get as kids, but elevated, richer, and with that irresistible peanut butter punch. If you’re a peanut butter lover, this is going to be your new go-to. Seriously, it’s that good.
What is peanut butter mousse?
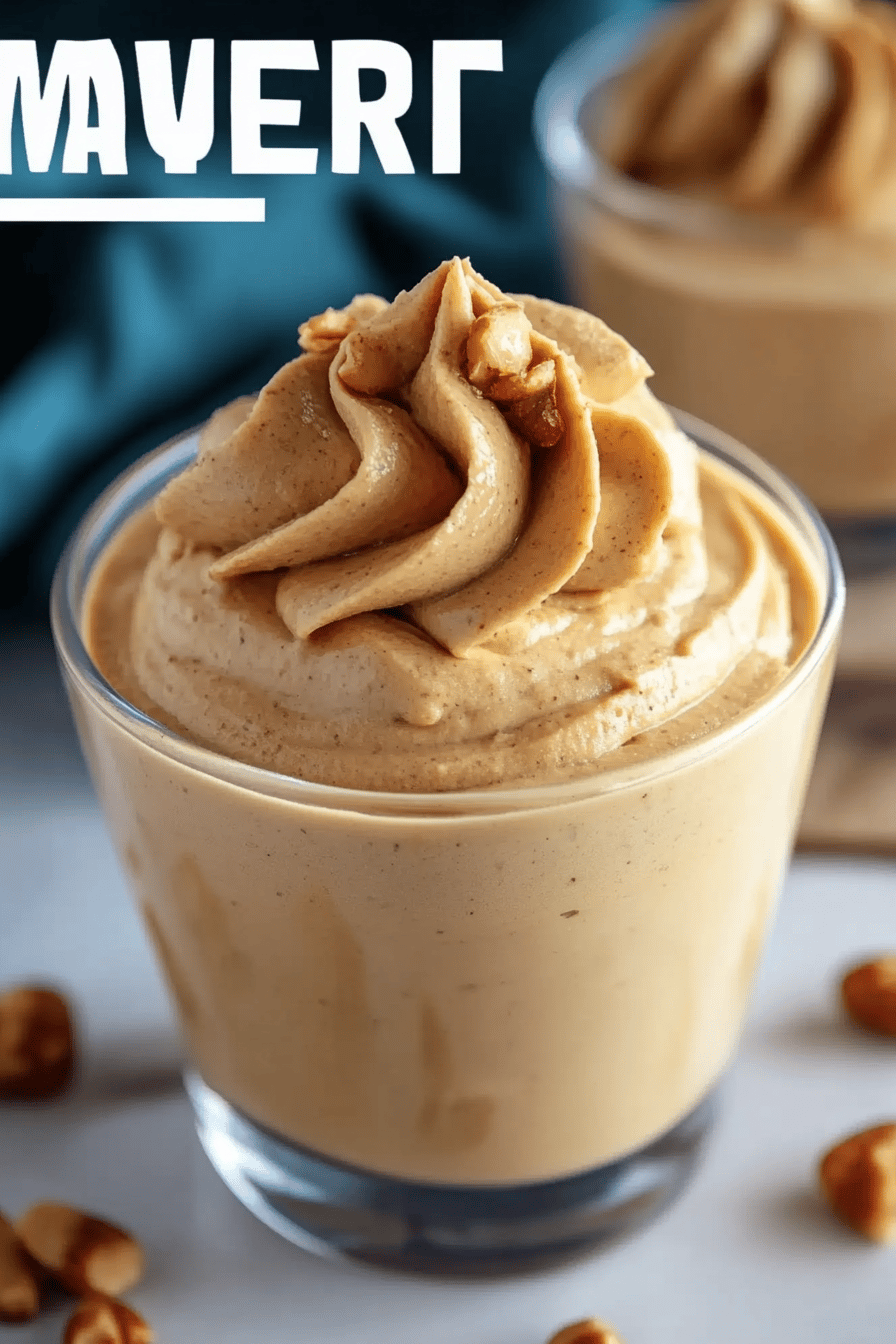
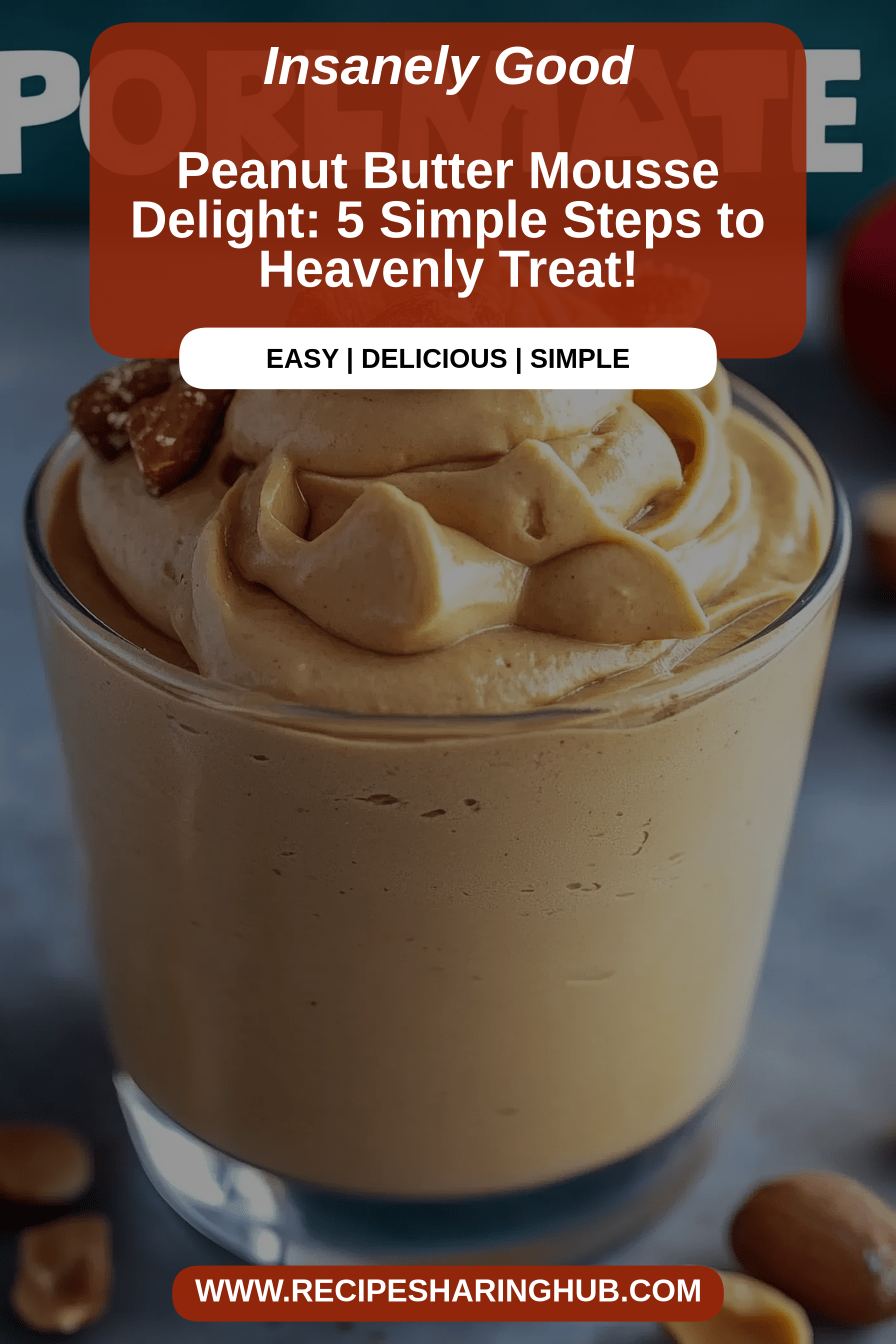
So, what exactly is this magical concoction I keep raving about? Think of it as the most decadent, cloud-like dessert you can imagine, all wrapped up in the irresistible flavor of peanut butter. It’s essentially a light, airy, and incredibly smooth mousse that hits all the right notes. It’s not heavy like a dense cake or overly sweet like some candies; it’s sophisticated yet incredibly approachable. The name itself, “Peanut Butter Mousse,” pretty much tells you what you’re getting: the creamy, dreamy texture of a classic mousse, infused with the rich, nutty goodness of peanut butter. It’s the perfect way to enjoy that beloved peanut butter flavor in a format that feels special without being fussy. It’s sunshine in a bowl, really!
Why you’ll love this recipe?
I know you will love this Peanut Butter Mousse recipe, but I know you will too.flavor is just out of this world. It’s that classic peanut butter taste, but amplified and made so incredibly smooth and luxurious. It’s rich without being overwhelming, and that hint of sweetness is just perfect. Then there’s the simplicity. Honestly, this is a lifesaver on busy nights or when unexpected guests pop over. You don’t need any fancy equipment or a culinary degree for this one. It comes together so quickly, and the satisfaction you get from making something so delicious from scratch is immense. Plus, it’s surprisingly cost-efficientWhat are some pantry staples that you can whip up without breaking the bank?versatility! This mousse is fantastic on its own, but it’s also incredible served with fresh berries, a drizzle of chocolate sauce, or even dolloped on top of brownies. What I love most about this recipe, though, is that it feels like a treat, a real indulgence, but it’s so easy to make that it doesn’t feel like a chore. It’s the perfect antidote to a long day or a simple way to celebrate a small victory. It’s the kind of dessert that makes everyone happy, from the pickiest eaters to the most discerning dessert aficionados.
How to Make Peanut Butter Mousse
Quick Overview
This Peanut Butter Mousse recipe is all about achieving maximum flavor with minimum fuss. We’re talking about a few simple steps that transform everyday ingredients into a show-stopping dessert. The magic happens as we whip cream and fold in our peanut butter mixture, creating an ethereal texture that melts in your mouth. It’s the kind of recipe that makes you feel like a baking wizard, even if you’re just starting out. The beauty is in its speed and simplicity – you can have this ready to chill in under 15 minutes! It’s a perfect example of how a few quality ingredients can create something truly special with hardly any effort.
Ingredients
For the Main Mousse Base:
Here’s what you’ll need to get that incredibly creamy texture. I always recommend using a good quality, creamy peanut butter – the natural stuff can sometimes separate and make the texture a little gritty, though if that’s all you have, just give it a really good stir! You’ll need about 1 cup (around 250g) of smooth peanut butter. We’ll also need 1 cup (240ml) of heavy whipping cream – make sure it’s cold for best results, it whips up so much better that way! And for a touch of sweetness, about 1/2 cup (100g) of granulated sugar is usually perfect, but you can adjust this to your taste. A tiny pinch of salt (about 1/4 teaspoon) really helps to balance the sweetness and bring out the peanut butter flavor. And for that extra something, a teaspoon of vanilla extract is a must!
For Optional Richness & Flavor Boost:
Sometimes I like to make it even more decadent. For this, you might want 2 ounces (about 55g) of CREAM CHEESE, softened. This makes it extra smooth and adds a lovely tang that cuts through the richness. I also sometimes add a tablespoon of melted unsalted butter to give it an even richer mouthfeel, but honestly, it’s delicious without it too. This part is totally optional but highly recommended for that next-level indulgence.
For Garnishes (Because Presentation Matters!):
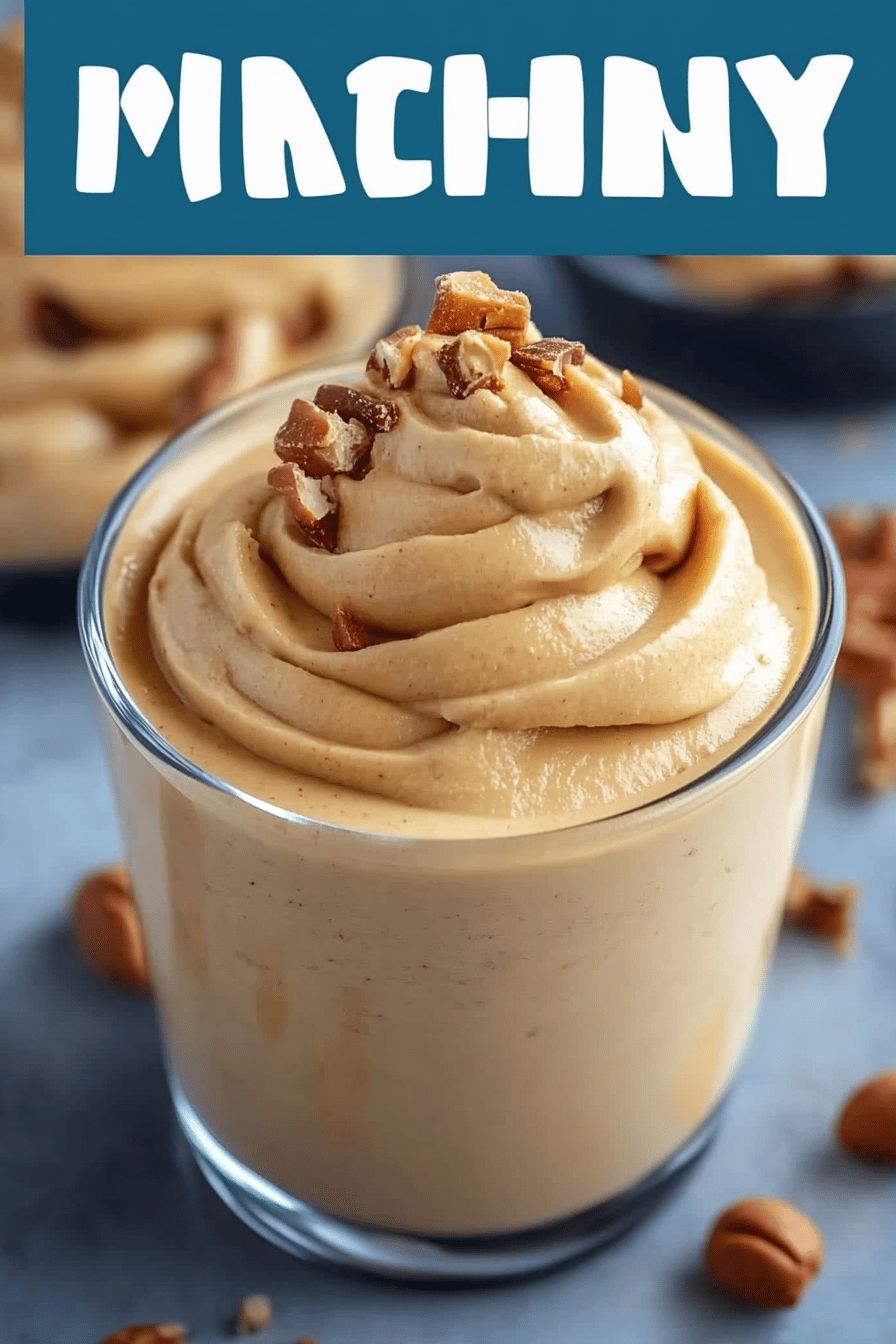
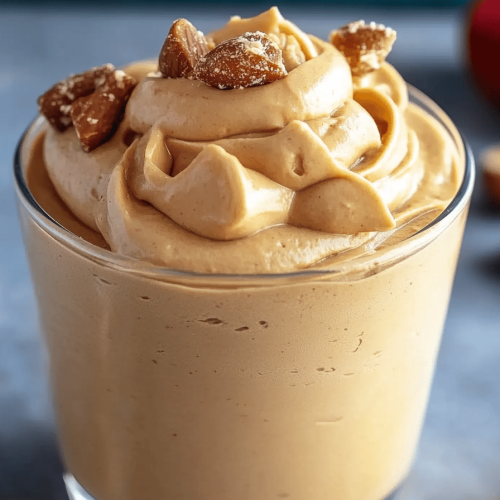
This is where you can get creative! I love a sprinkle of mini chocolate chips, some crushed roasted peanuts for a little crunch, or even a drizzle of melted chocolate. A few fresh raspberries or strawberries can also add a pop of color and freshness. And of course, a dollop of extra whipped cream is always a winner!

Step-by-Step Instructions
Step 1: Prepare Your Tools
First things first, let’s get organized! Make sure your mixing bowls and whisk attachment (or your hand mixer) are nice and clean. If you’re using cream cheese, make sure it’s softened to room temperature – this is key for a smooth mixture later on. I usually take it out of the fridge about 30-60 minutes before I plan to start. Also, decide on your serving dishes – pretty glasses, ramekins, or even small jars work wonderfully. Having them ready means you can transfer the mousse as soon as it’s done.
Step 2: Whip the Cream
In a large, chilled bowl, pour in your cold heavy whipping cream. Using your electric mixer (or a whisk if you’re feeling strong!), beat the cream on medium-high speed until soft peaks form. This means when you lift the whisk, the cream forms a peak that gently curls over. Be careful not to over-whip it into butter! If you’re adding a touch of sugar or vanilla to the cream itself, now’s the time to add it and whip until just combined and firm peaks form – when you lift the whisk, the peak should stand up straight.
Step 3: Mix the Peanut Butter Base
In a separate medium bowl, combine your smooth peanut butter, granulated sugar, pinch of salt, and vanilla extract. If you’re using the optional softened cream cheese and melted butter, add them in now. Beat or whisk these ingredients together until they are well combined and smooth. It will look a bit thick and paste-like, and that’s perfectly normal. Make sure there are no lumps of cream cheese remaining if you’re using it.
Step 4: Gently Combine
Now for the delicate part: bringing it all together. Take about a third of your whipped cream and gently fold it into the peanut butter mixture. Don’t be afraid to be a bit rough here; you’re essentially lightening up the peanut butter base. Once that’s incorporated, add the rest of the whipped cream to the peanut butter mixture. Now, fold *very gently* until just combined. You want to keep as much air in the whipped cream as possible, so use a spatula and a folding motion, scraping the bottom of the bowl and bringing it up over the top. Stop as soon as you don’t see any large streaks of peanut butter or cream. Overmixing will deflate the mousse and make it dense.
Step 5: Taste and Adjust
Before you portion it out, give it a little taste. Does it need a touch more sweetness? A little more vanilla? This is your chance to make it perfect for your palate. Remember, the flavors will meld and slightly intensify as it chills, so don’t go overboard. Just a tiny tweak can make all the difference.
Step 6: Portion and Chill
Carefully spoon or pipe the mousse into your prepared serving dishes. Fill them about two-thirds to three-quarters full. You can smooth the tops with the back of a spoon or create pretty swirls. Cover each dish with plastic wrap, pressing it gently onto the surface of the mousse to prevent a skin from forming, or simply cover the whole tray if you’ve used individual glasses. Refrigerate for at least 2-4 hours. I find overnight is even better if you can wait, as it allows the flavors to fully develop and the texture to set perfectly.
Step 7: Garnish and Serve
Once the mousse is chilled and set, it’s time for the fun part – garnishing! Add your favorite toppings like chocolate chips, crushed peanuts, a drizzle of chocolate syrup, or a dollop of fresh whipped cream. Serve immediately and watch the smiles appear!
What to Serve It With
This Peanut Butter Mousse is so versatile, it can be the star of any meal or occasion! For a quick and easy breakfast treat (yes, I sometimes have this for breakfast – don’t judge!), a small dollop in a ramekin with a sprinkle of granola and a few fresh berries is a delightful way to start the day. It pairs beautifully with a hot cup of coffee.
If you’re planning a brunch, this mousse can be served in elegant shot glasses or small martini glasses, perhaps topped with a tiny raspberry or a delicate chocolate curl. It adds a touch of sophistication without being too heavy before a main meal. A crisp sparkling cider or a mimosa would be a lovely accompaniment.
As a dessert, it truly shines. Serve it in larger bowls or wine glasses, perhaps with a side of chocolate biscotti for dipping, or alongside a rich chocolate lava cake for the ultimate chocolate-peanut butter experience. A dessert wine or a coffee liqueur would be a perfect pairing.
And for those cozy snack moments? This mousse is pure comfort. Serve it straight from the fridge in your favorite mug, maybe with a few pretzel sticks on the side for that salty-sweet contrast. It’s perfect for a movie night or just a quiet evening in. My family absolutely loves it after dinner, especially when there’s no energy left for baking but the sweet craving is undeniable. It’s a guaranteed crowd-pleaser, and I love how adaptable it is to whatever you have on hand or whatever mood you’re in!
Top Tips for Perfecting Your Peanut Butter Mousse
I’ve made this Peanut Butter Mousse more times than I can count, and over the years, I’ve picked up a few tricks that I think really help elevate it. First, regarding the peanut butter itself: make sure it’s smooth and creamy, and give it a really good stir if it’s a natural variety. Any oil separation can affect the final texture, so a well-emulsified peanut butter is your friend here. I’ve found that using the standard creamy peanut butter you find in most supermarkets gives the most consistently smooth result.
When it comes to mixing the ingredients, the key is gentle folding. You want to incorporate the peanut butter mixture into the whipped cream without deflating all that lovely air. Think of it like a delicate dance – don’t overdo it. I always start with about a third of the whipped cream to loosen up the peanut butter base, making it easier to fold in the rest without overmixing. You’re looking for just combined, no large streaks of peanut butter or cream visible. It’s better to have a few tiny streaks than to overwork it and end up with a dense mousse.
For swirl customization, while this recipe is more about smooth texture, if you’re feeling artistic, you can add a bit of melted chocolate or a swirl of fruit puree (like raspberry or strawberry) into the peanut butter mixture *before* folding in the cream. Then, when you’re spooning it into dishes, you can gently swirl it a bit more. Just be careful not to over-swirl, or you’ll muddy the colors and textures.
As for ingredient swaps, if you’re dairy-free, you can try using full-fat coconut cream (the solid part from a chilled can of coconut milk) instead of heavy cream, and a plant-based peanut butter. The texture might be slightly different, but it’s definitely doable! For sweetness, you can experiment with powdered sugar or even a good quality maple syrup, but adjust the quantities as they add moisture differently. I tested this with a touch of almond extract instead of vanilla once, and it was divine if you’re looking for a different nutty profile.
When it comes to baking tips, well, there’s no baking here! This is a no-bake wonder, which is part of its charm. The most important ‘baking’ tip is really about chilling. Give it ample time to set. I know it’s tempting to dig in right away, but the texture really improves with a few hours in the fridge. The flavors meld beautifully, and it firms up perfectly. If you’re in a rush, a quick stint in the freezer for about 45 minutes can help, but the fridge is ideal for the best result.
For glaze variations, if you’re not a fan of the traditional whipped cream, a simple ganache made from melted dark chocolate and a bit of cream or coconut milk drizzled over the top is amazing. You could also dust it with cocoa powder or a little powdered sugar for a simpler finish. Sometimes I’ll even add a little espresso powder to the peanut butter mixture for a mocha-peanut butter twist!
Storing and Reheating Tips
This Peanut Butter Mousse is best enjoyed fresh, but it does store quite well if you happen to have any leftovers (which is rare in my house!). For room temperature storage, I honestly wouldn’t recommend leaving it out for more than an hour or two, especially if you used cream cheese, as it’s a dairy-based dessert. It’s best kept chilled.
Refrigerator storage is your best bet. Once the mousse has set, cover the individual serving dishes tightly with plastic wrap, pressing it gently onto the surface to prevent air exposure. This helps maintain its creamy texture and prevents it from absorbing any odors from the fridge. It should stay deliciously fresh for up to 3-4 days. I’ve found the texture is actually even better on day two, as all the flavors have had more time to meld together.
Freezer instructions are a little trickier for mousse, as the texture can sometimes change upon thawing. However, if you absolutely must freeze it, I’d recommend doing so *before* adding any garnishes. Place the mousse in airtight containers or wrap the serving dishes very well with a double layer of plastic wrap followed by a layer of aluminum foil. It should keep for about 2-3 weeks. When you’re ready to thaw, transfer it to the refrigerator overnight. The texture might be a touch softer, but it should still be incredibly tasty. You might want to give it a quick whisk or gently stir it before serving if it seems a bit separated.
Regarding glaze timing advice, if you plan to store the mousse, it’s often best to add garnishes like whipped cream or chocolate drizzle right before serving. If you’re adding a ganache or a firmer topping, you can add it before refrigerating, as these tend to hold up better to chilling. For any fruit garnishes, definitely add those just before serving to keep them fresh and vibrant.
Frequently Asked Questions
Final Thoughts
So there you have it – my absolute go-to recipe for a Peanut Butter Mousse that’s ridiculously easy and incredibly delicious. It’s the perfect dessert for those times when you need something sweet, satisfying, and special, but don’t have a lot of time or energy. The combination of creamy peanut butter and light-as-air whipped cream is just pure magic. It’s a recipe that’s been a lifesaver for me more times than I can count, and I truly hope it becomes a favorite in your kitchen too. If you love this recipe, you might also enjoy my recipes for No-Bake Chocolate Peanut Butter Bars or my classic Creamy Peanut Butter Pie. They’re all winners in my book! I can’t wait to hear how your Peanut Butter Mousse turns out. Don’t forget to leave a comment below and let me know your favorite way to serve it, or if you’ve tried any fun variations. Happy whipping!
Peanut Butter Mousse
Ingredients
Main Ingredients
- 1.5 cup heavy cream
- 0.5 cup powdered sugar
- 0.5 cup creamy peanut butter room temperature
- 1 teaspoon vanilla extract
- 0.25 teaspoon salt optional, to taste
Instructions
Preparation Steps
- In a large bowl, whip the heavy cream until soft peaks form. Gradually add the powdered sugar and continue whipping until stiff peaks form.
- In a separate bowl, whisk together the peanut butter, vanilla extract, and salt until smooth.
- Gently fold about one-third of the whipped cream into the peanut butter mixture to lighten it. Then, carefully fold the peanut butter mixture into the remaining whipped cream until just combined. Be careful not to overmix.
- Spoon the mousse into individual serving dishes or glasses.
- Chill for at least 30 minutes before serving. Garnish with chopped peanuts or chocolate shavings if desired.