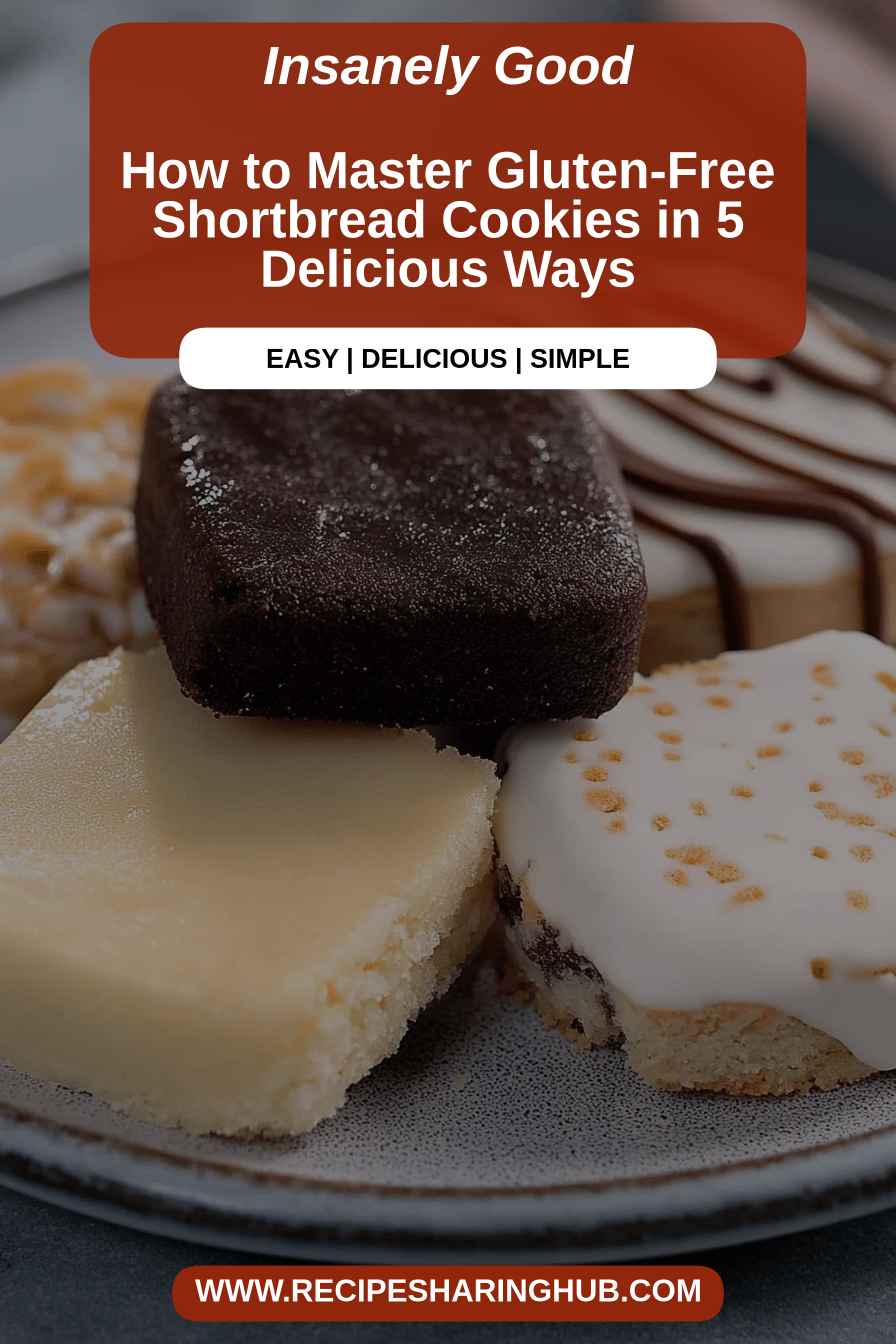
You know those days? The ones where you just need a little something sweet, something comforting, something that feels like a warm hug from the inside out? For me, that feeling always comes with a batch of my absolute favorite gluten-free shortbread cookies. They’re not fussy, they don’t require a million fancy ingredients, and honestly, they’re pretty forgiving, which is a huge win in my book! My family devours these faster than I can bake them, and I’ve lost count of how many times friends have begged me for the recipe. If you’ve ever tried a truly amazing shortbread, you know that melt-in-your-mouth texture and buttery, sweet flavor. Well, these gluten-free shortbread cookies capture all of that magic, and then some. They’re my go-to for potlucks, holiday cookie platters, or honestly, just for an afternoon tea break when I need a little pick-me-up. They’re as close as you can get to the real deal, and I’m so thrilled to finally share this treasure with you all.
What are gluten free shortbread cookies?
So, what exactly are these delightful little cookies we’re talking about? Think of them as the more accessible, allergy-friendly cousin to the classic shortbread you might remember. Traditionally, shortbread is made with a hefty amount of butter, sugar, and flour, giving it that wonderfully crumbly yet rich texture. My gluten-free shortbread cookies achieve that same crave-worthy texture and flavor, but we’re swapping out the regular wheat flour for a carefully selected gluten-free blend. The “short” in shortbread actually refers to the high fat content (from the butter!), which inhibits gluten development and gives it that characteristic tender, crumbly bite. This recipe aims to replicate that delightful mouthfeel and pure, buttery goodness without any gluten in sight. It’s all about celebrating that simple, elegant flavor profile that just makes you happy. These aren’t overly sweet or complicated; they’re just pure, unadulterated cookie bliss.
Why you’ll love this recipe?
I love this recipe, and I know you will too!flavorIs that perfect balance of sweet and buttery, with a hint of vanilla that just sings?simplicity. This recipe is a lifesaver on busy nights or when you’re suddenly craving something homemade but don’t have a lot of time. The steps are straightforward, and you probably already have most of the ingredients in your pantry. Plus, it’s incredibly cost-effective! Using pantry staples means you can whip up a big batch without breaking the bank, which is always a huge plus for me. What really sets these gluten-free shortbread cookies apart for me, though, is their versatility. They’re fantastic just as they are, but you can easily dress them up with a drizzle of chocolate, a sprinkle of sea salt, or even dip them in your morning coffee. I also find them to be a perfect base if you’re looking for a gluten-free cookie that’s sturdy enough to hold up well for decorating or for using in other recipes, like crushed as a topping for a gluten-free cheesecake. Compared to some other gluten-free baking projects that can be finicky, this one is just consistently delicious and reliable. It’s the kind of recipe that makes you feel like a baking superhero, even if you’re just starting out!
How to Make Gluten-Free Shortbread Cookies
Quick Overview
The beauty of these gluten-free shortbread cookies lies in their straightforward approach. We’re essentially creaming butter and sugar, then gently incorporating our gluten-free flour blend and a touch of vanilla. The dough comes together quickly, is shaped, and then baked until perfectly golden. It’s truly a no-fuss process that yields incredibly rewarding results. The key is to not overwork the dough, ensuring that tender, crumbly texture that makes shortbread so special. You’ll be amazed at how simple it is to achieve bakery-quality cookies right in your own kitchen.
Ingredients
For the Main Batter:
- 1 cup (2 sticks or 227g) unsalted butter, softened: Make sure it’s truly softened, not melted. This is crucial for getting that creamy texture when you cream it with the sugar. I usually leave mine out on the counter for about an hour.
- 1/2 cup (100g) granulated sugar: For sweetness and to help with browning.
- 1 teaspoon vanilla extract: A good quality vanilla makes a world of difference in simple bakes like this.
- 2 cups (280g) all-purpose gluten-free flour blend (with xanthan gum): I’ve tested this with a few different blends, and most 1:1 substitutes work wonderfully. If your blend doesn’t contain xanthan gum, add about 1/2 teaspoon.
- 1/4 teaspoon salt: Balances the sweetness and enhances the butter flavor.
For the Filling:
This section is actually not for a filling in this specific recipe, as we’re focusing on a classic, pure shortbread. However, if you wanted to add a simple touch, a light dusting of powdered sugar or a simple glaze after baking is wonderful!
For the Glaze (Optional):
- 1 cup (120g) powdered sugar
- 1-2 tablespoons milk (dairy or non-dairy) or water
- 1/4 teaspoon vanilla extract (optional)
Step-by-Step Instructions
Step 1: Preheat & Prep Pan
First things first, get your oven preheated to 325°F (160°C). This lower temperature is key for ensuring your shortbread bakes evenly and doesn’t get too brown too quickly. Next, line a baking sheet with parchment paper. This makes cleanup a breeze and ensures your cookies don’t stick. You can also lightly grease the parchment if you’re feeling extra cautious, but usually, it’s not necessary.
Step 2: Mix Dry Ingredients
In a medium bowl, whisk together your gluten-free flour blend and salt. Just a good whisking will do the trick to combine them evenly and aerate the flour slightly. Set this aside for a moment.
Step 3: Mix Wet Ingredients
In a large bowl, using an electric mixer (or a sturdy whisk and some elbow grease!), cream together the softened butter and granulated sugar until the mixture is light and fluffy. This usually takes about 3-5 minutes. You want it to be pale yellow and noticeably increased in volume. Beat in the vanilla extract until just combined.
Step 4: Combine
Gradually add the dry ingredients to the wet ingredients, mixing on low speed (or stirring with a spatula) until just combined. Be careful not to overmix here! Overmixing can make your cookies tough, even without gluten. The dough will look crumbly at first, but keep mixing until it starts to come together into a cohesive dough. If it seems too dry, you can add another tablespoon of milk or a tiny bit more butter. If it seems too wet, add a tablespoon of your GF flour blend.
Step 5: Prepare Filling
As mentioned, this recipe is for a classic shortbread. If you’re feeling adventurous and want a filling, you could prepare a simple fruit jam or a chocolate ganache to dollop onto the dough *before* baking, but be mindful that this can change the baking time and texture. For this recipe, we’re keeping it simple and pure.
Step 6: Layer & Swirl
For classic shortbread cookies, you have a couple of options. You can gently press the dough into a round or square pan (about 8×8 inches) and score it into wedges before baking, or you can form it into a log, chill it, and then slice it into rounds. For this recipe, I love the rustic charm of pressing it into a pan. Gently press the dough evenly into your prepared pan. You can use your hands or the bottom of a glass. If you want a swirled effect, this is where you’d add a contrasting element, like a raspberry puree swirled in, but for pure shortbread, a nice, even surface is perfect.
Step 7: Bake
Bake in your preheated oven for 20-25 minutes, or until the edges are lightly golden and the center looks set. Keep an eye on them, as gluten-free baked goods can sometimes brown a bit differently. You don’t want them to be dark brown, just beautifully golden around the edges.
Step 8: Cool & Glaze
Let the shortbread cool in the pan for about 10 minutes before attempting to cut it. This is crucial for structure! If you pressed it into a pan, now is the time to gently cut it into squares or fingers. Let it cool completely on a wire rack. If you’re adding the optional glaze, mix the powdered sugar, milk, and vanilla until smooth and drizzle over the completely cooled cookies. Let the glaze set before storing.
Step 9: Slice & Serve
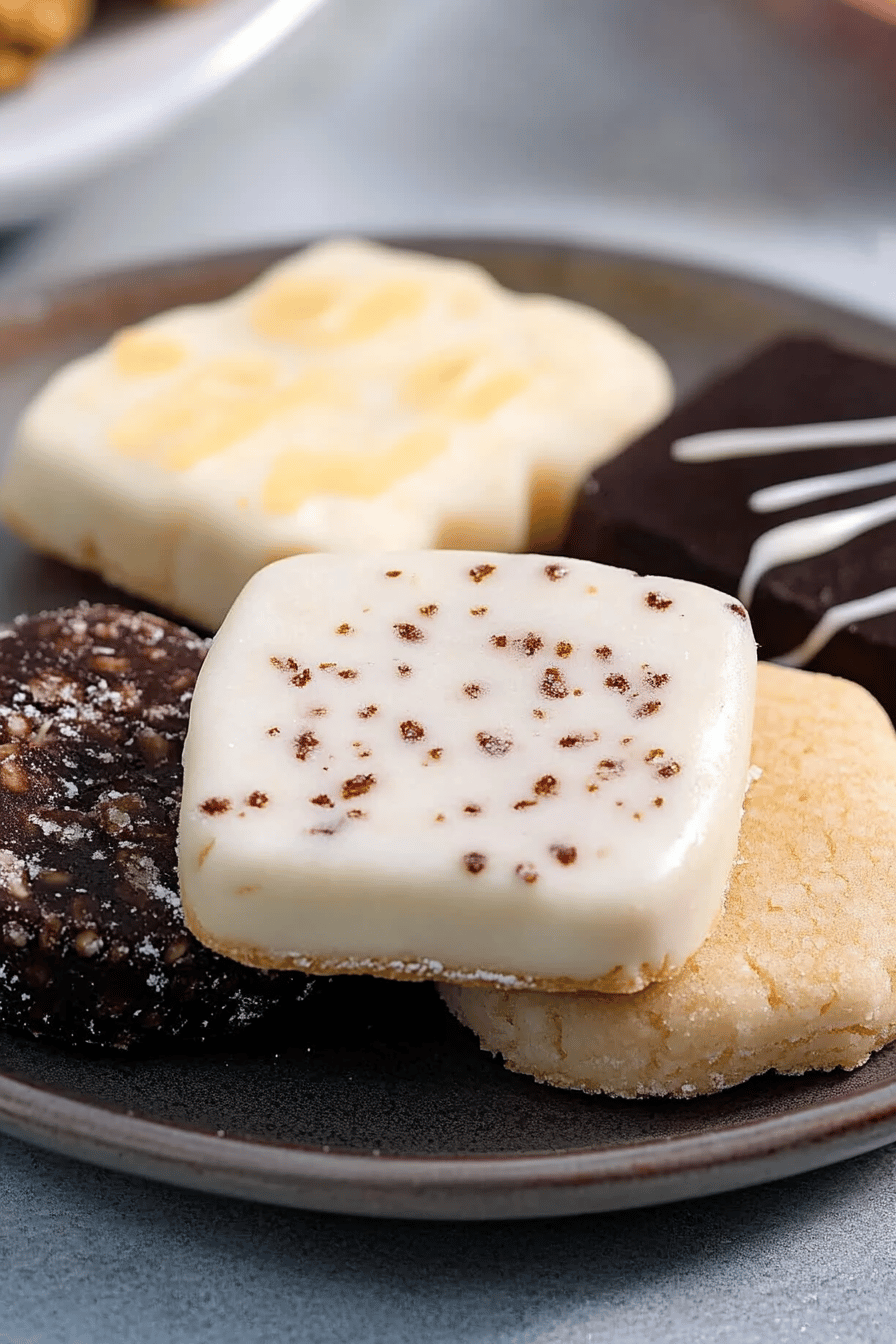
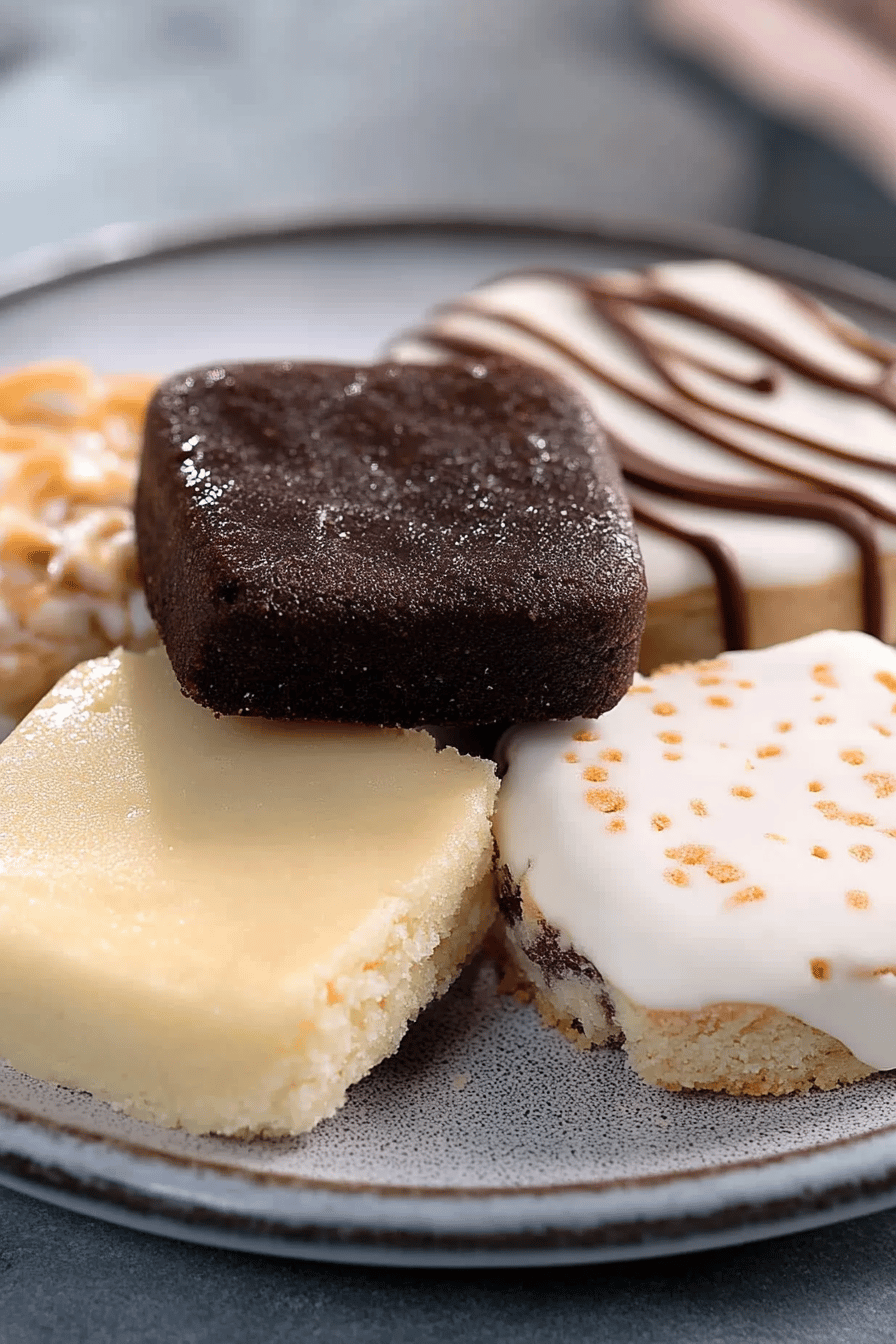
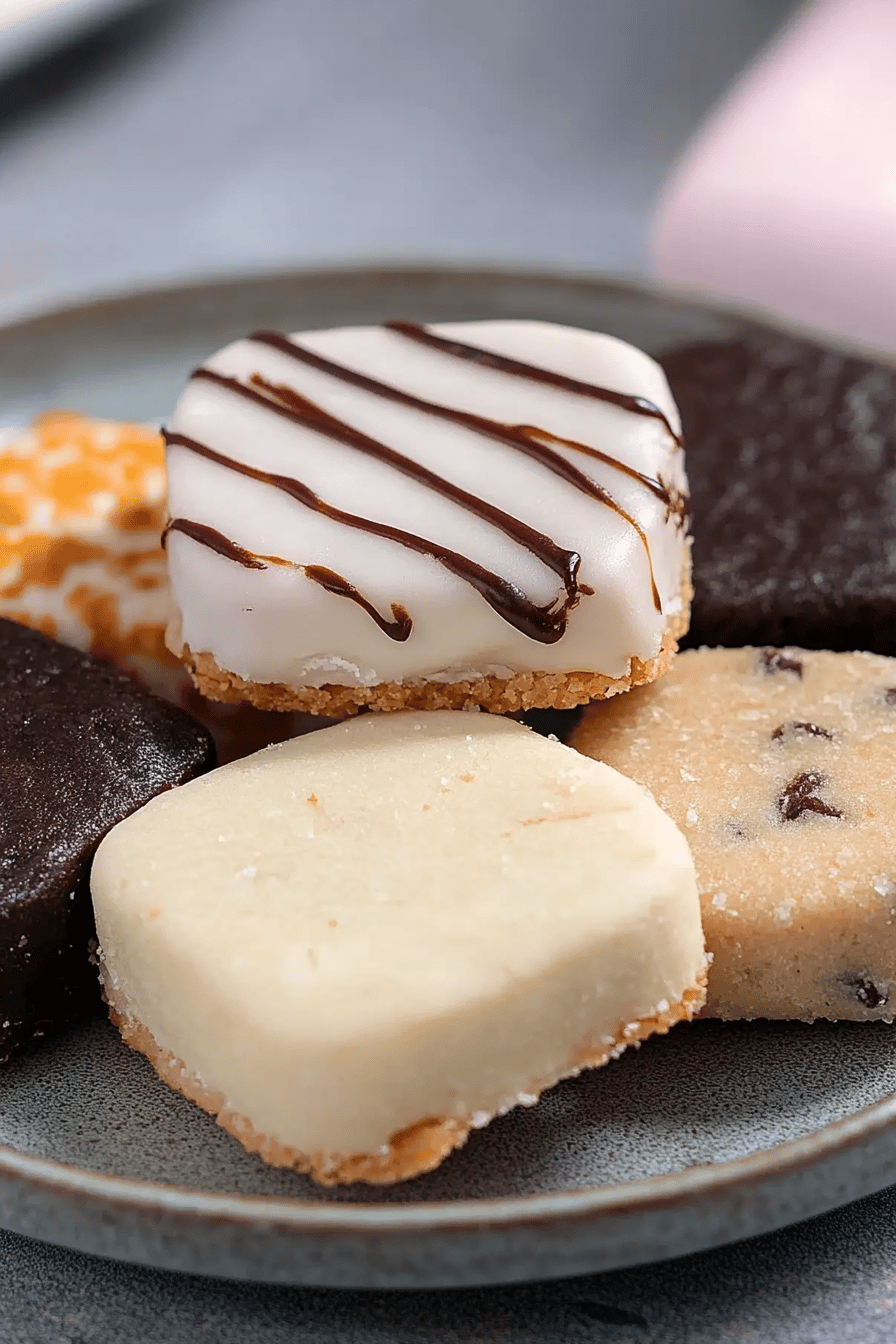
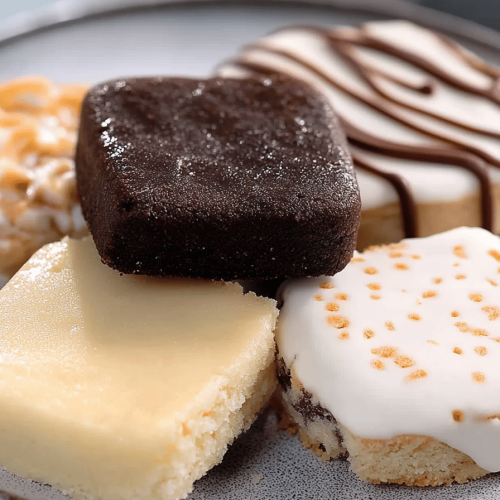
Once completely cooled (and glazed, if you chose to do so), you can break apart or slice your gluten-free shortbread cookies. They are best served at room temperature. The texture should be tender and crumbly, with a satisfying buttery flavor. Enjoy!
What to Serve It With
Oh, these gluten-free shortbread cookies are wonderfully versatile! They’re not just for dessert, though they certainly shine there. For a lovely breakfast treat, they are absolute perfection alongside a steaming mug of coffee or a cup of herbal tea. Their subtle sweetness won’t overpower your morning beverage. For a more elegant brunch, I love to arrange them on a tiered stand with fresh berries and a dollop of whipped cream. They add a touch of sophistication without being too heavy. As a sophisticated dessert, they’re fantastic alongside a scoop of vanilla bean ice cream or a warm fruit crumble. They also make a wonderful palate cleanser or a little something sweet to end a meal. But my absolute favorite way to enjoy them is for cozy snacks. Picture this: curled up on the sofa with a good book, a cup of hot chocolate, and a couple of these cookies. Pure bliss! My kids also love dipping them into their milk; it’s a simple tradition that always brings a smile to their faces. They’re also wonderful crumbled over yogurt or even used as a base for mini trifles. Honestly, anywhere you need a simple, delicious, buttery cookie, these gluten-free shortbread cookies will fit right in!
Top Tips for Perfecting Your Gluten-Free Shortbread Cookies
I’ve made these gluten-free shortbread cookies more times than I can count, and over the years, I’ve picked up a few tricks that really make a difference. So, let me share some of my best advice with you!
Butter Temperature is Key: This is non-negotiable for amazing shortbread. You want your butter to be truly softened – think the consistency of slightly mashed potatoes, not melted. If it’s too cold, it won’t cream properly with the sugar, leading to a dense cookie. If it’s too warm or melted, your cookies will spread too much and lose that signature crumbly texture. I usually leave my butter out on the counter for about an hour before I start. I know life gets busy, so if you forget, you can cut your butter into small cubes and let it sit for about 15-20 minutes.
Don’t Overmix the Dough: This is a common pitfall, even with regular flour! Once you add the dry ingredients to the wet, mix *just until* everything is combined. You’ll see it start to come together. Stop mixing as soon as you don’t see any more dry flour pockets. Overmixing develops toughness, and while gluten-free flour behaves differently, it can still get a bit tough or dense if overworked. A gentle hand is your best friend here.
The Right Gluten-Free Flour Blend Matters: For this recipe, I strongly recommend a good quality all-purpose gluten-free flour blend that already contains xanthan gum. Brands like Bob’s Red Mill 1-to-1 Baking Flour or King Arthur Flour Gluten-Free Measure for Measure Flour are usually excellent choices. They’ve been formulated to mimic the behavior of wheat flour. If your blend *doesn’t* have xanthan gum, add about 1/2 teaspoon to the dry ingredients. Xanthan gum helps bind the gluten-free dough together and gives it structure.
Chilling is Your Friend (If Forming Logs): While this recipe works well pressing the dough directly into the pan, if you prefer to make logs for slicing, chilling the dough is essential. After you form the dough into logs, wrap them tightly in plastic wrap and refrigerate for at least 30 minutes, or even up to 2 days. This firms up the butter, making the logs much easier to slice neatly and preventing the cookies from spreading too much during baking. I often make the logs a day in advance for a quicker baking session later!
Watch the Baking Time Closely: Ovens can be so finicky, right? For these gluten-free shortbread cookies, aim for a pale golden edge. They shouldn’t be deeply browned. Because they don’t have gluten, they bake a bit faster and can go from perfectly done to slightly overdone quite quickly. Start checking them around the 18-20 minute mark and adjust from there. If you’re baking them in a pan, the center might still look a little pale, but it will set up as it cools.
Cooling is Crucial: Please, please, please let them cool in the pan for at least 10-15 minutes before trying to cut or move them, especially if you’re making them in a pan. They’re quite delicate when hot and can crumble apart. Once cut, transfer them to a wire rack to cool completely. This step ensures you get those clean edges and the best texture.
Don’t Skip the Salt: I know it seems odd to add salt to a sweet cookie, but trust me on this one! The salt doesn’t make the cookies taste salty; it actually enhances all the other flavors, especially the buttery richness. It creates a more balanced and complex taste that you’ll really appreciate.
Storing and Reheating Tips
Proper storage is key to keeping these gluten-free shortbread cookies tasting their absolute best, and thankfully, they’re pretty forgiving. For optimal freshness, it’s all about keeping them away from moisture and air.
Room Temperature Storage: Once completely cooled (and any glaze is set), you can store these shortbread cookies in an airtight container at room temperature for up to 5 days. I like to use a good quality plastic container or a decorative cookie tin. If I’m stacking them, I might put a piece of parchment paper between layers to prevent them from sticking together, especially if they have a glaze or any toppings. They maintain their lovely crumbly texture and buttery flavor quite well this way.
Refrigerator Storage: While not strictly necessary for shortbread, if you live in a very warm or humid climate and are concerned about them getting a bit soft, you can store them in the refrigerator. Just make sure they are in an airtight container. They will last a bit longer in the fridge, perhaps up to a week, but be aware that the texture can sometimes become a little harder when chilled. I usually only refrigerate them if I’ve added something perishable like a CREAM CHEESE frosting.
Freezer Instructions: These gluten-free shortbread cookies freeze beautifully! This is my secret weapon for having them on hand during busy times. Once completely cooled, you can freeze them in a single layer on a baking sheet until firm, then transfer them to a freezer-safe airtight container or a heavy-duty freezer bag. I like to separate layers with parchment paper. They’ll keep well in the freezer for about 2-3 months. To thaw, simply remove them from the freezer and let them come to room temperature in their container. This usually takes about 30-60 minutes, and they’ll be just as delicious as when you first baked them!
Glaze Timing Advice: If you’ve added a glaze, it’s best to store the cookies at room temperature after the glaze has fully hardened. If you freeze them with glaze, the moisture from the thawing process can sometimes make the glaze slightly sticky or streaky, although it’s still edible and tasty. For the best visual appeal with glaze, I recommend only freezing the plain cookies and glazing them after they’ve thawed and are ready to be served.
Frequently Asked Questions
Final Thoughts
There you have it – my absolute favorite recipe for gluten-free shortbread cookies! I truly hope you get a chance to make these and experience that wonderful, comforting flavor and texture for yourself. They’re more than just a cookie; they’re a little bit of happiness, a reminder of simple pleasures, and proof that delicious treats can be enjoyed by everyone. Whether you’re baking them for a special occasion, a family gathering, or just because you deserve a treat (which, let’s be honest, you always do!), I know these will become a staple in your recipe box. If you love this recipe, you might also enjoy my gluten-free chocolate chip cookies or my allergy-friendly vanilla sugar cookies for more delightful baking adventures. Please, if you make these, let me know how they turn out! I absolutely adore hearing about your baking successes and seeing your creations. Drop a comment below or share your photos – I can’t wait to see them! Happy baking, everyone!
Gluten-Free Shortbread Cookies
Ingredients
Main Ingredients
- 2 cup all-purpose gluten-free flour blend
- 0.5 cup granulated sugar
- 1 cup unsalted butter, softened
- 0.5 teaspoon salt
- 1 teaspoon vanilla extract
Instructions
Preparation Steps
- In a large bowl, cream together the softened butter and granulated sugar until light and fluffy.
- Beat in the vanilla extract.
- In a separate bowl, whisk together the gluten-free flour blend and salt.
- Gradually add the dry ingredients to the wet ingredients, mixing until just combined. Do not overmix.
- Shape the dough into a disc, wrap in plastic wrap, and chill in the refrigerator for at least 30 minutes.
- Preheat oven to 350°F (175°C). Line baking sheets with parchment paper.
- On a lightly floured surface (using gluten-free flour), roll out the dough to about 0.25-inch thickness. Cut into desired shapes using cookie cutters.
- Place the cookies on the prepared baking sheets.
- Bake for 18-20 minutes, or until the edges are lightly golden brown.
- Let the cookies cool on the baking sheets for a few minutes before transferring them to a wire rack to cool completely.