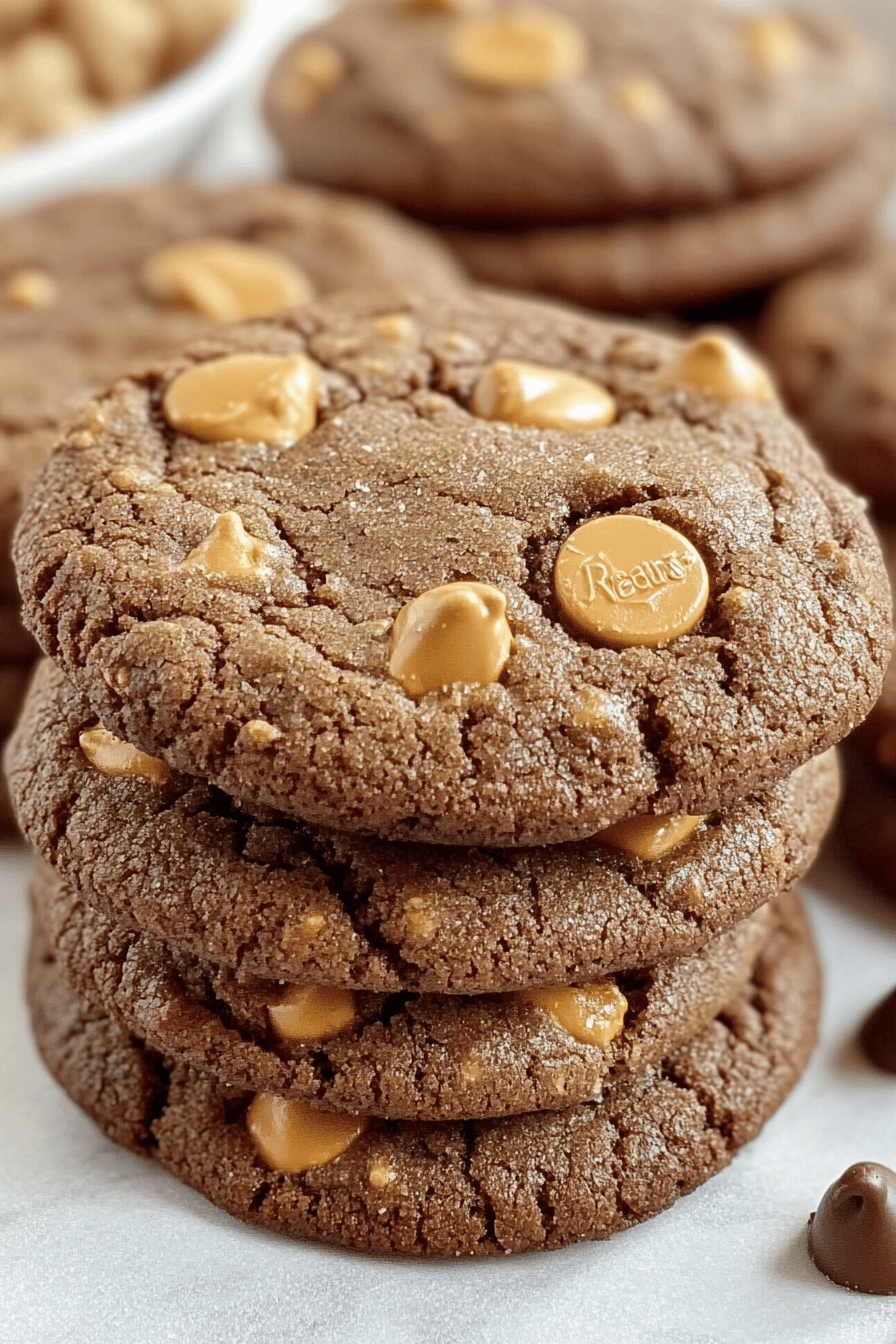
Oh, friends, get ready, because I’m about to share a recipe that’s not just a recipe, it’s a hug in cookie form. These Chocolate Reese’s Cookies are pure magic. The moment the scent of baking chocolate and Peanut Butter fills your kitchen, you’ll know you’ve stumbled onto something truly special. I’ve been making these for years, and they’re the first thing to disappear at any gathering, hands down. They’re like a love letter to everyone’s favorite candy bar, but better, because you can make them whenever that craving strikes. Forget those store-bought cookies; these are the real deal, a little slice of heaven that tastes exactly like happiness. They’re incredibly fudgy and rich, with that perfect balance of salty peanut butter and sweet, decadent chocolate. Honestly, if you’re a fan of Reese’s peanut butter cups, or just anything chocolate and peanut butter related, these Chocolate Reese’s Cookies are going to be your new best friend.

What is Chocolate Reese’s Cookies?
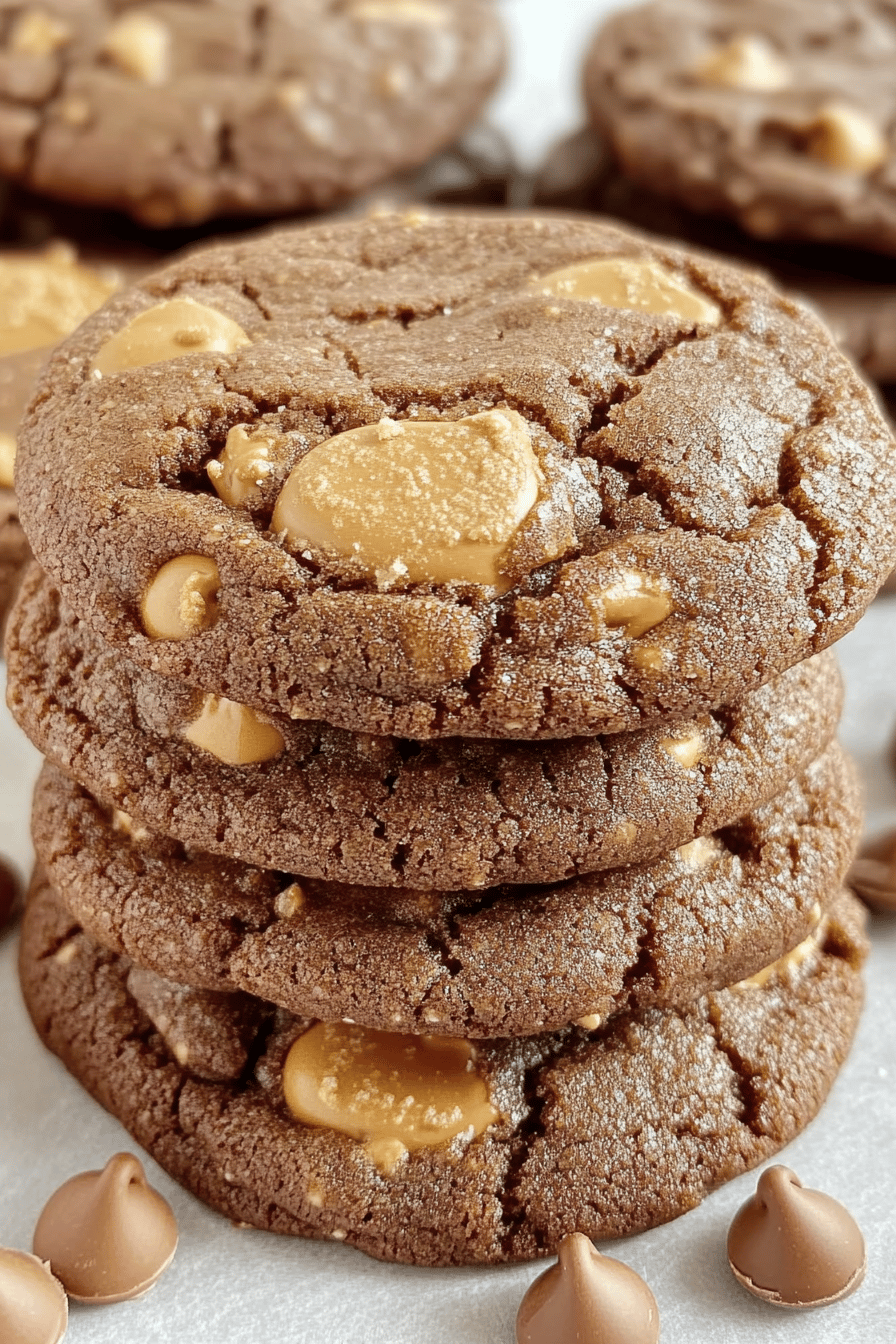
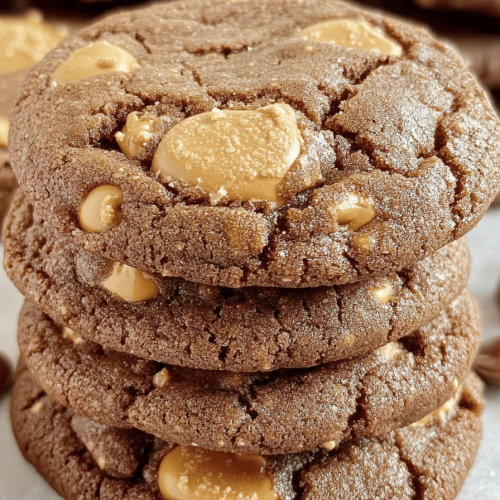
So, what exactly are these Chocolate Reese’s Cookies that I’m raving about? Think of them as the ultimate ode to those iconic peanut butter cups we all adore. It’s not just a chocolate cookie with a dollop of peanut butter; it’s a carefully crafted symphony of flavors and textures. We’re talking about a deeply chocolatey, wonderfully soft, and slightly chewy cookie base that practically melts in your mouth. Then, we swirl in that unmistakable, creamy peanut butter goodness, and sometimes, I like to press a mini Reese’s cup right on top before baking for an extra punch of flavor and fun. They’re essentially the best parts of a chocolate chip cookie and a peanut butter cookie, amplified by the pure joy of Reese’s. It’s a cookie that evokes childhood memories, cozy evenings, and pure, unadulterated comfort. It’s simple enough for a weeknight bake but impressive enough for any special occasion.
Why you’ll love this recipe?
There are so many reasons why this Chocolate Reese’s Cookies recipe has earned a permanent spot in my recipe binder, and I just know you’re going to fall in love with it too. First off, the FLAVOR is out of this world. It’s that perfect marriage of rich, dark chocolate and creamy, slightly salty peanut butter that just sings. Every bite is a delightful surprise, a perfect harmony that makes you close your eyes in pure bliss. Then there’s the SIMPLICITY. Honestly, these are surprisingly easy to whip up. Even if you’re not an experienced baker, you can totally nail these. The steps are straightforward, and the payoff is HUGE. Plus, they’re incredibly COST-EFFECTIVE. You likely already have most of the ingredients in your pantry, making it a budget-friendly way to satisfy a serious sweet craving. And let’s talk VERSATILITY – these cookies are perfect for absolutely everything. They’re fantastic for bake sales, birthday parties, a thoughtful care package, or just because you deserve a treat after a long day. What I love most, though, is the way they make people feel. They’re a guaranteed crowd-pleaser, a little taste of nostalgia that brings smiles to faces. They’re way better than any store-bought treat and have that wonderful homemade charm that you just can’t replicate.
How do I make chocolate Reese’s cookies?
Quick Overview
Making these irresistible Chocolate Reese’s Cookies is a journey of simple steps that lead to cookie perfection. You’ll start by combining your dry and wet ingredients separately to ensure everything is perfectly incorporated. Then, we’ll bring them together to create a rich, chocolatey dough. The magic happens when we add that luscious peanut butter swirl, creating beautiful marbled patterns. After a short bake time, you’ll have warm, gooey cookies ready to be devoured. It’s a fuss-free process that guarantees delicious results every single time, perfect for when you need a homemade treat without a lot of stress.
Ingredients
For the Main Batter:
Flour: About 2 and 1/4 cups of all-purpose flour. Make sure to spoon and level it out, don’t just scoop directly from the bag – that’s a common mistake that can lead to dry cookies!
Cocoa Powder: 3/4 cup unsweetened cocoa powder. I prefer Dutch-processed for a deeper, richer chocolate flavor, but natural works too. Sift it if it looks clumpy!
Baking Soda: 1 teaspoon. This is crucial for giving the cookies that perfect lift and chewy texture.
Salt: 1/2 teaspoon. Don’t skip this! It balances the sweetness and enhances all the other flavors.
Butter: 1 cup (2 sticks) unsalted butter, softened. Make sure it’s truly softened, not melted or still cold. This makes creaming much easier.
Sugar: 1 cup granulated sugar and 1/2 cup packed light brown sugar. The combination gives you that perfect balance of crisp edges and chewy centers.
Eggs: 2 large eggs, at room temperature. Room temp eggs incorporate better into the batter.
Vanilla Extract: 2 teaspoons pure vanilla extract. Always use pure vanilla – it makes a difference!
For the Filling:
Peanut Butter: 1 cup creamy peanut butter. I love using the standard Jif or Skippy, but a natural peanut butter can work if it’s well-stirred and has a good consistency. Avoid anything too oily or runny.
For the Glaze (Optional, but highly recommended!):
Powdered Sugar: 1 cup powdered sugar, sifted to avoid lumps.
Milk: 2-3 tablespoons milk (any kind works, even non-dairy like almond or oat milk).
Peanut Butter Extract (Optional): A tiny splash can really boost the peanut butter flavor in the glaze.
Step-by-Step Instructions
Step 1: Preheat & Prep Pan
First things first, let’s get your oven ready. Preheat it to 350°F (175°C). Line your baking sheets with parchment paper. This is a lifesaver for preventing sticking and makes cleanup a breeze. Trust me, I learned this the hard way after one too many batches fused to the pan!
Step 2: Mix Dry Ingredients
In a medium bowl, whisk together your flour, cocoa powder, baking soda, and salt. Whisking well ensures that all the leavening and salt are evenly distributed, which is key for consistent cookies. Set this aside for now.
Step 3: Mix Wet Ingredients
In a large bowl, cream together the softened butter, granulated sugar, and brown sugar using an electric mixer until light and fluffy. This usually takes about 3-5 minutes. Beat in the eggs one at a time, then stir in the vanilla extract. Make sure you scrape down the sides of the bowl as you go.
Step 4: Combine
Gradually add the dry ingredients to the wet ingredients, mixing on low speed until just combined. Be careful not to overmix! Overmixing can develop the gluten too much, resulting in tough cookies. Stop as soon as you no longer see streaks of flour. The dough will be thick and rich.
Step 5: Prepare Filling
In a separate small bowl, stir the peanut butter until it’s smooth and pliable. If it’s a bit stiff, you can microwave it for about 10-15 seconds to soften it up, but don’t let it get runny. We want it easy to swirl, not to melt into the Cookie Dough immediately.
Step 6: Layer & Swirl
Drop rounded spoonfuls of the chocolate cookie dough onto your prepared baking sheets, leaving about 2 inches between them. Now for the fun part! Dollop about a teaspoon of the peanut butter into the center of each cookie dough ball. Using a toothpick or a knife, gently swirl the peanut butter into the chocolate dough, creating beautiful marbled patterns. You don’t want to over-swirl, or the colors will blend too much. A few gentle swirls are all you need for that signature look. If you’re feeling extra decadent, press a mini Reese’s cup into the center of each cookie before baking!
Step 7: Bake
Bake for 9-12 minutes, or until the edges are set and the centers look slightly soft. They’ll continue to cook a bit on the baking sheet, so it’s better to err on the side of slightly underbaked for that chewy texture. Keep an eye on them, as oven temperatures can vary!
Step 8: Cool & Glaze
Let the cookies cool on the baking sheets for about 5 minutes before transferring them to a wire rack to cool completely. While they’re cooling, whisk together the powdered sugar, 2 tablespoons of milk, and peanut butter extract (if using) in a small bowl until smooth. Add more milk, a teaspoon at a time, if needed to reach your desired drizzling consistency. Once the cookies are completely cool, drizzle the glaze over the tops. This is where they really start to look fancy!
Step 9: Slice & Serve
Once the glaze has set slightly, your Chocolate Reese’s Cookies are ready to be enjoyed! They are absolutely divine when they’re still a little warm, with that gooey center, but they’re also fantastic at room temperature.
What to Serve It With
These Chocolate Reese’s Cookies are so versatile, they fit into almost any occasion! For Breakfast, they’re a delightful treat alongside a strong cup of coffee or a steaming mug of hot chocolate. Imagine starting your day with that rich chocolate and peanut butter goodness – pure bliss! For Brunch, I love serving them on a tiered stand with fresh berries and a selection of other pastries. They add that perfect touch of indulgence. They pair wonderfully with a mimosa or a creamy latte. As Dessert, they’re a showstopper. Serve them à la mode with a scoop of vanilla bean ice cream for the ultimate sweet treat. They’re also fantastic with a glass of milk or even a rich, dark coffee to cut through the sweetness. And for Cozy Snacks? Oh, this is my favorite! They’re perfect with a glass of cold milk on a rainy afternoon, or a cup of herbal tea while you curl up with a good book. My kids absolutely love them after school, and honestly, I often find myself sneaking one (or two!) with my evening tea. They’re just universally loved!
Top Tips for Perfecting Your Chocolate Reese’s Cookies
I’ve made these Chocolate Reese’s Cookies so many times, I’ve picked up a few tricks along the way that I think you’ll find super helpful. When it comes to the COCOA POWDER, sifting it is really important. It ensures that you don’t end up with little lumps of cocoa in your otherwise smooth dough, and it makes sure that chocolate flavor is distributed perfectly. For the BUTTER, make sure it’s truly softened to room temperature – not melted! If it’s too cold, it won’t cream properly with the sugar, and if it’s melted, your cookies will spread too much and lose that wonderful chewy texture. I’ve learned that patience here pays off big time. When you’re COMBINING the wet and dry ingredients, the biggest mistake people make is overmixing. Once the flour is added, mix only until it’s *just* combined. Seriously, stop as soon as you don’t see any dry streaks of flour. A little bit of undermixing is always better than overmixing when it comes to tender cookies.
For the PEANUT BUTTER SWIRL, don’t be afraid to get creative! I often use a fork or a skewer to make those pretty swirls, but you can also just drop dollops and gently press them down with the back of a spoon. The key is to get that marbled effect without completely blending the peanut butter into the chocolate dough. If your peanut butter is too stiff, just microwave it for 10-15 seconds to make it more pliable. And for the optional MINI REESE’S CUPS? Press them in gently right before they go into the oven. This helps them adhere and get that lovely gooey center. When it comes to BAKING, ovens really do vary. My tip is to start checking around the 9-minute mark. You want the edges to look set, but the center should still appear a little soft. They’ll continue to firm up as they cool on the baking sheet, which is how you achieve that perfect soft and chewy texture. If you bake them until they look completely firm, they’ll likely turn out dry and crumbly. And finally, for the GLAZE – consistency is key. Start with the lower amount of milk and add more only if needed. You want it thick enough to drizzle without running off completely, but thin enough to spread easily. A little peanut butter extract really does boost the peanut butter flavor, but it’s totally optional if you can’t find it!
Storing and Reheating Tips
Storing these delicious Chocolate Reese’s Cookies properly is key to keeping them tasting fresh and delicious. At ROOM TEMPERATURE, they’ll stay wonderfully soft and chewy for about 3-4 days if stored in an airtight container. Make sure they’ve cooled completely before sealing them up, otherwise, the steam can make them soggy. I usually just pop them into a good quality cookie tin or a zip-top bag. For REFRIGERATOR STORAGE, they can last a bit longer, up to a week. The cooler temperature can sometimes firm them up a bit, but they’re still perfectly enjoyable. Just make sure to use an airtight container to prevent them from drying out or absorbing other fridge odors. If you want to FREEZER INSTRUCTIONS, these cookies freeze beautifully! You can freeze them unfrosted for up to 3 months. Wrap them individually in plastic wrap, then place them in a freezer-safe bag or container. To thaw, just let them sit at room temperature for a couple of hours. If you’ve already added the glaze, you can still freeze them, but they might be a little softer when thawed. For the GLATE TIMING ADVICE, I highly recommend adding the glaze *after* the cookies have completely cooled and just before you plan to serve or store them. If you glaze them too early and they’re not fully cooled, the glaze can melt or become sticky. If you’re freezing them, it’s often best to freeze them unfrosted and add the glaze once they’re thawed and ready to eat.
Frequently Asked Questions
Final Thoughts
Honestly, I could talk about these Chocolate Reese’s Cookies all day! They’re more than just a dessert; they’re a little moment of pure joy. They’re that perfect balance of chocolate and peanut butter that just hits every single spot. They’re easy enough for a beginner baker, but impressive enough to wow anyone. The aroma that fills your kitchen as they bake is simply intoxicating, and the first bite… well, it’s pure bliss. They’re the kind of cookie that brings people together and creates happy memories. If you love Reese’s, if you love chocolate, if you love anything delicious and comforting, you *have* to give these a try. I promise you won’t regret it. If you’re already a fan of rich chocolate bakes, you might also enjoy my Double Chocolate Brownies or my Fudgy Chocolate Chip Cookies – they have that same decadent, crowd-pleasing appeal. I can’t wait to hear how your Chocolate Reese’s Cookies turn out! Please leave a comment below and let me know your thoughts, or share your own creative twists. Happy baking, my friends!
Chocolate Reese's Cookies
Ingredients
Main Ingredients
- 0.75 cup Unsalted butter, softened
- 0.5 cup Granulated sugar
- 0.5 cup Light brown sugar, packed
- 2 Large eggs
- 1 teaspoon Vanilla extract
- 2.5 cups All-purpose flour
- 0.5 cup Unsweetened cocoa powder
- 1 teaspoon Baking soda
- 0.5 teaspoon Salt
- 1 cup Reese's Pieces candies
- 1 cup Semi-sweet chocolate chips
Instructions
Preparation Steps
- Preheat oven to 375°F (190°C). Line baking sheets with parchment paper.
- In a large bowl, cream together the softened butter, granulated sugar, and brown sugar until light and fluffy.
- Beat in the eggs one at a time, then stir in the vanilla extract.
- In a separate medium bowl, whisk together the flour, cocoa powder, baking soda, and salt.
- Gradually add the dry ingredients to the wet ingredients, mixing until just combined. Do not overmix.
- Stir in the Reese's Pieces candies and chocolate chips.
- Drop rounded tablespoons of dough onto the prepared baking sheets, spacing them about 2 inches apart.
- Bake for 10-12 minutes, or until the edges are set and the centers are still slightly soft. Cookies will continue to cook on the baking sheet.
- Let the cookies cool on the baking sheets for a few minutes before transferring them to a wire rack to cool completely.